How To: Set up an Order Status
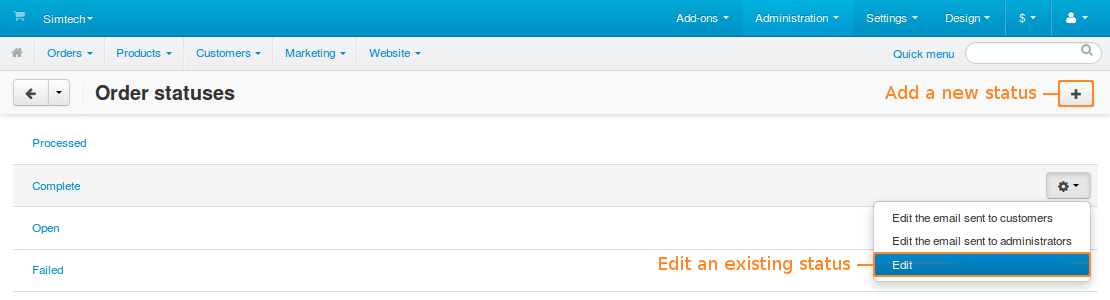
Go to Administration → Order statuses in the Administration panel of your store.
Choose whether you want to:
- create a new status by clicking the + button;
- edit an existing status by clicking its name.
Important
You can have up to 26 order statuses at the same time, as the database uses letters to identify them.
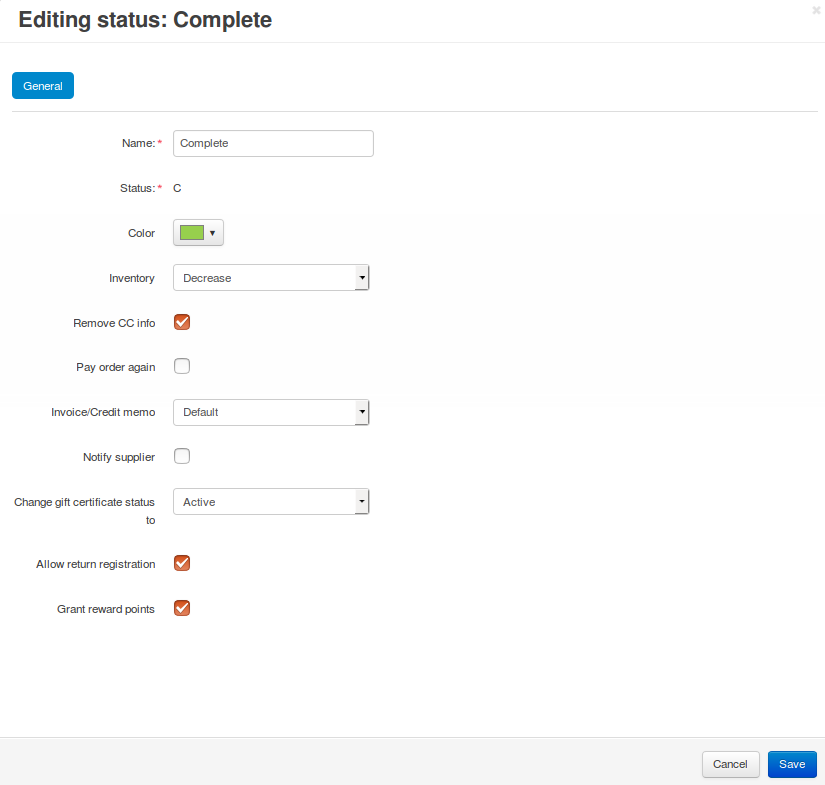
Specify the status properties.
Click the Create or Save button.
Note
CS-Cart and Multi-Vendor only consider that the money has been paid when an order gets the Processed or Complete status (regardless of how you rename them). If you’d like to have more statuses that signify that the order has been paid for, that would have to be done via a third-party add-on.
Status Properties
Note
Properties marked with * won’t appear if you enable the email template editor. In that case you’re supposed to manage email notifications related to order statuses via the email template editor.
Name—the name of the status as it appears in the Administration panel.
Status—a letter that identifies the status in the database. That’s why there can’t be more than 26 statuses.
E-mail subject*—the subject of an e-mail notification about the order with this status.
E-mail header*—the actual text of an e-mail notification about the order with the status.
Color—the color of this status on the order list in the Administration panel.
Notify customer*—tick this checkbox to inform the customer by email about an order getting this status.
Notify orders department*—tick this checkbox to inform the store administrator by email about an order getting this status.
Note
The email address of the order department is specified in Settings → Company.
Inventory—choose whether to decrease or increase the number of items in stock for products included in an order with this status.
Remove CC info—tick this checkbox to remove sensitive credit card info from the database when the order gets this status.
Pay order again—tick this checkbox to allow a customer to make a payment for the order again, if it was declined.
Note
To make this option work properly, go to Settings → Checkout and enable the Allow a customer to pay the order again if transaction was declined setting.
Invoice/Credit memo—choose the desired behavior after an order gets this status:
- Default—the default behavior (an invoice ID is not generated);
- Invoice—the order has been paid and processed successfully (an invoice ID is generated);
- Order—the order was placed, but has not paid for yet;
- Credit memo—the order has been paid and processed, but then returned (a credit memo ID is generated).
Important
The properties described below appear only when the corresponding add-ons are installed and activated under Add-ons → Manage add-ons. These add-ons are: Suppliers, Gift certificates, RMA, Reward points.
Notify supplier—tick this checkbox to send automatic email notifications to suppliers once an order gets this status. The notifications will be sent to suppliers whose products are in the order.
Change gift certificate status to—choose a status to be automatically assigned to gift certificates purchased as a part of an order that gets this order status.
Allow return registration—tick this checkbox to allow customers to request a return if the order has this status.
Grant reward points—tick this checkbox to give the earned reward points to the customer once the order gets this status.
Note
If you change a status of the order to a status that grants reward points, the customer will get them. But if you later choose another status that doesn’t grant reward points, the points will be taken from the customer.
Questions & Feedback
Have any questions that weren't answered here? Need help with solving a problem in your online store? Want to report a bug in our software? Find out how to contact us.