How To: Set up Stripe Connect in Multi-Vendor
Note
The Stripe Connect Payments add-on is available only in Multi-Vendor.
Stripe Connect allows maketplace owners to offer credit card payments via Stripe and automatically distribute money from orders between vendors.
Step 1. Configure the Payment Method
Go to Administration → Payment methods and click the + button in the top right corner to add a payment method.
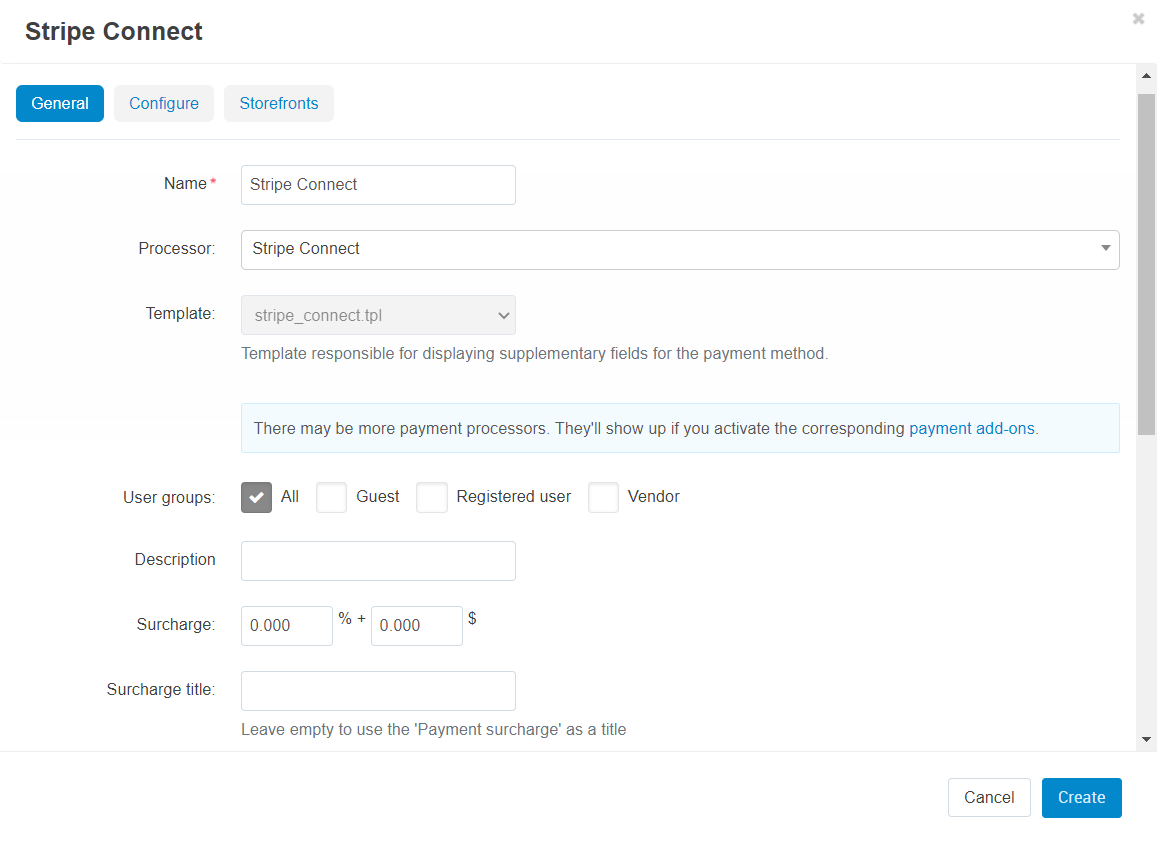
A new pop-up window with the payment method creation form will open. Fill in the fields on the General tab:
Name—the name the new payment method. That’s the name that the customers will see at checkout.
Processor—the online payment processor that will handle the transactions. Choose Stripe Connect from the drop-down menu.
If necessary, specify the data in other fields as you see fit.
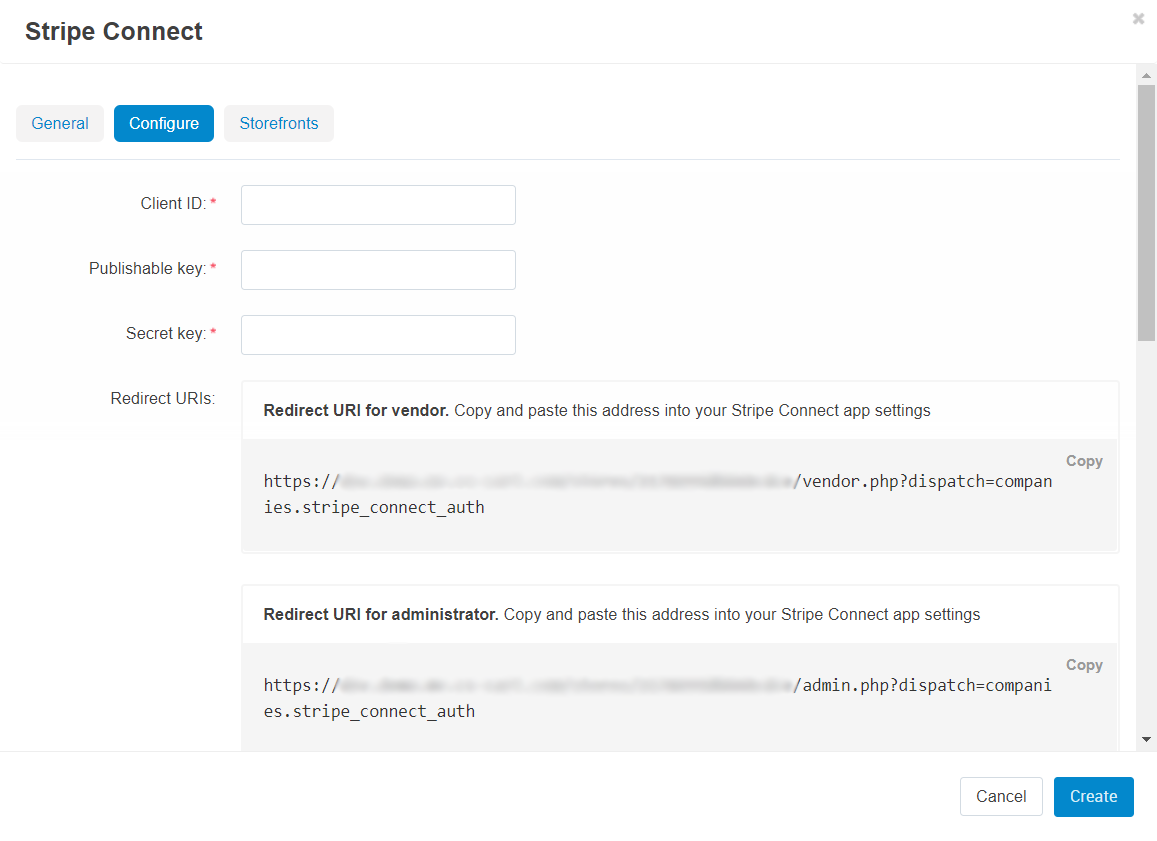
Switch to the Configure tab. It contains the settings specific to Stripe Connect:
Client ID—the live client ID of your Stripe account.
Publishable key—the publishable API key of your Stripe account.
Secret key—the secret API key of your Stripe account.
Redirect URIs—the values that you must copy to the corresponding fields on the Stripe dashboard.
Note
Learn more about how to get client ID and API keys for Stripe Connect and how to use Redirect URIs in a separate article.
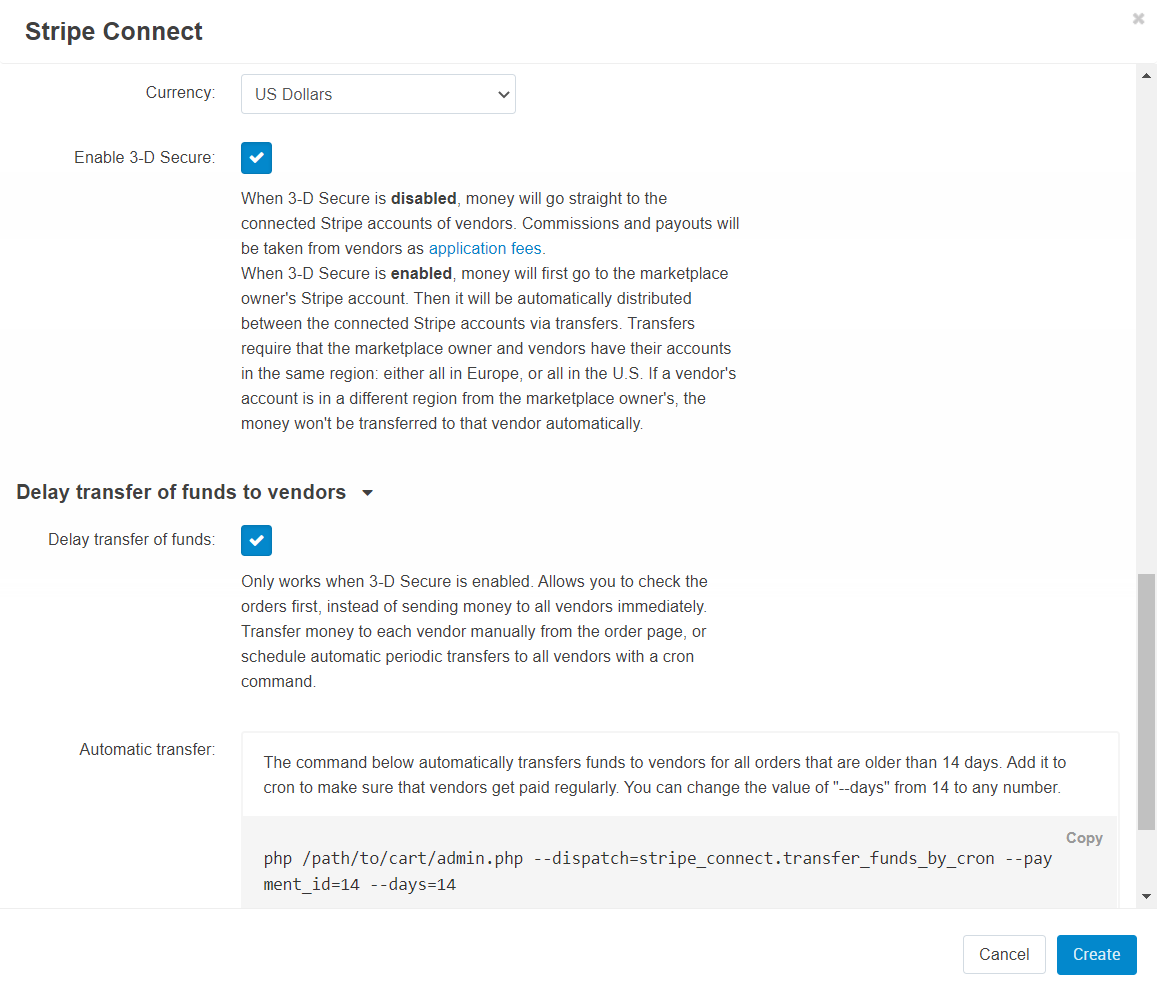
Currency—select the currency of your Stripe account. It should match the primary currency of your store—that way the calculations will be more precise.
Enable 3-D Secure—the setting defines whether money will first go to the marketplace owner instead of going straight to vendors. Money will be automatically distributed between connected Stripe accounts via transfers later.
Delay transfer of funds—delay sending money to vendors. Configure manual or automatic disbursements to vendors. The setting works if 3-D Secure was enabled.
To schedule automatic periodic disbursements, add a special command to cron. Set the desired value of the “–days” parameter. Money will be automatically transfered to vendors for orders that are older than this value.
php /path/to/cart/admin.php --dispatch=stripe_connect.transfer_funds_by_cron --payment_id=14 --days=14To tranfer money to the vendor for the current order manually, click the Transfer funds to vendors button on the order page. After clicking this button, the note will inform you if Funds have been transferred successfully or not.
Once you have configured the payment method, click Create.
Step 2. Have Your Vendors Connect Their Accounts
Once you set up a Stripe Connect payment method, your vendors will be able to connect their accounts, so that they can use the Stripe Connect payment method that you have created. The payment method will be offered to customers only if all the vendors in the order have connected their accounts.
Important
The Connect with Stripe button will appear only to vendors’ administrators or those marketplace administrators who switch to a particular vendor.
Here is the instruction for a vendor:
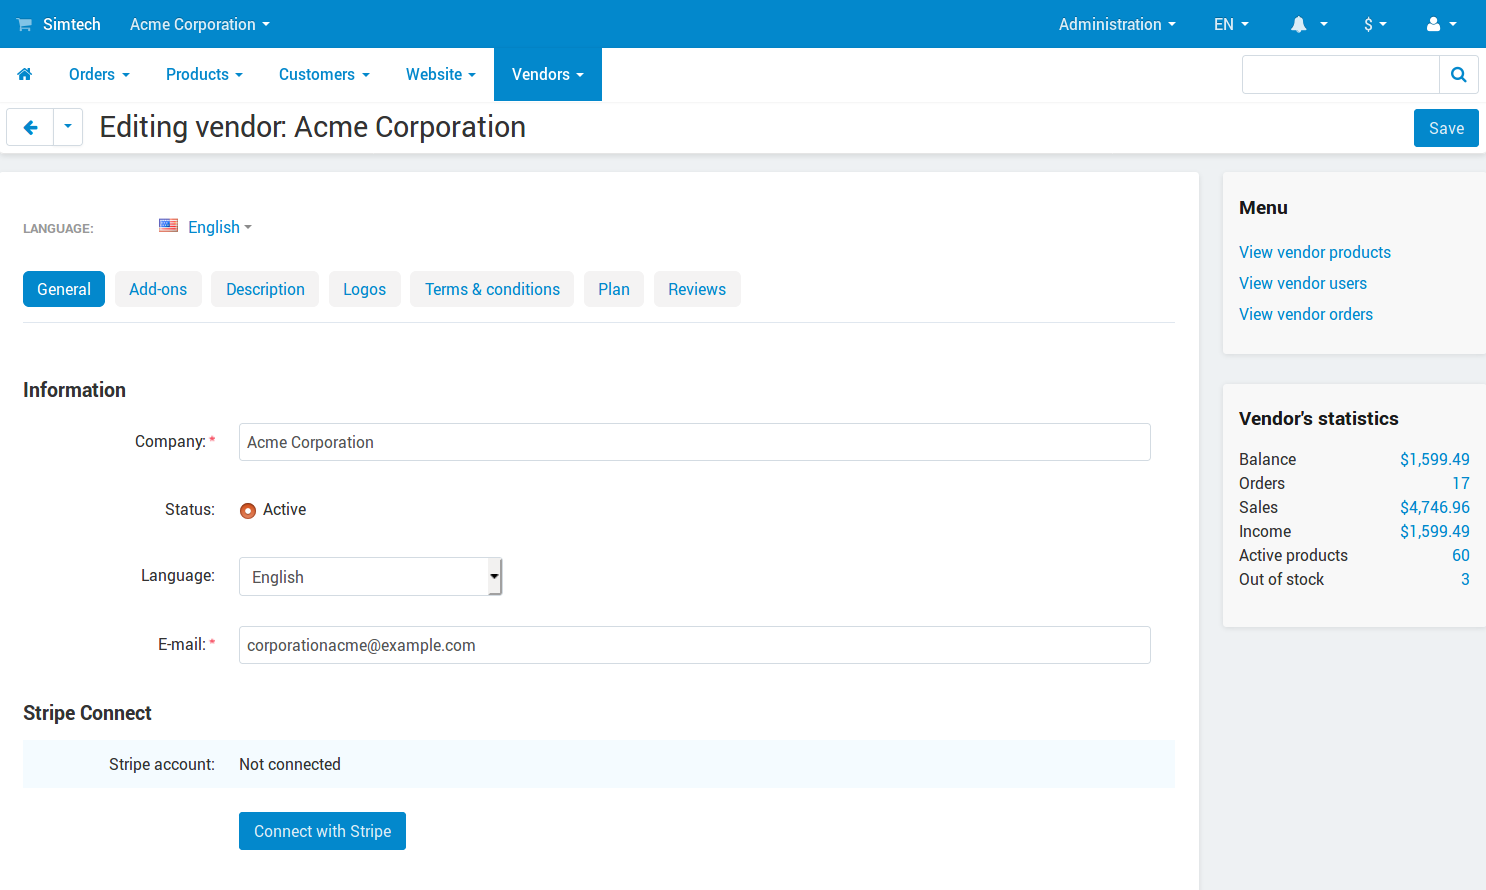
Open the vendor’s administration panel and go to Vendors → Vendors.
Click on the name of your company.
The vendor editing page will open. Scroll down and click the Connect with Stripe button. This will take you to the Stripe page where you’ll be able to register an account or connect an existing one.
Questions & Feedback
Have any questions that weren't answered here? Need help with solving a problem in your online store? Want to report a bug in our software? Find out how to contact us.