Delivering Add-on Releases to the Marketplace with Git
We recommend developing add-ons in Git repositories—this facilitates collaboration and testing. There are instructions on organizing your Git workflow, that can make add-on development more convenient for you.
There is one more reason to use Git—you can deliver add-on releases from GitHub to the Marketplace automatically. This article shows how to do that.
Connecting Repository to the Marketplace
Important
Before you begin, you’ll need to add your add-on to the Marketplace. The add-on must follow these rules.
- Open the add-on editing page and switch to the Update with Git tab.
- Configure the settings for the Service you selected.
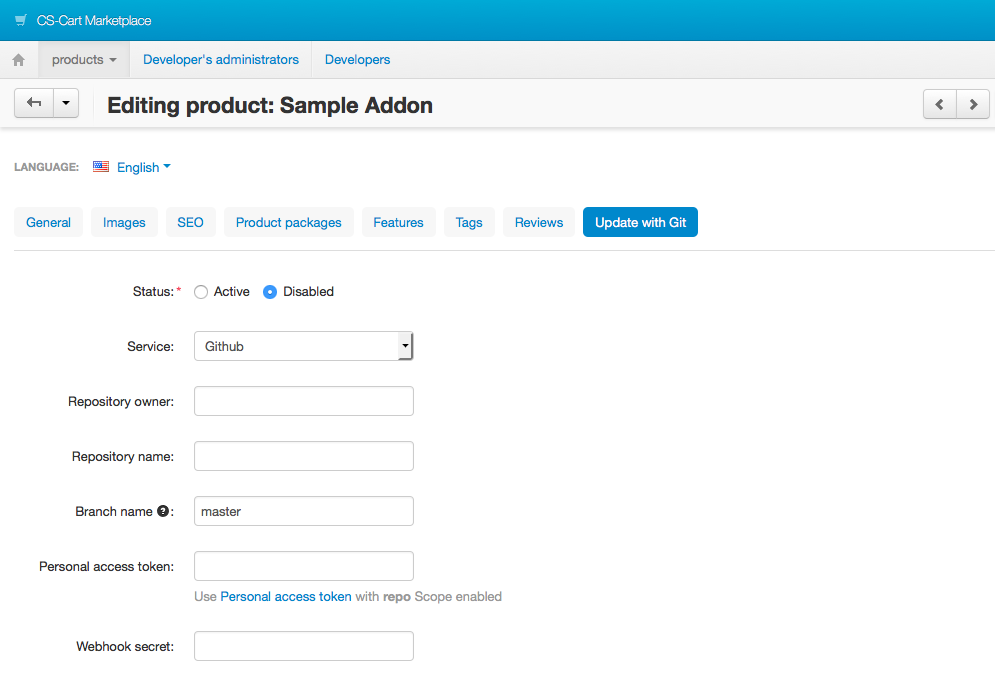
GitHub
- Go to the repository of the add-on on GitHub to find out where to get the values for the settings in the Marketplace:
- Repository owner—the username [1].
- Repository name—the name of the repository [2].
- Branch name—one of the branches of the repository [3].
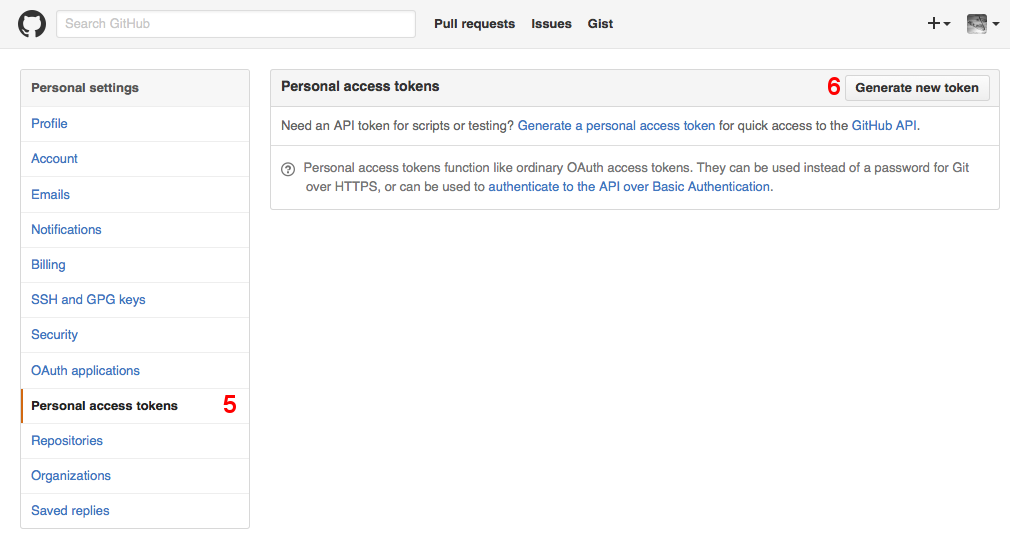
- Open the drop-down menu of the profile and go to Settings [4].

- Go to Personal access tokens [5].
- Click Generate new token [6].
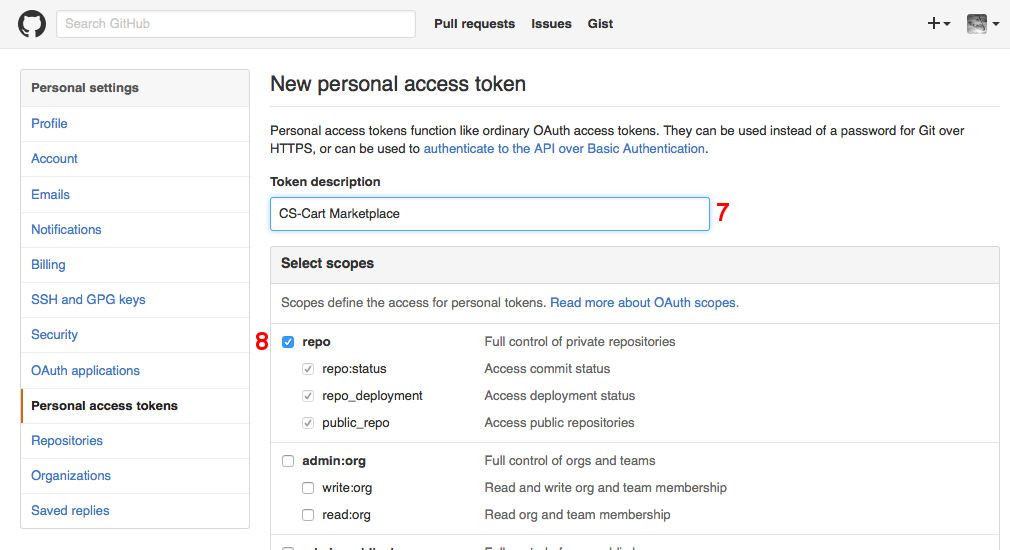
- Specify the description for the new token [7].
- Select the repo scope [8].
- Create the token.
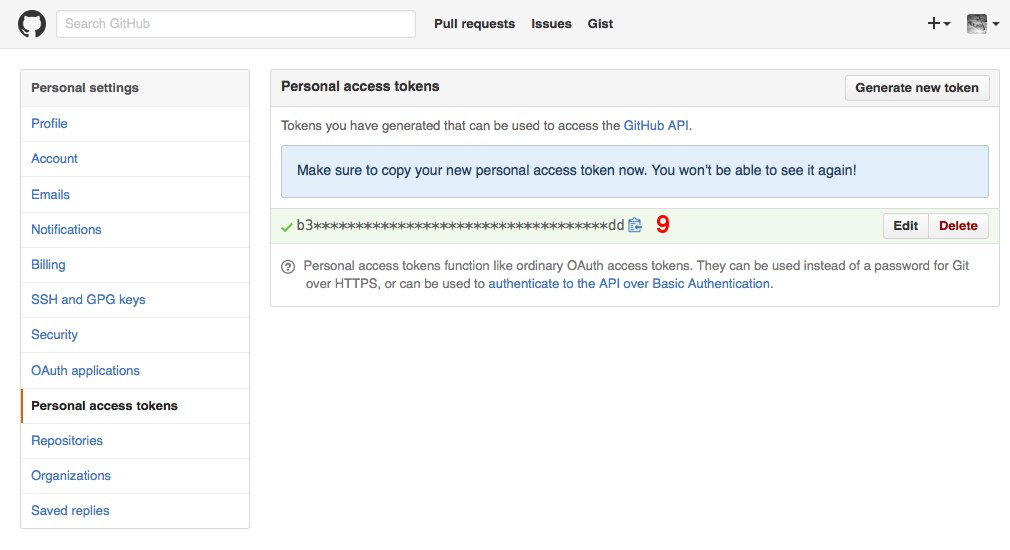
- You now have a token [9]. You can return to the Marketplace and specify it as the Personal access token.
- Set Status to Active [10].
- Enter Webhook secret [11].
- Save your changes.
- Copy the URL from the Webhook URL field [12].

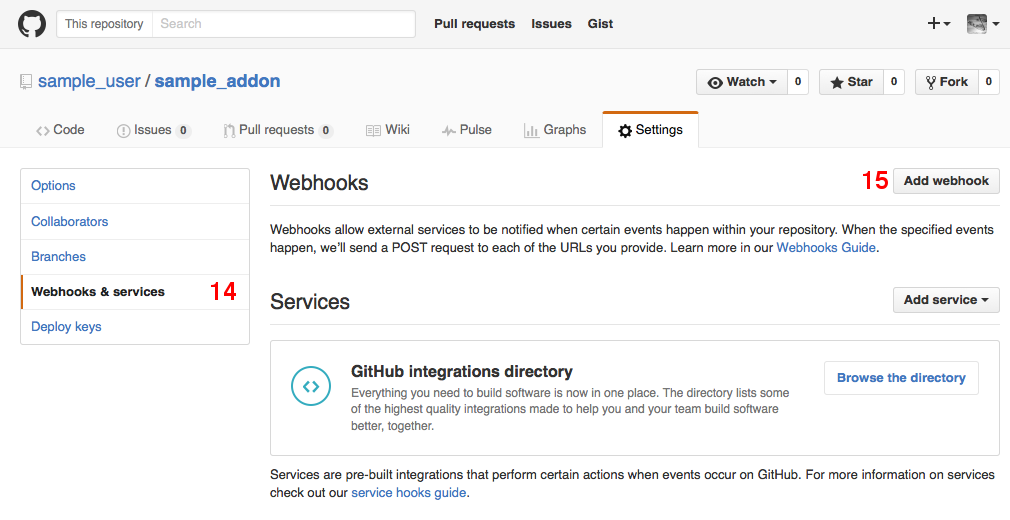
- Go back to the GitHub repository and switch to the Settings tab [13].

- Choose Webhooks & services [14] and click Add webhook [15].
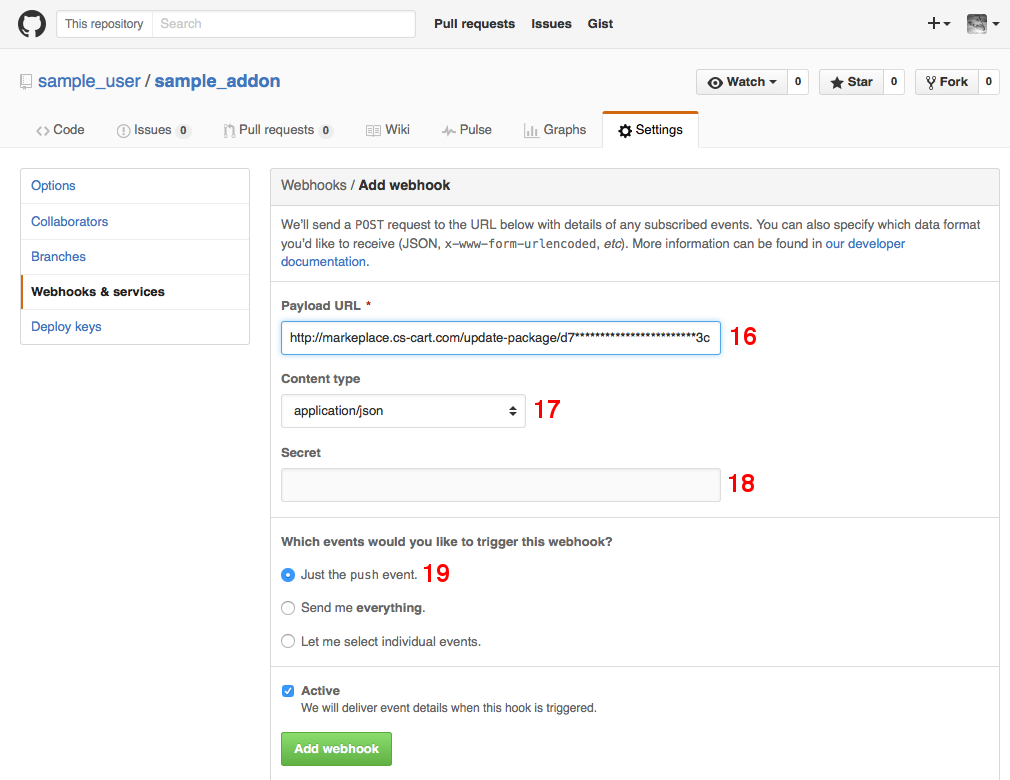
- Configure the webhook:
- Payload URL [16]—enter Webhook URL from step 12.
- Content type [17]—select application/json.
- Secret [18]—enter Webhook secret that you specified in step 10.
- Which events would you like to trigger this webhook? [19]— choose Just the push event.
- Click Add webhook.
Bitbucket
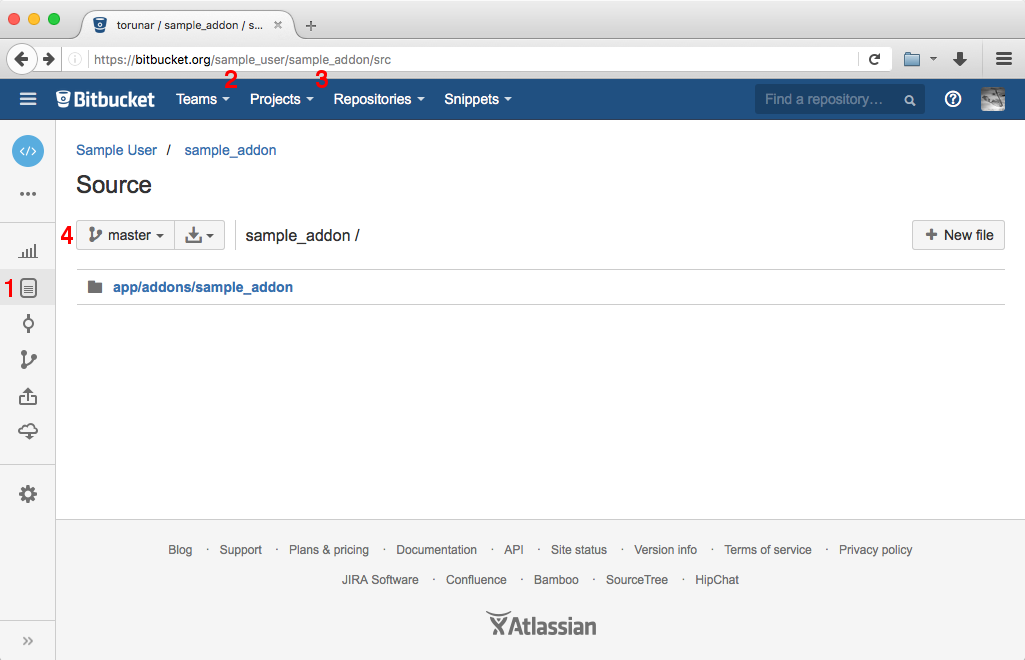
- Go to the repository of the add-on on Bitbucket and switch to the Source tab [1] to find out where to get the values for the settings in the Marketplace:
- Repository owner—enter the username from the URL [2].
- Repository name—enter the name of the repository from the URL [3].
- Branch name—enter one of the branches that exist in the repository [4].
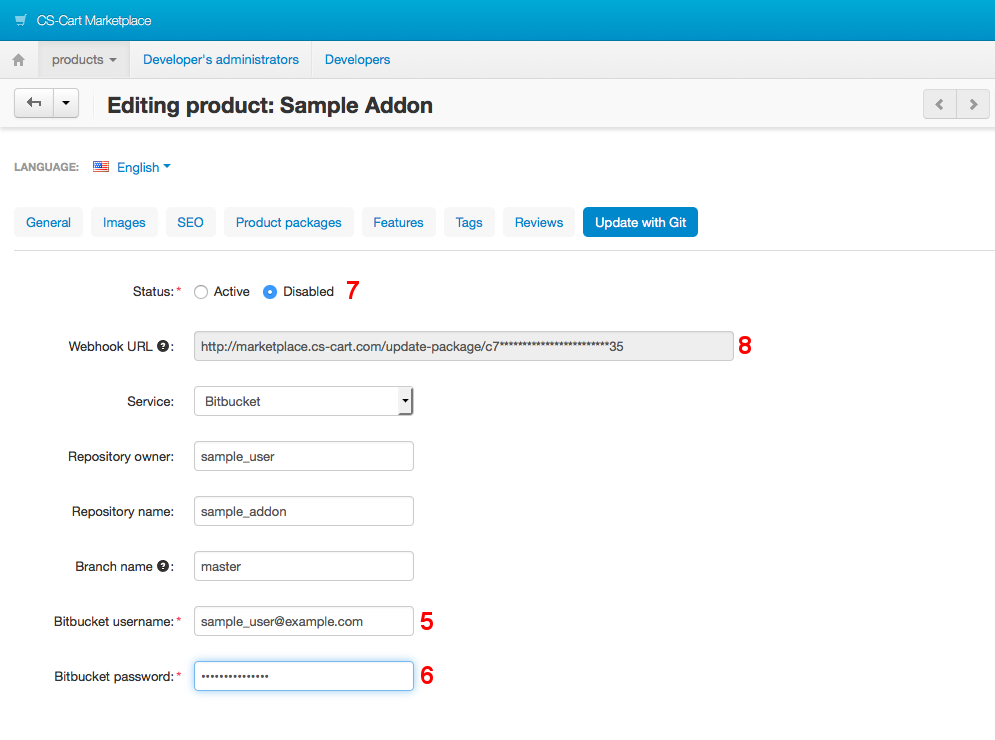
- Specify other settings:
- Bitbucket username—your Bitbucket login [5].
- Bitbucket password—your Bitbucket password [6].
- Status—Active [7].
- Save your changes, then copy the URL from the Webhook URL field [8].
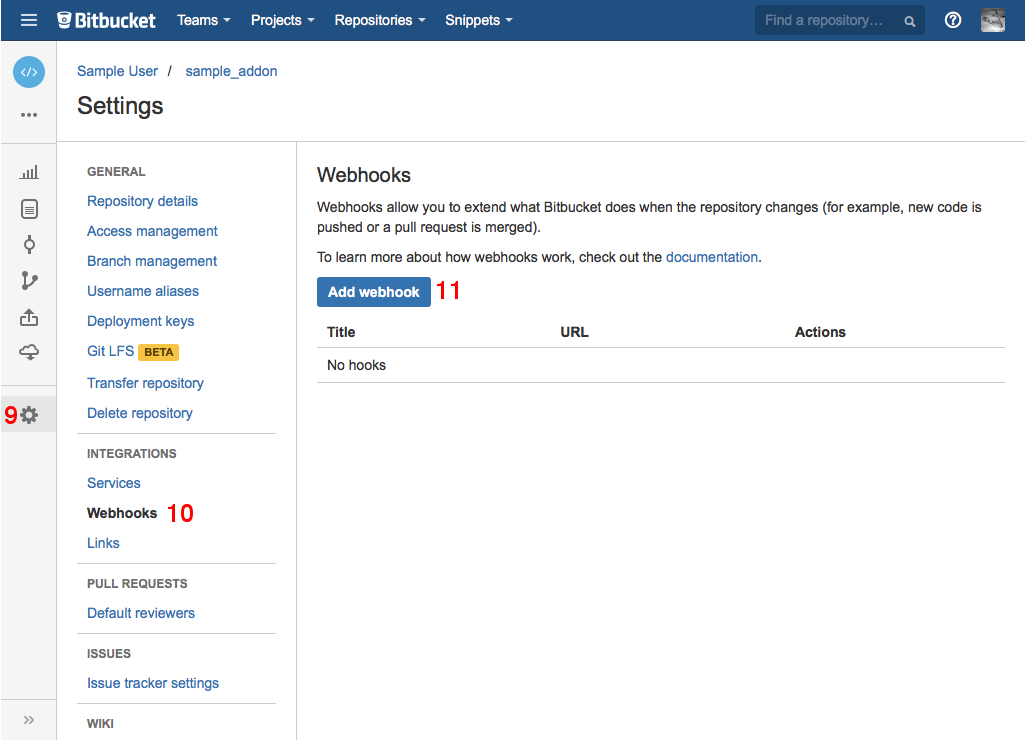
- Open your Bitbucket repository.
- Go to Settings [9].
- Switch to Webhooks [10].
- Click Add webhook [11].
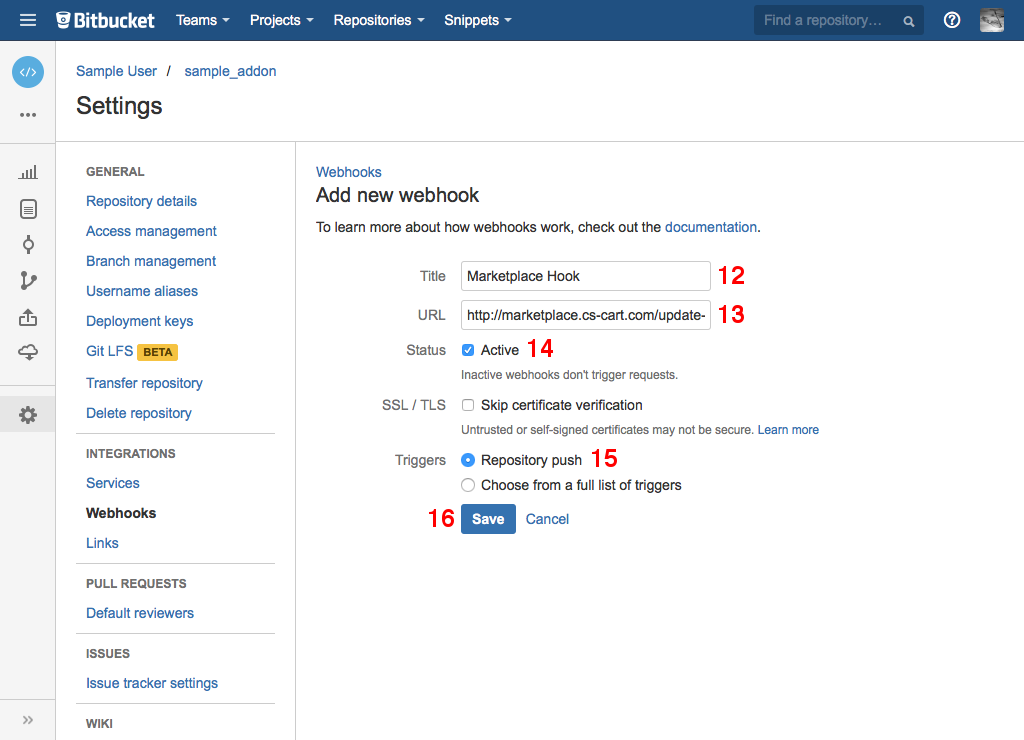
- Configure your new webhook:
- Title [12]—webhook name.
- URL [13]—the value of Webhook URL from [8].
- Status [14]—Active.
- Triggers—Repository push [15].
- Save your webhook [16].
Creating Add-on Releases via Git Tags
Once you have made some changes in your repository and are ready to roll out a new release, follow these steps:
- Commit your changes:
$ git add .
$ git commit -m "Functionality added."
- Add a tag that conforms to Semantic Versioning:
$ git tag 1.1.0
- Push the changes in the branch to the remote repository:
$ git push origin master
- Push the tag to the remote repository:
$ git push origin 1.1.0
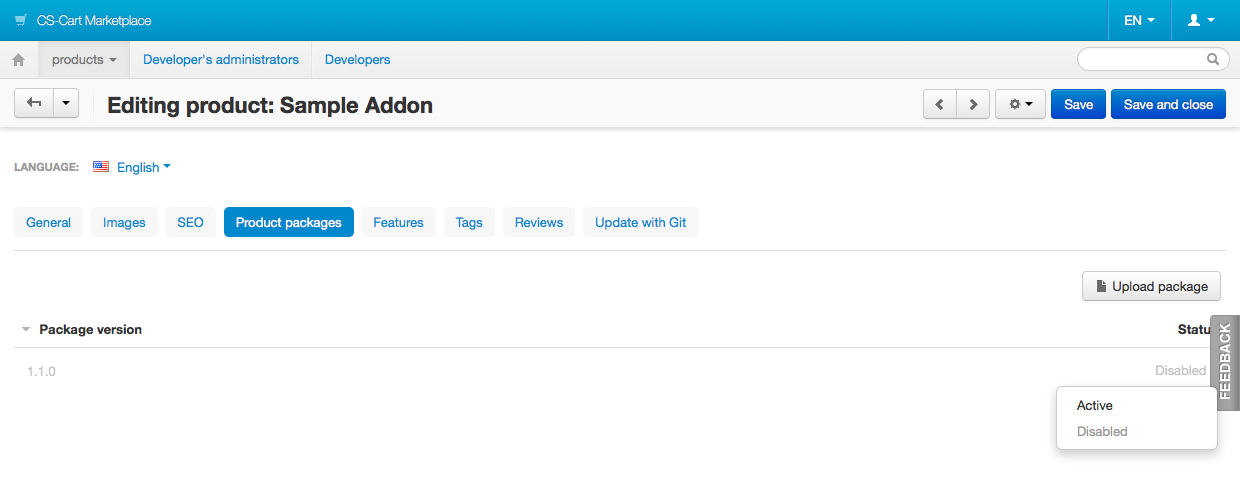
- Once the webhook is processed, the package will appear on the Product packages tab of the add-on editing page in the Marketplace.
- By default, the package is Disabled, i.e. unavailable to customers. That way you can test the package before release. Once you’re ready to distribute the package, change its status to Active:
Monitoring the Package Building
GitHub
- Open the editing page of the webhook you created.
- Expand the delivery event [1].
- Switch to the Response tab [2].
- The response from the server about the building process appears in the Body section [3].
- To process the webhook again if there are any errors, click Redeliver [4].

Bitbucket
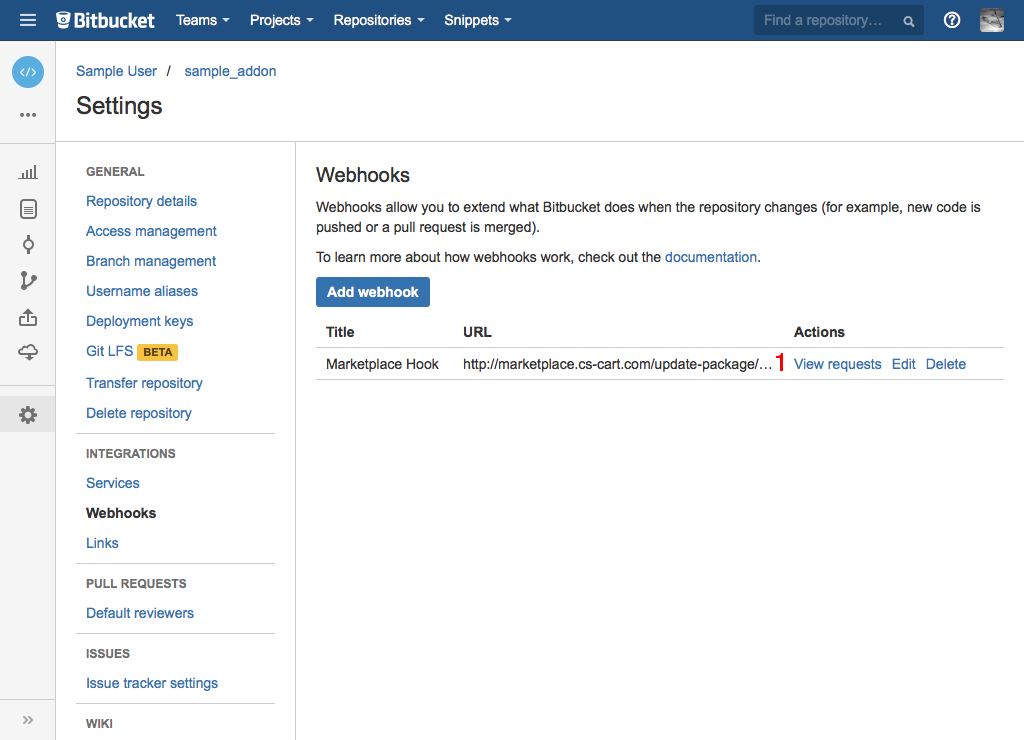
- Go to your repository on Bitbucket.
- Switch to Settings, then to Webhooks.
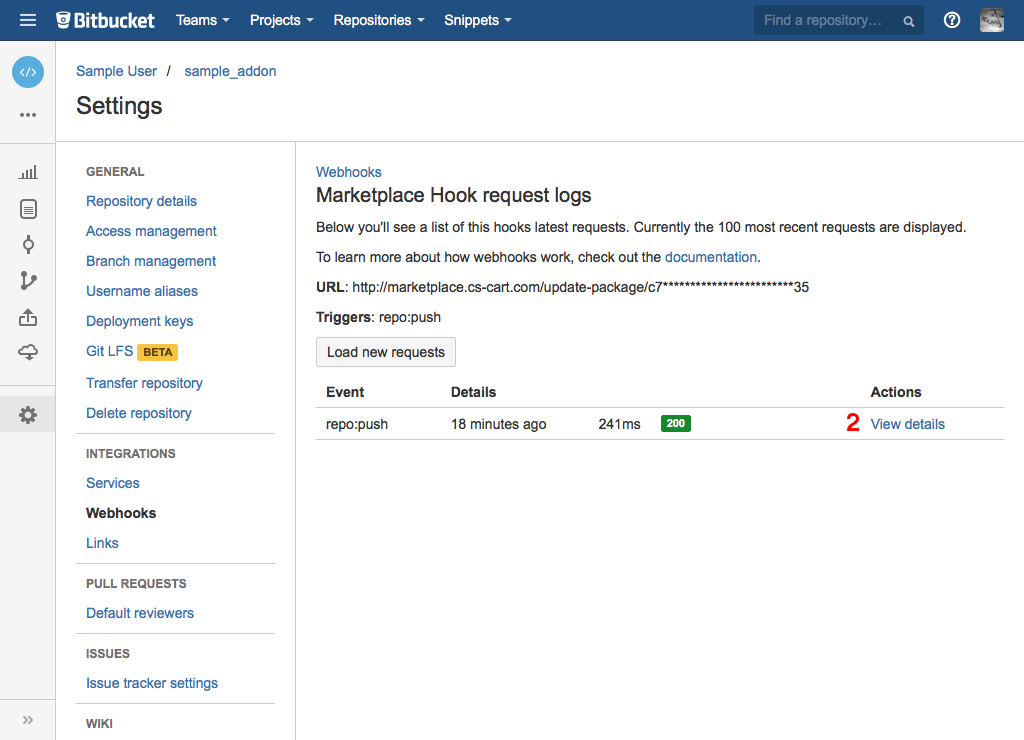
- Click View requests next to the webhook you created [1].
- Click View details next to an event [2].
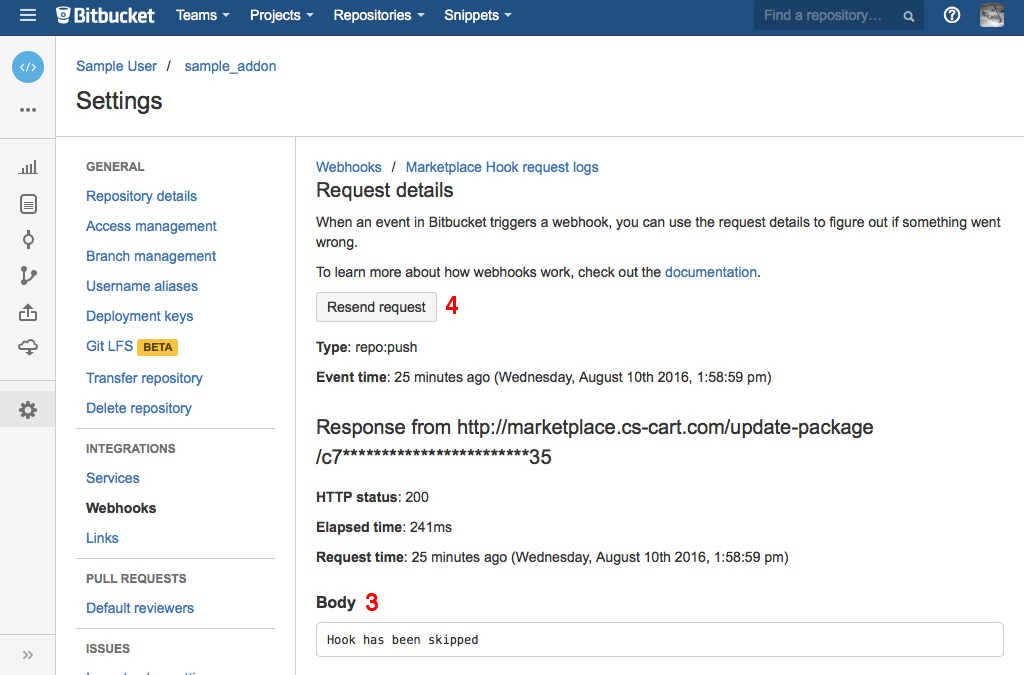
- You can find the response of the server in the Response from http://marketplace.cs-cart.com/update-package/… > Body section [3].
- To process the webhook again in case of errors, click Resend request [4].
Error Messages
| Error Text | Possible Reasons |
|---|---|
| Hook has been skipped | Updating with Git is disabled for the add-on.
The webhook uses a wrong Webhook URL.
|
| Invalid payload | The service has sent the data with the invalid structure.
The Webhook secret on the Marketplace or in the service is incorrect.
|
| Unknown payload source | The service that is used isn’t supported. |
| Not a push. Skipped | An action other than git push was performed with the repository. |
| Not a tag. Skipped | It wasn’t a tag that was sent to the repository. |
| Tag is not in the Semantic Versioning format. Skipped | The tag doesn’t follow Semantic Versioning. |
| Wrong owner/repository. Skipped | The wrong Repository owner/Repository name has been specified in the Marketplace.
The webhook uses a wrong Webhook URL.
|
| Tagged commit is not in the branch {Branch name}. Skipped | The commit that was tagged isn’t a part of the branch that is specified as the Branch name in the Marketplace. |
Questions & Feedback
Have any questions that weren't answered here? Need help with solving a problem in your online store? Want to report a bug in our software? Find out how to contact us.