How To: Install CS-Cart Store Builder with Softaculous
Note
This article applies only to CS-Cart Store Builder Free because Softaculous doesn’t support paid versions of software.
Softaculous App Installer is a tool that makes installation of web applications much easier. It creates databases, uploads the necessary files to your server and sets the right permissions for the files.
Softaculous can install Store Builder Free for you. It works with virtual hosts and dedicated servers. All you need to do is fill in a form or two to provide the necessary information.
Some hosts may have Softaculous App Installer as a separate section in the control panel, while others may not include it at all. If you found Softaculous to be installed on your server, use the following instructions.
Step 1. Login to your control panel and find Softaculous
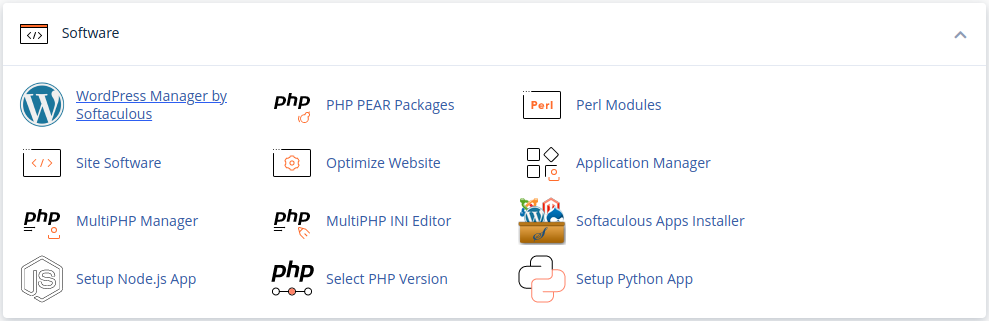
1.1. Log into your control panel and find Softaculous in the list of software. For example, in cPanel go to Software → Softaculous Apps Installer.
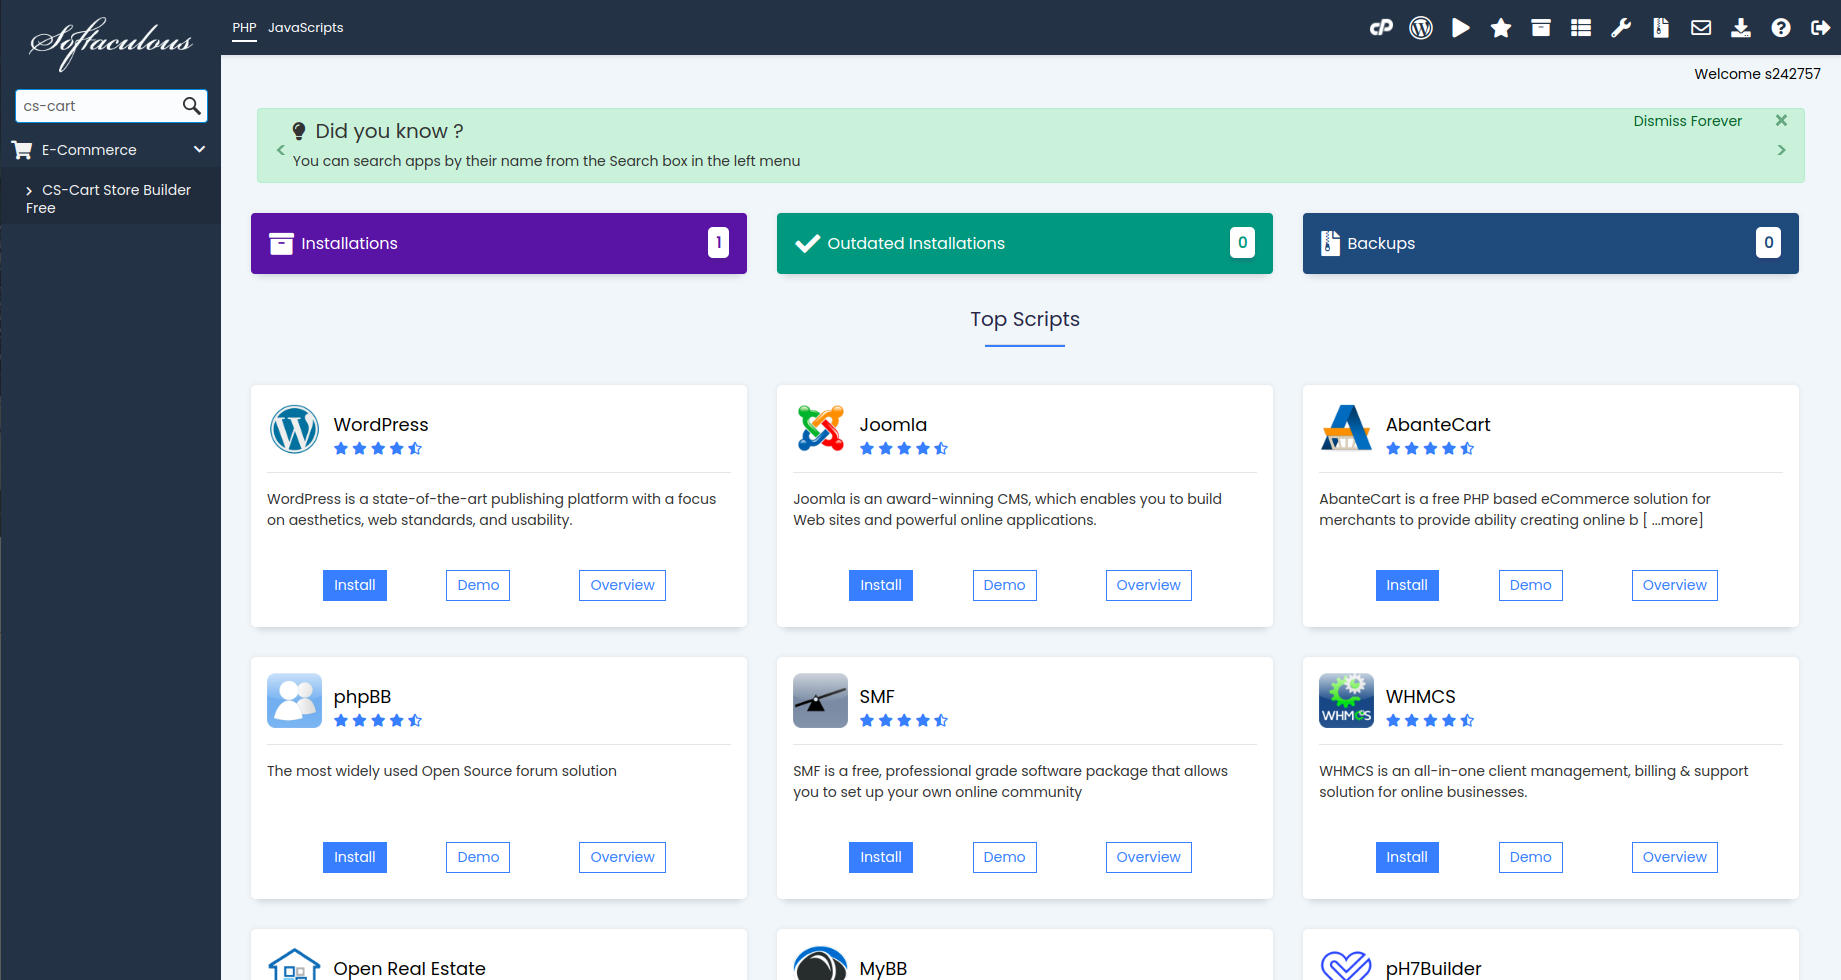
1.2. Enter cs-cart in the search box in the top left corner of the page below the Softaculous logo and you will find CS-Cart Store Builder Free.
Important
First, associate a domain name with your host’s IP: find out what name servers your host uses for your domain, then use your domain registrar’s control panel to associate your domain name with the name servers. We suggest you read this article to learn more.
Step 2. Install Store Builder
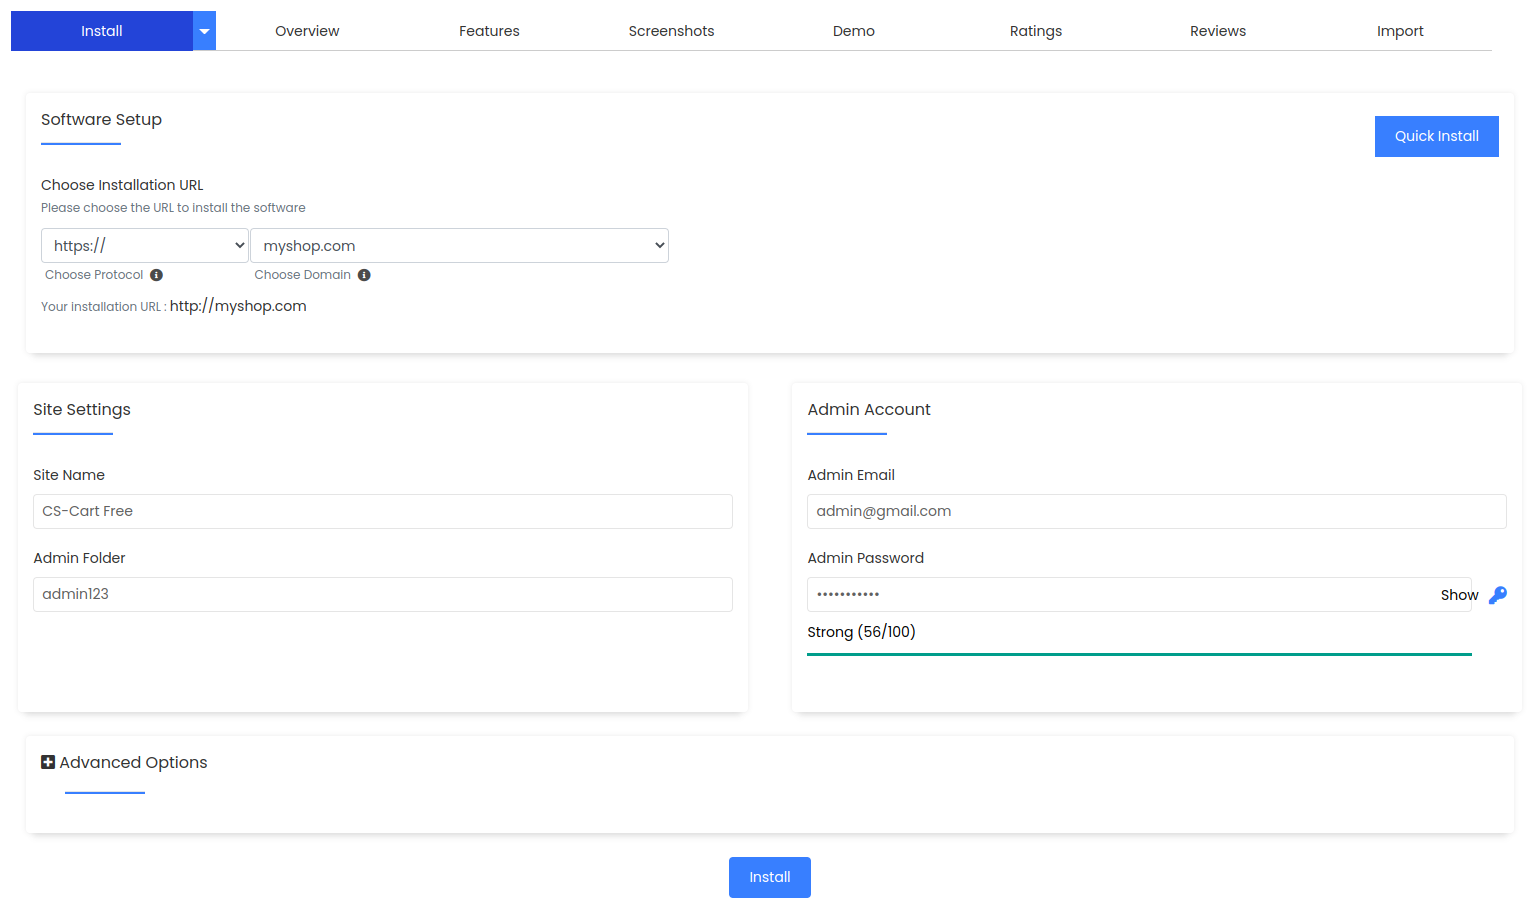
2.1. Switch to the Install tab, and you’ll see a form. Fill it in:
- Choose Protocol—http:// (choose https:// if your site has SSL).
- Choose Domain—select your domain from the dropdown menu. It’s myshop.com in the example.
- Site Name—it will be displayed as a Company name in your Store Builder Settings.
- Admin Folder—a name of the installation’s directory.
- Admin Email—enter your email here. It will be used to log in to your Admin panel. Store Builder will use it to notify you about new orders, call requests, and other important events in your store.
- Admin Password—enter the password you will use to access the Store Builder administration panel.
2.2. (optional) You can also fill in the Advanced options section. Click on the + icon to open additional settings.
- Table Prefix—leave it as is.
- Database Name—leave it as is or enter another name for the database.
- Disable Update Notifications—tick the checkbox, if you don’t want to receive the notifications about Store Builder updates.
- Email installation details to—enter the email where Softaculous will send the installation details, such as Store Builder admin credentials, MySQL database name, user and password, and other data. You may leave the field empty, but we highly recommend you to enter your e-mail.
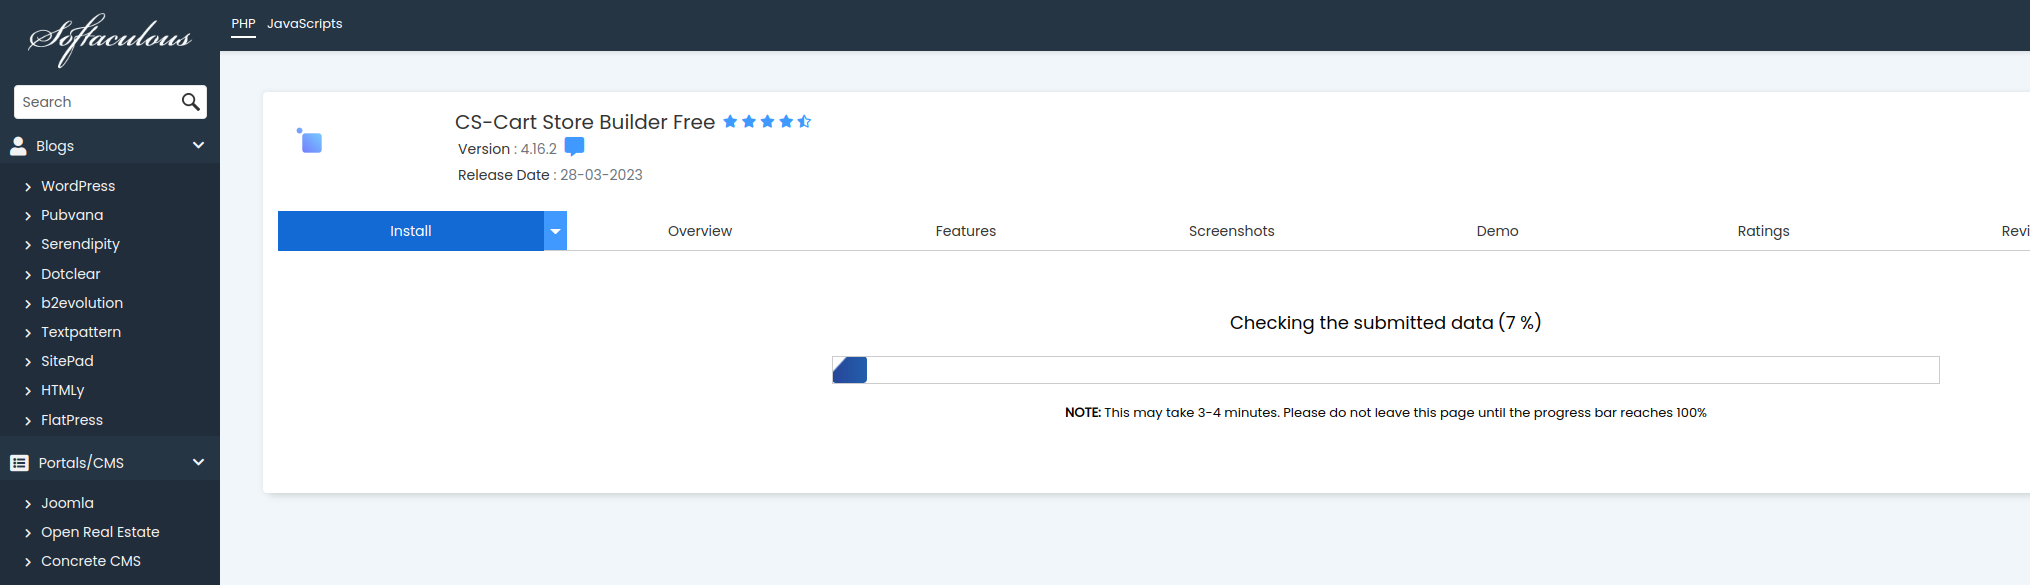
2.3. After you press Install, you’ll see the progress bar running. Please, don’t close the page during the installation.
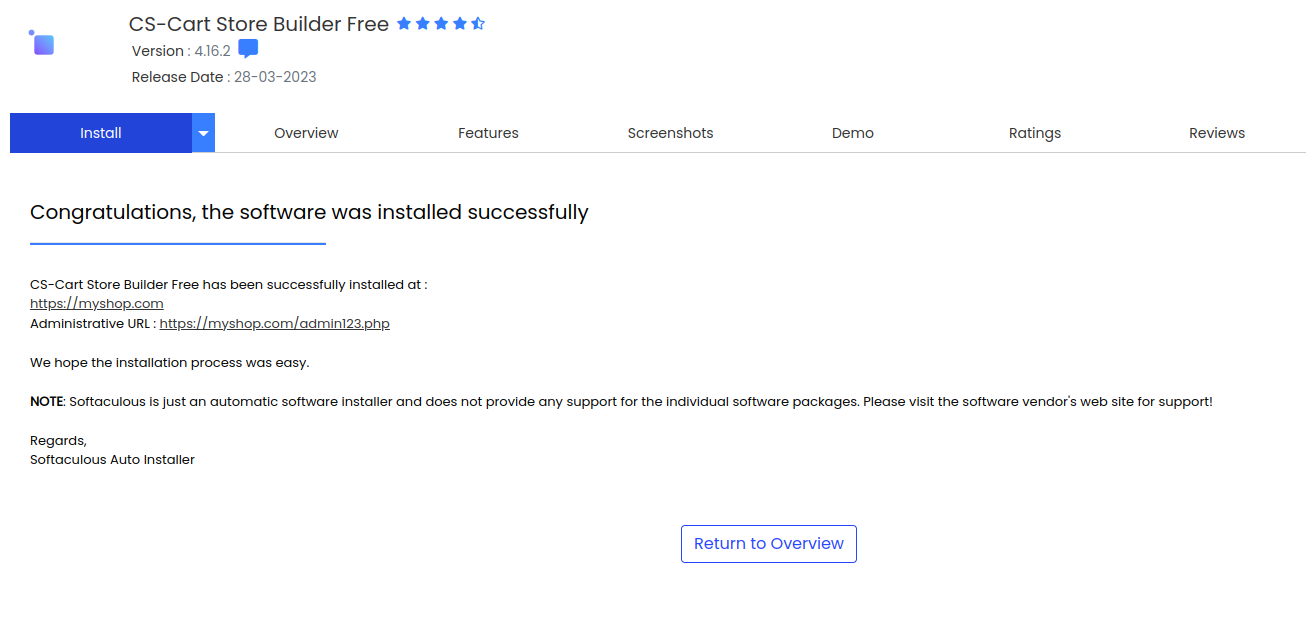
2.4. When the installation is complete you’ll see a message with 2 links to your store: use the first link to view the storefront, and the second link to enter the administrator panel.
Questions & Feedback
Have any questions that weren't answered here? Need help with solving a problem in your online store? Want to report a bug in our software? Find out how to contact us.