How To: Configure Multiple Storefronts on CS-Cart Cloud Hosting
Note
Here is more information about storefronts in CS-Cart and Multi-Vendor. You only need one CS-Cart or Multi-Vendor installation to manage all your storefronts.
This article describes how to configure multiple storefronts on CS-Cart cloud hosting.
Step 1. Configure Cloud Hosting
MyCloud interface includes the possibility to add sites or redirects to your server’s configuration.
To add an alias or a redirect:
- Go to the Sites section in your MyCloud account.
- Check the www checkbox if you need to add the www.subdomain.
- Type the domain of an alias or a redirect in the Domain field.
- Select the Type of the site you need to add.
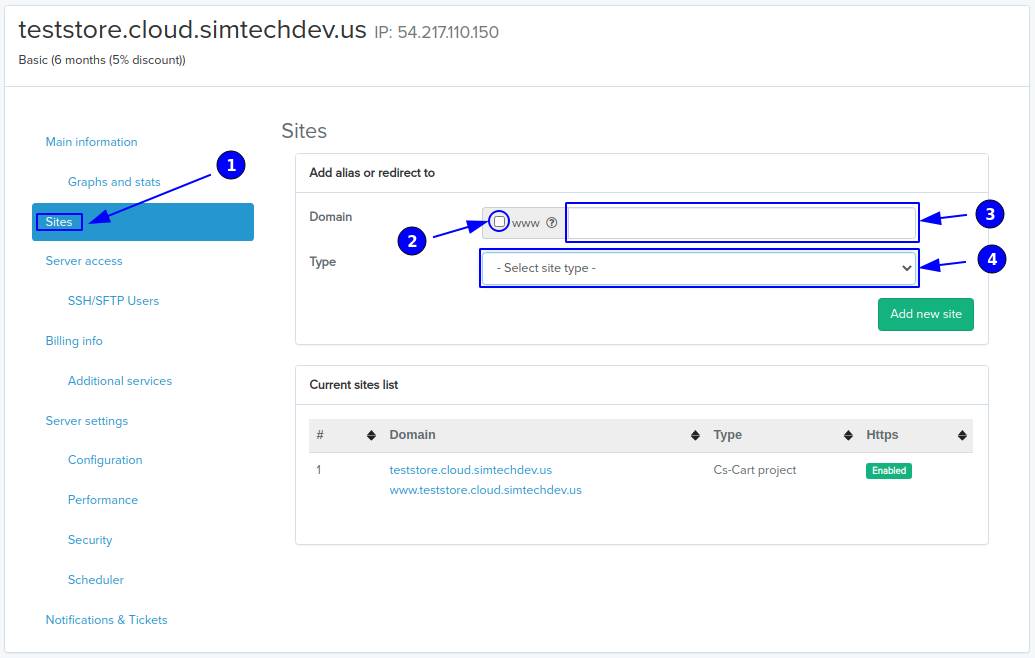
There are two types of sites you can add via MyCloud — aliases and redirects:
- An alias domain is an alternate name for another existing domain. When we talk about marketplace platforms, alias usually means an additional storefront to your project.
- A redirect changes the site’s URL to the required one and moves visitors to the site where the content is actually located.
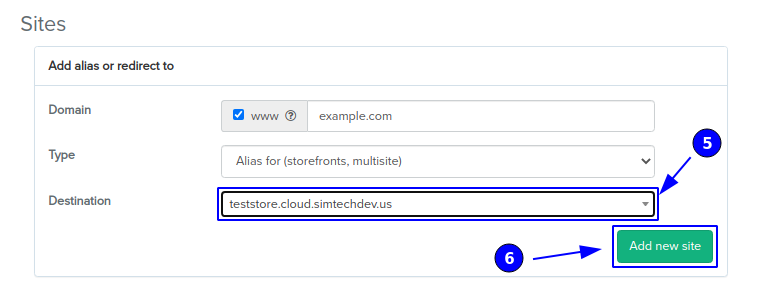
Let’s add an alias to the server configuration and see how it works (the process is the same for a redirect). When you select the type you need from the list, the Destination (5) field, where you need to choose a project to which the alias will be added from the list, will arise. When the Destination project is selected, click Add new site (6). Done, the example.com alias is added to the server configuration.
Step 2. Create New Storefront in CS-Cart/Multi-Vendor
Open the administration panel of CS-Cart or Multi-Vendor. In our case that will be CS-Cart project that we have chosen in the Destination field. Create a new storefront and assign it to its respective subdomain.
- Go to the Administration → Stores page and click the + button.
- Fill in the Storefront URL field with the subdomain you have entered in the Domain field when configuring hosting on Step 1.
- Specify other properties and click Create.
- Now the new storefront should be listed on the Stores page.
Questions & Feedback
Have any questions that weren't answered here? Need help with solving a problem in your online store? Want to report a bug in our software? Find out how to contact us.