How To: Set Up Full-Page Caching in Multi-Vendor
Important
This add-on doesn’t come with CS-Cart and Multi-Vendor by default. You can buy it separately in our Marketplace.
The Marketplace Performance Booster add-on works in combination with Varnish Cache—free software that serves as caching reverse proxy. Learn more about Varnish here:
Important
Configuring Varnish Cache requires experience and involves a lot of steps. It’s best to leave it to a server administrator. That’s why this article provides links rather than step-by-step instructions.
Step 1. Install Varnish
The add-on supports Varnish 4.1 and newer versions, such as 6.2. To install Varnish, refer to the following articles:
- Official Varnish Documentation
- Put Varnish on Port 80
- Install Varnish 4.1 on Ubuntu
- How to Install Varnish (Tecmint)
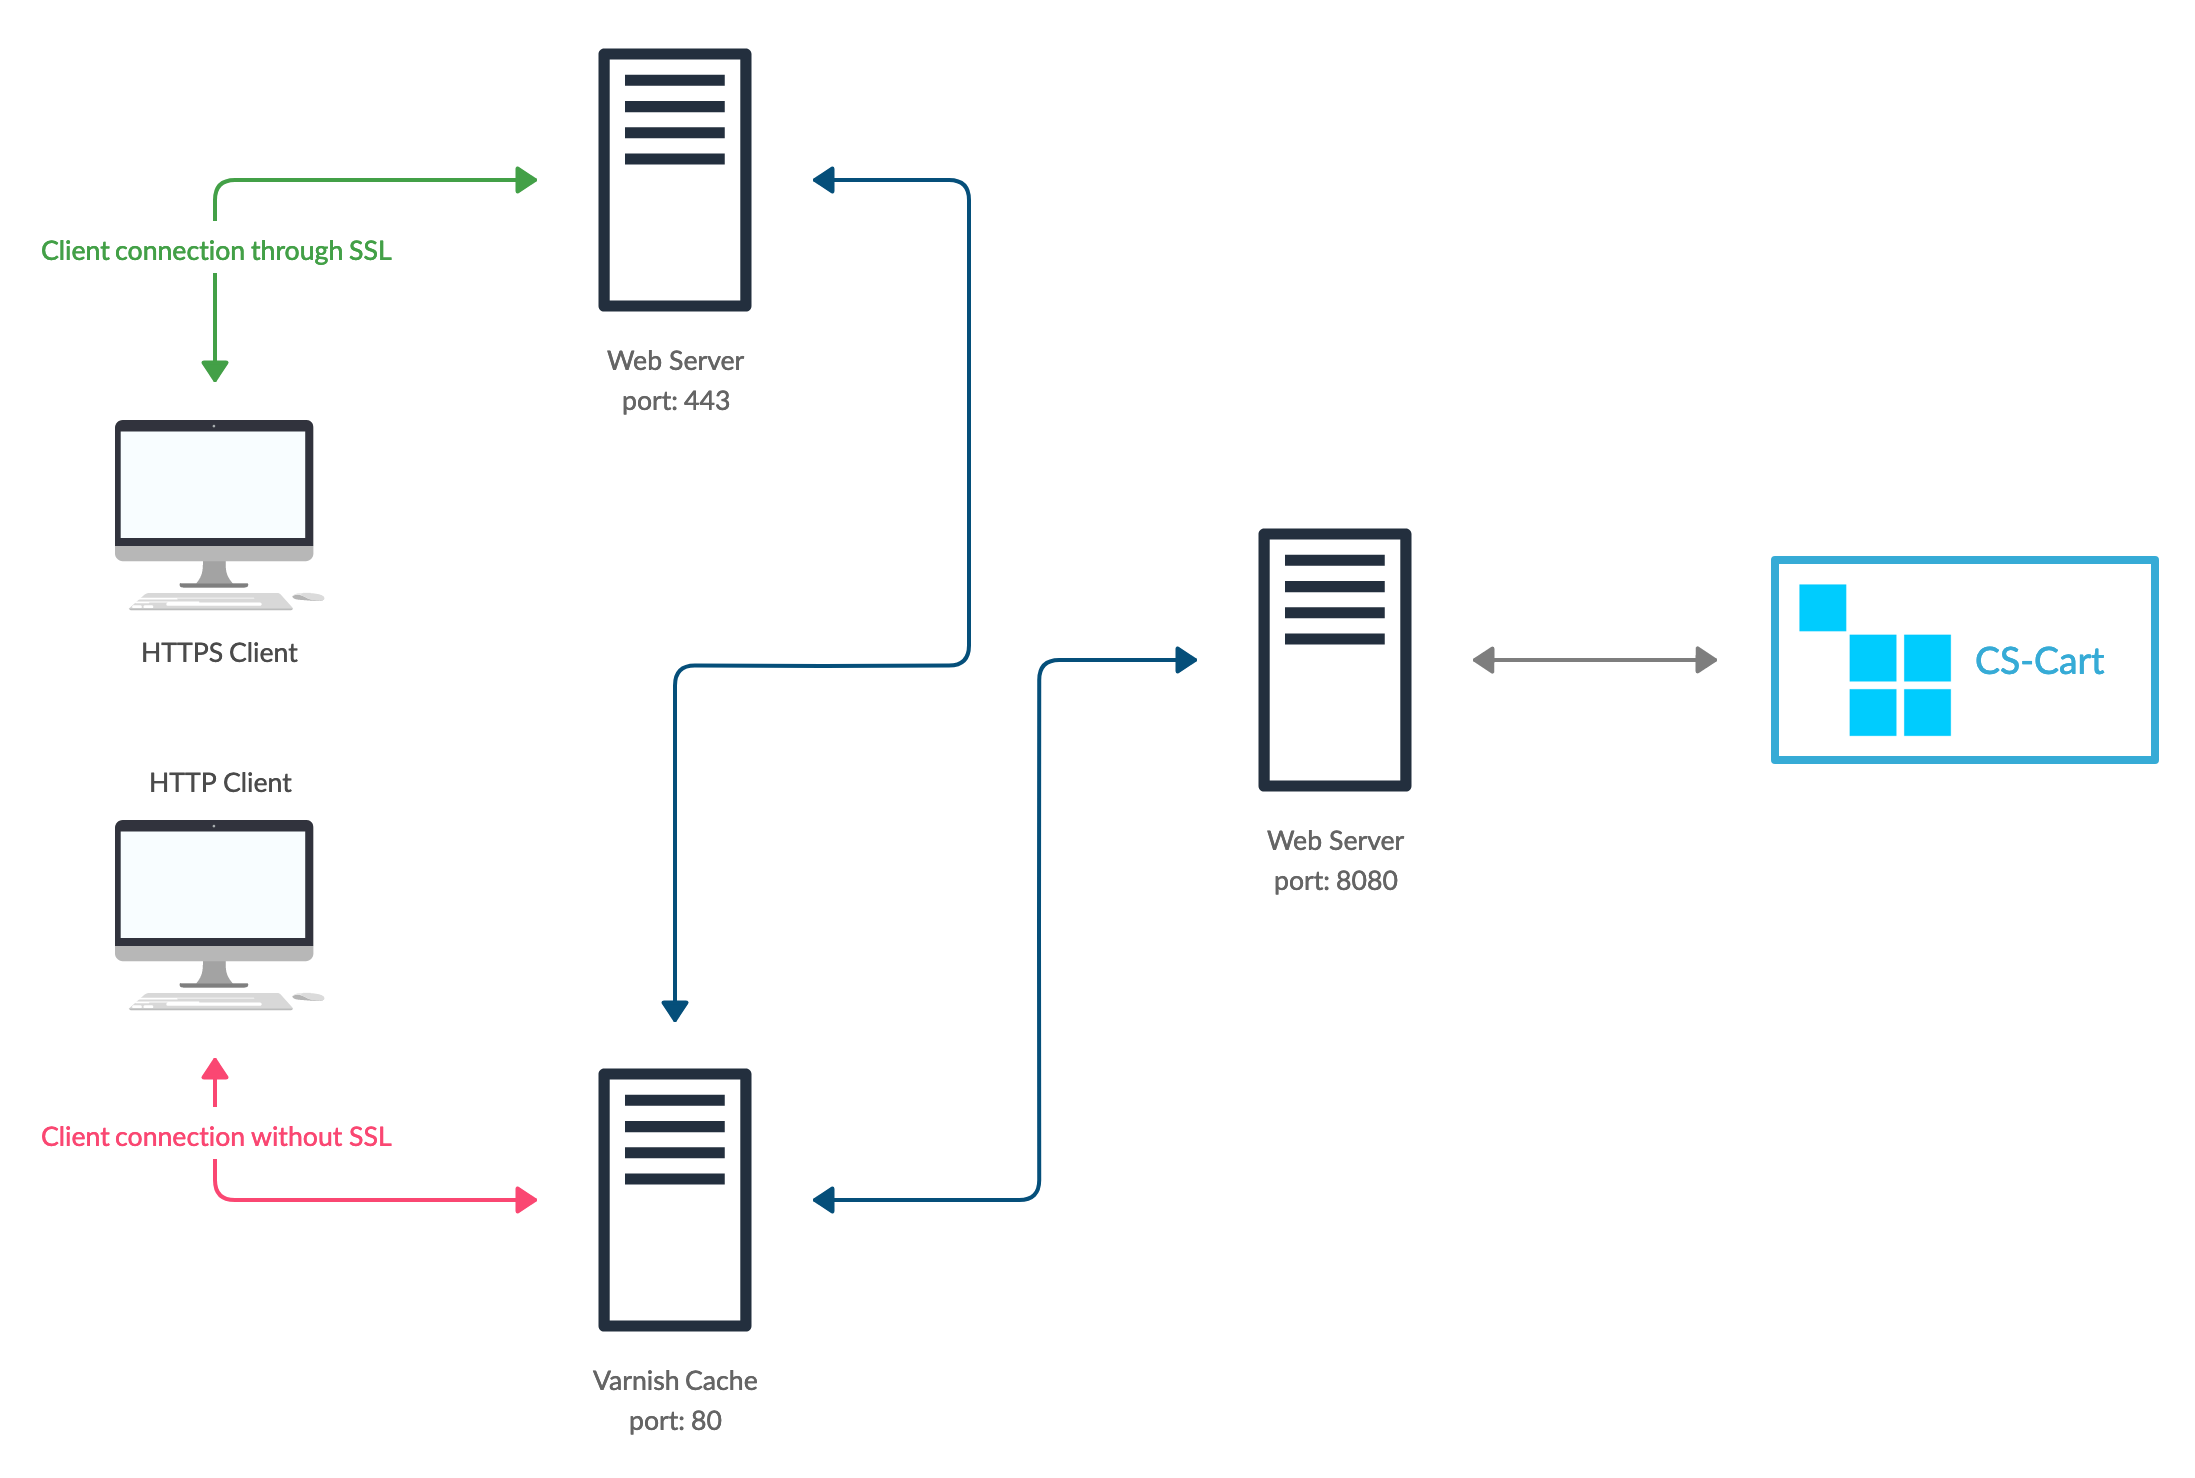
Varnish must listen to port 80 and process all HTTP connections.
Step 2. Configure Varnish and Web Server
2.1. Configure Reverse Proxy Server for HTTPS
Varnish doesn’t support HTTPS, so if your store uses SSL certificate, it will need a reverse proxy server to work with Varnish. Any web-server can work as a reverse proxy, but we recommend nginx.
The reverse proxy server must listen to port 443 and redirect traffic to port 80 of the Varnish server. Here is an example configuration for nginx:
server {
    listen              443 ssl;
    server_name         example.com;
    server_name         www.example.com;

    ssl_certificate     /etc/nginx/certs/example.com.crt;
    ssl_certificate_key /etc/nginx/certs/example.com.key;

    location / {
        proxy_set_header Host $host;
        proxy_set_header X-Real-IP $remote_addr;
        proxy_set_header X-Forwarded-For $proxy_add_x_forwarded_for;
        proxy_set_header X-Forwarded-Proto $scheme;
        proxy_pass http://127.0.0.1;
        proxy_read_timeout 90;
    }
}
2.2. Configure Backend Web Server
The job of the backend web server is to process the requests from the Varnish server. For that purpose, the backend server must listen to port 8080. To configure the backend web-server, use the following articles:
2.3. Configure Varnish
Now we need to teach Varnish to react properly to the responses from the backend server. To do that, modify the default.vcl file. Depending on how Varnish was installed, default.vcl might be located in different places:
- /etc/varnish/default.vcl
- /usr/local/etc/varnish/default.vcl
Replace that file with our default.vcl for Multi-Vendor.
If the backend server and Varnish are on different physical servers or use the ports different from those we listed above, please change the configuration accordingly:
Backend server address:
backend default {
    .host = "127.0.0.1";
    .port = "8080";
}
host—the IP address of the backend server in the internal network.port—the port that the backend server listens to.
Security settings:
acl internal {
    "127.0.0.1";
}
This section lists the IP addresses in the internal network that Varnish will consider safe. These IP addresses will be able to send cache invalidation requests.
Important
Cache invalidation requests are sent by a PHP script. If you process PHP on a separate server, then its IP address must be added to this list.
Step 3. Install and Configure Full-Page Cache Add-on
Download the add-on and install it from the archive.
By default, the add-on is already configured. It expects that Varnish is installed on the same server as CS-Cart or Multi-Vendor. If this isn’t the case, then open the add-on’s settings and specify the IP address of the Varnish server in the Host field.
To enable full-page caching, just activate the add-on.
Note
During activation, the add-on will attempt to invalidate the cache. If everything works, the add-on will activate. Otherwise, you’ll need to check the settings of the add-on and Varnish Cache.
Questions & Feedback
Have any questions that weren't answered here? Need help with solving a problem in your online store? Want to report a bug in our software? Find out how to contact us.