How To: Configure Back-End Sign-In via Google
Note
This functionality first appeared in CS-Cart/Multi-Vendor 4.9.1. It doesn’t affect vendors in Multi-Vendor, only marketplace administrators.
If you want your administrators to sign in to the admin panel via their Google accounts and without any passwords, you’ll need to configure a project at Google Cloud and link it to your store via an add-on. The article describes how to do it.
Step 1. Set Up the Add-on
Go to Add-ons → Manage add-ons in the administration panel of your store.
Install the Back-End Sign-In via Google add-on.
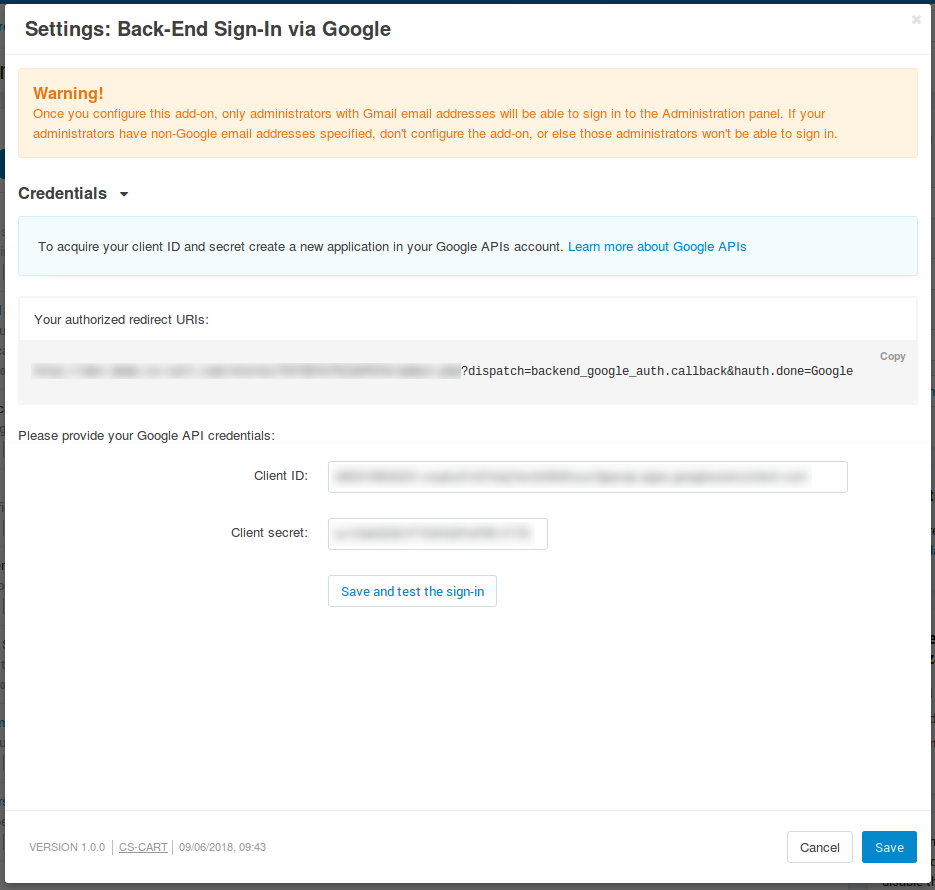
Click the name of the newly-installed add-on to open its settings. You’ll need to do 2 things there:
- Take the authorized redirect URI from the add-on settings and put it into your Google Cloud project.
- Fill in 2 fields in the add-on settings with the data from your Google Cloud project (we’ll describe how to do it in Step 2):
- Client ID
- Client secret
Step 2. Create a Google Cloud Project
Go to the cloud resource manager at Google Cloud Platform.
Click CREATE PROJECT.
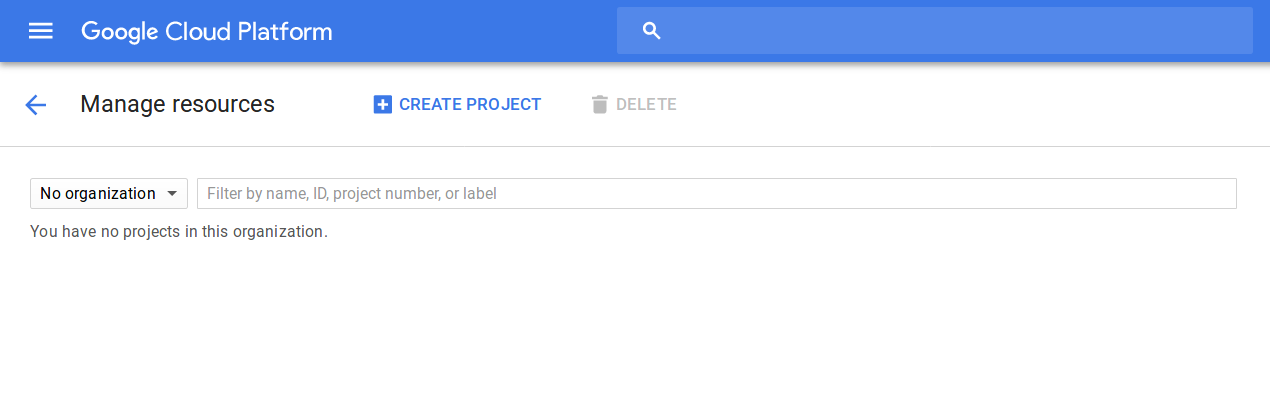
Enter the project name (for example, you can name it after your company) and create the project.
Go to the page for creating credentials. Make sure that the name of the newly-created project is selected in the upper left part of the page.
Click Create credentials and choose OAuth client ID.
First Google will request that you configure OAuth consent screen. Agree, and you will be redirected to the settings. There are many of them, but only a few need to be filled in:
- Application name—you can enter your company name.
- Authorized domains—enter the domain name of your store.
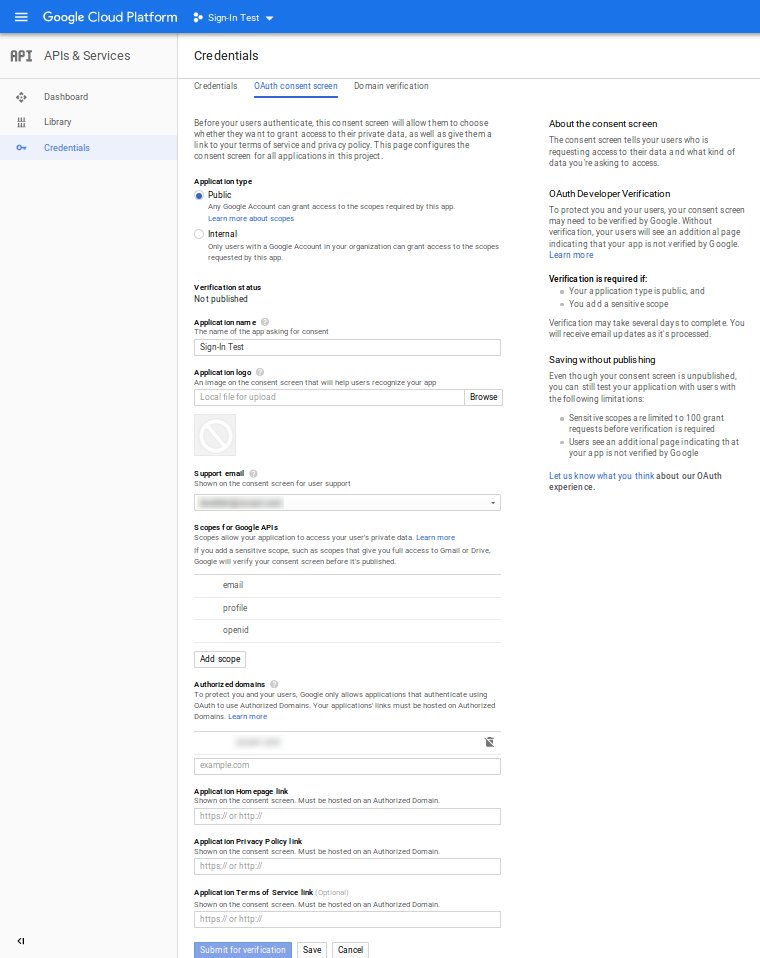
Click Save, and you will return to the page for configuring the credentials. Specify the settings as follows:
- Application type—choose Web Application.
- Name—use the default one or enter any other name.
- Authorized redirect URIs—enter the value from the Back-End Sign-In via Google add-on in CS-Cart.
Important
Before you save everything, make sure that Google has accepted your URI: the field should become empty, and the URI that you entered should appear next to it. It may not happen immediately; try selecting another field and then returning to Authorized redirect URIs.

Once you create the credentials, you should be able to see the Client ID and Client secret of the project. Copy them to the Back-End Sign-In via Google add-on, but don’t save the settings yet.
Important
Once you have pasted the values, make sure that there are no extra spaces before or after them.
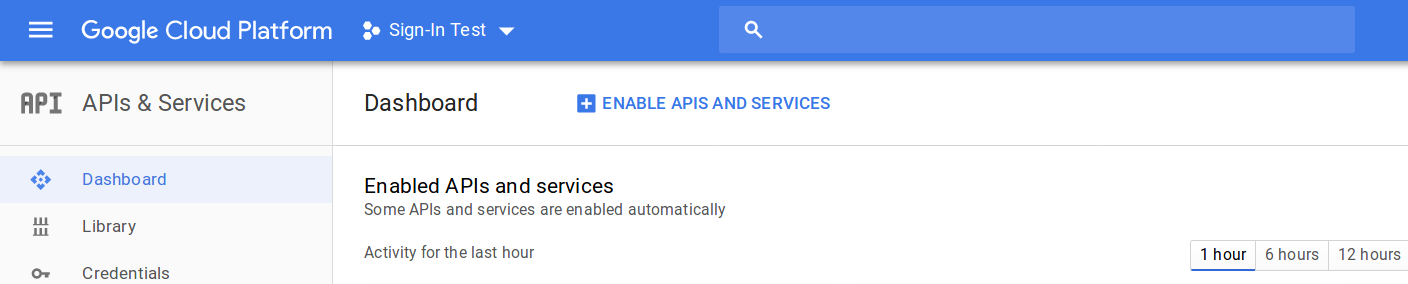
Return to the Google Cloud Platform Dashboard in a different tab or window of your browser.
Go to ENABLE APIS AND SERVICES, find the Social section, click Google+ API, and choose Enable.
Now return to the settings of the Back-End Sign-In via Google add-on. Click the Save and test sign-in button:
- If everything is configured properly, you’ll see the window for choosing your email address. You’ll be able to check if the sign-in works. Go through all the steps of the sign-in to make sure there are no issues.
- If you see an error, clear the fields in the add-on settings and save your changes. When the fields aren’t filled in, CS-Cart will use the standard sign-in mechanism (email + password). But if the fields are filled in (even with a mistake of some sort), only sign-in via Google will be offered.
Warning
Once you configure the add-on, only administrators with Gmail email addresses will be able to sign in to the Administration panel. If your administrators have non-Google email addresses, they won’t be able to sign in.
Questions & Feedback
Have any questions that weren't answered here? Need help with solving a problem in your online store? Want to report a bug in our software? Find out how to contact us.