How To: Create a Mailing List
- In the Administration panel, go to Marketing → Newsletters → Mailing lists.
- Click the + button on the right to add a mailing list.
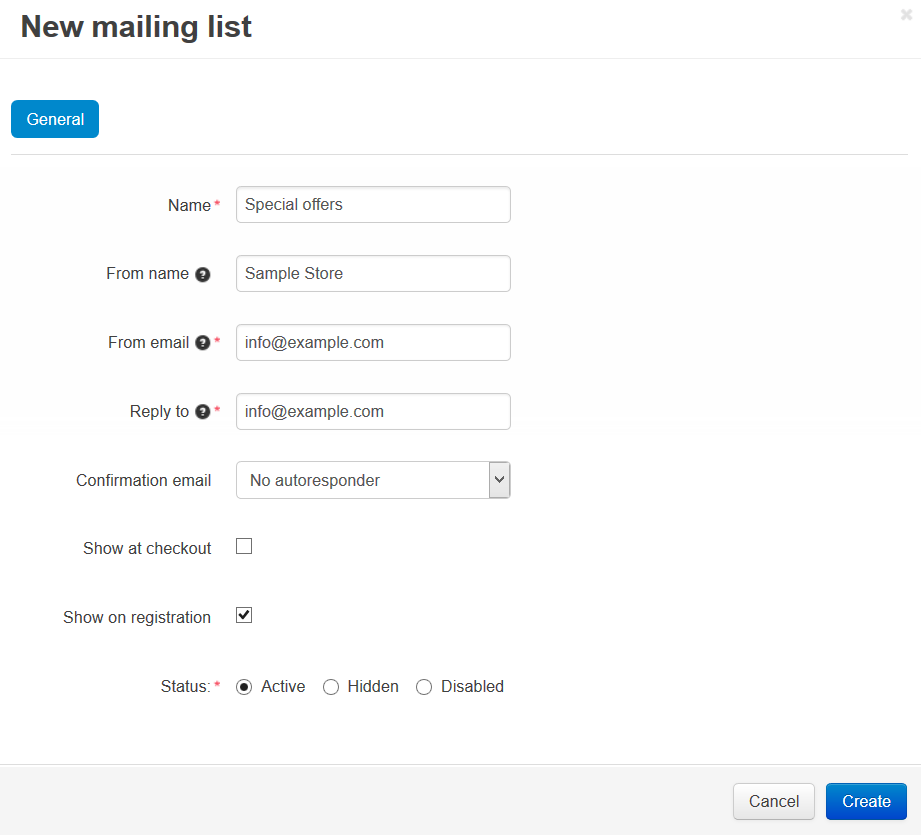
- Fill in the following fields:
- Name — enter the name of the mailing list.
- From name — enter the name from which the e-mails will be sent.
- From email — enter the e-mail from which the e-mails will be sent.
- Reply to — enter the e-mail to which the replies will be sent to.
- Confirmation e-mail — choose an autoresponder for this mailing list (e.g., it can be sent to confirm subscriptions or unsubscriptions, etc.)
- Show at checkout — select if you would like to display the subscription block at checkout.
- Show on registration — select if you would like to display the subscription block at registration.
- Status — select the desired mailing list status.
- Click Create.
- The Mailing lists section will be displayed in the storefront, and customers will be able to subscribe to the list.
To add subscribers to the mailing list:
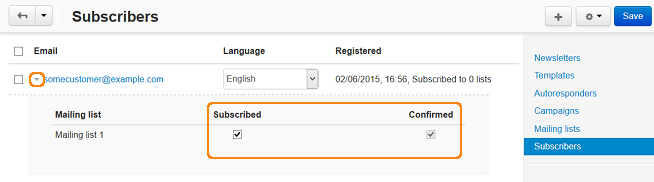
- Go to Marketing → Newsletters → Subscribers.
- Click the pointer icon of a subscriber, new small section will be displayed. Tick the Subscribed and Confirmed check boxes of the mailing list and click Save.
- Or click the + button on the right and choose Add subscriber, fill in the necessary fields in the opened window, and click Create.
Questions & Feedback
Have any questions that weren't answered here? Need help with solving a problem in your online store? Want to report a bug in our software? Find out how to contact us.