Pixel Facebook
Note
You need a Facebook account to work with this add-on.
As people take action on your website (make a purchase or add an item to their cart), the Facebook pixel registers the event and shares it with Facebook. Event tracking helps power your Facebook ads — for example, you can launch a campaign for a more relevant audience.
The add-on helps to measure the effectiveness of Facebook and Instagram ads and collect web analytics. Users will see the received event data in Events Manager.
Functionality
The Facebook pixel allows you to receive the following information about customer behavior (events):
- viewed pages;
- items added to cart;
- placed orders.
Installation and Configuration of the Add-on
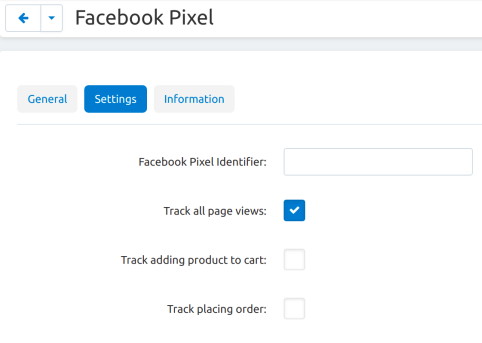
Install the add-on just like any other add-on. Click on the name of the installed add-on to open its settings.
Facebook Pixel Identifier. Copy the ID of the created pixel from the pixel page, under its name.

These are the settings responsible for the support of tracked events. Tick the checkboxes and decide if you want to:
- track all page views;
- track adding product to cart;
- track placing order.
Creation and Configuration of Pixel
Creation
Note
Create a Business Manager account before starting. Use your Facebook account information to log into Business Manager.
- Go to Events Manager.
- Click
 , to Connect Data Sources and select Web.
- Select Facebook Pixel and click Connect.
- Add your Pixel Name.
- Enter your website URL to check for easy setup options.
- Click Continue.
Configuration
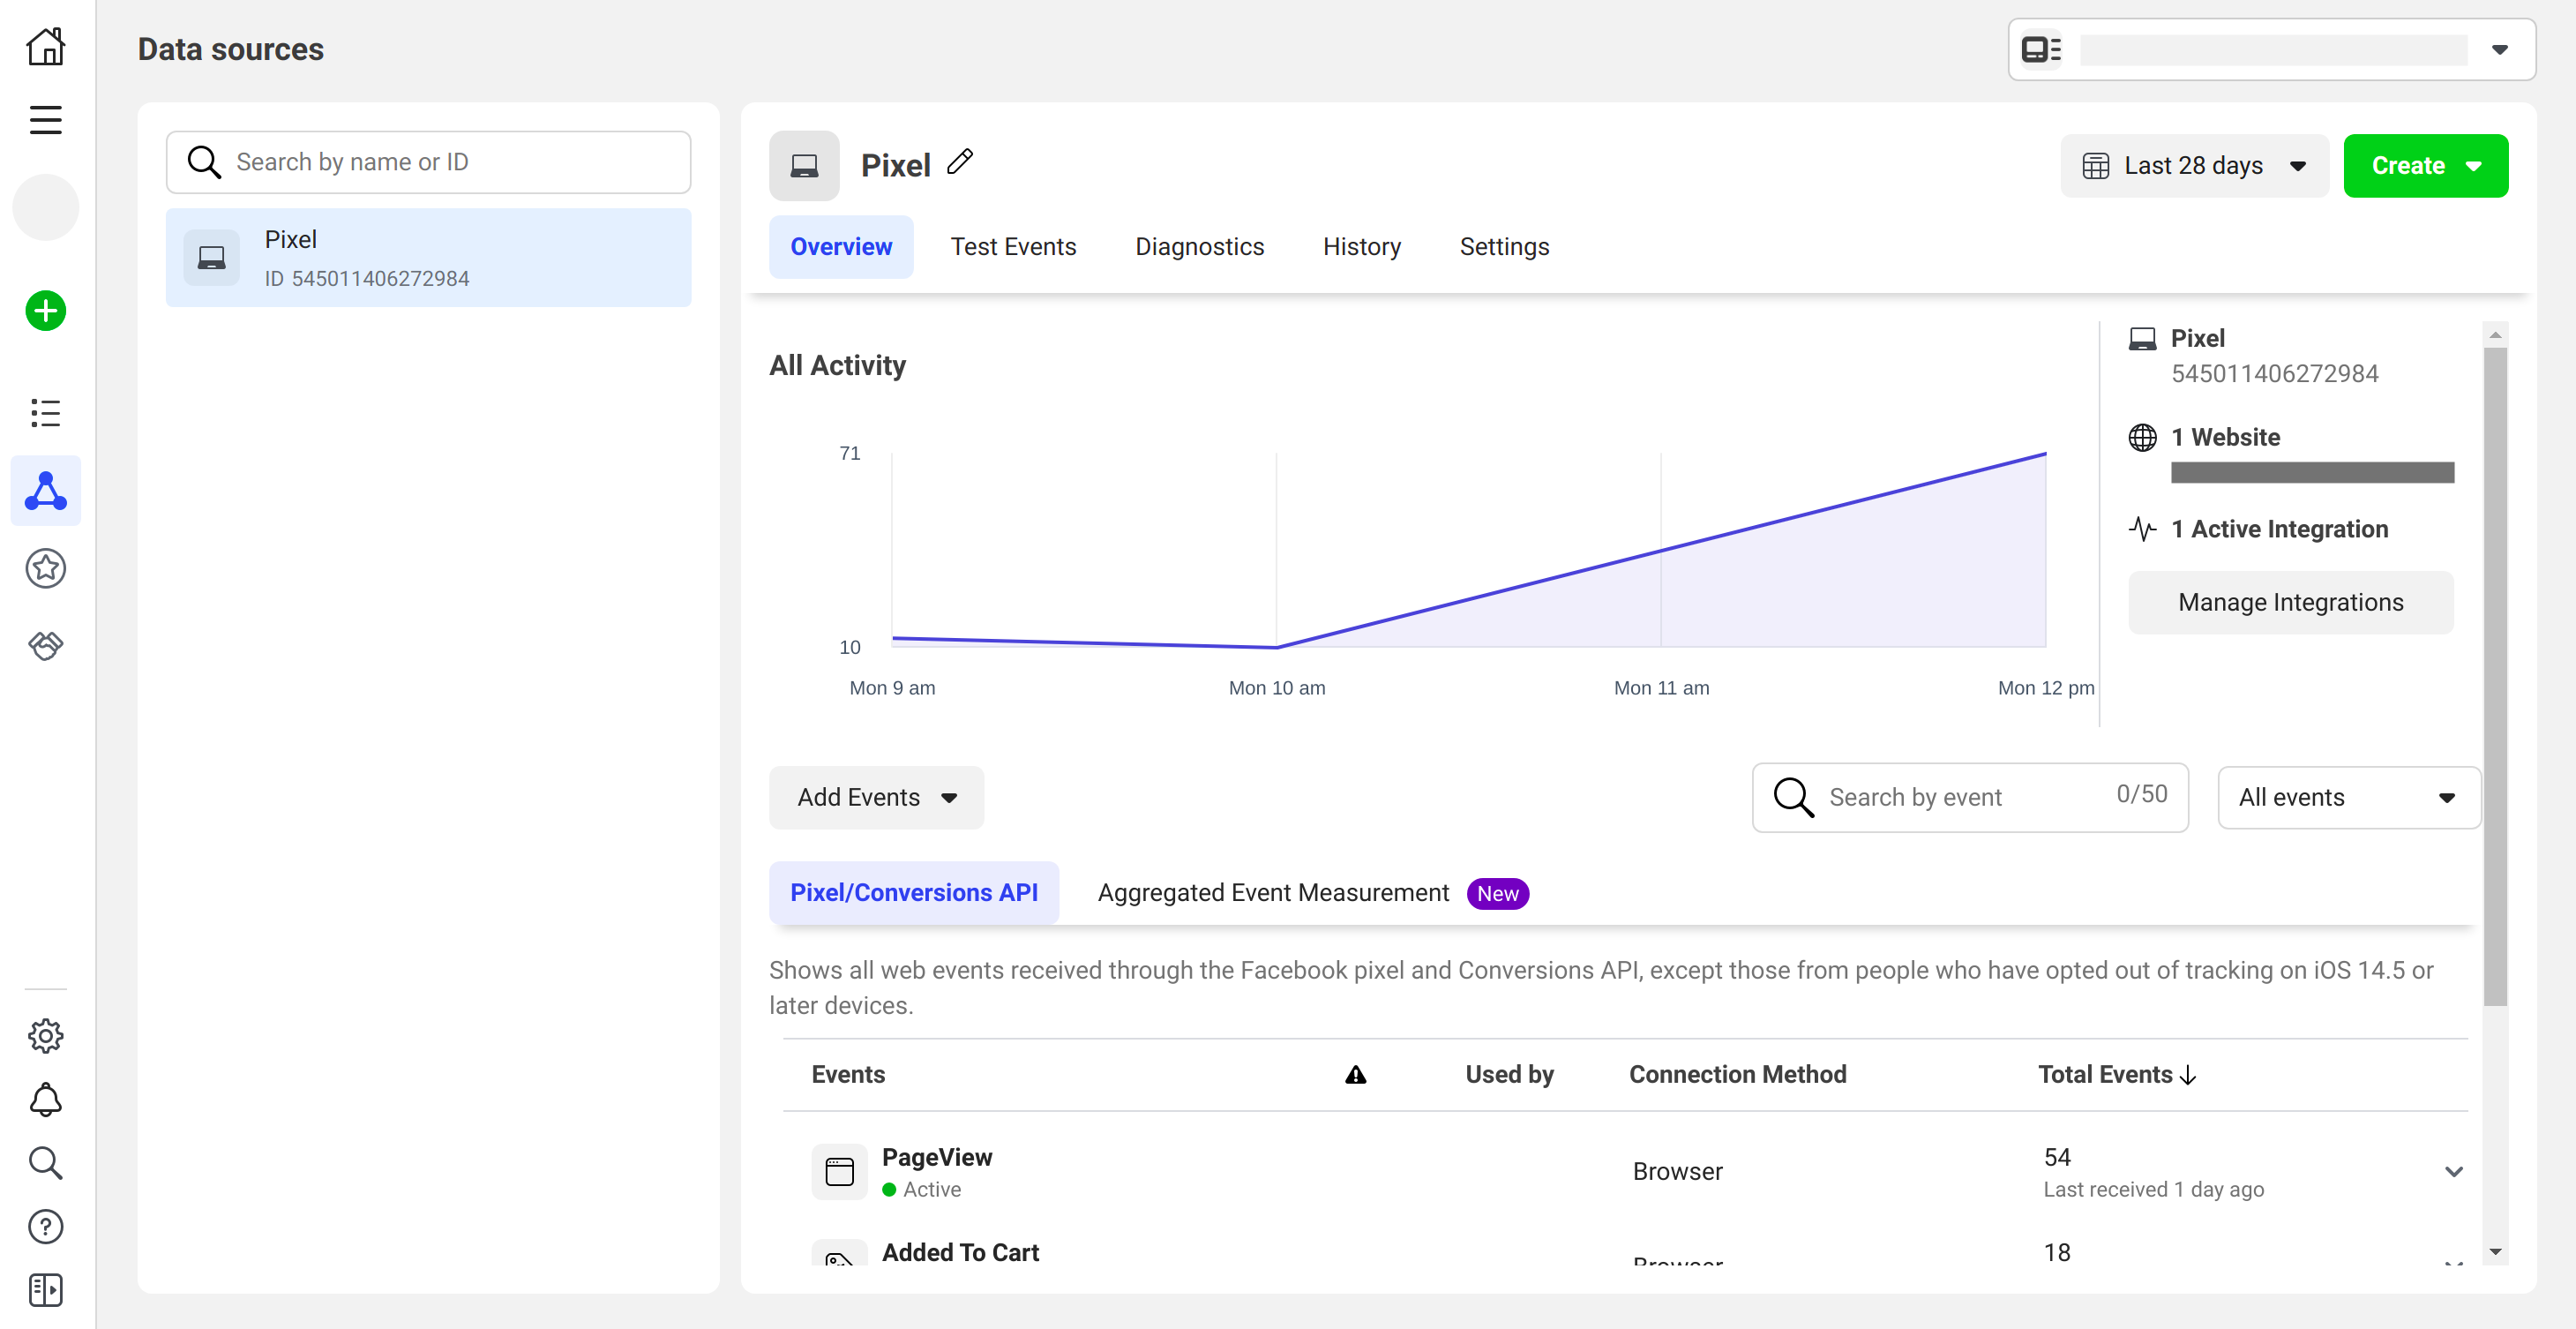
If you enter the correct site URL during pixel creation and pixel ID in the add-on settings, you’ll see information about the events occurred on the Overview tab in Events Manager. Data can appear with a delay of up to 20 minutes.
Checking Pixel Performance
Testing Events
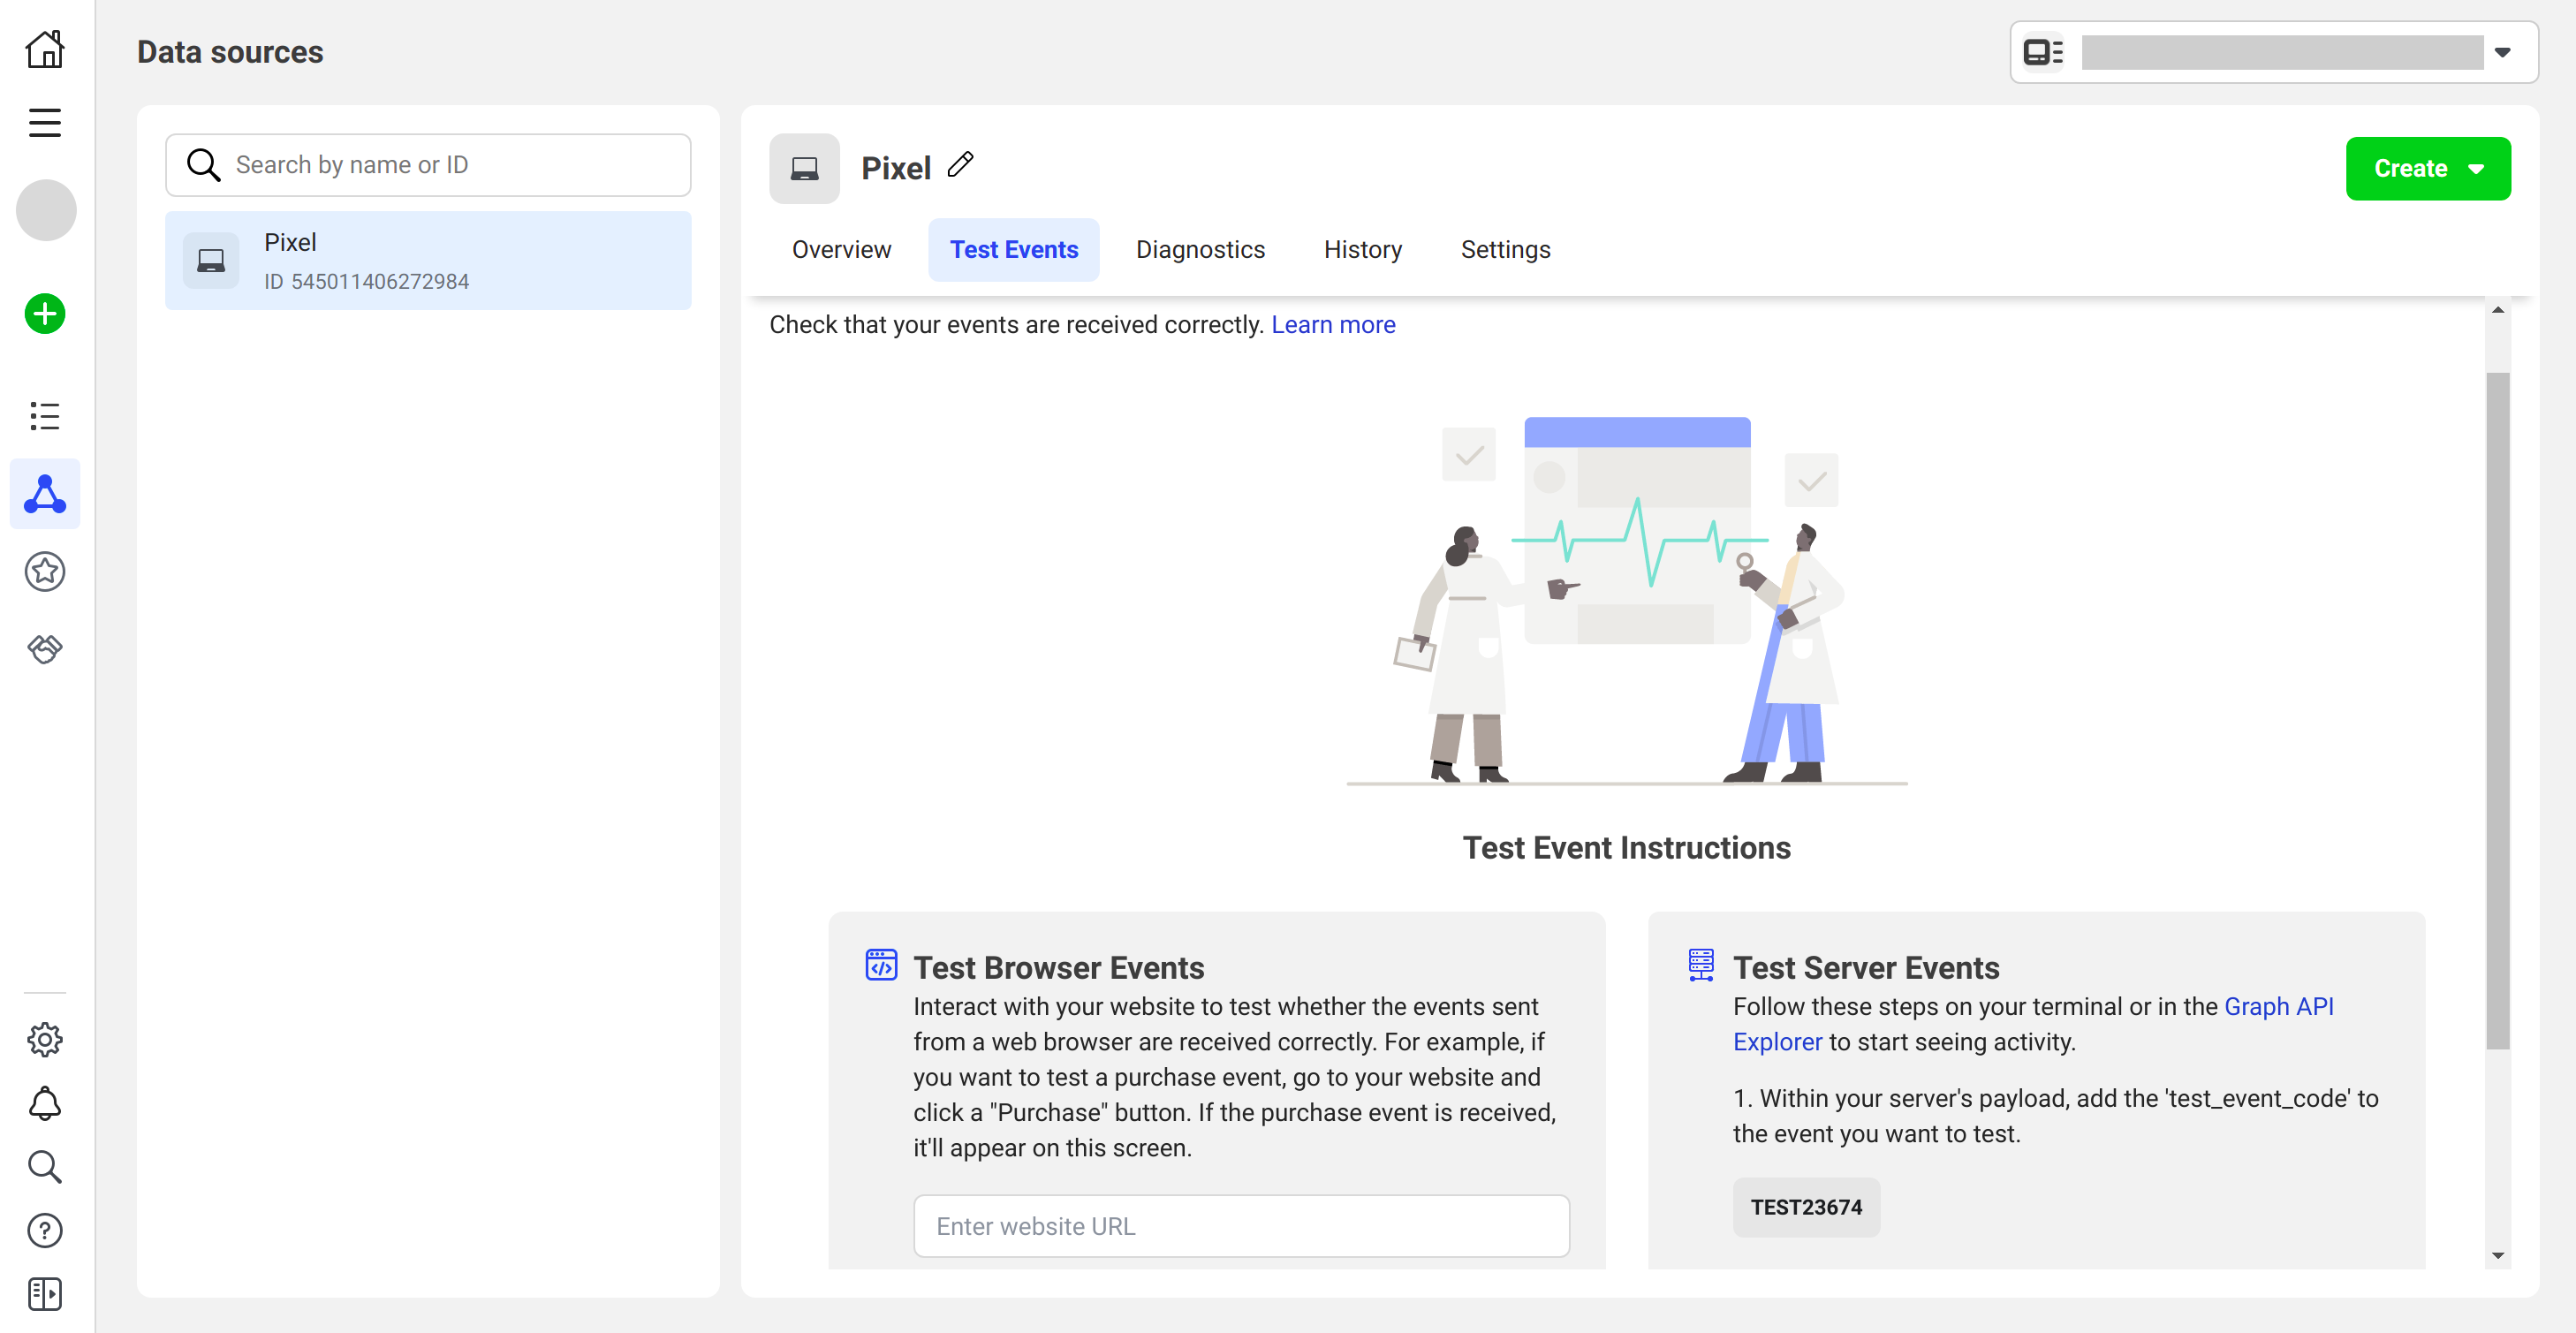
A Test Events tool in Events Manager can help you ensure you’ve set up the add-on and events correctly, and that Facebook receives the data.
Open the Test Event tab and do not close it until testing is complete. Actions are only recorded while this tab is kept open.
In the Test Browser Events section, enter the URL of the site you want to test actions on. Click Open Website and check the pixel work according to the add-on settings: visit pages, add items to your cart, make purchases. Your interactions will appear in the Test Events tab within 30 seconds.
Facebook recognizes events by context. Therefore, pixel will track the events that you enabled in the add-on settings, as well as the events predefined by Facebook. Filter the events by clicking on the filter iconto see specific types of events  .
.
Plugin
You can also use the Chrome plugin to see if your pixel is working properly. Install Facebook Pixel Helper from the Chrome Web Store. After installation, go to your site in your Chrome browser and click the Pixel Helper icon  next to the address bar. An opened pop-up window will show what pixels and events were found on the page, and if they have loaded successfully.
Questions & Feedback
Have any questions that weren't answered here? Need help with solving a problem in your online store? Want to report a bug in our software? Find out how to contact us.