How To: Set up CS-Cart with AuthorizeNet
- In the Administration panel, go to Administration → Payment methods.
- Click the + button on the right.
- In the opened window:
- In the Name field type AuthorizeNet.
- In the Processor select box select AuthorizeNet.Aim.
- If necessary, specify other fields and upload an icon.
- Open the Configure tab in the same window to view the AuthorizeNet settings.
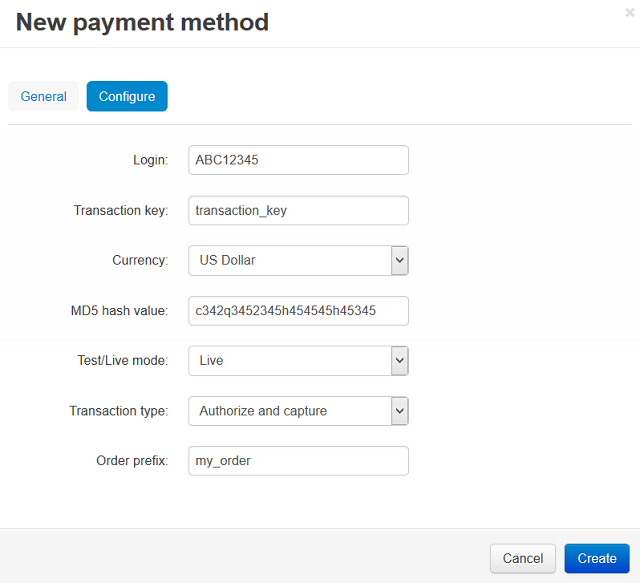
- Fill in the following fields:
- Login — your AuthorizeNet login.
- Transaction key — transaction key that you can get on the AuthorizeNet web site.
- Currency — the currency in your AuthorizeNet account. It must match the primary currency of your store.
- MD5 hash value — MD5 hash value that you can get on the AuthorizeNet web site.
- Test/Live mode — set it to Test while testing the credit card processing through this payment gateway.
- Transaction type — select a transaction type. If you use the Authorize only type, AuthorizeNet.Aim only checks your credit card data and does not make any payments. If you use the Authorize and capture type, AuthorizeNet.Aim checks all information and makes a payment. So, for real payments you should use the second type of transaction.
- Order prefix — any prefix you want invoice IDs to have on AuthorizeNet site (optional field) (for instance, mycart). Using the prefix allows to prevent duplicate invoice IDs in case you use the same AuthorizeNet account for accepting payment from several websites.
- Click the Create button to save the changes.
Important
In order to use AuthorizeNet as a payment method on your site, there must be PHP’s Curl support on your server. You are able to read more about it here.
Questions & Feedback
Have any questions that weren't answered here? Need help with solving a problem in your online store? Want to report a bug in our software? Find out how to contact us.