Hello World Add-on Tutorial
Introduction
Each add-on has its own directory inside the app/addons directory. The add-on is described in the file addon.xml.
Among the information listed there, are the add-on id, priority, version, display name, etc.
Basically, an add-on will run with only this file existing. All it will do will be just sit in the add-on list and do absolutely nothing. However, such add-on will be installable and uninstallable, even configurable and properly translated if you define settings and translations in the addon.xml file.
So, keeping that in mind, you can go on further and create you first CS-Cart add-on.
Hello, World!
Go to the app/addons directory in the CS-Cart installation directory. There, create a directory called hello_world and switch to it. That will be your working directory for this add-on.
Important
It is important that the add-on directory name is the same as the add-on id. Otherwise, the add-on will not install properly.
As said before, all an add-on needs to have to be operational is the addon.xml file. Let’s create this file.
Provide some basic add-on attributes:
id—(must be equal to the add-on catalog name,hello_worldin our case)version—set to1.0name—add-on display name in the default language (English, if not explicitly specified). Set to Hello, World!description—add-on description in the default language (English, if not explicitly specified). Set to Say hello to the worldpriority—set this one to something big like 100500
The addon.xml file should look like this:
<?xml version="1.0"?>

<addon scheme='2.0'>
    <id>hello_world</id>
    <version>1.0</version>
    <name>Hello World</name>
    <description>Say hello to the world</description>
    <priority>100500</priority>
</addon>
This is enough for our add-on to start. Log in to your admin panel and switch to Administration → Add-ons. The add-on should be present in the list. You can install/uninstall and activate/disable it:
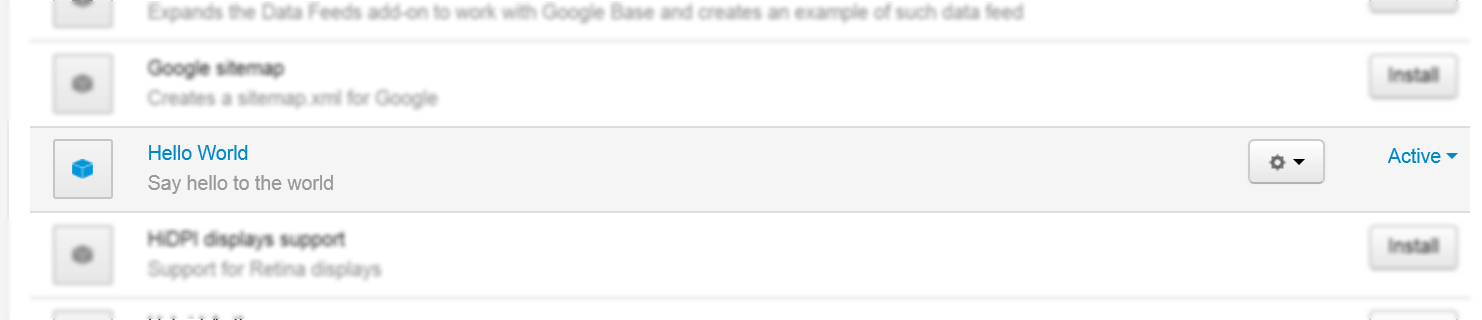
Note
You may have to clear the store cache to view the changes in the add-on list. Add &cc at the end of the URL in the browser address field.
Pay attention to the scheme='2.0' parameter. Add-ons without this parameter are considered using the deprecated markup. It still may be present in some add-ons, but it should be done solely for backward compatibility.
OK, now let’s add some settings.
To do that, create the settings section in the addon.xml file. Settings are divided to sections that contain items. Each item is a particular setting with its own name, type, default value, etc.
Put the following lines in your addon.xml after <priority>100500</priority>:
<settings>
    <sections>
        <section id="general">
            <items>
                <item id="some_prop">
                    <name>Enter any text</name>
                    <type>input</type>
                    <default_value>Hello World!</default_value>
                </item>
                <item id="some_dropdown">
                    <name>Pick a value from the list</name>
                    <type>selectbox</type>
                    <default_value>blue</default_value>
                        <variants>
                            <item id="red">
                                <name>Red</name>
                            </item>
                            <item id="green">
                                <name>Green</name>
                            </item>
                            <item id="blue">
                                <name>Blue</name>
                            </item>
                        </variants>
                </item>
            </items>
        </section>
    </sections>
</settings>
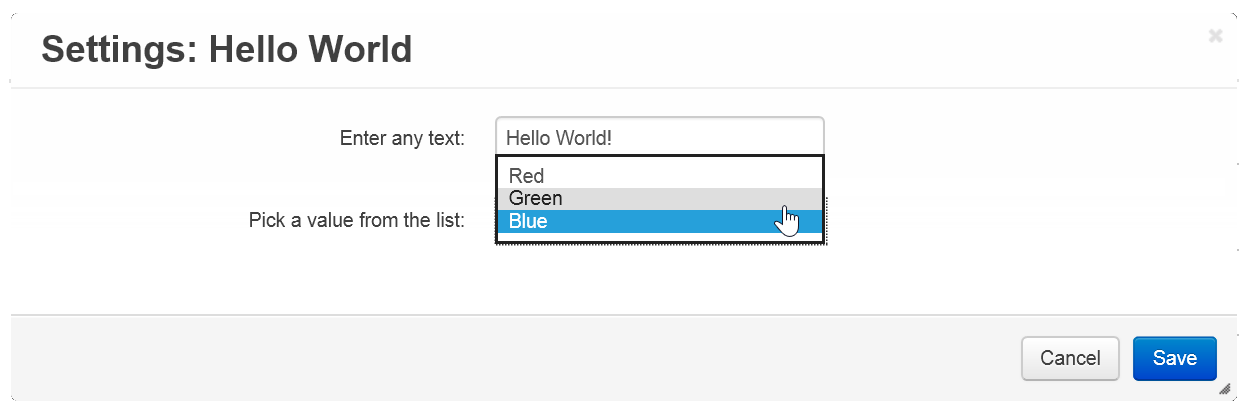
Go back to the add-on management page in the CS-Cart admin panel and re-install the Hello World add-on.
Now, click the gear button and you’ll see the Settings link. Click it and the add-on configuration dialog will appear, containing the settings you have just added:

That was not rocket science, was it? Still, that was not too helpful either. In the next tutorial, we are going to create something more complicated and useful.
Questions & Feedback
Have any questions that weren't answered here? Need help with solving a problem in your online store? Want to report a bug in our software? Find out how to contact us.