How To: Install CS-Cart on DigitalOcean Hosting
Note
You’ll need to use the command line and may have to install SSH and SFTP clients to follow this guide.
In this tutorial you will learn how to install CS-Cart on a DigitalOcean server. DigitalOcean is an SSD cloud hosting that offers virtual private servers.
We will also use a script that will automatically configure the server on DigitalOcean cloud hosting for maximum CS-Cart speed.
Step 1. Prepare Your Hosting
1.1. Go to DigitalOcean website and register an account.
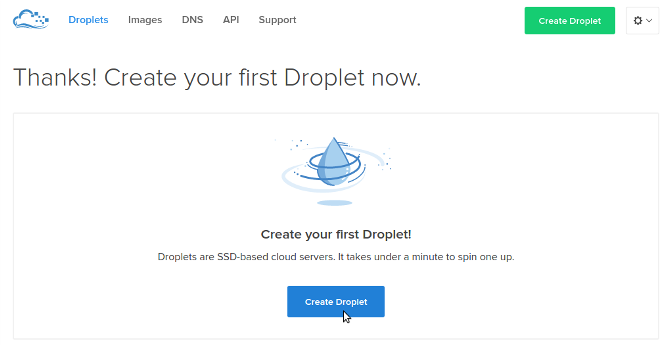
1.2. After you log in to your account, hit the Create Droplet button:
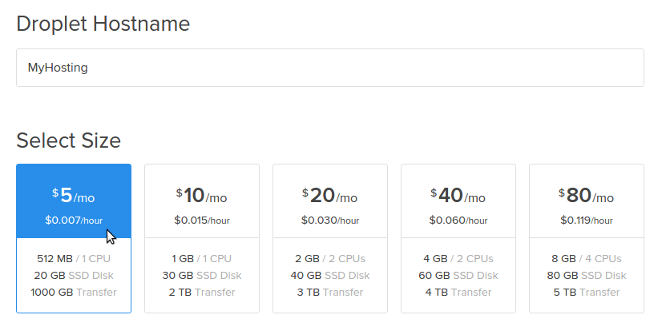
1.3. Name your hosting and select the plan:
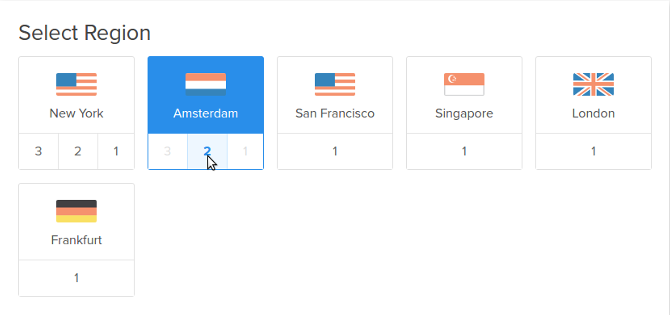
1.4. Choose the region of your server. We recommend that you choose the closest region to your location:
1.5. Select your server’s operating system. We recommend CentOS 7 x64. You can also choose CentOS 6, Ubuntu 14.04 or 16.04. We mention specific operating systems because we have a script that automatically configures the environment for CS-Cart or Multi-Vendor on clean installations of these systems.

1.6. Click the Create Droplet button at the bottom of the page.
Take a coffee break — your hosting will be ready in a couple of minutes.
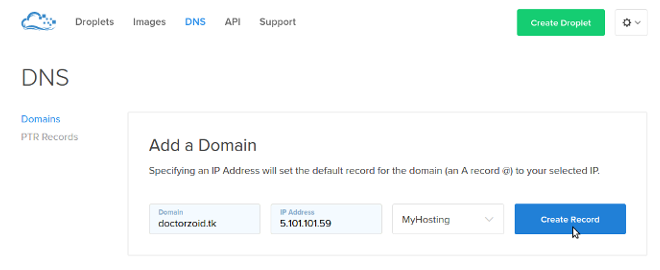
1.7. Assign the domain name of your future store to your new droplet using these official instructions.
Note
To test this instruction, we temporarily registered a free domain in the TK zone: doctorzoid.tk. Naturally, as you follow this guide you’ll need to replace mentions of doctorzoid.tk with the name of your domain.
Step 2. Configure Your Server
Note
You’ll need an SSH client to connect to your server, execute the configuration script, and install CS-Cart. Here are free, commonly-used SSH clients:
- Mac OS X: Terminal, iTerm 2
- Linux: Terminal, KDE Konsole, XTerm
- Windows: PuTTy
We used the Linux Terminal in the instructions.
2.1. DigitalOcean has sent you an email with your server’s credentials to the address you had signed up with. Check your mailbox for the “Your New Droplet” email from support@support.digitalocean.com.
2.2. Open the SSH client on your computer and connect to your server using the username, IP address, and the password from the email:

2.3. After you connect to your server, reset the password.
You have to change the password only at the first connection to your server. Please use a strong password — it gives the full access to your server.
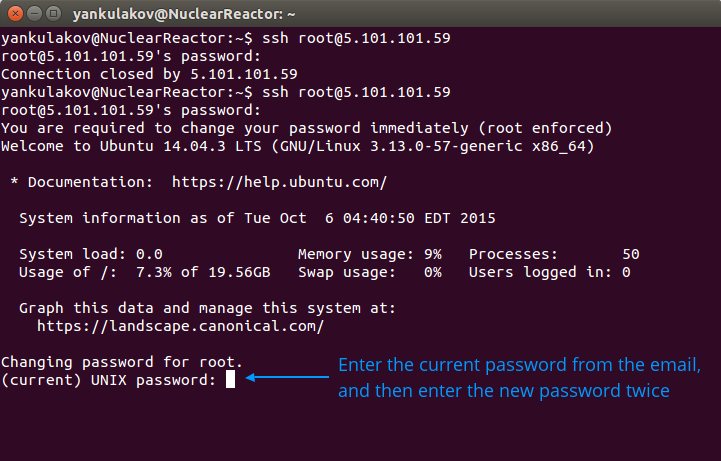
2.4. Execute the script for automatic server configuration as described in this article.
Note
In that article we advise modifying a text file via a command-line text editor (it’s the quickest way). Instead you may want to use an SFTP client (like FileZilla) to download the file, change it on your machine, and then re-upload it to the droplet. For more information on how to use FileZilla with DigitalOcean, please refer to this tutorial by DigitalOcean community.
2.5. When the script completes the server configuration, you will be able to install CS-Cart.
Step 3. Install CS-Cart
3.1. Go to the CS-Cart folder:
cd /var/www/html/[your domain name]

3.2. Download the CS-Cart installation package from our website:
wget "https://www.cs-cart.com/index.php?dispatch=pages.get_trial&page_id=297&edition=ultimate" -O cscart.zipNote
If you see the Command not found message on CentOS, then install wget first by using this command:
yum install wget.
3.3. Unzip the CS-Cart installation package:
unzip cscart.zip
3.4. Change the owner and set file permissions for CS-Cart installation by executing these commands one by one:
chown -R service ./
chmod 644 config.local.php
chmod -R 755 design images var
find design -type f -print0 | xargs -0 chmod 644
find images -type f -print0 | xargs -0 chmod 644
find var -type f -print0 | xargs -0 chmod 644
3.5. Open your store’s URL in your browser and click [install]:

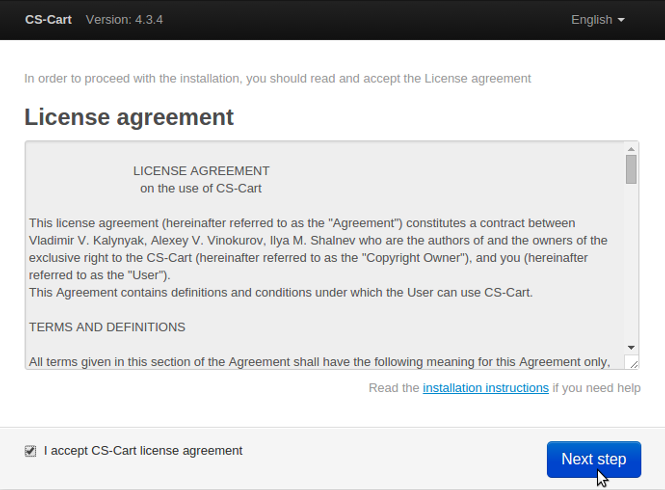
3.6. Read and accept the CS-Cart License Agreement:
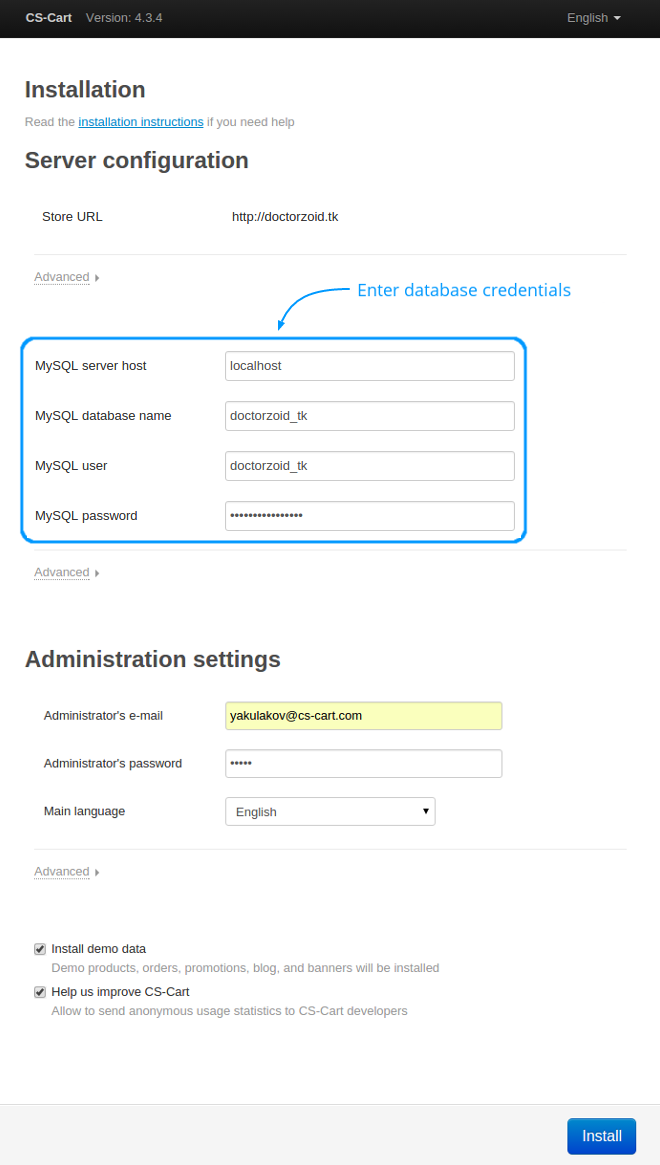
3.7. Enter your MySQL information (see Step 2.4), define admin credentials, and click Install:
3.8. Congratulations! Now you have a fast CS-Cart store on DigitalOcean hosting.
Questions & Feedback
Have any questions that weren't answered here? Need help with solving a problem in your online store? Want to report a bug in our software? Find out how to contact us.