How To: Set up the RMA Add-on
To enable the RMA add-on:
- In the Administration panel, go to Add-ons → Manage add-ons.
- Enable the RMA add-on (change its status to Active).
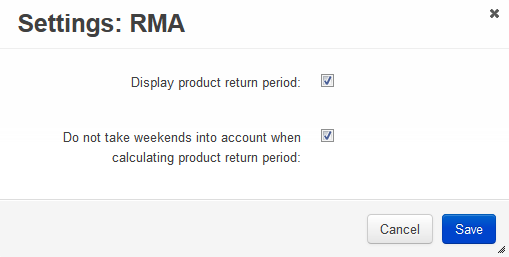
- Click on the name of the RMA add-on.
- Select the desired options and tick the check boxes, if needed:
- Display product return period - If selected, product return period is displayed on the storefront. * Do not take weekends into account when calculating product return period - If selected, Saturdays and Sundays are excluded from the return period.
- Click Save.

To set up return registration:
- Go to Orders → Return requests.
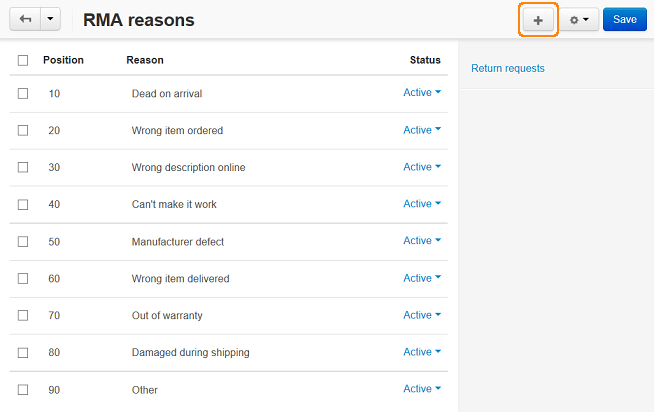
- Click the gear button in the top right corner of the page and choose RMA reasons.
- Click the + button and create a reason why a customer will be able to return products.

- Click the gear button in the top right corner and choose RMA actions. Change the Status of the actions to Active.
- Click Save.

- Click the gear button in the top right corner of the page and choose RMA request statuses.
- To add a new request status, click the + button. To edit the existing status, click on its name.
- Click Save.
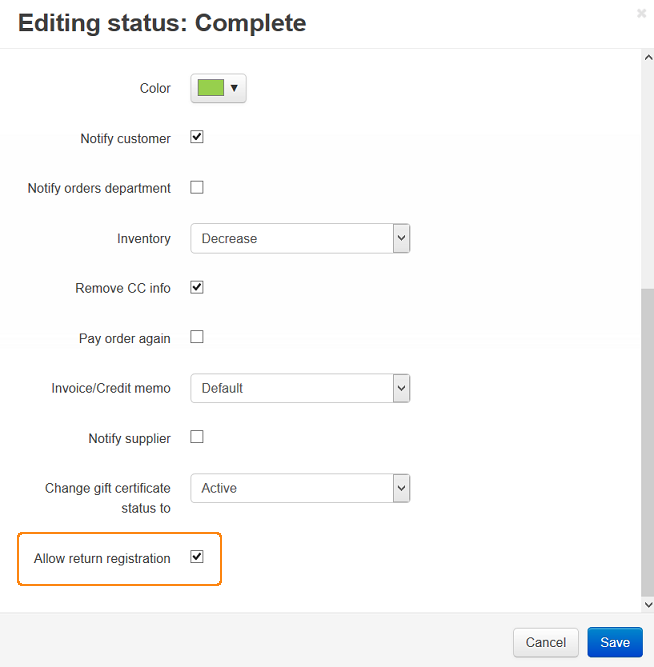
- Go to Administration → Order statuses.
- Click on the order status for which you want to allow return and tick the Allow return registration check box.
- Click Save.

Questions & Feedback
Have any questions that weren't answered here? Need help with solving a problem in your online store? Want to report a bug in our software? Find out how to contact us.