How To: Configure Multiple Storefronts in Plesk 12
Note
If you want to manage multiple stores, you’ll need to purchase additional storefront licenses or specify the desired number of storefronts when you buy a CS-Cart license.
Way 1. Deploy CS-Cart on Subdomains
Let’s set up a store with 3 storefronts:
- computers.example.com
- toys.example.com
- books.example.com
Step 1. Install CS-Cart
Let’s assume the Document Root of our hosting is /httpdocs.
Install CS-Cart in any directory within the Document Root, for example /httpdocs/store/.
Step 2. Configure Subdomains
- Open the Websites & Domains tab in the Plesk 12 main menu:

- On this page click the Add New Subdomain button:
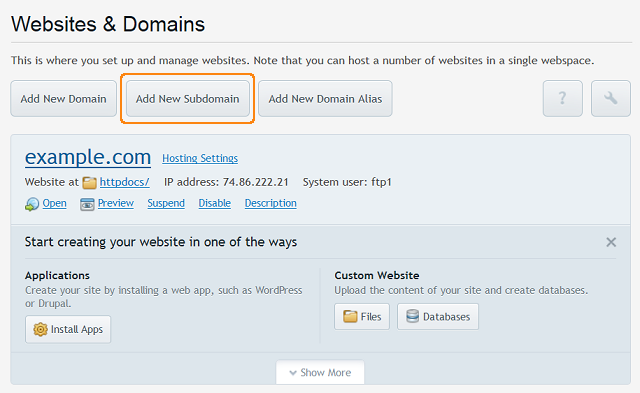
- Fill in the necessary fields of the form to create the first subdomain:
- Subdomain name: computers
- Document Root: /httpdocs/store
Note
Specify the directory where you installed CS-Cart as the Document Root.
- Click OK.
- Create the other 2 subdomains in the same way. All 3 subdomains must appear at the Websites & Domains page:
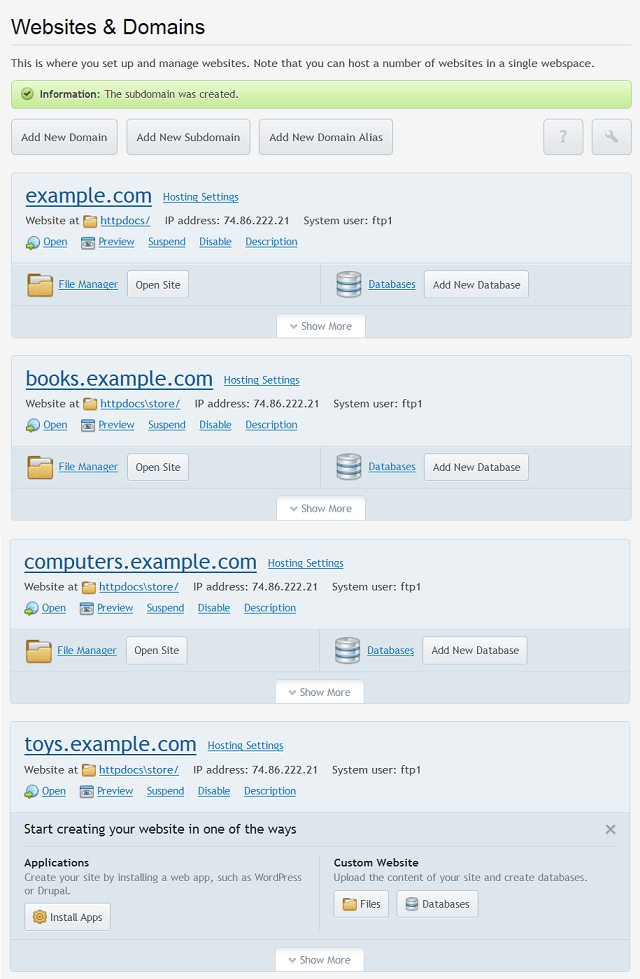
Step 3. Create Storefronts
- Open the CS-Cart administration panel. In our case that will be http://example.com/store/admin.php.
- Create 3 new storefronts and assign them to their respective subdomains.
- Go to the Administration → Stores page and click the + button:
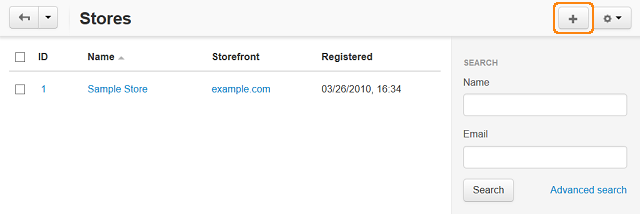
- Fill in the form. Enter one of the subdomains you created in step 2 in the Storefront URL field.
- Click Create and close.
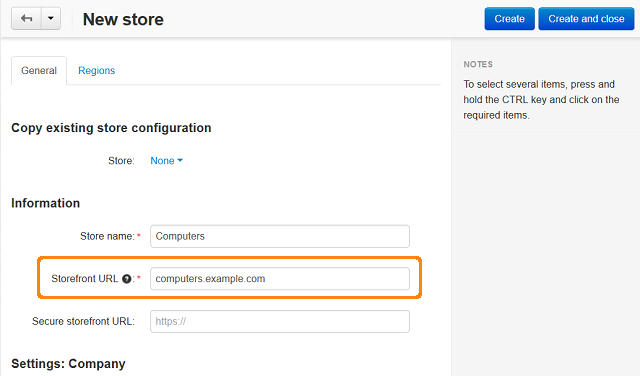
- Create 2 more storefronts in the same way. Now all 3 storefronts should be listed on the Stores page:

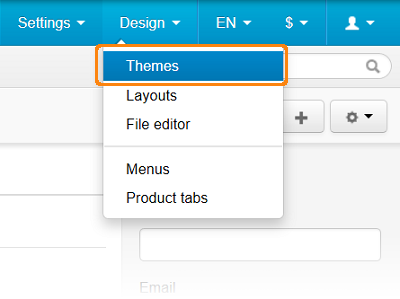
- Assign themes for the storefronts using the Themes section in the Design menu:
Step 4. Testing
Go to any of the created subdomains, for instance, computers.example.com.
You should see the storefront, which has computers.example.com defined as its Storefront URL.
Way 2. Deploy CS-Cart on Different Domains
Setting up your storefronts on different domain names is almost the same as for subdomains.
Let’s create 2 storefronts under 2 different domains:
- example.com
- example-store.com
Step 1. Install CS-Cart
We assume that you already have a regisered domain name, like example.com.
You need to install CS-Cart in the /httpdocs directory, which is the Document Root of example.com.
Step 2. Bind Domains
If you already have the additional registered domains, they should be bound to your existing account. In this guide we will bind the example-store.com domain to example.com.
- First you need to change the Name Servers at the example-store.com domain name registrar.
Go to the domain name registrar control page and replace the Name Servers with the ones currently associated with example.com.
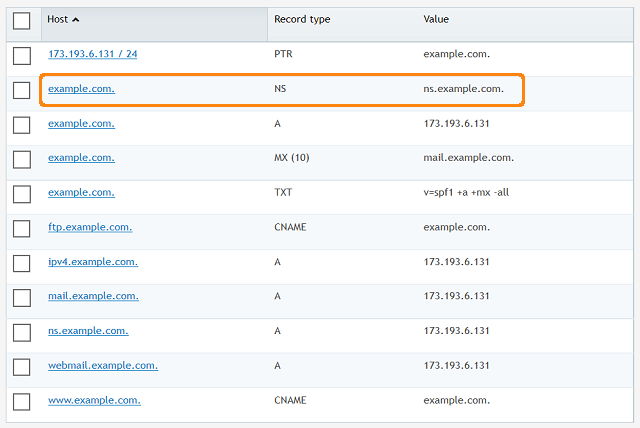
To find out which Name Servers are currently associated with example.com, do the following:
- Go to the Websites & Domains page of the Plesk 12 control panel.
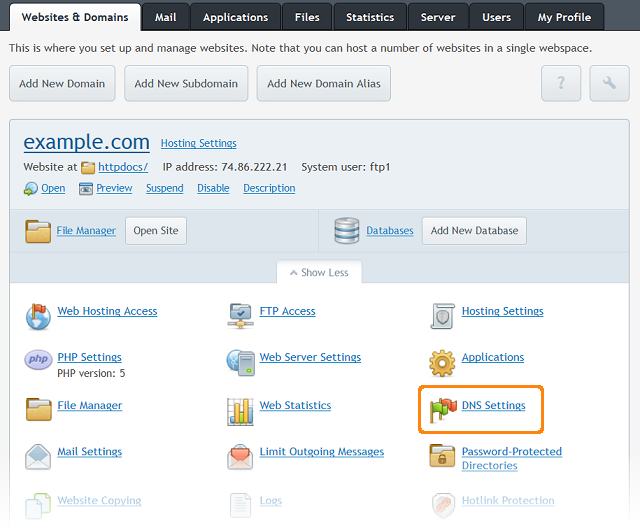
- Choose the site you’re binding example-store.com to (in our case it is example.com) and click Show More.
- Click the DNS Settings link:
- You will see the current domain DNS settings page. Name Servers value is stored in the record of the NS type.
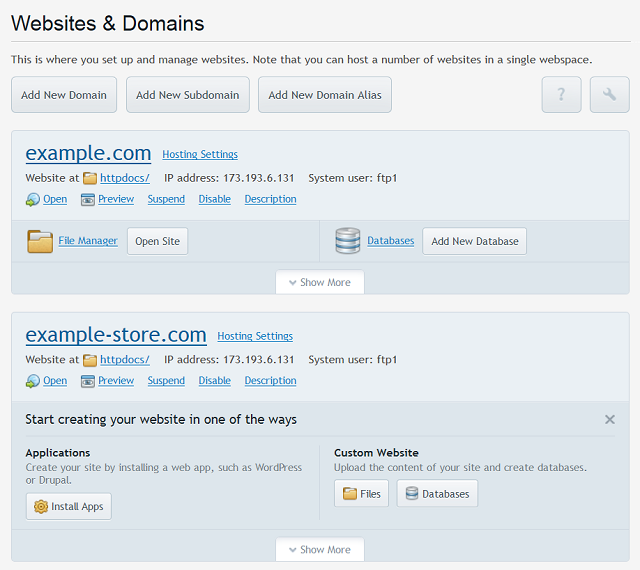
- In the Websites & Domains page of the Plesk 12 control panel click Add New Domain:
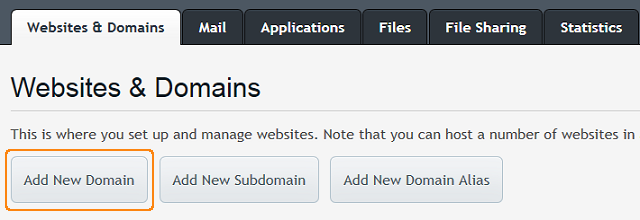
- Enter the new domain name (in our case it’s example-store.com) in the Domain name field.
- Enter /httpdocs as Document Root.
- Click OK.
So, the example-store.com domain name is bound and points to the files of the example.com domain.
Step 3. Create Storefronts
Create 2 storefronts with Storefront URLs set to example.com and example-store.com as described in Way 1, Step 3 of this article.
Step 4. Testing
Go to your second domain (example-store.com). You should see the storefront, which has that domain as its Storefront URL.
Questions & Feedback
Have any questions that weren't answered here? Need help with solving a problem in your online store? Want to report a bug in our software? Find out how to contact us.