How To: Allow Vendors to Edit Layouts and Styles of Their Stores
Note
This ability wasn’t available until Multi-Vendor 4.6.1.
How Store Owners Allow Vendors to Edit Styles and Layouts
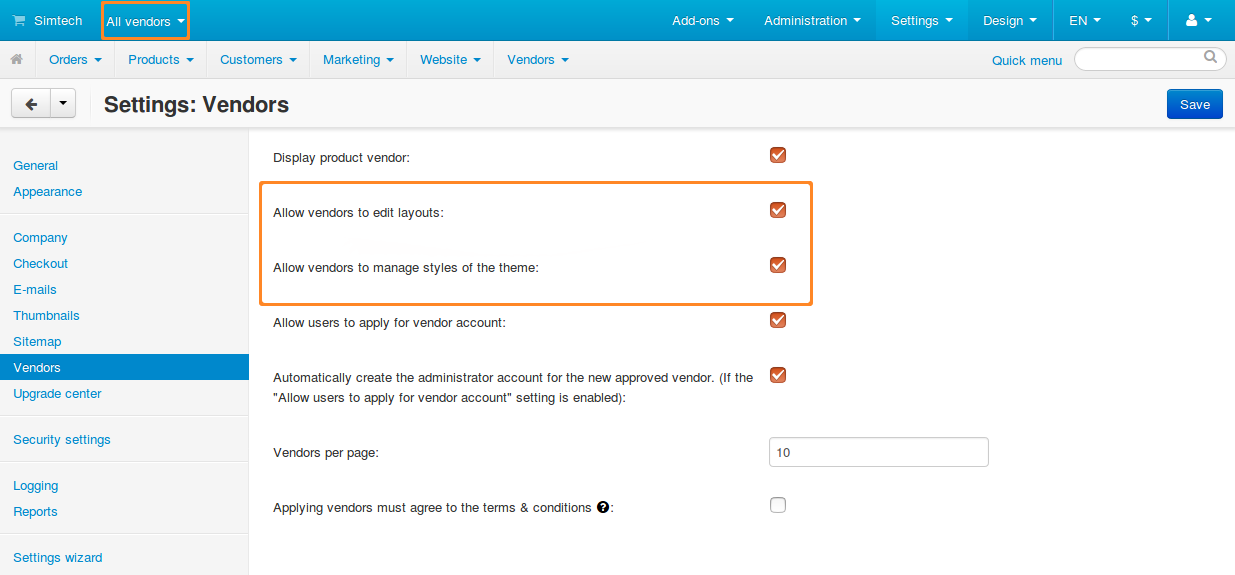
Go to Settings → Vendors in the Administration panel of your store.
Tick the following checkboxes:
- Allow vendors to edit layouts — this will allow vendors to edit layout pages.
- Allow vendors to manage styles of the theme — this will allow vendors to use the Theme Editor.
Click the Save button in the top right part of the page.
Note
If a vendor’s administrator belongs to a user group, that group needs to have the following privileges from the Look and Feel section: Edit blocks, Manage design, Manage themes.

How Vendors Edit Styles
Log in to the Multi-Vendor Administration panel as a vendor.
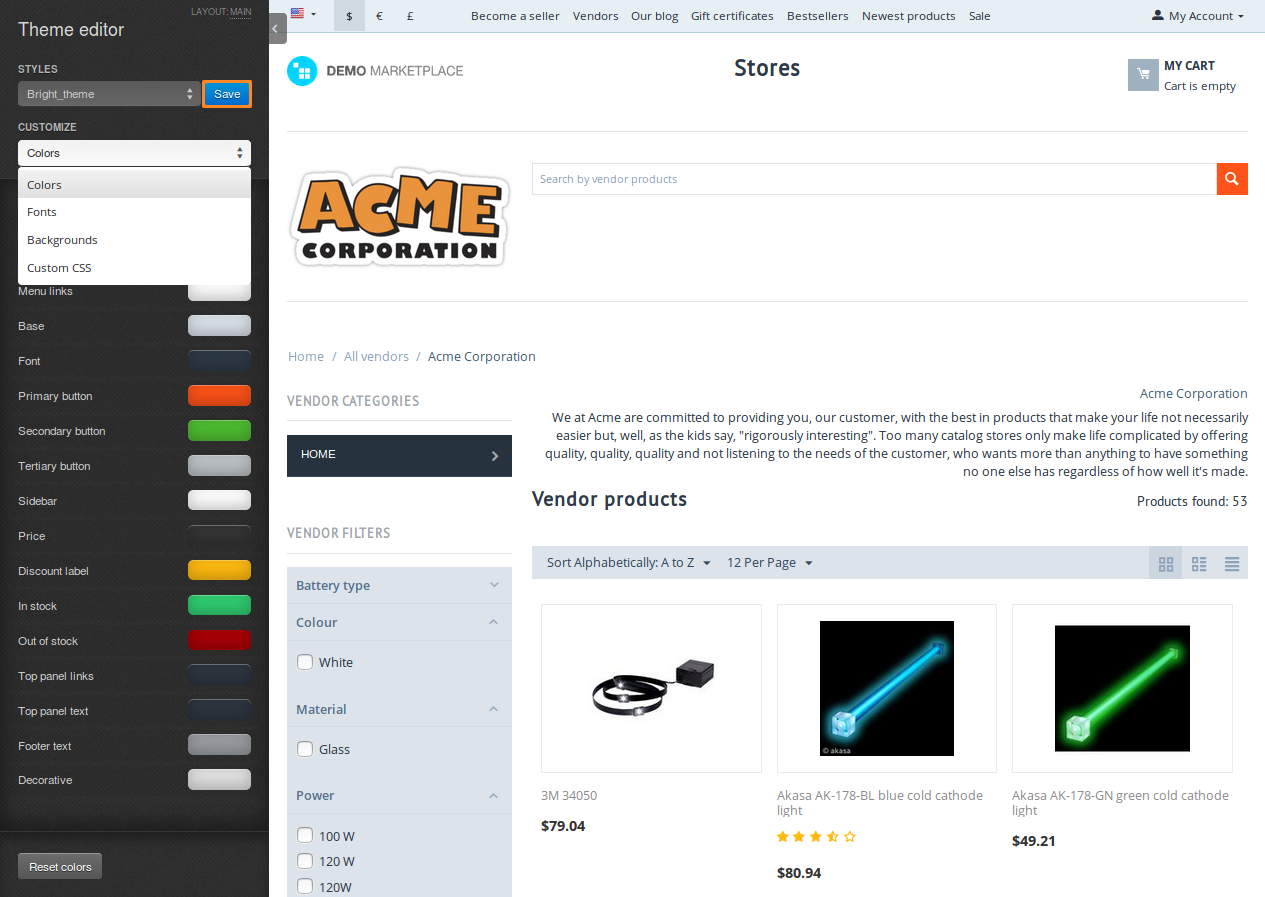
Go to Design → Themes and click the Theme editor button.

You’ll be taken to your page on the storefront, and you’ll be able to make changes using the Theme Editor. The changes you make will affect your microstore (if you have one), your products, and your pages, including the page with the information about the vendor.
Note
Vendors don’t have access to the General and Logos sections of the theme editor.
Once you’ve made the changes, click Save.

How Vendors Edit Layouts
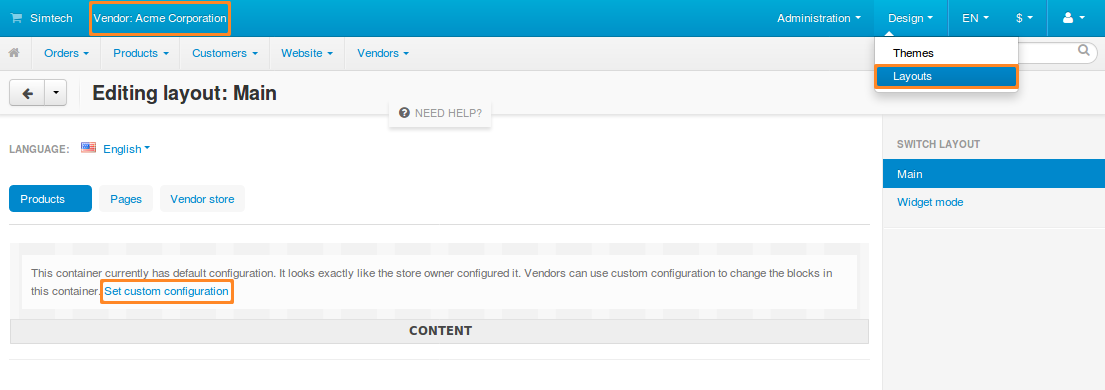
Log in to the Multi-Vendor Administration panel as a vendor.
Go to Design → Layouts.

The tabs you see represent the layout pages that a vendor can edit. Vendors don’t have access to all containers, only to Content.
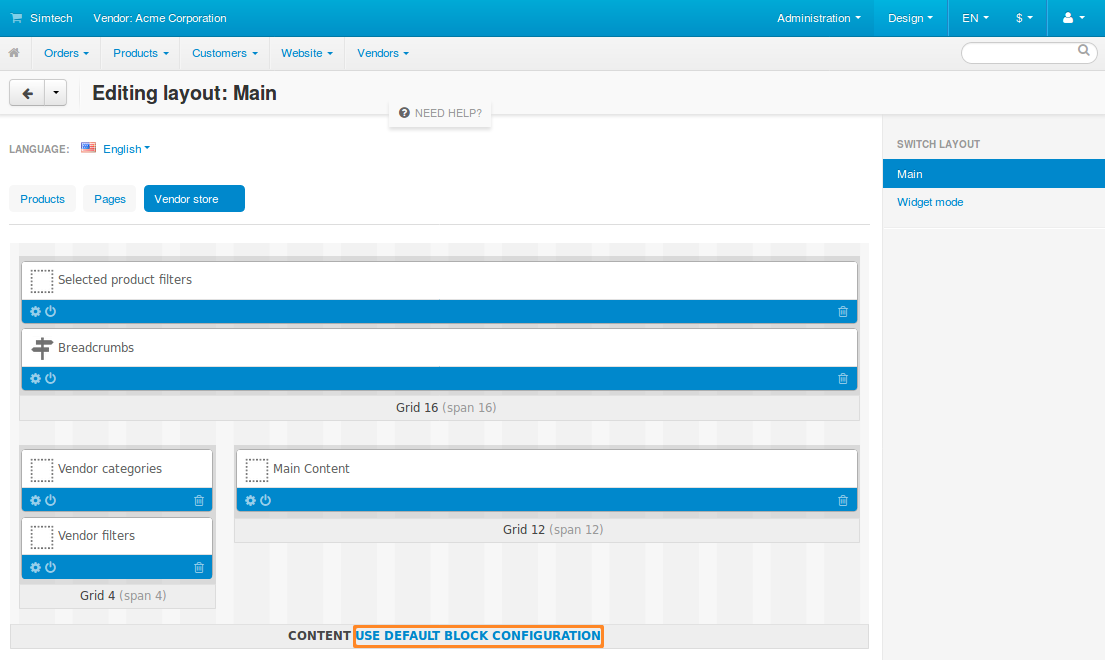
Click the Set custom configuration link. By default, the blocks in the container are organized just as the store owner configured it. But now you are able to add, configure, and remove blocks and grids. The changes are saved automatically.
If you want to revert the layout page to the original look, click the Use default block configuration link.
Warning
This will make the layout page look as the store owner configured it; any changes you made to the layout page will be lost.

Questions & Feedback
Have any questions that weren't answered here? Need help with solving a problem in your online store? Want to report a bug in our software? Find out how to contact us.