Settings¶
CS-Cart has 2 types of settings:
- Core settings affect CS-Cart in general and work regardless of what add-ons you have installed.
- Add-on settings affect the behavior of their respective add-ons.
Settings are managed via the Registry and Settings classes. The information about settings is stored in the database, in the tables with names that begin with settings_. Administrators work with core and add-on settings in the administration panel.
Working with Settings in the Administration Panel¶
Core and add-on settings can be viewed and edited in the Administration panel. A setting has edition_type that determines when and where the setting appears (see Attachment 1: Possible Values of edition_type):
MVE(Multi-Vendor)—the setting will appear only in Multi-Vendor and only if the All vendors mode is selected in the dropdown list in the top left corner.ULT(СS-Cart and CS-Cart Ultimate)—the setting will appear both in the All stores mode and when a storefront is selected. Each storefront can have its own values for settings, depending on edition_type. Settings that aren’t available when a storefront is selected will be hidden.
Core Settings¶
Core settings are located in the Administration panel on the Settings page (see the top menu). They are split into sections:
- General
- Appearance
- Company
- Stores
- Checkout
- E-mails
- Thumbnails
- Sitemap
- Vendors
- Upgrade center
- Security settings
- Image verification—this section was hidden starting with version 4.5.1
- Logging
- Reports
- Settings wizard
A setting or a section with settings may or may not appear, depending on edition_type (see Attachment 1: Possible Values of edition_type). A setting can have different values, depending on the storefront or vendor. Usually a core setting must belong to a section. If a setting doesn’t belong to a section, the setting will be hidden.
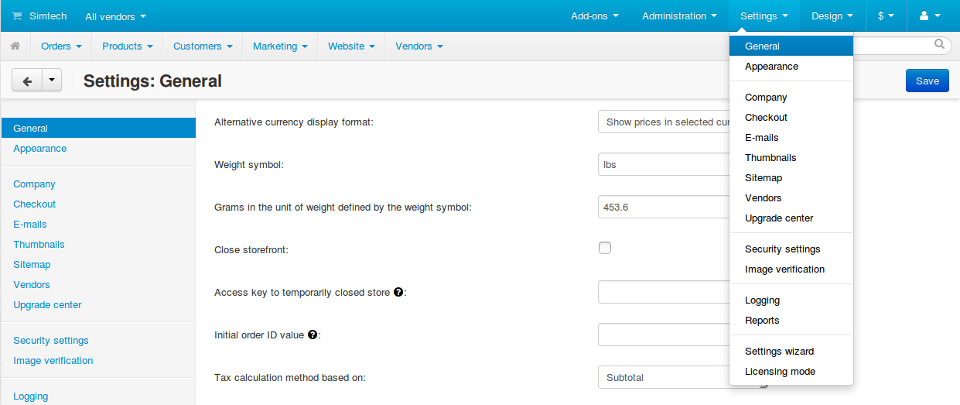
For example, when there are multiple storefronts, the Alternative currency display format (edition_type="ULT") will look like this:

Add-on Settings¶
Add-on settings are managed under Add-ons → Manage add-ons (see the top menu in the Administration panel). Most add-ons have their own settings. To open the settings of an add-on, use one of the two ways:
- Click the name of the add-on.
- Hover over the add-on. The gear button will appear on the right. Click it and choose Settings. Settings may not be available when a certain edition_type is set for them.
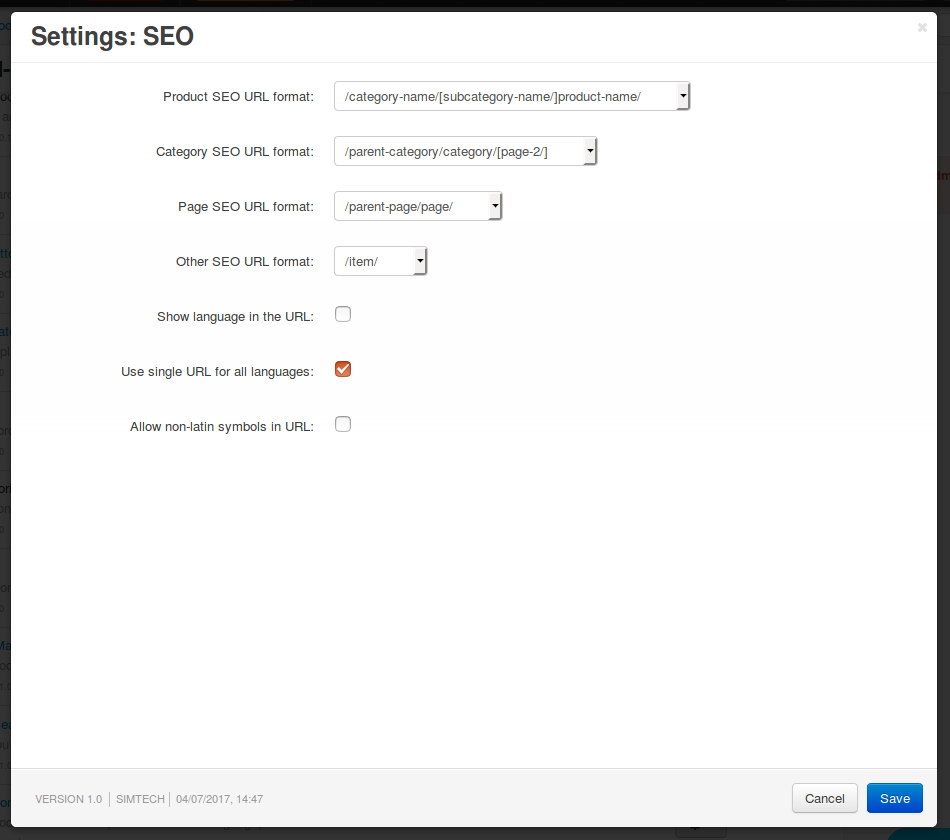
For example, here are the settings of the SEO add-on:
Working with Settings in the Code¶
Settings are managed in the code via the Registry and Settings classes. These classes provide methods that add, change, and get the values of the settings.
The Registry Class¶
The Registry class allows to control settings from any part of the application. This class also performs caching of settings (see the var/cache/registry folder).
Here is how settings are controlled with the Registry class:
Getting the value of a core/add-on setting:
Registry::get('settings.SECTION_NAME.SETTING_NAME');
Registry::get('addons.ADDON_NAME.SETTING_NAME');
Changing the value of a core/add-on setting:
Registry::set('settings.SECTION_NAME.SETTING_NAME', 'Some value');
Registry::set('addons.ADDON_NAME.SETTING_NAME', 'Some value');
The Settings Class¶
The Settings class is an extended API that exists specifically to work with CS-Cart settings stored in the database. This class has many methods: checking the availability of settings; reading, changing, and removing the values of settings.
For example, here’s how to manage the elements_per_page setting (Elements per page from Settings → Appearance) with the Settings class:
Checking the availability of the setting:
Settings::instance()->isExists('elements_per_page', 'Appearance');
Getting the value of the setting:
Settings::instance()->getValue('elements_per_page', 'Appearance');
Changing the value of the setting:
Settings::instance()->updateValue('elements_per_page', $new_value, 'Appearance');
Add-on Settings¶
Declaring Settings in addon.xml¶
Settings of an add-on are declared in the addon.xml file located in the directory of that add-on. The list of settings is added to the <settings> section of addon.xml.
Here are the attributes of the <settings> section:
layout—determines the look of the window with the add-on’s settings. By default, settings will appear in a pop-up window; if you specifylayout="separate", settings will appear on a separate page.edition_type—determines when and where the setting will be available (see Attachment 1: Possible Values of edition_type).
Note
Both of these parameters are optional.
For example, <settings layout="separate" edition_type="ROOT"> means that the settings will appear on a separate page and will be available in the All stores/All vendors mode.
Structure of the <settings> Section¶
<settings layout="separate" edition_type="ROOT,ULT:VENDOR">
        <sections> <!-- The list of tabs (sections) in add-on settings -->
            <section id="section1"> <!-- A section with settings has the following attributes:
                id—an identifier by which a setting can be addressed:
                   Registry::get('addons.[addon_id].[setting_id]')
                edition_type—determines when and where the section is available;
                             this parameter is optional and supports
                             multiple variants separated by commas.
            -->
                <items> <!-- The list of settings in the section -->
                    <item id="header"> <!-- The settings
                        id—the identifier of the setting.
                        edition_type—determines when the setting is available;
                                     this parameter is optional and supports
                                     multiple variants separated by commas.
                    -->
                        <type>header</type> <!-- see Attachment 2 for
                            the description of possible values:
                              input, textarea, password, checkbox, selectbox,
                              multiple select, multiple checkboxes,
                              countries list, states list,
                              file, info, header, template
                        -->
                        <default_value>radio_1</default_value> <!-- The default
                        value assigned to the setting. -->
                        <variants> <!-- The variants for the following types:
                        selectbox, multiple select,
                        multiple checkboxes, combo select -->
                            <item id="radio_1"></item> <!-- id—the identifier of the variant-->
                        </variants>
                </items>
            </section>
</settings>
Functions for Working with Settings¶
The variants of values for settings can be changed and added via 2 types of functions: variants.functions and actions.functions:
variants.functions generate the list of possible variants without recording those variants to the database. The variants of values for a setting are generated dynamically every time when someone opens the page with that setting.
These functions must be in the variants.functions.post.php file in the [addon_name]/schemas/settings directory. The functions must be named as follows:
fn_settings_variants_addons_[addon_name]_[setting_name]().Let’s assume that the my_changes add-on has a setting with
exampleas its ID. To generate the variants of values for this setting, create the variants.functions.post.php file in my_changes/schemas/settings. This file must contain a function calledfn_settings_variants_addons_my_changes_example().actions.functions are called when add-ons are installed and uninstalled. For example, these functions generate fields for the add-on’s settings in the database during add-on installation. They also remove those fields when the add-on is uninstalled.
These functions must be located in the actions.functions.post.php file in the [addon_name]/schemas/settings. The functions must be named as follows:
fn_settings_actions_addons_[addon_name]_[setting_name]().Let’s assume that the my_changes add-on has a setting with
exampleas its ID. To create a function for this setting, create the actions.functions.post.php file in my_changes/schemas/settings. This file must contain a function calledfunction fn_settings_actions_addons_my_changes_example().
Storing the Data of Settings¶
The data about core and add-on settings is stored in the database. The names of the tables that contain this data begin with settings_:
Table settings_sections¶
The settings_sections table contains the list of sections to which the settings may belong. This table has the following fields:
section_id—the identifier of the section.parent_id—the identifier of the parent section.edition_type—the information on when and where the section will be available; this field determines if the section will be available in CS-Cart/Multi-Vendor, and which level of access an administrator must have. This field may include one value or multiple values separated by commas (for example,ROOT,ULT:VENDOR).name—the name of the section.position—the position of the section relative to other sections.type—the type of the section:CORE—a section of the core settings. All the sections of this type are listed on the Settings page in the Administration panel (see the settings.php controller).ADDON—a section with the add-on settings. All sections of this type appear either in a pop-up window or on a separate page and include the settings of an add-on (see the addons.php controller).TAB—a subsection of settings (a tab). Core and add-on settings can both have tabs. Each subsection has the ID of its parent section in theparent_idfield.SEPARATE_TAB—a subsection of settings (a tab). Core and add-on settings can both have tabs, but this tab is added as a separate container. Each subsection has the ID of its parent section in theparent_idfield.
Note
Only sections with the
COREorADDONtype can have subsections.
Here is an example of the entry in the database—the Appearance section:
| section_id | parent_id | edition_type | name | position | type |
|---|---|---|---|---|---|
| 4 | 0 | ROOT,VENDOR | Appearance | 20 | CORE |
Here is how to learn the ID of the section in the Administration panel:
Core settings: go to the Settings page and select a section. The name of the section will be displayed in the browser’s address bar as the
section_idparameter in the URL.For example, the Appearance section will have
Appearanceassection_id. The URL will look like this: example.com/admin.php?dispatch=settings.manage§ion_id=AppearanceAdd-on settings: go to Add-ons → Manage add-ons and click the gear button of an add-on. If you hover over the Uninstall action, a URL should appear at the bottom of the browser window. The URL will include the
addonparameter with the name by which the add-on can be referred to in the code.For example, Customers also bought add-on will have
customers_also_boughtas a name. The URL will look like this (note that this example only includes a part of the URL): example.com/admin.php?dispatch=…&addon=customers_also_bought&…
Table settings_objects¶
The settings_objects table contains the list of core settings and add-on settings, and their values. This table has the following primary fields:
object_id—the identifier of the setting.edition_type—the information on when and where the setting will be available; this field determines if the setting will be available in CS-Cart/Multi-Vendor, and which level of access an administrator must have.name—the name of the setting.section_id—the identifier of the section to which the setting belongs.section_tab_id—the identifier of the tab (if the setting is located in a tab).type—the type of the setting.value—the value of the setting.position—the position of the setting relative to other settings.
Here is an example of the entry in the database—company_name (Company name from Settings → Company):
| object_id | edition_type | name | section_id | section_tab_id | type | value | position |
|---|---|---|---|---|---|---|---|
| 1 | ROOT,ULT:VENDOR | company_name | 5 | 0 | I | Simtech | 0 |
To learn the identifier of the setting, view the code of the page with the setting. For example, let’s learn the identifier of the elements_per_page setting (Elements per page from Settings → Appearance).
To do this, go to Settings → Appearance, click the right mouse button on the setting and choose Inspect element. The identifier of the setting can be found in the square brackets [] in the name attribute.
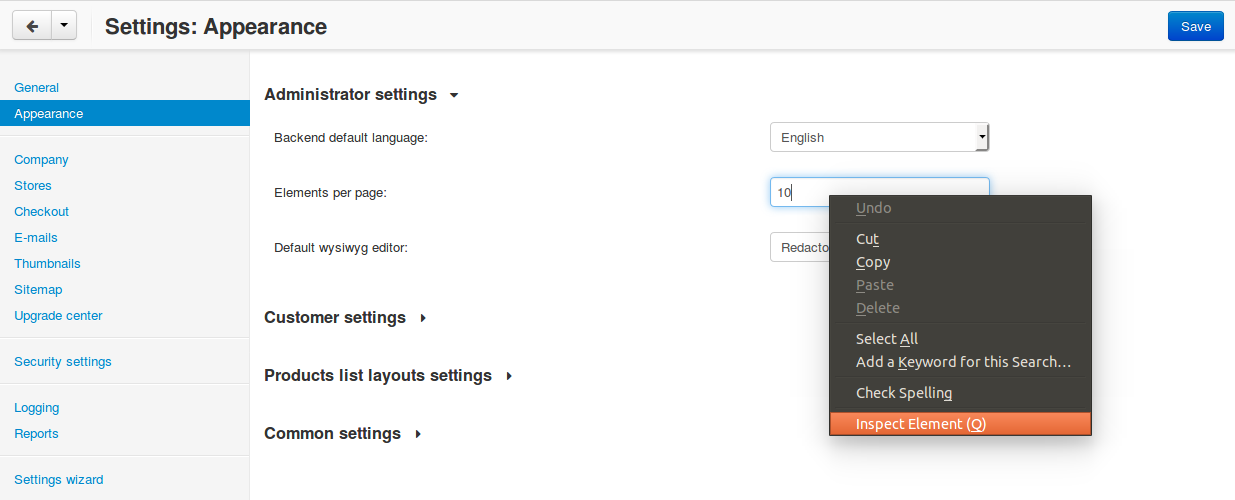
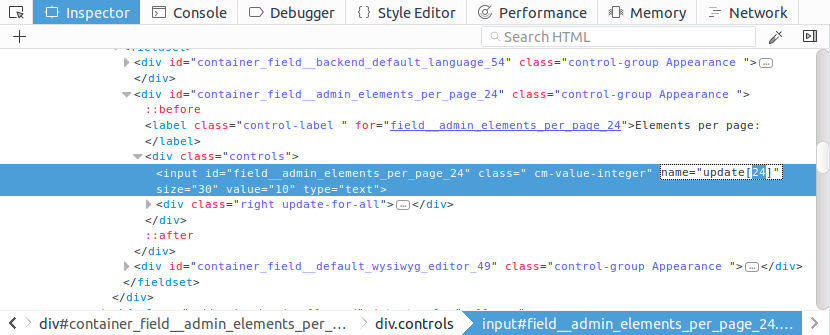
Table settings_variants¶
The settings_variants table contains the list of variants (possible values) for the settings with the following types: selectbox, multiple select, and multiple checkboxes. Administrators choose one of the predetermined variants as the value of the setting.
For example, there is a setting called Orders in the Settings → Logging section. The information about which variants are chosen is stored in the log_type_orders setting (see the settings_objects table). The list of all possible variants for this setting is stored in settings_variants.
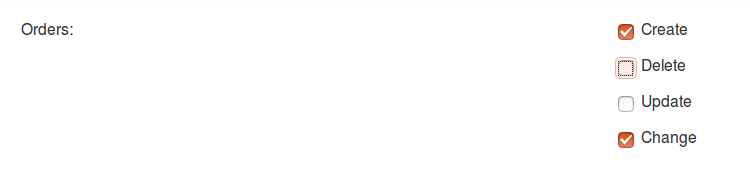
You can get the list of all the possible values of a setting by the object_id field. If the table doesn’t have any variants for the setting, it means that they are formed dynamically via the variants.functions.
Table settings_descriptions¶
The settings_descriptions table contains the names of sections, settings and variants, and the tooltips for different languages. Here are the primary fields of the table:
object_id—the identifier of the setting.object_type—one of the following types:V—the name of a variant of a setting value (see thesettings_variantstable).O—the name of a setting (see thesettings_objectstable).S—the name of a section (see thesettings_sectionstable).
lang_code—the language code.value—the name of a setting/section/value in the specified language.tooltip—the tooltip of a setting/section/value.
This table contains the information for all the languages that are currently installed. When searching the database for a specific value, you need to consider lang_code as well as object_id and object_type.
Attachment 1: Possible Values of edition_type¶
Note
An add-on can have multiple values of edition_type separated by commas. If you don’t specify any value, it will behave like ROOT.
| Value: | Description: |
|---|---|
NONE |
The setting won’t appear in the interface and won’t be editable. |
ROOT |
The setting will appear in the interface and will be editable, but only in the All stores/All vendors mode. |
VENDOR |
The setting will appear both in the All stores/All vendors mode and when a specific storefront/vendor is selected. If you add ULT:NONE after comma, the setting will only be editable when a storefront is selected. |
MVE:NONE |
The setting won’t appear in Multi-Vendor. To make the setting appear in CS-Cart, you’ll need to add another value after comma, for example, ULT:ROOT. |
MVE:ROOT |
The setting will appear in Multi-Vendor, but only in the All vendors mode. |
ULT:NONE |
The setting won’t appear in CS-Cart. To make the setting appear in Multi-Vendor, you’ll need to add another value after comma, for example, ROOT or MVE:ROOT. |
ULT:ROOT |
The setting will appear in CS-Cart, but only when the All stores mode is selected. |
ULT:VENDOR |
The setting will appear both in the All stores mode and when a specific storefront is selected. If you add ULT:NONE after comma, the setting will only be editable when a storefront is selected. |
ULT:VENDORONLY |
The setting won’t appear in the interface, but can be edited for a specific storefront via the code. |
Attachment 2: Possible Values of <type> for Settings¶
The types of settings are specified in the addon.xml file in the <type> parameter (see Structure of the <settings> Section).
For example, let’s add a setting new_setting with the checkbox type and N (unticked checkbox) as the default value. This setting needs to be added to the addon.xml file of the add-on; here is what it looks like in the file:
<settings edition_type="ROOT">
   <sections>
       <section id="general">
           <items>
               <item id="new_setting">
               <type>checkbox</type> // This parameter determines
                                     //  what the setting will look like.
               <default_value>N</default_value>
           </item>
       </section>
   </sections>
</settings>
Here are the possible values of <type> (the letters in brackets are how these types are stored in the database):
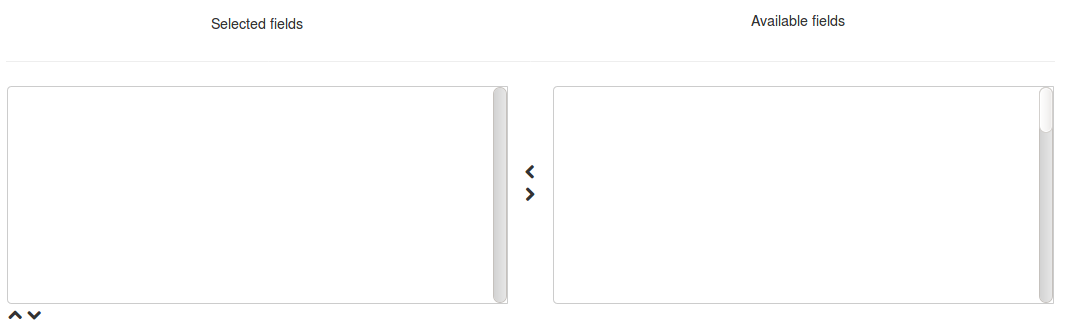
selectable_box(B)—a multiple select box that consists of two lists: one list with possible values, and the other list with selected values:<type>selectable_box</type>
сheckbox(С)—a checkbox:<type>checkbox</type>
hidden(D)—a hidden setting that users won’t see:<type>hidden</type>
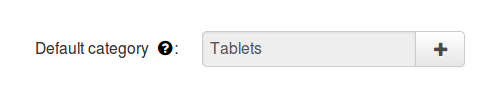
template(E)—a file with a custom template. Templates must be located in the design/backend/templates/addons/[addon]/settings directory. The content of the template will appear in place of the setting, but only if the add-on is active. For example:<type>template</type> <default_value>settings.tpl</default_value> // the name of the template to show.
In this case the template with a field for category selection is loaded:
file(F)—a field for selecting a file:<type>file</type>

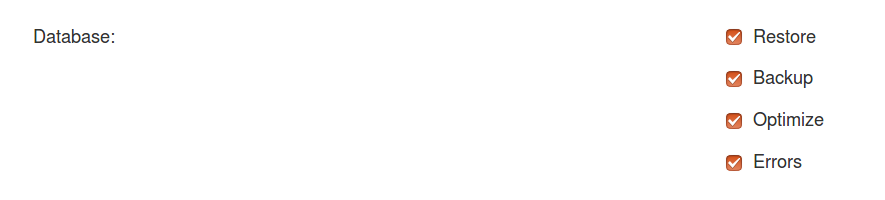
checkboxes(G)—a list of checkboxes with the ability to choose multiple variants; the variants are added via variants.functions:<type>checkboxes</type>
This list can be used to create a list of variants for a
selectbox(K) setting.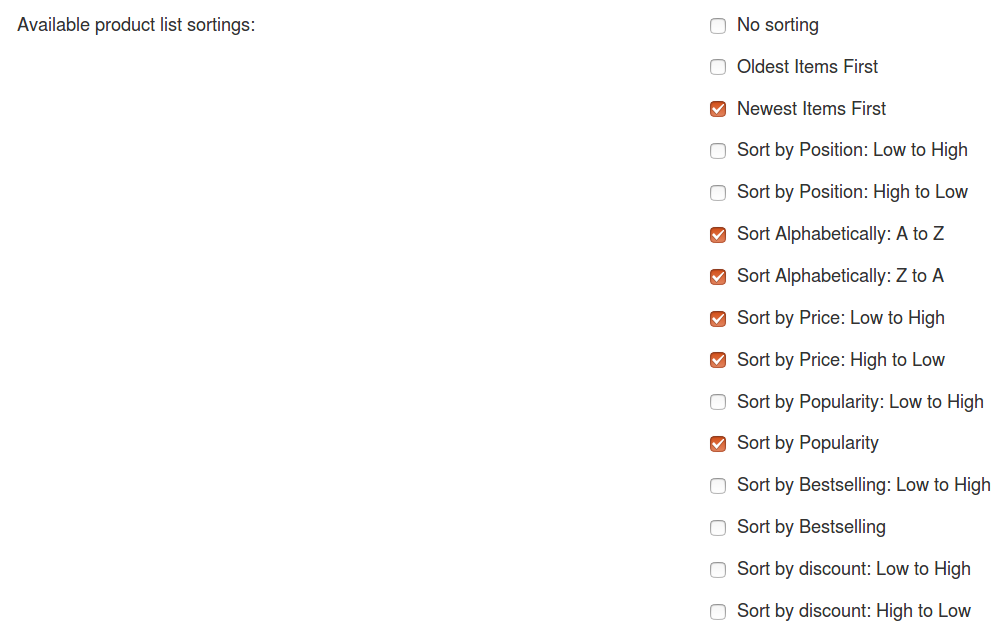
header(H)—a heading for a block with settings or for a piece of content:<type>header</type>

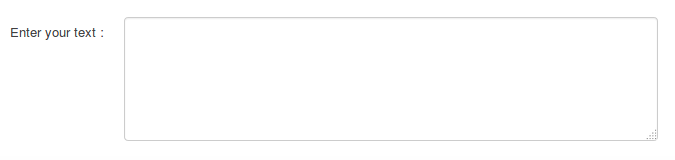
input(I)—an input field for entering any symbols. Entire texts can be entered there, but it’s inconvenient to read them in that field:<type>input</type>

selectbox(K)—a dropdown list that allows choosing one of the variants:<type>selectbox</type>
The variants that are available depend on the selected values of the
checkboxes(G) setting.
multiple_select(M)—a list of possible values with scrolling and the ability to choose multiple variants. When adding this list, specify the possible values in thevariantsparameter:<item id="multiple_select"> <type>multiple select</type> <variants> <item id="select_box_1"></item> <item id="select_box_2"></item> <item id="select_box_3"></item> </variants> </item>

multiple_checkboxes(N)—a list of checkboxes with the ability to tick multiple checkboxes. When adding the list, the checkboxes are specified in thevariantsparameter:<item id="multiple_checkboxes"> <type>multiple checkboxes</type> <variants> <item id="select_box_1"></item> <item id="select_box_2"></item> <item id="select_box_3"></item> </variants> <default_value>select_box_2</default_value> </item>
info(O)—the results of the function that was passed in the<handler>parameter. Usually contains some sort of information. For example, let’s show the output of a function calledfn_get_informationin theinformationsetting:<item id="information"> <type>info</type> <handler>fn_get_information</handler> </item>

password(P)—a field for entering the password. All the entered symbols are displayed as*:<type>password</type>

radiogroup(R)—a group of radiobuttons; only one of them can be selected at a time. The button themselves are specified in thevariantsparameter:<item id="radiogroup"> <type>radiogroup</type> <default_value>radio_2</default_value> <variants> <item id="radio_1"></item> <item id="radio_2"></item> </variants> </item>

selectbox(S)—a dropdown list with the ability to choose only one variant. When adding a list, specify the possible variants in thevariantsparameter:<item id="selectbox"> <type>selectbox</type> <variants> <item id="select_box_1"></item> <item id="select_box_2"></item> </variants> </item>

textarea(T)—a field for entering texts:<type>textarea</type>
input(U)—a field for entering numbers only; all other symbols are removed:<type>input</type>

states_list(W)—a dropdown list for choosing a state or region:<item id="states_list"> <type>states_list</type> </item>

countries_list(X)—a dropdown list for choosing a country:<item id="countries_list"> <type>countries_list</type> </item>

permanent_template(Z)—a file with a custom template. It will always be available, even if the add-on is disabled. The file must be located in the design/backend/templates/addons/[addon]/settings directory.For example, let’s add a
permanent_templatesetting that shows the content of permanent_template.tpl:<item id="permanent_template"> <type>permanent_template</type> <default_value>permanent_template.tpl</default_value> </item>
Questions & Feedback
Have any questions that weren't answered here? Need help with solving a problem in your online store? Want to report a bug in our software? Find out how to contact us.