How To: Import Products and Product Data
Note
This article describes the behavior of 4.8.1 and newer versions. This functionality is implemented by the Advanced Products Import [Beta] add-on.
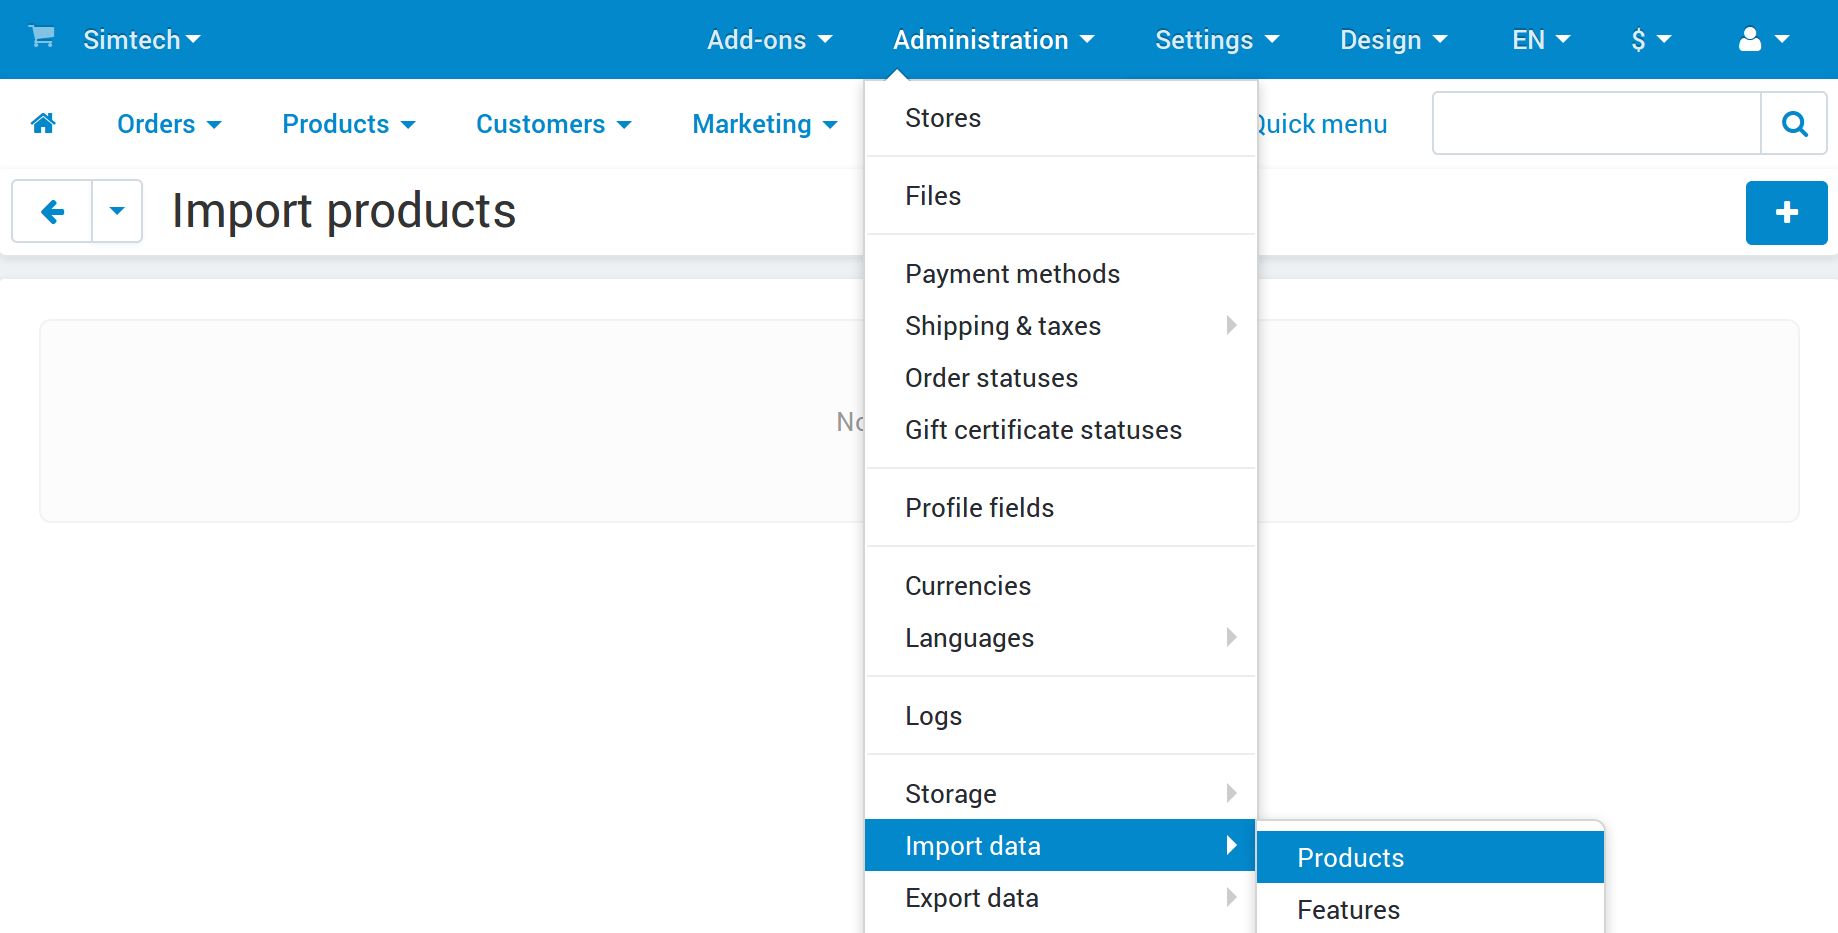
In the Administration panel, go to Administration → Import data → Products.
Click the + button to add a new import preset.
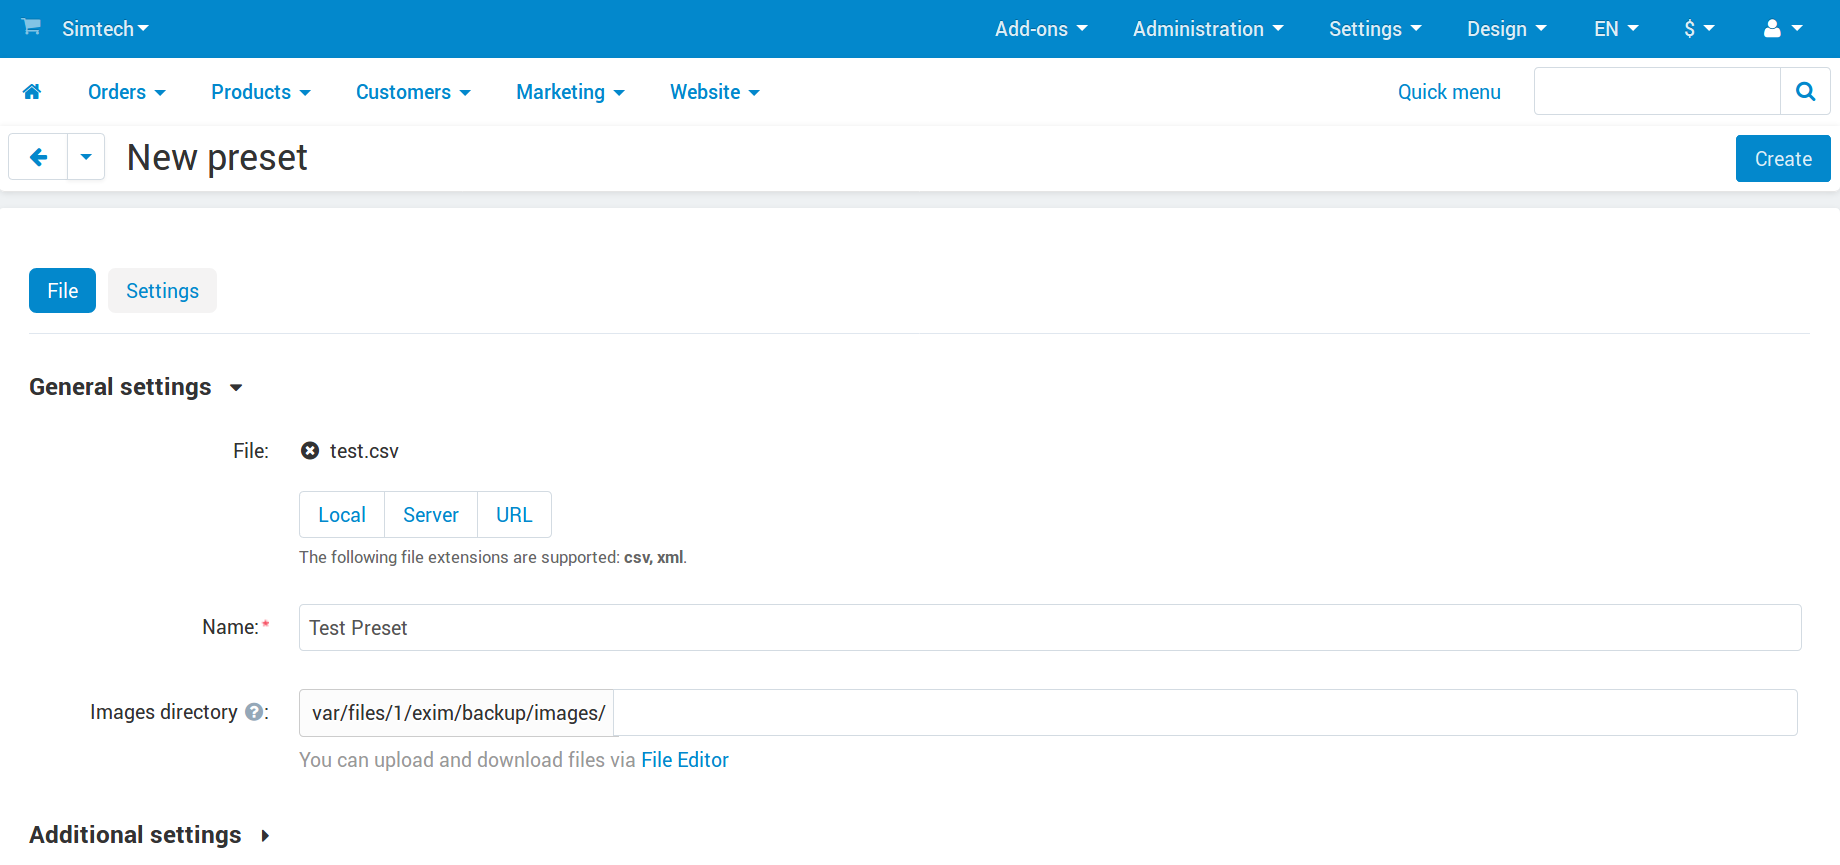
A preset is a set of rules on how to interpret an imported file. Once you configure a preset, you’ll be able to import multiple files of similar structure without the need to modify each of them separately.
Configure the import preset: choose a file (of CSV or XML format) that you’d like to import, and enter the name of the preset (you’ll use it later to find it among other presets).
If you upload an XML file, you’ll also need to specify an XML target node in the field with the same name. XML files have different and complicated structure, and not all information needs to be imported. Take a look at this XML example:
<?xml version="1.0"?>
<data>
    <address>NY, Green Street</address>
    <working_hours>9 am - 5 pm</working_hours>
    <products>
        <product>
            <sku>D00014MK1P</sku>
            <item>65" Class (64.5" Diag.) LED 8000 Series Smart TV</item>
            <in_stock>Yes</in_stock>
            <price>500</price>
        </product>
        <product>
            <sku>K01502P8VF</sku>
            <item>Wildwood City Classic</item>
            <in_stock>Yes</in_stock>
            <price>300</price>
        </product>
    </products>
</data>
CS-Cart needs to know how to distinguish individual products an XML file. For this example, the correct value of XML target node would be
data/products/product. It’s the full path to the XML node that contains all the information about a single product.Click Create.
Hint
Once you create an import preset, the File tab will contain a command that you can add to cron. That way you’ll be able to run the import periodically, at certain time intervals.
The Fields mapping tab should appear now. Switch to it. This is where you tell CS-Cart how to interpret the imported file:
Match the columns or XML elements in the imported file with corresponding product properties in CS-Cart.
Check the example of imported data to see if the matching is correct. Make sure that the imported data follows the field format of the corresponding product property.
If necessary, add a few modifiers. Modifiers are functions that help you change the imported data. Use the Modifiers list button to find out what modifiers exist and how to use them.
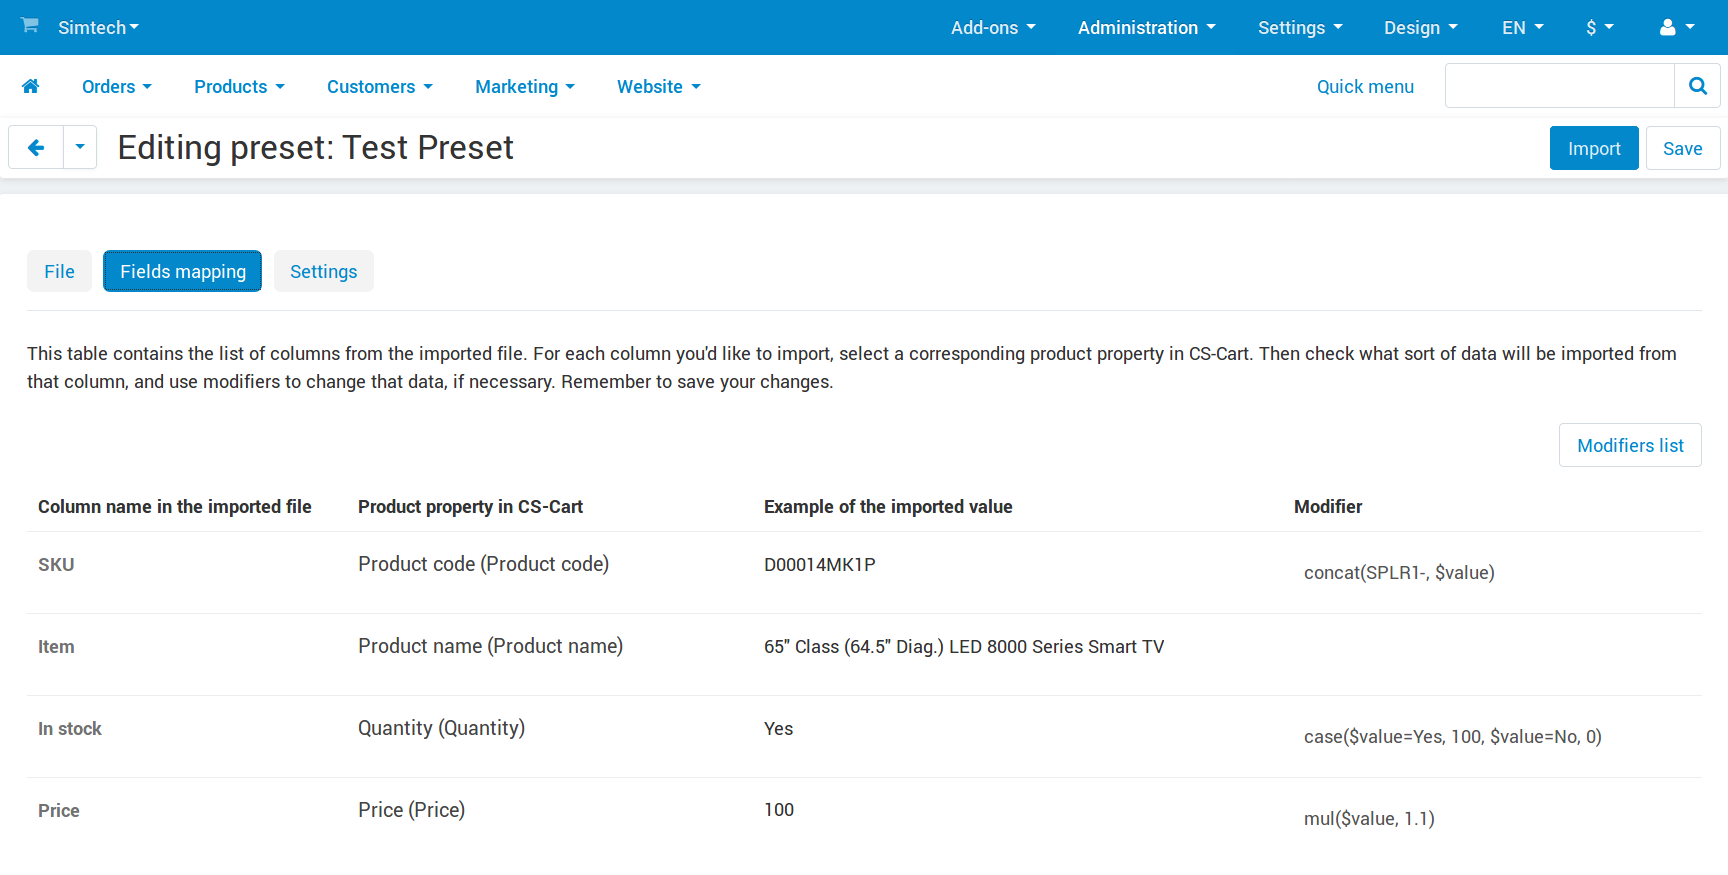
Here are a few examples of how modifiers can be used:
Let’s assume that you import products from two suppliers. Each supplier uses unique SKUs (the CODE field in CS-Cart) for each product internally, but a few SKUs of these suppliers overlap: each supplier has a different product with the same SKU. You, however, need to have a unique SKU for every product.
In that case you can create different import presets for each supplier. If you add a modifier like
concat(SPLR1-, $value)when importing products from Supplier 1, all SKUs of that supplier will have the SPLR1- prefix. That way SKUs will be unique.Important
This will only work if you don’t have these products in your store already. Otherwise the old products will remain with old SKUs, and the imported products will be created as new ones.
Let’s assume your supplier doesn’t give you the number of products in stock. The file only contains “Yes” when a product is available, and “No” otherwise. CS-Cart, however, requires that you specify a number as the quantity of a product.
In that case you can add a modifier like
case($value=Yes, 100, $value=No, 0)for the column where the information about availability is stored. That way, if the column has “Yes”, CS-Cart will assume that there’re 100 items in stock, and “No” will mean 0 items.Let’s assume that you sell all products that come from your supplier at the prices that are 10% higher, but the supplier provides his prices in the file.
In that case you can add a modifier like
mul($value, 1.1)for the column with price to automatically increase all prices in the imported file by 10%.
Once you configure field mapping and modifiers, click Save. If you’ve done everything properly, you’ll now see that the examples of imported values have changed to take the modifiers into account.
(optional) Switch to the Settings tab. It contains settings related to import behavior.
Perform test import—enable this setting if you wish to import only the first five products from the file.
That will allow you to check if everything is configured properly. Deleting or fixing 5 products should something go wrong is easier than dealing with 500 products after a full import.
Import strategy—choose whether to import all products or only some of them:
Import all products from the file—new products will be created, but if a product already exists (the existence is determined by product code), then it will be updated instead.
This strategy is the standard behavior of the product import.
Update existing products only—skip any products that don’t exist in your store; only products that already exist will be updated.
This strategy is convenient if a supplier provides a file with all his products, but you sell only some of them. That way you won’t get unwanted products in your store after the import.
Create new products only—skip any products that already exist in your store; only products that don’t exist in your store will be imported.
This strategy is convenient if you change some product data (such as description, product name, etc.) after the import. That way your changes won’t be lost if you need to import the data from that supplier again.
Hint
But what if eventually you need to update quantities for existing products without changing their other data? In that case just create a separate preset, and map only the necessary fields (Product code and Quantity). The fields that you don’t map will be ignored.
Set quantity of all products to zero—enable this setting if you want the quantity of all the products in your store to be set to 0 during the import.
Only the products that have a quantity specified in the imported file will have a different quantity.

There are two Additional settings hidden by default:
Delete existing files of downloadable products—if you enable this setting, then importing downloadable products will delete their existing files.
When the setting is disabled, importing a file of a downloadable product doesn’t replace the existing files, but rather adds it alongside them.
Delete existing additional images—if you enable this setting, all the additional images of a product will be replaced with the images specified in the imported file.
When the setting is disabled, importing additional images for a product doesn’t repalce the existing additional images, but rather adds new images alongside the existing ones.
Click Import. If your preset is configured properly, and the data in the imported file is correct, your products will be imported.
Hint
After the import you can go to Products → Products and use the Recently updated saved search to see all products that were updated within the last hour (alternatively, you can use Advanced search). This will help you check the import results.
Questions & Feedback
Have any questions that weren't answered here? Need help with solving a problem in your online store? Want to report a bug in our software? Find out how to contact us.