The Themes Section Overview
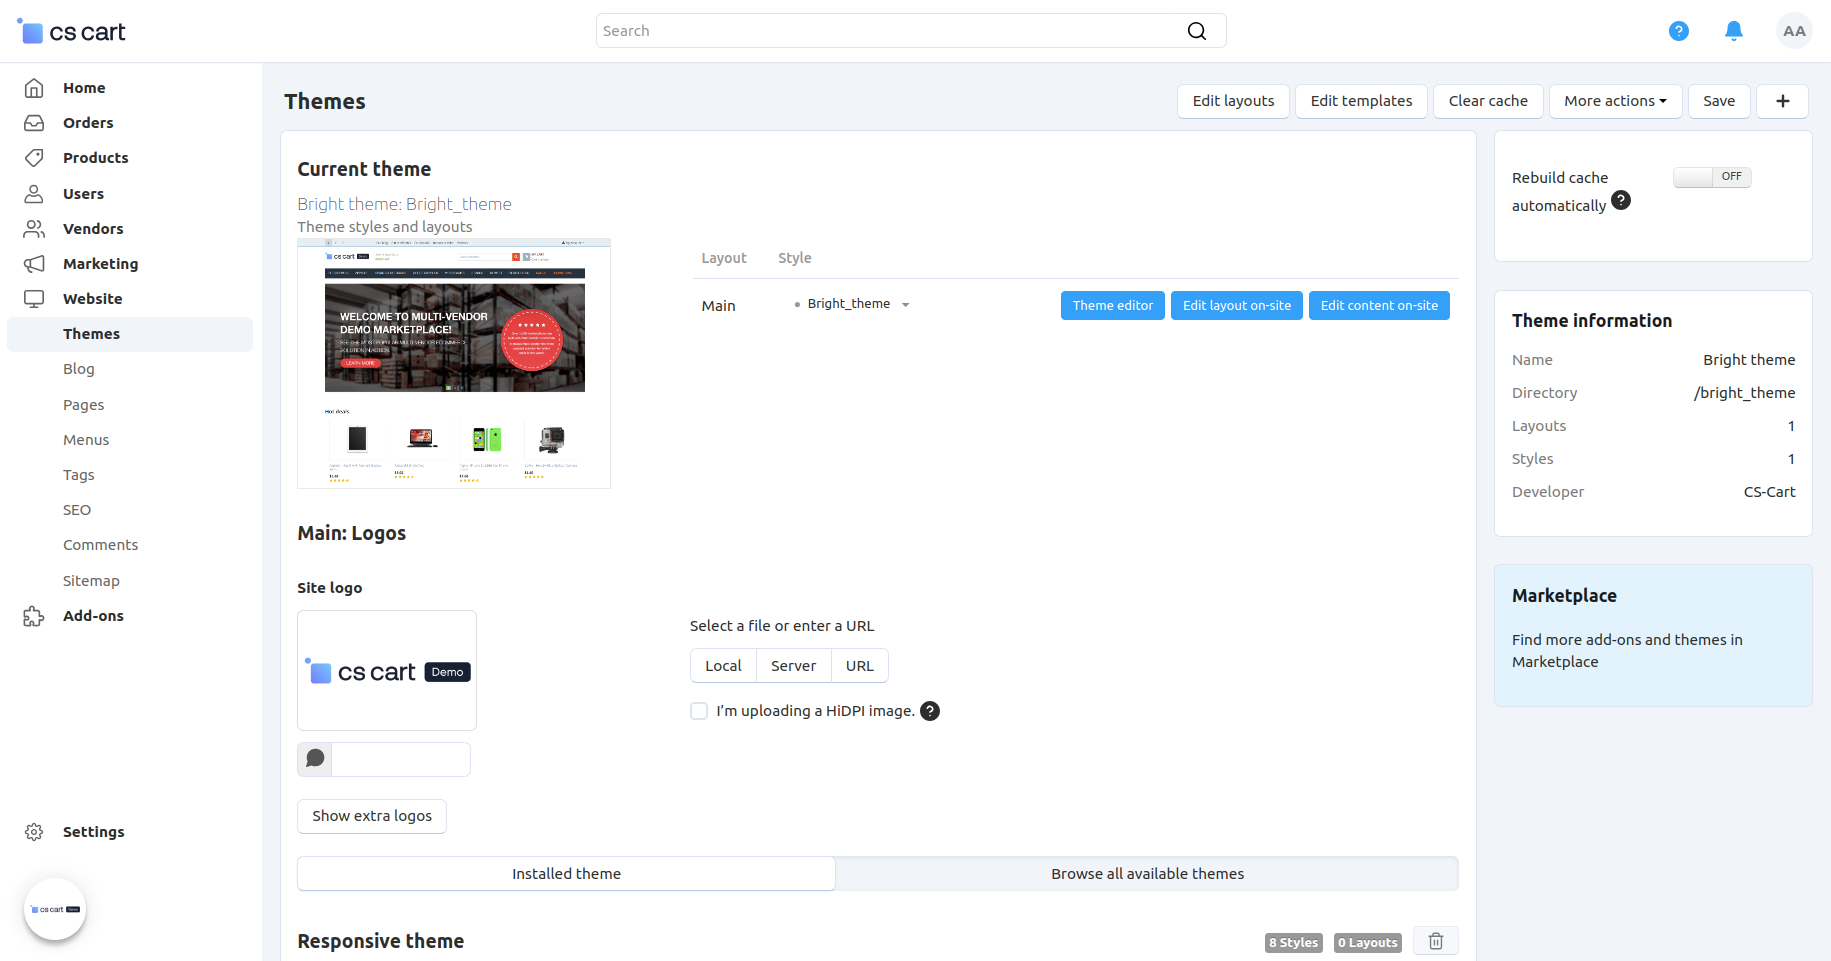
In the Design → Themes section of the Administration panel you can choose, install, upload, delete, and customize themes for your store.

In this page you can see the current theme applied to your store and the list of available themes (with different styles for each theme).
Click NEED HELP in the upper part of the page to see the video tutorial on how to customize your storefront.
Current Theme
In the Current theme section you can:
- Open the theme editor to customize your storefront in real time by clicking Theme editor.
- Choose the existing styles for layouts by using the drop-down lists near each layout name.
- Open the On-site live editor with the Edit content on site button.
In the On-site live editor you can see the storefront, and all the editable interface elements are marked with a dash line. You can continue navigating through the interface just if you were using the regular mode.
To edit an element, hover the mouse pointer over it and click the appeared icon. Change the value of the element that appears in an editable field. Click the tick button when you are ready.
In the Main: Logos section you can change the logo that is displayed on the storefront of your store. Read more about logos in this article.
On-site Live Editor
With the On-site live editor you can edit:
- Language variables
- Products
- Images
- Categories
- Pages
- Banners
- Storefront logo
- Some settings
Installed and Available Themes
In the Installed theme tab, there is a list of themes with different styles, that you can use in your store. For example, there is the default Responsive theme and the list of styles (Black, Brightness, Facebook, etc.) available for it. Hover the mouse pointer over the style preview and click Use this style to use the style.

In the Browse all available themes tab, there is a list of themes available for the installation. If you need to install the pristine default theme, you can find it here.
Additional Functionality
To the right of the page, you can see some theme information. There is the theme name, directory, where the theme is placed, the number of layouts and styles and the current theme developer.
Here you can:
- open the file editor by clicking on the directory name
- go to the Layouts page by clicking on the number of layouts
- see the list of styles for the current theme by clicking on the number of styles.

Click the gear button in the right upper corner of the page and choose Clone theme from the drop-down list to clone the current theme, if you wish to apply changes to it, customizing the theme to your own taste.
Here you can also see the Rebuild cache automatically selector. Click (On) if you want the modified files to be re-cached on the fly.
Removing a Cloned Theme
To remove a cloned theme:
- Make sure that the theme you want to remove is not currently used (select another theme from the Installed theme tab).
- Find the theme you want to remove in the Installed theme tab and click the trash can button on the right.
Important
Before deleting a theme, make sure that the layout used by it is not set as default. Otherwise, you will not be able to delete a theme.
Uploading a New Theme
To upload a new theme, click the + button in the right upper corner of the page. In the opened pop-up window choose whether to upload a file from the local computer (Local) or the server file system (Server). You can also specify URL to a remote location, where the required archive is physically located.
Pay attention, that the theme archive must be in tgz, gz or zip format. When you are ready, click Upload.

Questions & Feedback
Have any questions that weren't answered here? Need help with solving a problem in your online store? Want to report a bug in our software? Find out how to contact us.