Affiliate PRO
- Overview
- New user type
- Managing in the admin area
- What the affiliate will see
- Giving commissions for affiliate orders
- How to provide affiliates with widget code and how affiliates can use it
- What the customer will see
Overview
Power your online business with our Affiliate PRO add-on. It gives the CS-Cart store owner the ability to create affiliate programs with other online stores and websites.
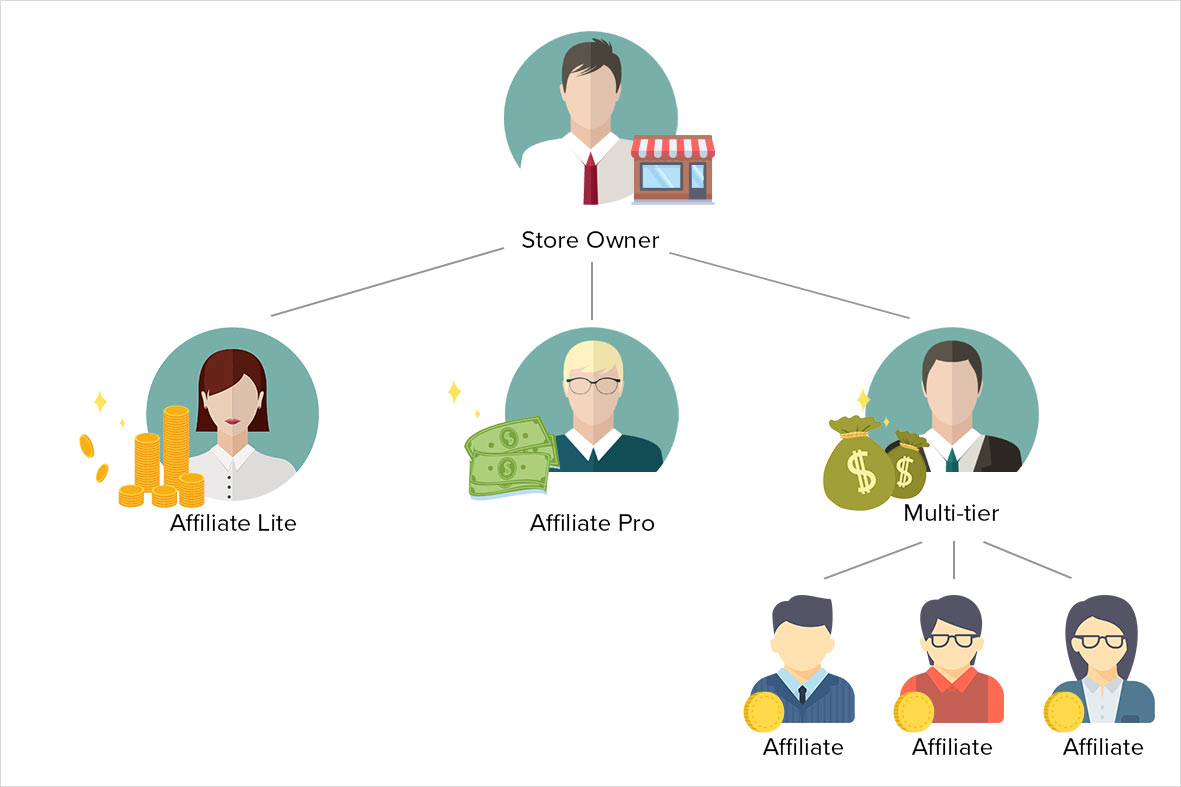
There are three levels of affiliation.
Level 1: Affiliate Lite
Your customer shares a link to your store with their friends, family, co-workers, etc. When someone follows that link, the Affiliate gets reward points which they can spend in your store.
Level 2: Affiliate Pro
The customer may want to have more than bonuses. Why not to let them make real money? The idea is the same—the affiliate shares a link or places a banner which leads to your store and gets a commission. You can create various affiliate plans with rewards for showing a banner, customer clicks, sales, etc. All the commissions will be available in the Admin Panel of your CS-Cart store.
Level 3: Multi-tier Affiliate
Your affiliates may bring you more and more new affiliates. For example, your first affiliate can bring you five more and each of them will invite some more affiliates. Thus you affiliation pyramid will get more participants interested in the promotion of your merchandise. But there is nothing to worry about, you can always confirm or decline a new one. All the affiliate tiers are shown on the Affiliate tiers tree page and you can always see how many affiliates bring your partners.
How it works
The Affiliate add-on helps CS-Cart owners manage work with their affiliates.
You create advertising banners for affiliate websites. Your affiliates place these banners on their resources, which helps attract new visitors to your store.
The add-on tracks and keeps a full count of events, such as banner views, click-throughs, and registration of new users who come from affiliate websites. A monetary value can be set for each event. The store administrator has a powerful tool for tracking events involving affiliates and calculating accurate payouts to them.
Anyway affiliates can also view their event statistics in the customer area of your store. They will know their income from the affiliate program. Such transparency in the business relationship will facilitate effective work and create profit for both parties.
Affiliates’ profit
Your affiliate will receive payments for attracting customers to your store. Therefore, affiliates will be interested in advertising your store.
Store owner’s profit
You will receive good advertising, new customers and, as a result, excellent sales.
Compatibility
The add-on is compatible with CS-Cart and Multi-Vendor 4.9 and above, but only versions 4.12.x and above are supported. Minimum required PHP version is 7.1.
See more information about compatibility of our add-ons here.
Support
You are guaranteed a quality add-on supported by the future versions. If you need help, please contact us via our help desk system.
Demo
Check out the Affiliate PRO add-on in our demo store.
Note
Every half an hour the demo store is reset to the default state.
New user type
The add-on integrates a new user type (Affiliate) to the store. These users can advertise your store getting payouts for this.
Adding an affiliate to the admin panel
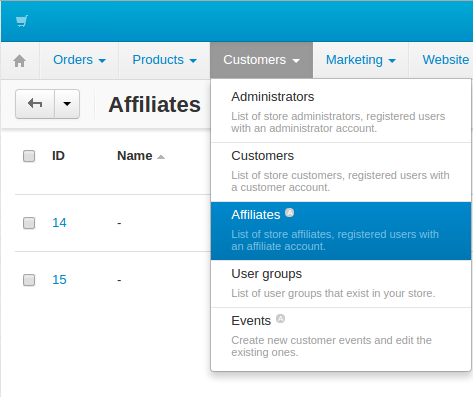
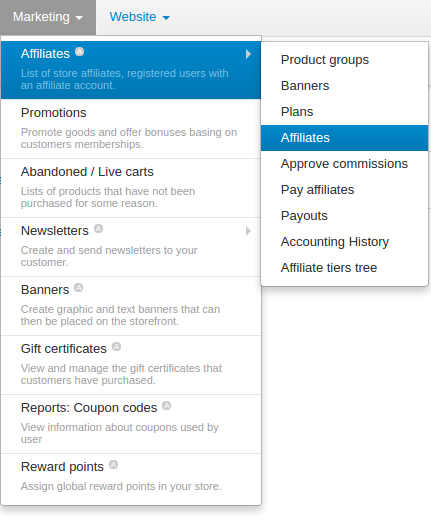
To access the Manage affiliates page, go to “Customers” → “Affiliates”.
Affiliate is in fact a usual customer. That is why the process of creating a new affiliate user does not differ from the process of adding a usual user.
Access to the admin panel is also forbidden for affiliates. Nonetheless, the functionality in the customer area is extended for an affiliate. You can learn more about the abilities of an affiliate in the customer area from the What the affiliate will see section.
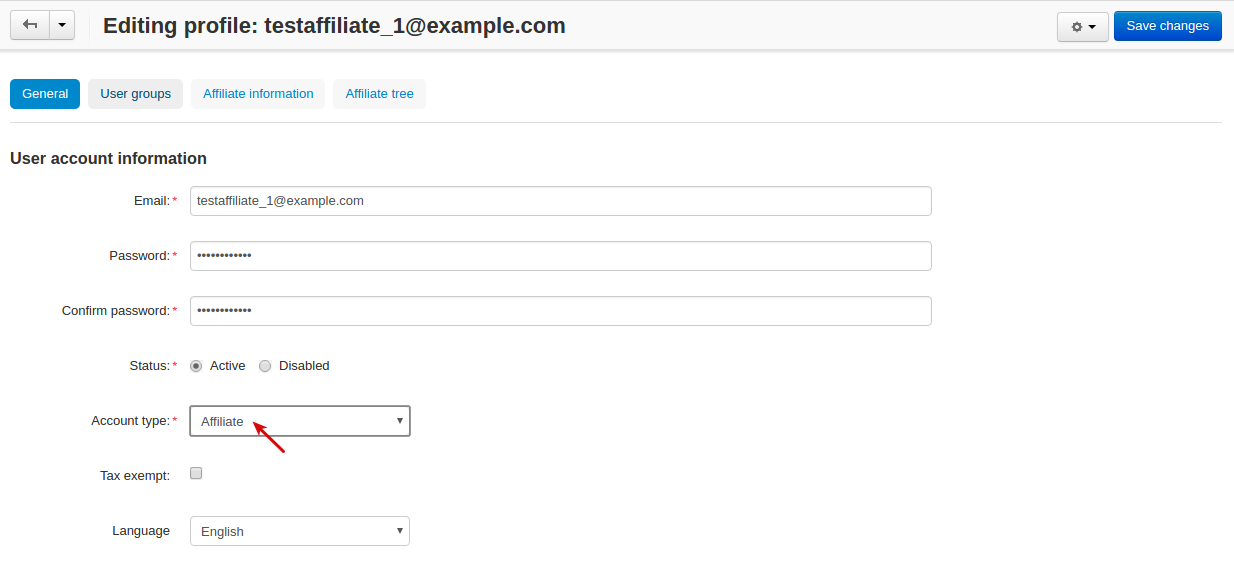
When creating a new affiliate it is necessary to make sure that the appropriate value is set in the “Account type” field on the user creation page.
How store users can become affiliates
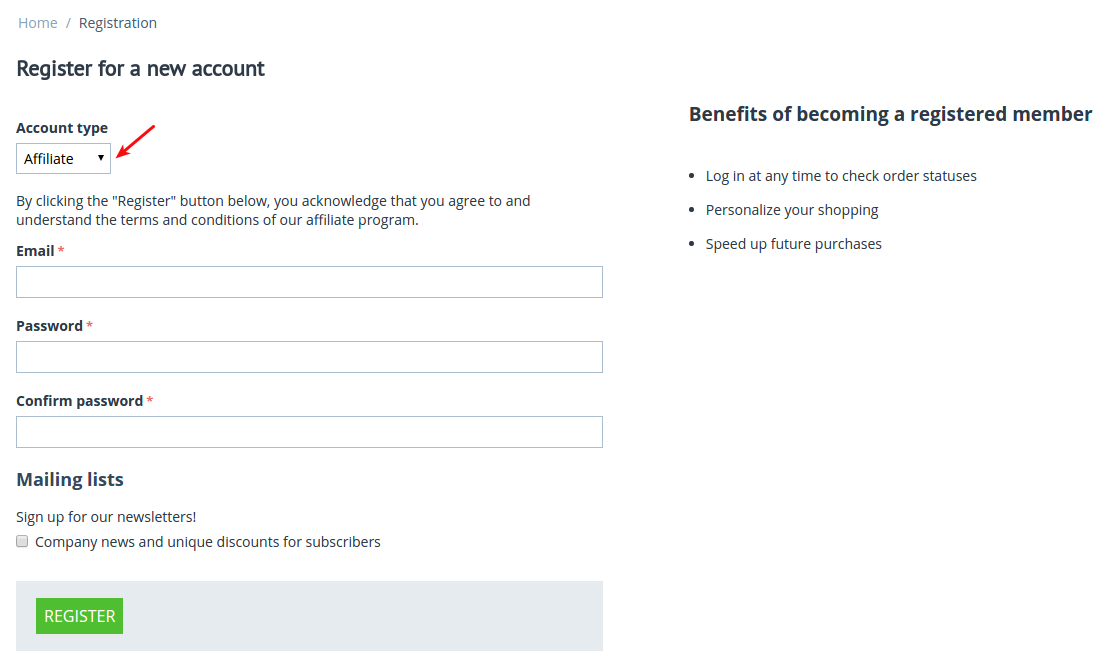
In order to become an affiliate, the users of your store should specify the appropriate account type when registering or on the editing profile page.
After the registration the store administrator should approve the affiliate account. You can learn more about managing affiliates in the admin panel from the Affiliates manage section.
Before the administrator approves the affiliate account, only the functionality of a usual customer will be available to the user.
Managing in the admin area
Installing and setting up the add-on
Installing the add-on
Install the “Affiliate PRO” add-on on the add-ons list page (“Addons” → “Manage add-ons”).
Note
The Affiliate PRO add-on is incompatible with the Affiliate Light add-on.
Available settings
All settings of the “Affiliate PRO” add-on are split into three sections: General, Text banner, Discount Coupons.
1. General settings
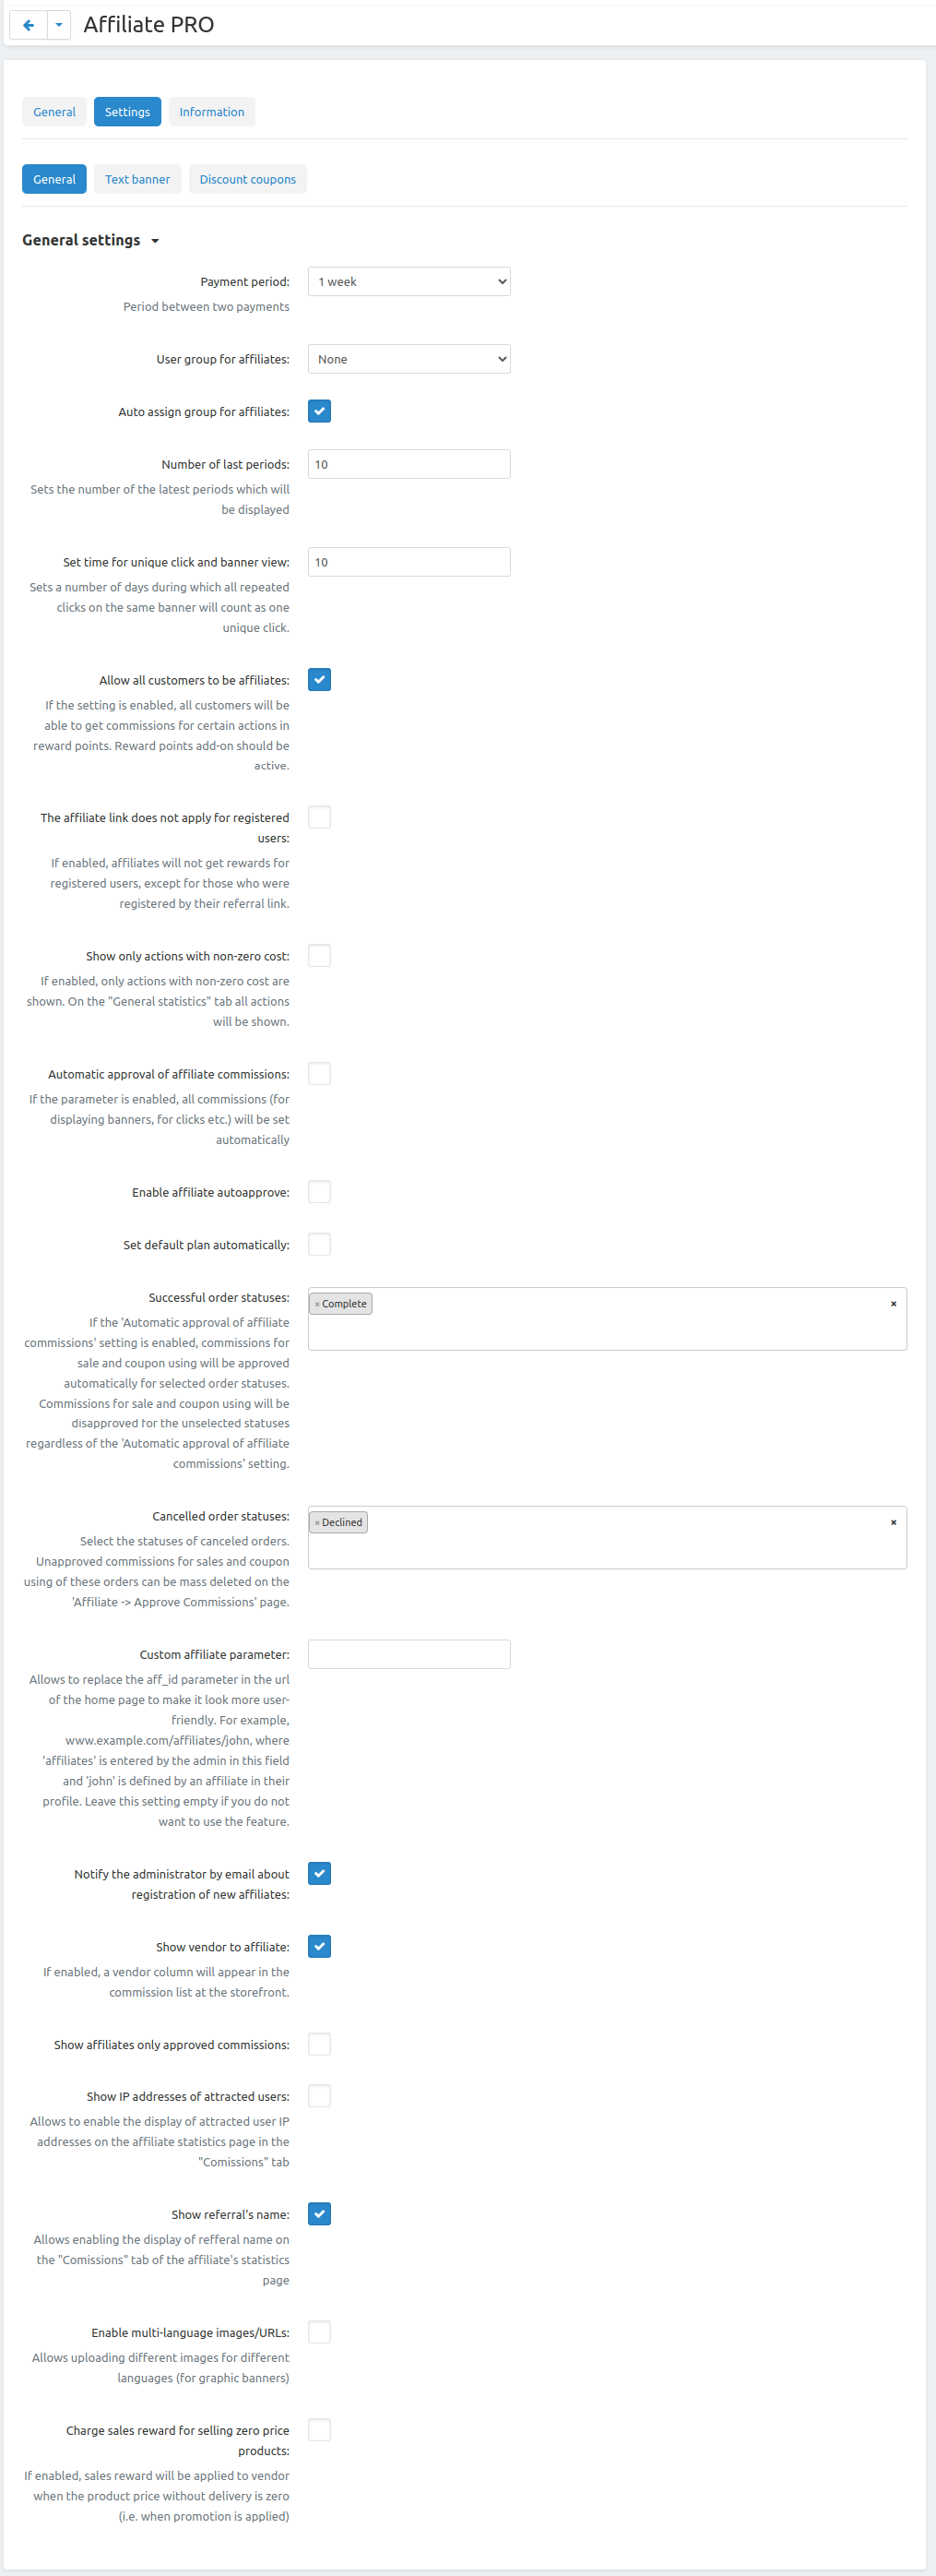
Payment period — is used in the “Commissions of latest periods” table in the Affiliates manage and What the affiliate will see sections. It sets a period between two payouts: once a week, twice a week or once a month.
Number of last periods — is used in the “Commissions of latest periods” table in the Affiliates manage and What the affiliate will see sections. It sets the number of payouts to be shown in the table.
Allow all customers to be affiliates — if the setting is enabled, all customers will be able to get commissions for certain actions in reward points. It automatically assigns to them the affiliate plan for customers created in Marketing - Affiliates - Plans: Customers. For more details, see the What the customer will see section.
If the setting is disabled, customers will be able to become an affiliate in their account in the Affiliates section.
Note
You cannot enable the Allow all customers to be affiliates setting if the Reward points add-on is disabled.
If you uninstall the Reward points add-on, the Allow all customers to be affiliates setting will be disabled.
Automatic approval of affiliate commissions — if the setting is enabled, all affiliate commissions (for showing the banner, for clicking, etc.) will be approved automatically.
Successful order statuses — if the ‘Automatic approval of affiliate commissions’ setting is enabled, commissions for sale and coupon using will be approved automatically for selected order statuses. Commissions for sale and coupon using will be disapproved for the unselected statuses regardless of the ‘Automatic approval of affiliate commissions’ setting.
Сanceled order statuses — Select the statuses of canceled orders. Canceled commissions for sales and coupon using of these orders can be mass deleted on the ‘Affiliate->Approve Commissions’ page. All canceled commissions for orders in the selected statuses will be immediately removed from the commissions list for approve:

Custom affiliate parameter — allows to replace the aff_id parameter in the url of the home page to make it look more user-friendly. For example, www.example.com/affiliates/john, where affiliates is entered by the admin in this field and john is defined by an affiliate in their profile. Leave this setting empty if you do not want to use the feature. For more details, see the What the affiliate will see section.
Show referral’s name — allows to hide the names of attracted customers and partners on the partner’s statistics page in the “Comissions” tab. If the setting is disabled, the names of attracted customers and partners will be displayed in the format C****r C****r:
2. Text banner settings
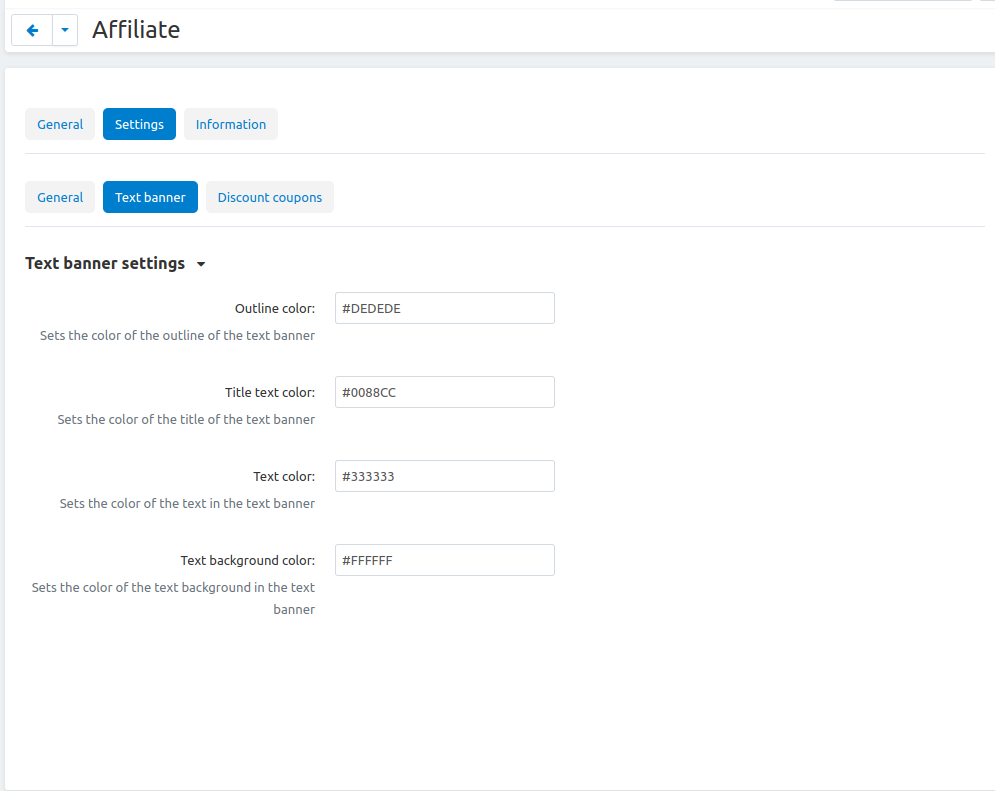
It allows to set the appearance of the text banner. The store administrator can set the border, text and background colors for the text banner.
You can learn more about creating a text banner from the Creating banners section.
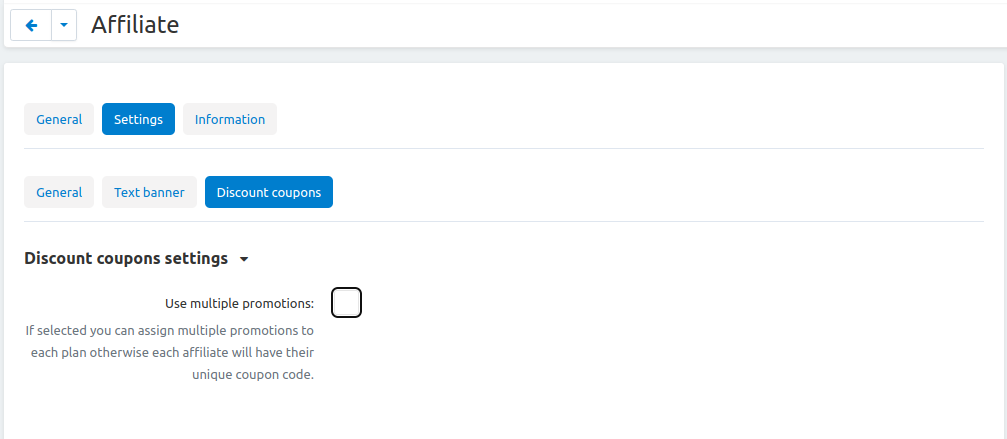
3. Discount coupon settings
Affiliates can distribute promotion codes with attracting new customers to your store and, accordingly, get payouts for this.
The settings in this section allow you to decide whether you want to set a unique promo code for each affiliate or allow using the same promo code by different affiliates. In the former case, leave the Use multiple promotions box empty. In the latter case, select the Use multiple promotions box.
If you select the Use multiple promotions box, two further settings will be available to you.
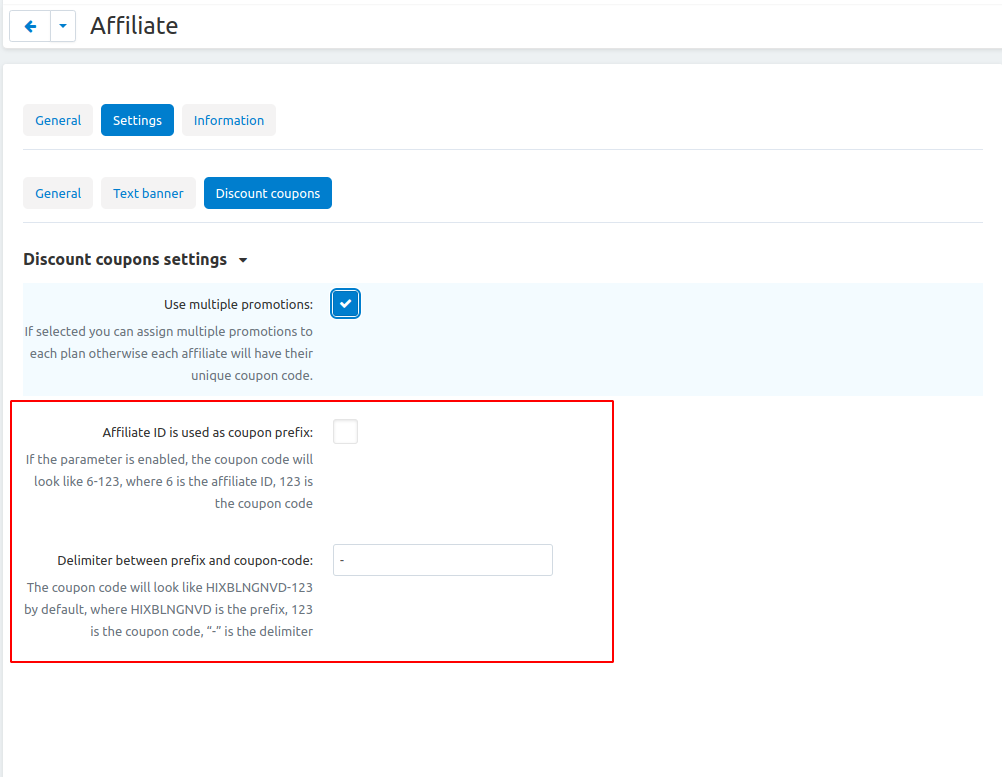
These settings allow you to to set a prefix and delimiter for a promotion code to identify an affiliate correctly.
- Affiliate ID is used as coupon prefix—If enabled, the coupon code will look like 6-SALE123, where 6 is the affiliate id and SALE123 is the coupon code.
- Delimiter between prefix and coupon-code—Specify a delimiter between a prefix and coupon-code, for example -. The coupon code will look like 6-SALE123, where 6 is the affiliate id (or a prefix) and SALE123 is the coupon code, and - is the delimiter.
Learn more about using promo codes for affiliates in the Managing affiliate promotions section.
Product groups
The add-on offers a lot of actions for that affiliates will get their payouts. One of such actions is clicking on the banner located on the affiliate’s website. After that the user gets to your store from the website of the affiliate. There is a question - what content should be shown to the users when they go from the affiliate’s website to the CS-Cart store? This may be a page with certain products or any link of your store.
Most likely it will be necessary that several banners direct to the same store page. It would be good to have the ability to create the content in advance for such cases, and then assign this content to the banners. The “Product groups” functionality will help you with this.
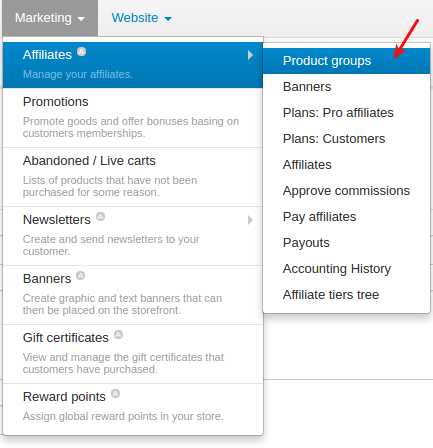
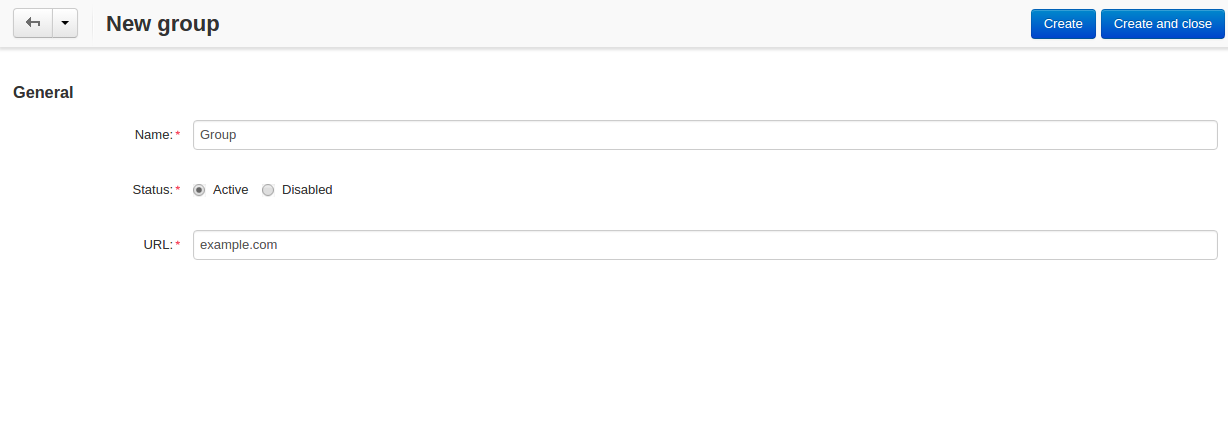
In other words, you create Group for categories, Group for products or URL and assign it to the banner (you can learn more about creating banners from the Creating banners section). So the users, when clicking on the banner on the affiliate’s website, will see a list of categories or products, or follow the link mentioned by you. These groups can be assigned to several banners at a time.
Group for categories
A list of all available groups is located in the “Group for categories” tab. The administrator can create, edit or remove groups.
On the editing group page it is possible to specify what categories should be assigned to this group.
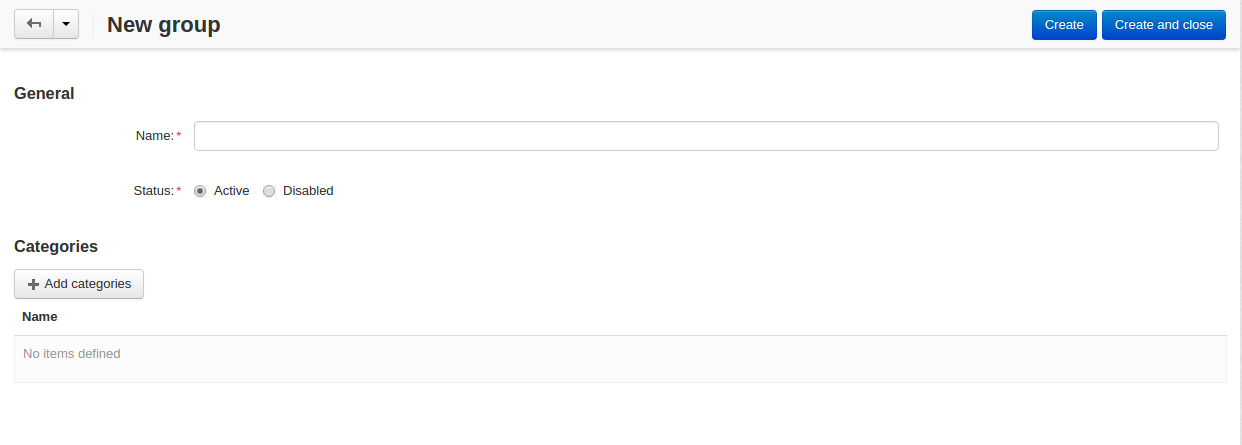
So when the banner assigned to this group is clicked, the users will get to the page where they will see a list of the categories.
Group for products
A list of groups to that products are assigned is displayed in the “Group for products” tab. The functionality of “group for products” is similar to the functionality of “group for categories”.
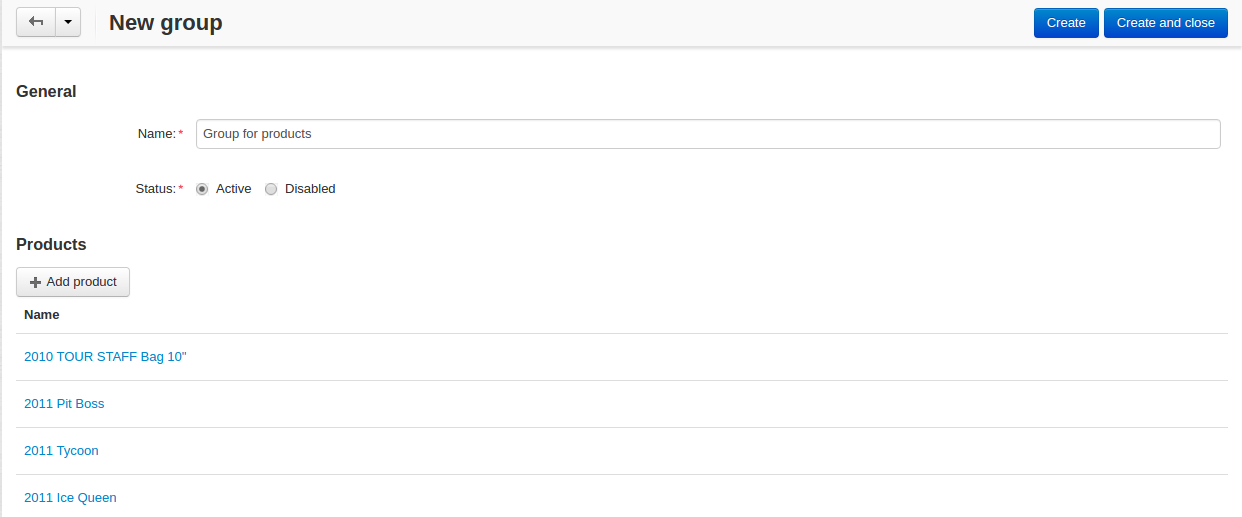
The difference is that when the banner which is assigned to the product group is clicked, the user will get from the affiliate’s website to the page of your store where the product list is shown.
Creating banners
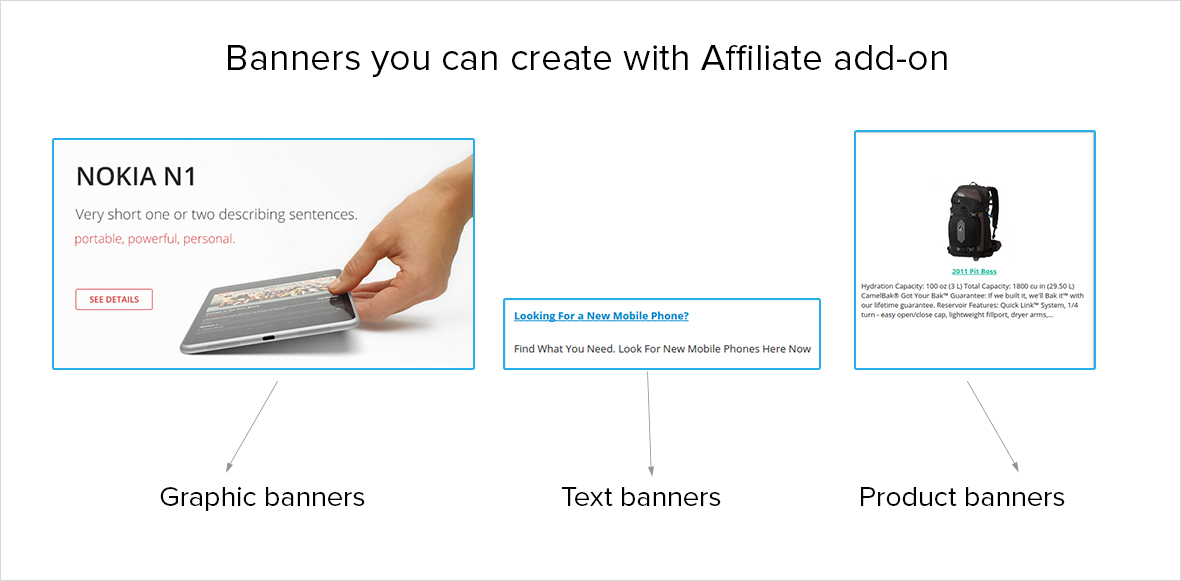
One of the most popular ways to advertise a store using affiliates is banners. The “Affiliate PRO” add-on allows to create text banners, graphic banners and product banners.
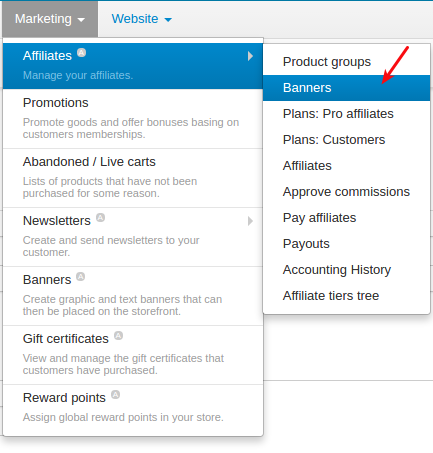
To go to the Banners manage page, please use the menu Marketing → Affiliate → Banners.
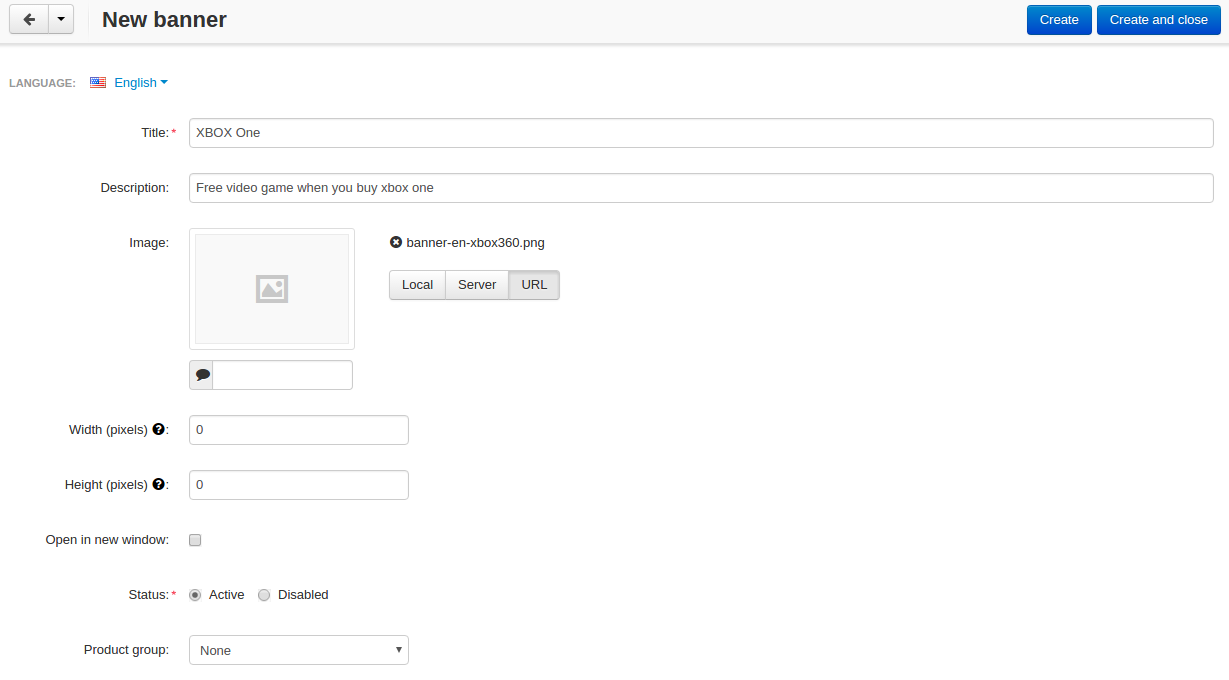
In the left sidebar, select the banner type you would like to create.
Text banners

Text banners are split into four sections:
- Product groups. Such banners should be assigned to Product groups. In this case when clicking on the banner, the user will see the content of the assigned product group.
- Categories. It is necessary to specify a list of categories for such a banner when creating it. In this case when clicking on such a banner, the user will get to the page with the specified list of categories.
- Products. It is necessary to assign a list of products for such banners. When such a banner is clicked on, the user will get to the store page where these products are shown.
- URL. For such banners it is required to specify the direct link which the users should follow when clicking on it.
The look-and-feel of text banners is fully customizable—you can specify the color of the text, banner, etc. in the add-on settings. Learn more about it in the Installing and setting up the add-on section.

Graphic banners

As well as text banners, graphic banners are split into four sections - Product groups, Categories, Products and Url. Their main difference from text banners is that for graphic banners it is required to define a banner image. The rest functionality of text and graphic banners is the same.
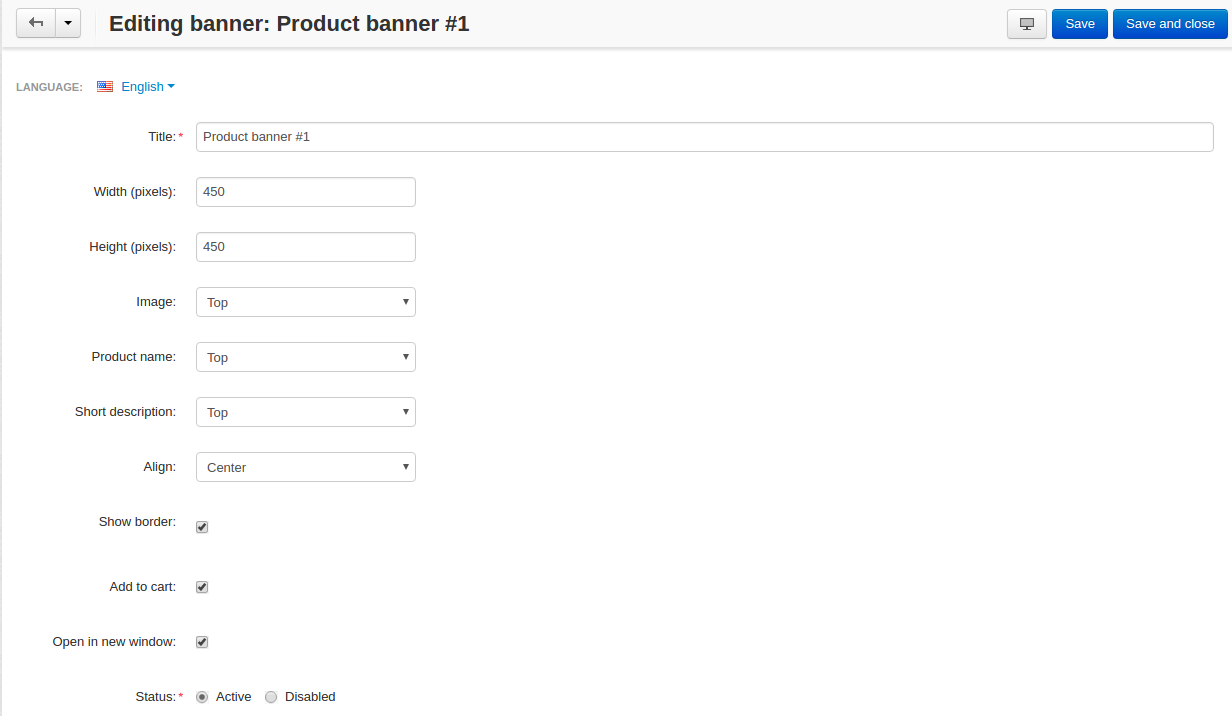
Product banners
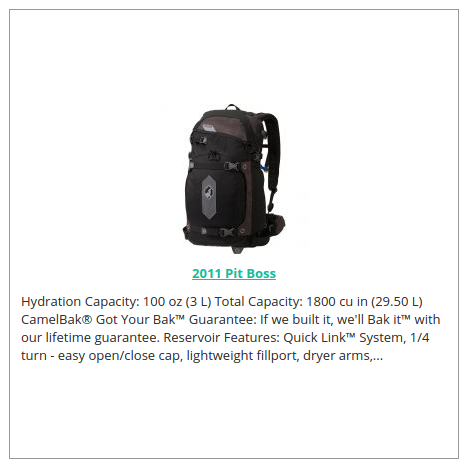
This banner type differs from graphic banners. The main purpose of the banner is to show information about a certain product in the store. A product is selected randomly each time the banner is shown.
The administrator can set the general banner appearance—set the location of the product image, product name, etc. inside the banner.
Plans for pro affiliates
The store administrator can create various plans with specifying individual payout amounts for each plan.
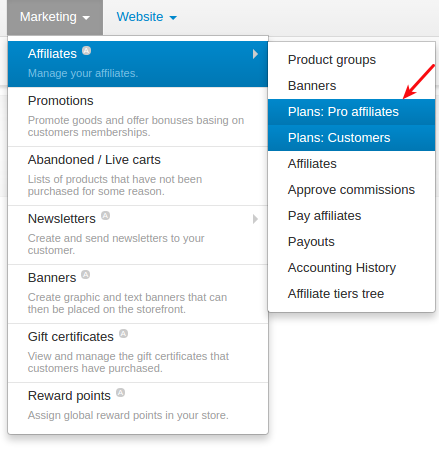
For each individual plan it is possible to set a wide range of payouts for certain actions of the users. To do this, go to Marketing - Affiliates - Plans: Pro affiliates.
General
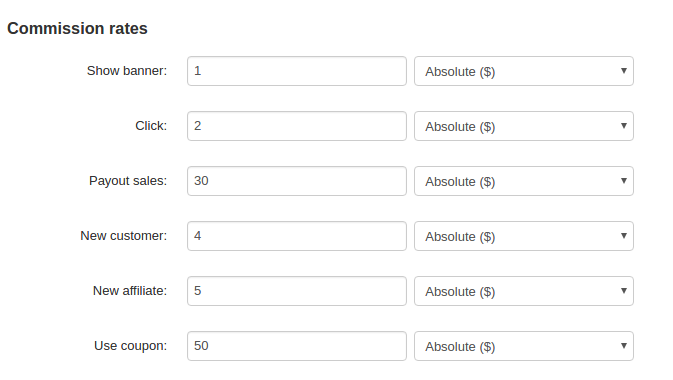
In the “General” tab the store administrator can specify the general settings of an affiliate plan (name, description, commission rates, etc.).
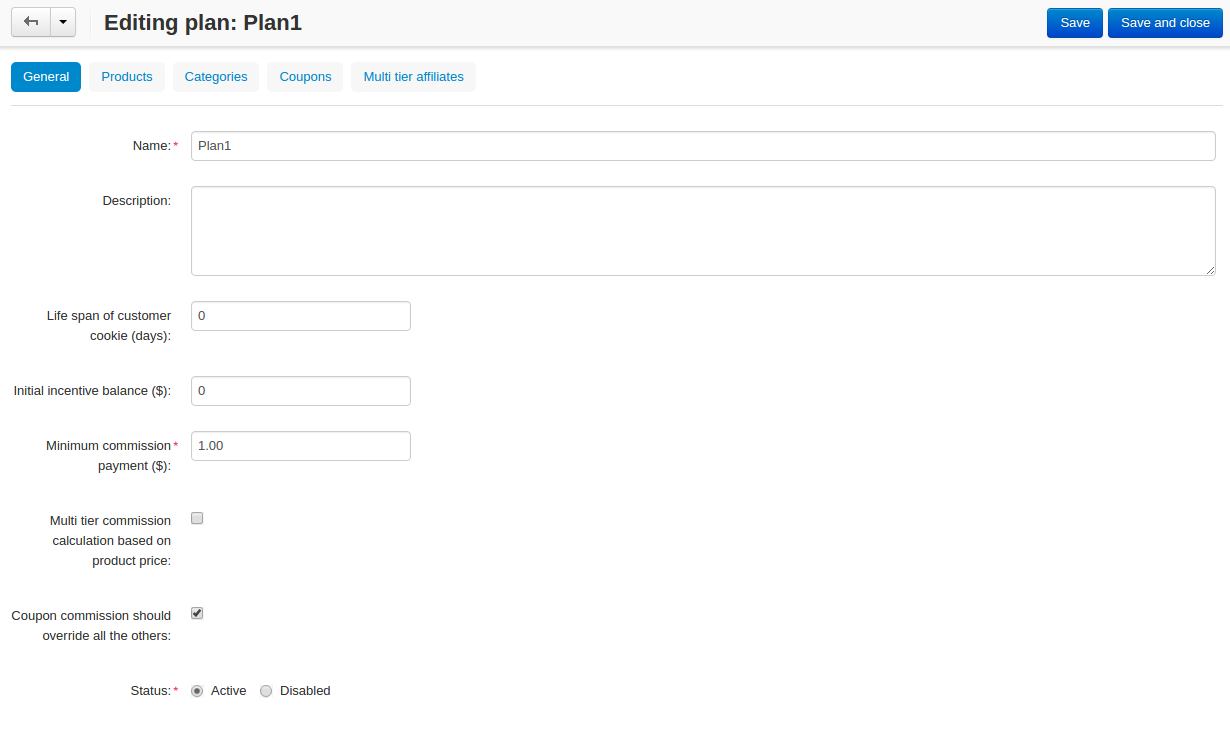
Below you can see clarifications on some special plan settings.
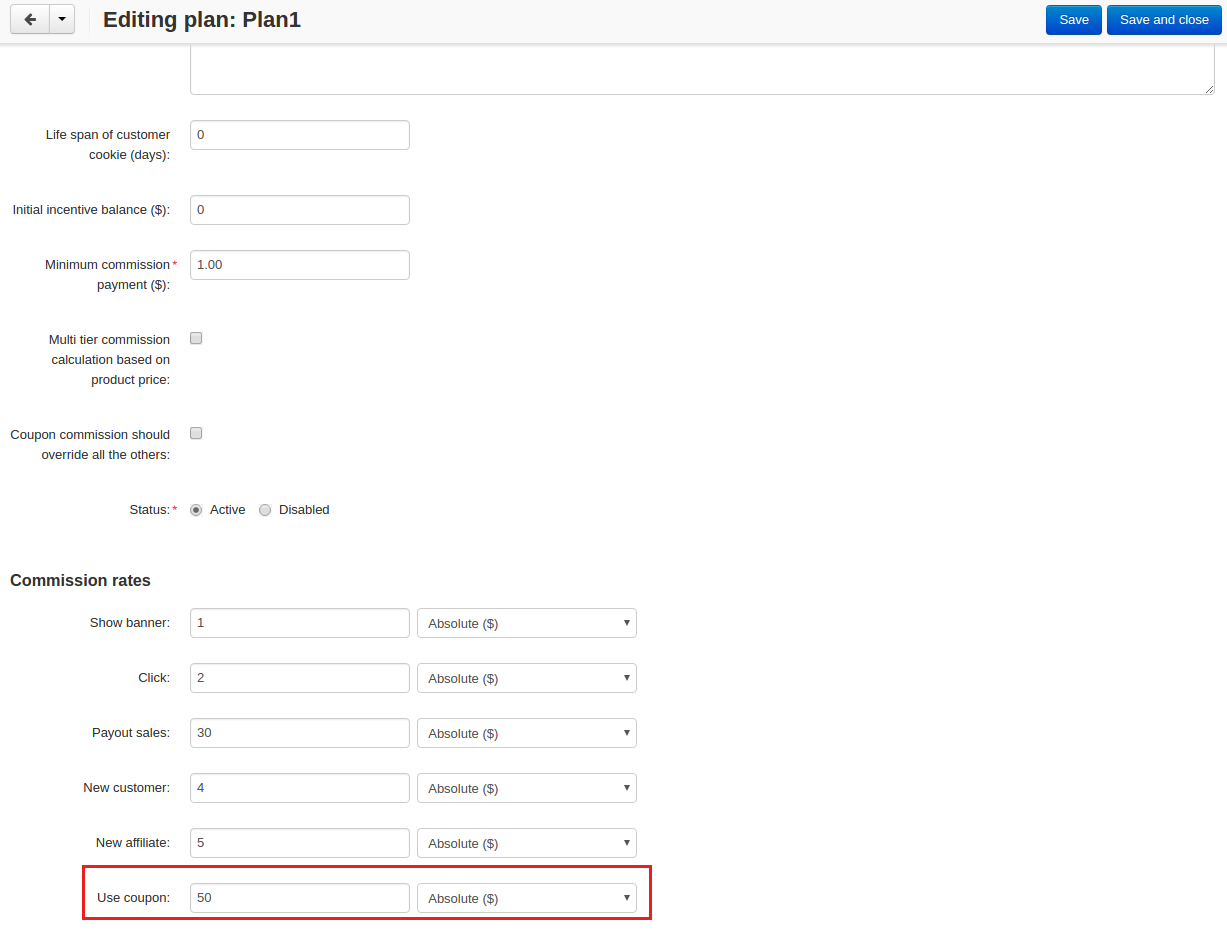
- Life span of customer cookie (days) — sets the lifetime of unregistered user’s cookie. When an unregistered user comes from the affiliate’s website, it is recorded in the store that this user came from the affiliate’s website. If the user makes purchases or does some other actions, the affiliate will get certain bonuses for this. This setting defines within what time (in days) it is required to store information about the affiliate in the customer’s session. In other words, if the value of 3 is defined for this setting, and the customer who came to the store from the affiliate’s website purchased a product only the next day after visiting the store, the affiliate will get the bonus specified for him/her anyway. Note that this setting is defined only for unregistered users, it does not affect registered users.
- Initial incentive balance ($) — it is set for an affiliate as the first incentive bonus at the original approval of the account.
- Minimum commission payment ($) — it is used when searching for affiliates on the “Pay affiliates” page.
- Multi tier commission calculation based on product price. If this setting is enabled, the multi tier commission will be calculated based on the product cost. If the setting is disabled, the multi tier commission will be calculated based on the commission of the main affiliate.
- Coupon commission should override all the others. If this option is selected, only the coupon commission will be considered when calculating the payout sales commission. No other commissions—the commission for purchasing a certain product or a product from a specific category—will be considered.
You can also specify commission rates for showing a banner, clicking on it, attracting a new customer, etc.
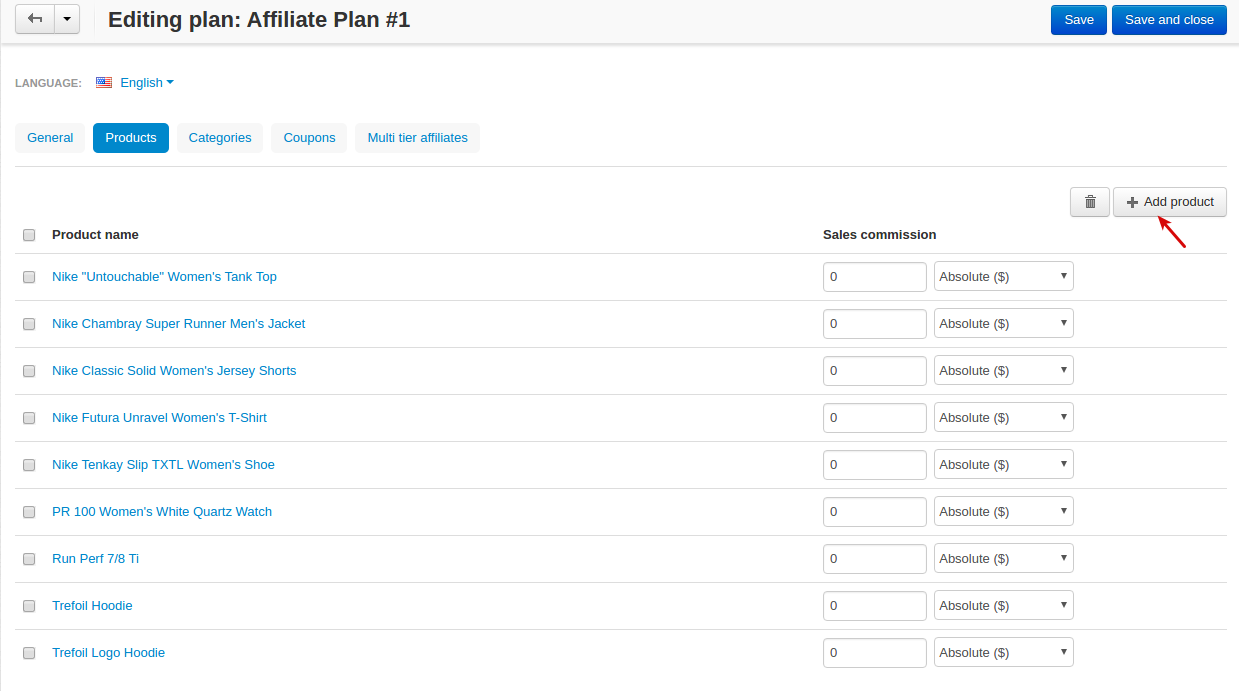
Products
For an affiliate plan you can set a list of products for the sales of which the affiliates will get commissions. The list of products and the appropriate commissions are set in the “Products” tab on the editing affiliate plan page. To add products to the list, click the + Add product button.
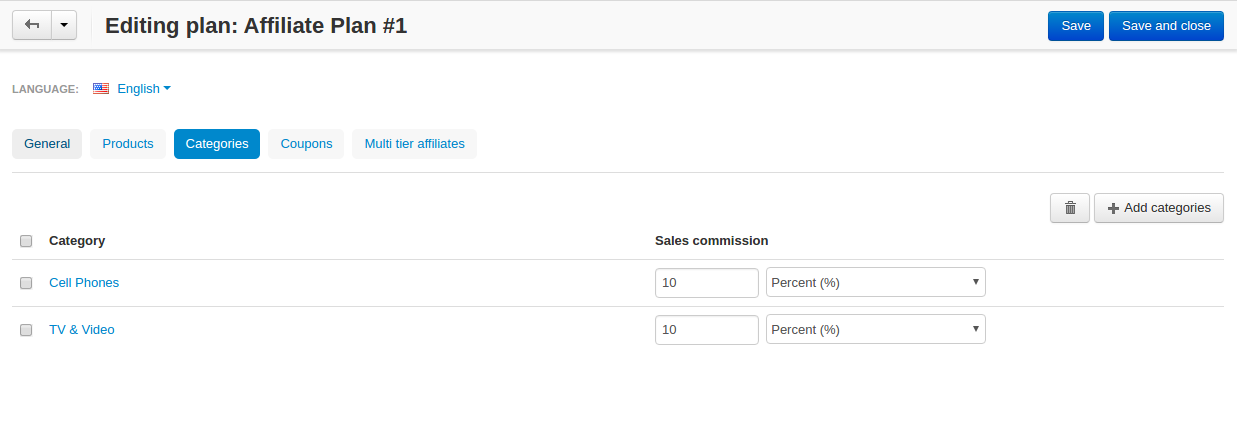
Categories
In the “Categories” tab, it is possible to specify commissions for purchasing products from certain categories.
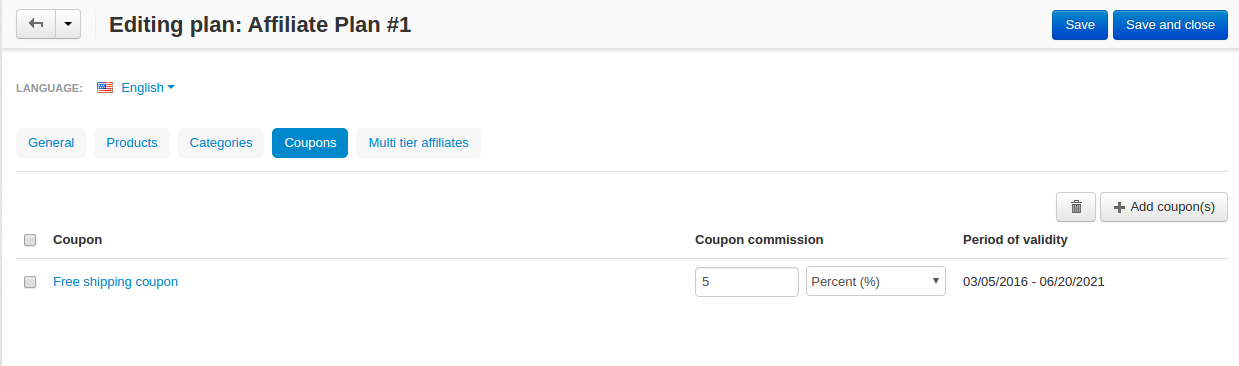
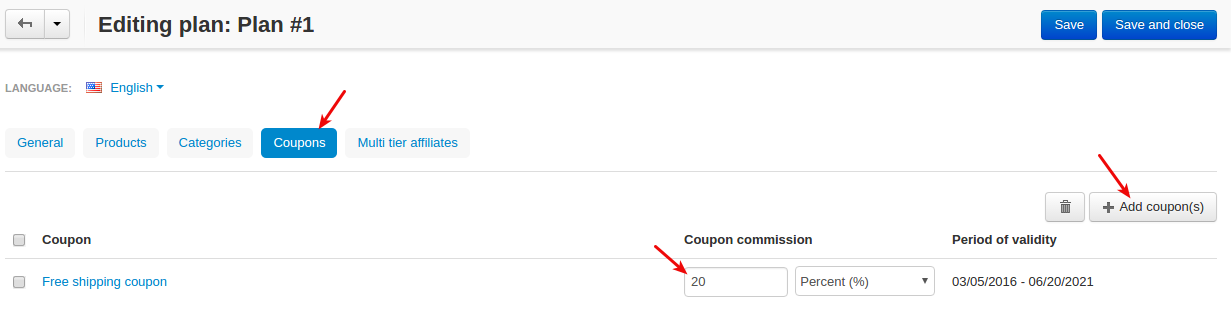
Coupons
Attention
The Coupons tab appears only if you select the Use multiple promotions selectbox in the add-on settings.
In the “Coupons” tab, you can set a commission for the use of promo codes by customers.
To learn more how to create and manage promotions, please refer to the CS-Cart Docs.
Watch this video to learn more about using coupons with the Affiliate PRO add-on.
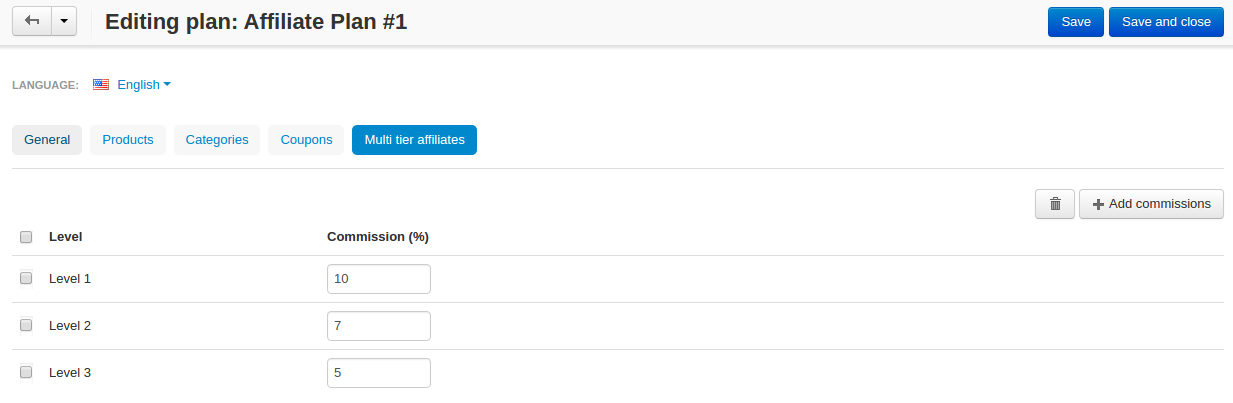
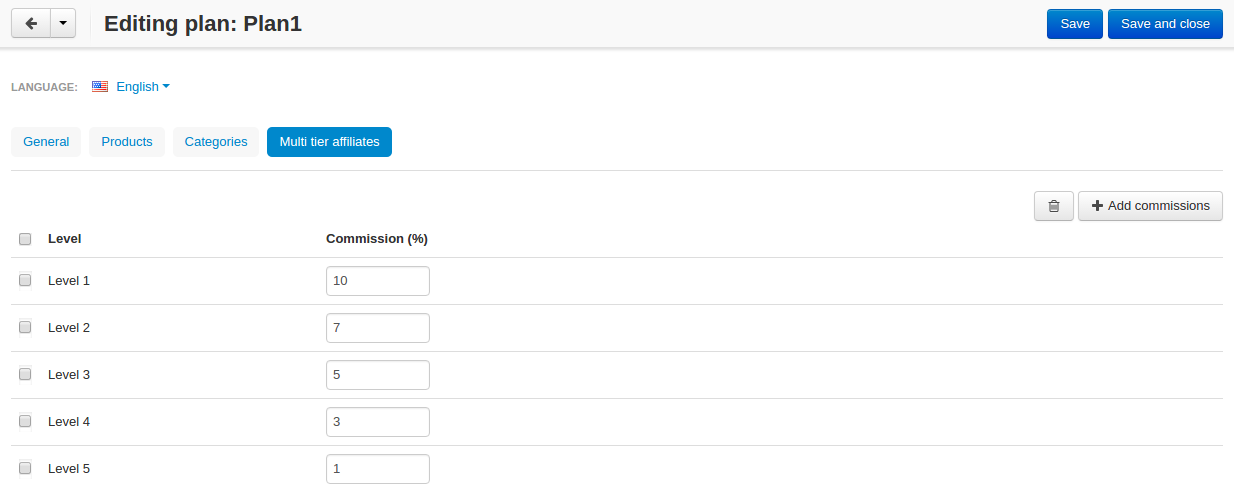
Multi-tier affiliates
The add-on allows to create many levels of affiliates. In other words, the affiliates already existing in the store can invite other affiliates and get commissions for the actions of the invited affiliates.
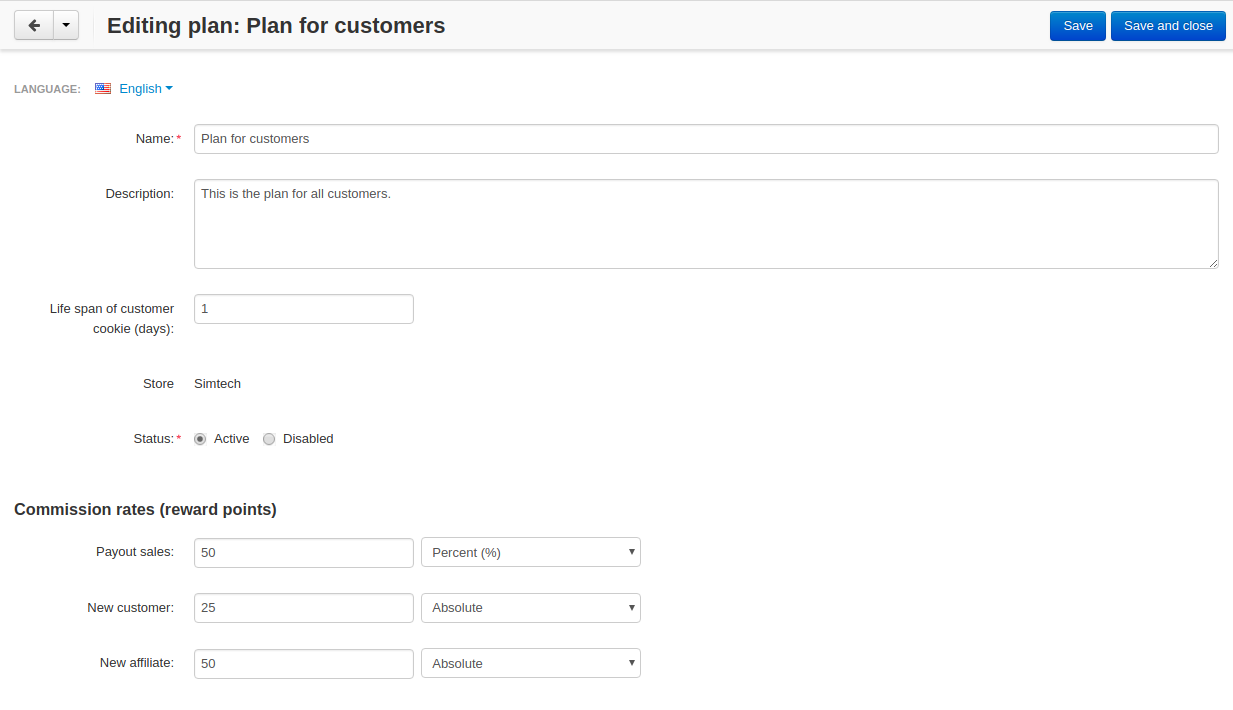
Plans for customers
You can create a plan for customers under Marketing - Affiliates - Plans: Customers.
Fill in the provided fields and configure it the way you need.
The details of the affiliate plan will be available to customers in their account in the Affiliates section.
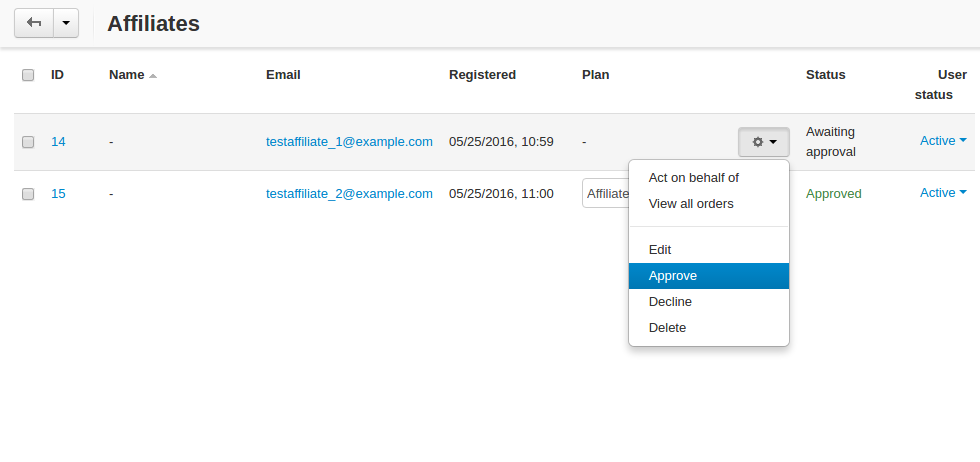
Affiliates manage
A list of all affiliates in the store is available on the “Affiliates” page.
All new requests for getting an affiliate account will also be in this list, so the store administrator can approve or decline them.
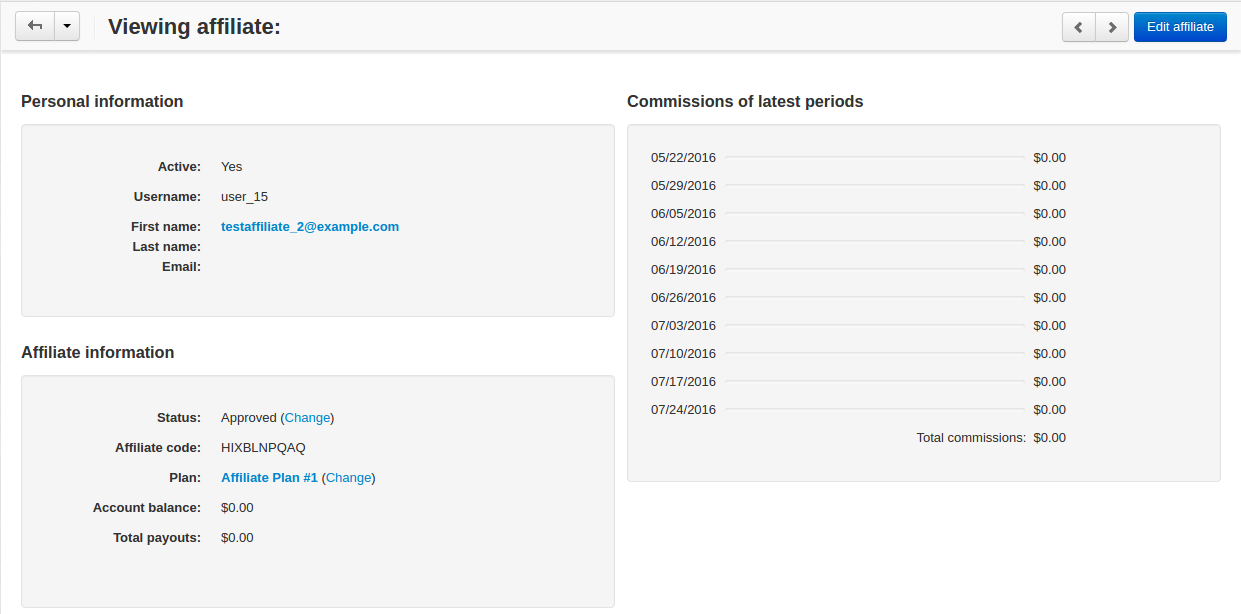
Affiliate detailed information
Full information about an affiliate is shown in the General tab:
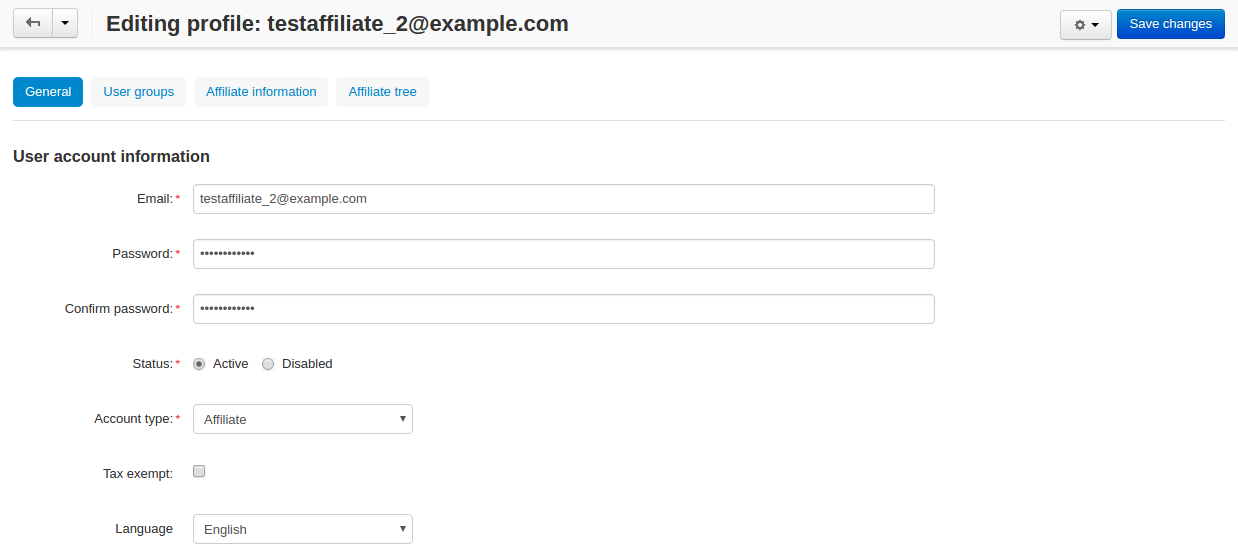
On this page, you can also see Contact information, Billing address and Shipping address.
In the User groups tab, you can view a list of available user groups and assign a group to an affiliate.
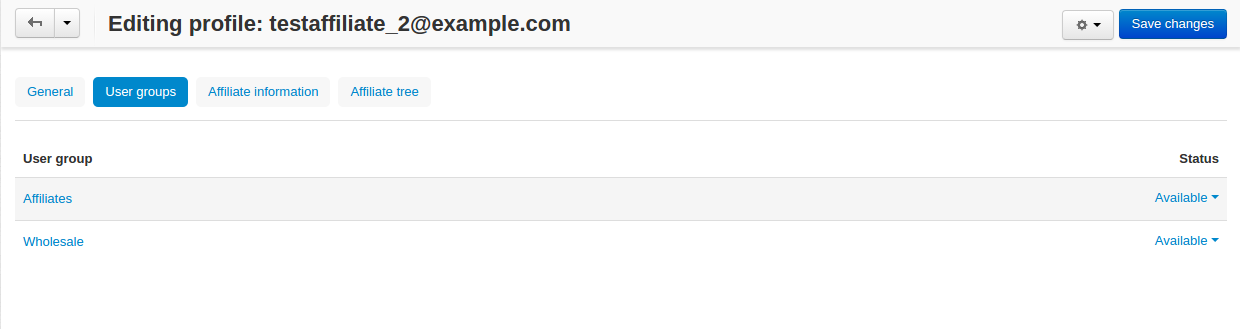
Note
Affiliates cannot be assigned to customers’ usergroups
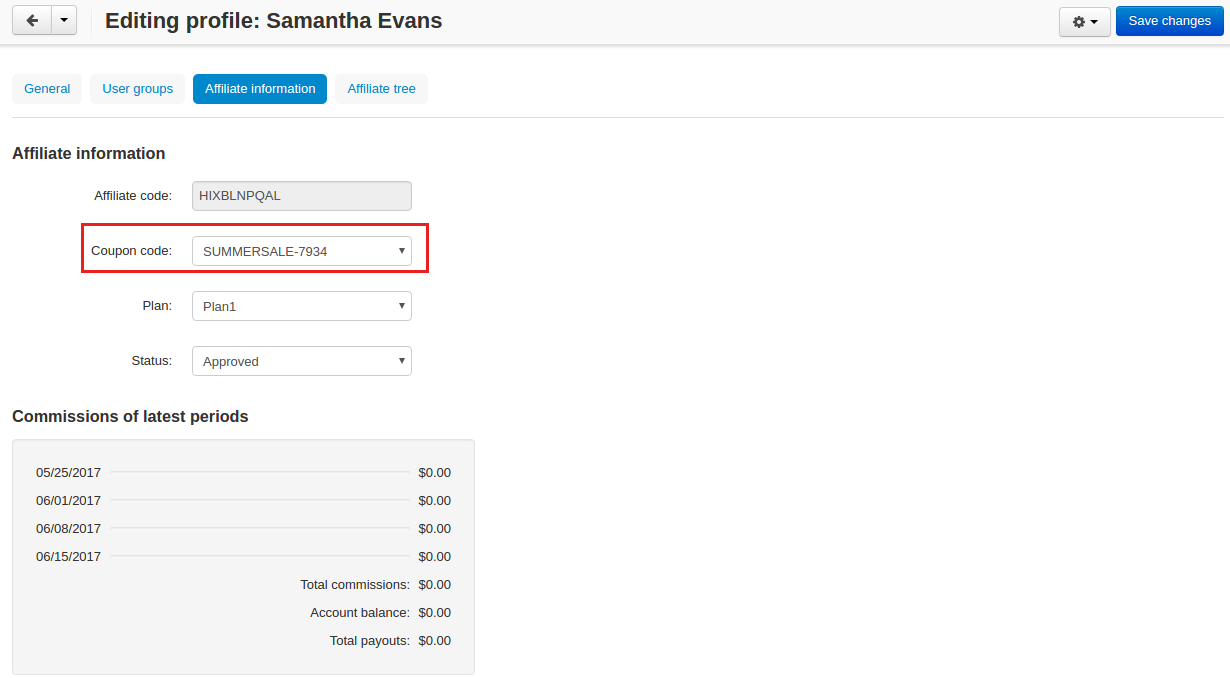
The Affiliate information tab contains affiliate information and commissions of latest periods.
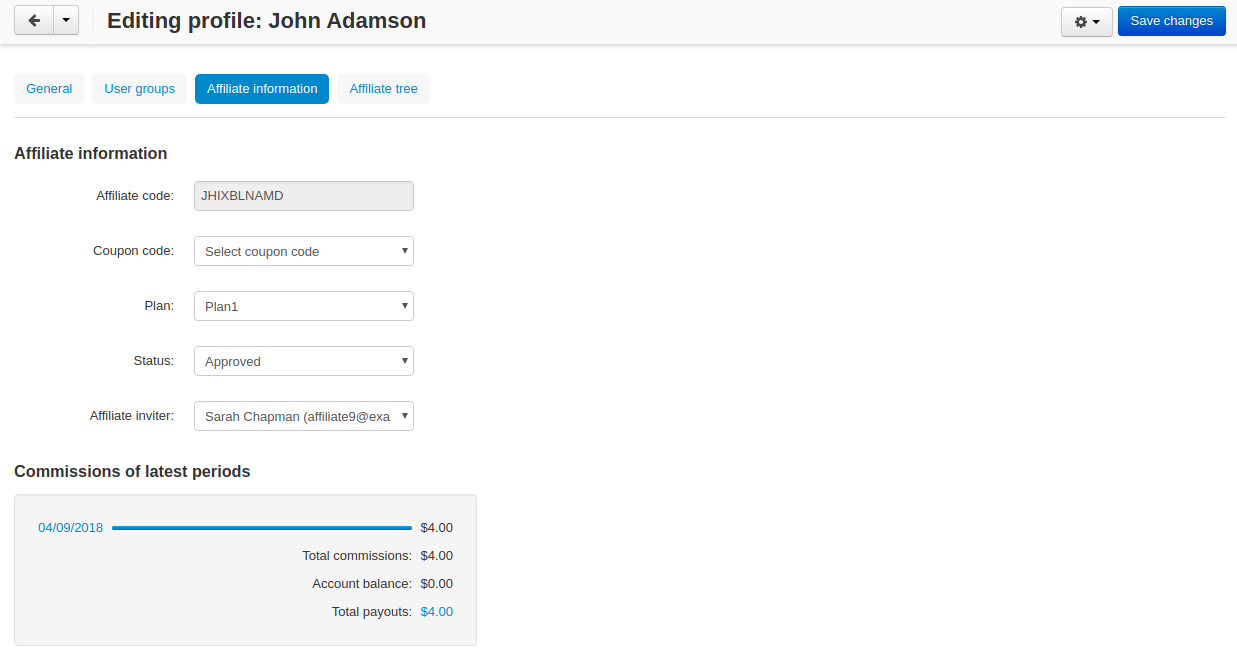
Tip
You can manually set the affiliate who invited the current affiliate using the Affiliate inviter setting.
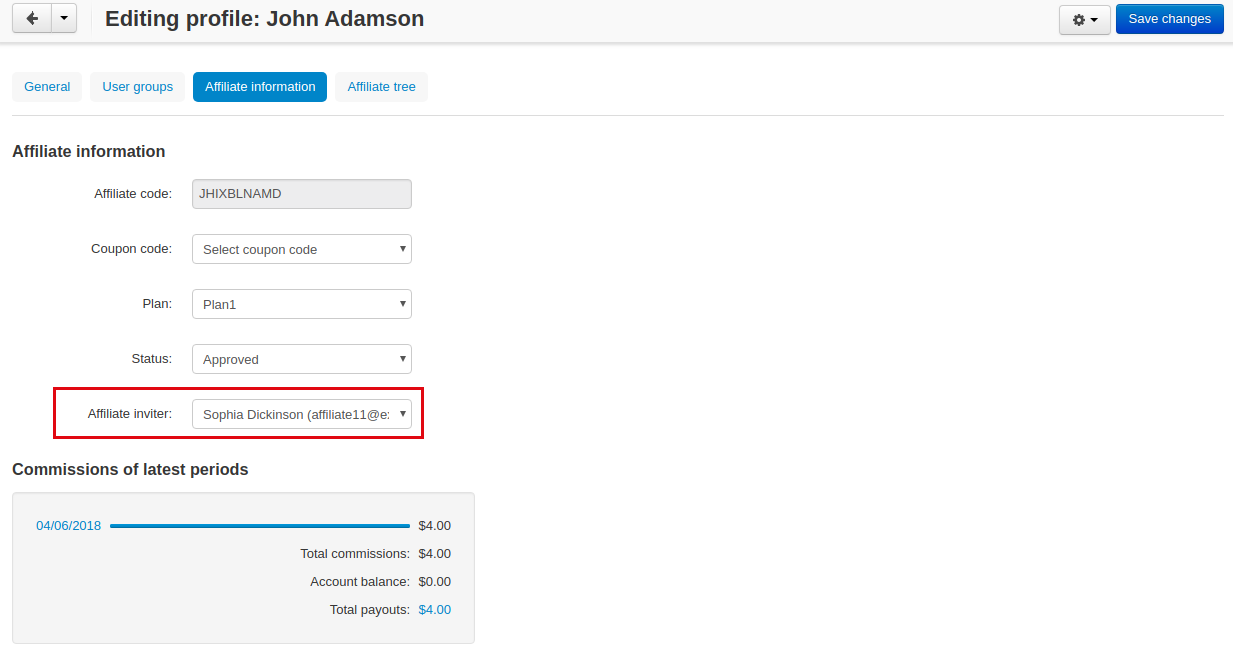
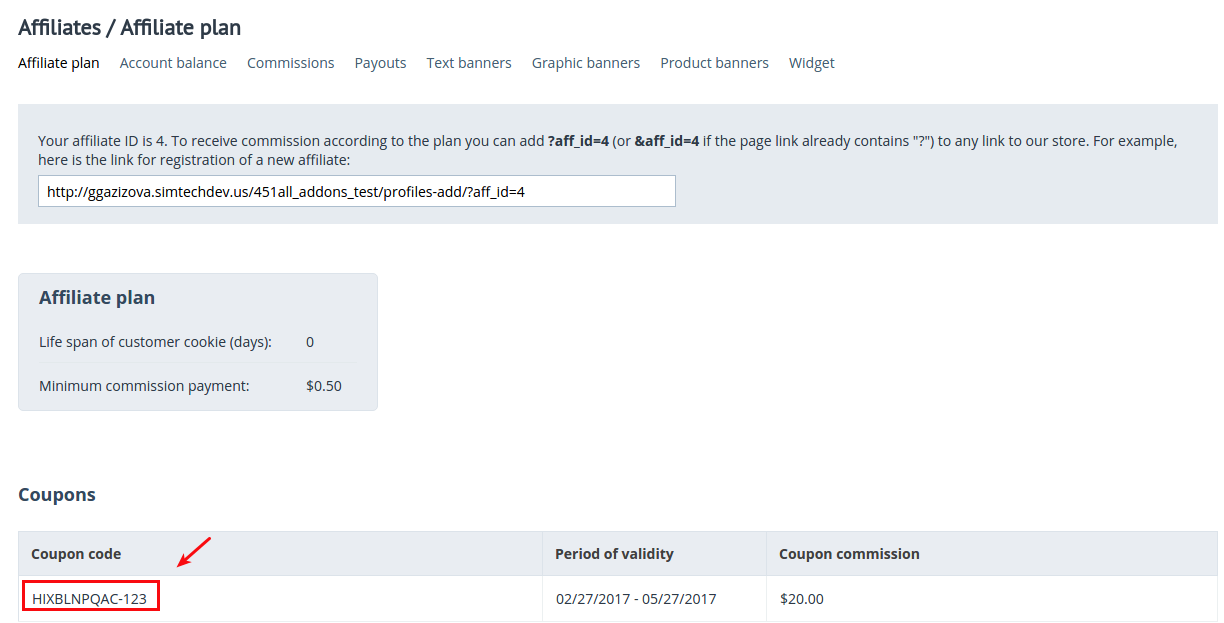
The most interesting here is Affiliate code. It is used to identify an affiliate in the store. For example, it can be used in promo codes. In other words, an affiliate can distribute such promo codes in your store:
[AFFILIATE-CODE][DELIMETER][PROMO CODE]Here is an example (code valid in the demo store)
HIXBLNPQAC-123It will give commission of $1 to the affiliate with ID 4.
And if a user uses such code when placing an order, it will be considered that this customer was attracted to the store by the affiliate, and the affiliate will get the necessary bonuses.
Plan — a plan set for the current affiliate
Status — affiliate’s status: Awaiting approval, Approved, Declined
Commissions of latest periods — information in this table (the number of items, the time period between two periods) is set in the Available settings section.
The Affiliate tree tab shows all tiers of the current affiliate.
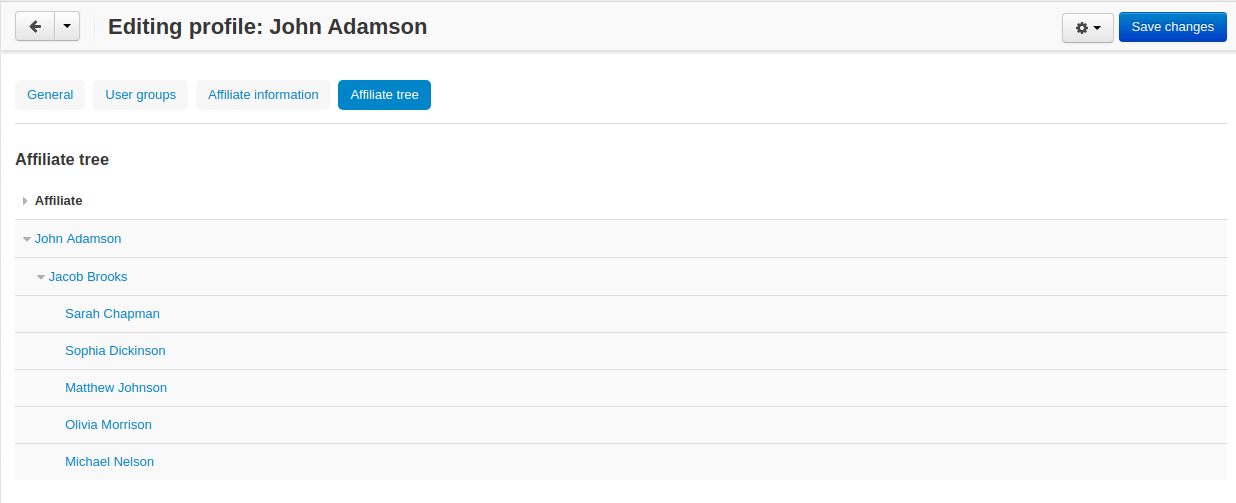
Clicking on the affiliate’s name on this page will show the detailed information of the affiliate.
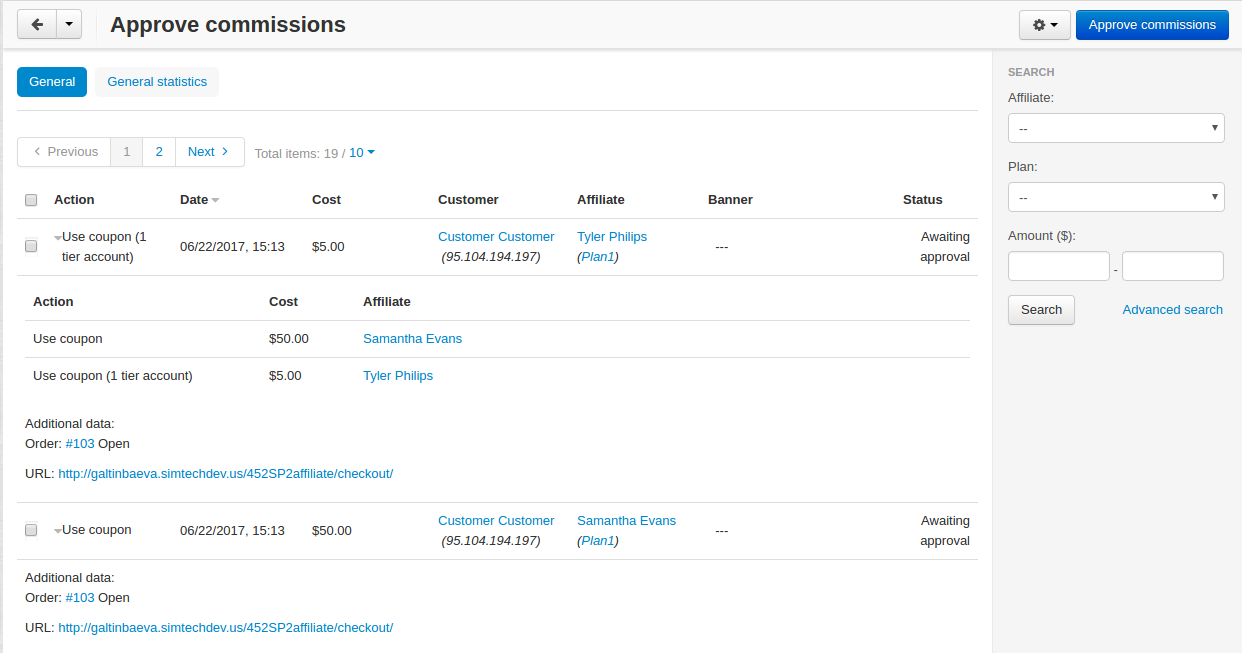
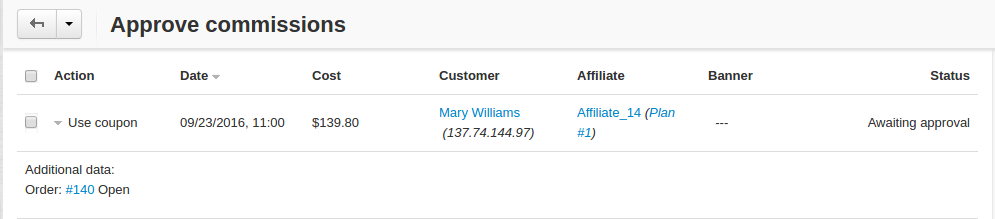
Approve commissions
A list of all commissions that the administrator should pay to the affiliates is available under Marketing > Affiliates > Approve commissions.
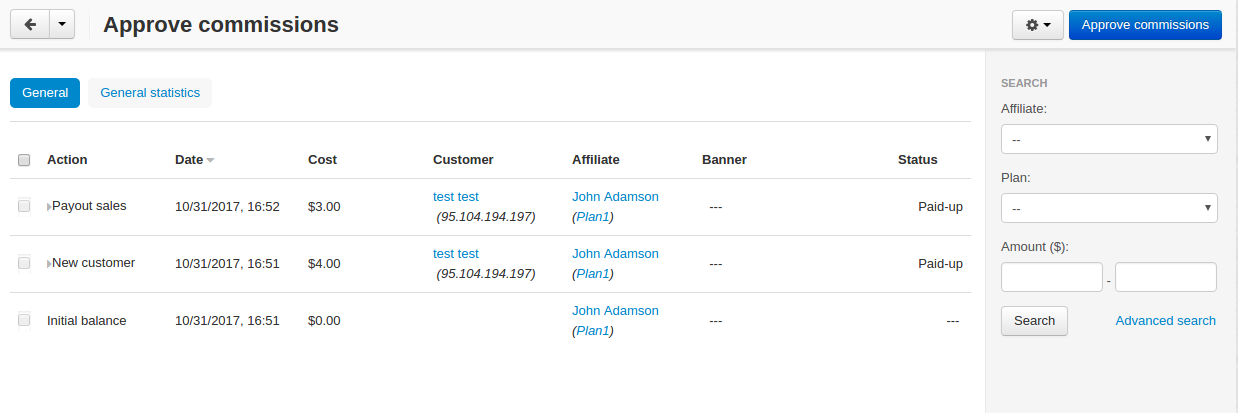
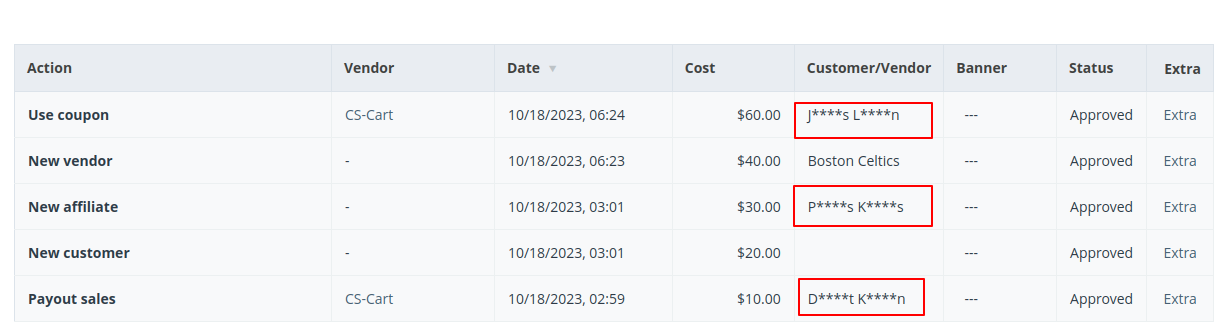
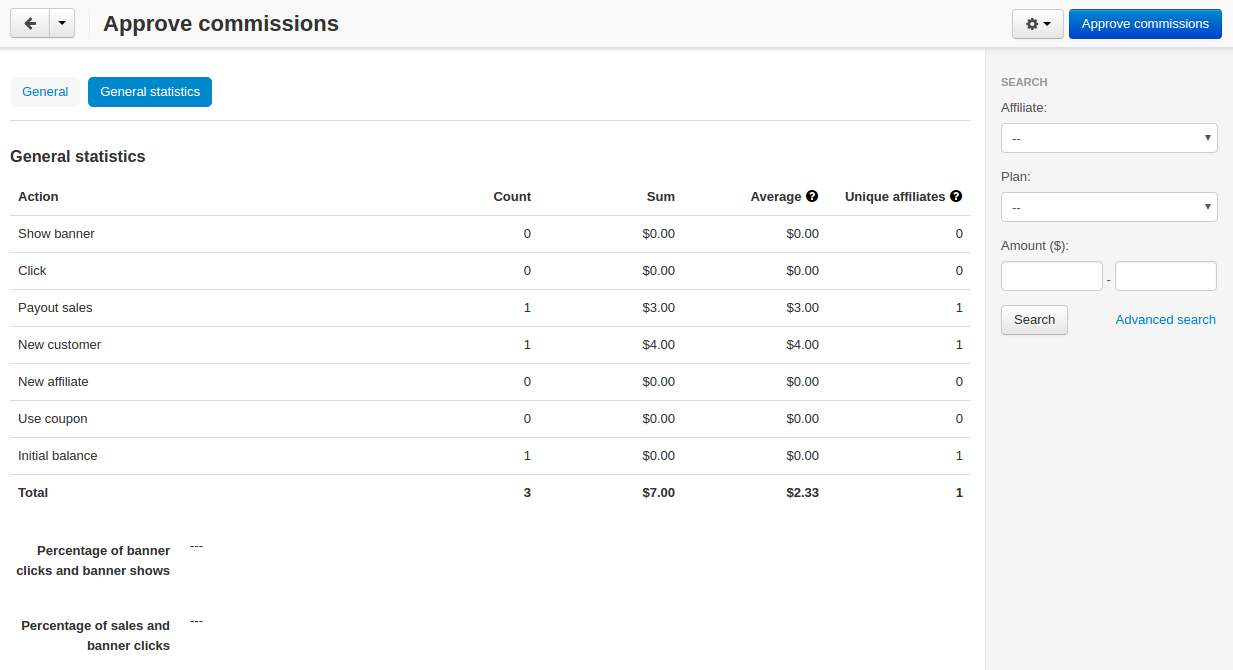
General statistics can be viewed in the corresponding tab.
Note
Keep in mind that the Average and Unique affiliates columns are calculated in a specific way; the values in these columns are not summed up.
The average value is calculated by dividing the sum by the count. Example: if Sum equals $6 and Count equals 2, Average = $3 (Average = Sum / Count). Note: the average total is not the sum of separate average values. The Average total = Sum total / Count total.
Unique affiliates is the number of unique affiliates that performed actions. Example: if New customer equals 3, it means that 3 affiliates attracted new customers. Note: Affiliates total is not the sum of separate affiliate values. The affiliates total is the sum of all unique affiliates. Example: if Show banner equals 2 (Affiliate A and Affiliate B) and New customer equals 3 (Affiliate B, Affiliate C, and Affiliate D), the Affiliates total equals 4 (Affiliate A+Affiliate B+Affiliate C+Affiliate D).
This convenient tool allows the store administrator to monitor all the actions from the part of their affiliates. After they approve the commissions, they will become available to them on the “Pay affiliates” page.
Pay affiliates
On this page, the administrator can view actions of the affiliates in general and the corresponding bonuses that should be paid to the affiliates.
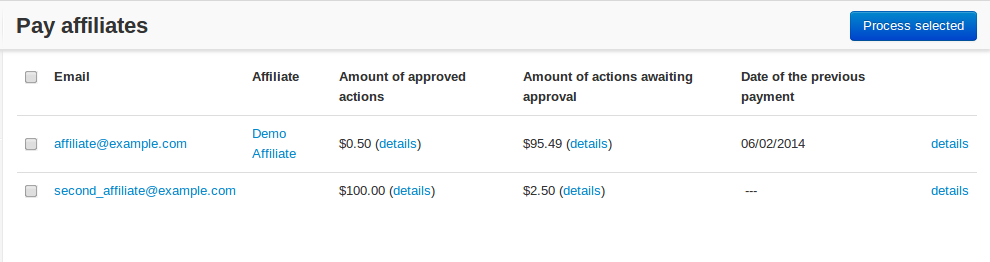
The administrator can select an affiliate (or several ones) to make a payout to.
Warning
The add-on does not make any money transfers from the administrator’s account to the affiliate’s one. All the payouts registered in the store are required as notes only. And the add-on does not allow to perform money transactions between the administrator and the affiliate.
Payouts
On this page, you can see current payouts to affiliates. Payouts can have the Open (awaiting payout) or Successful (successfully paid payout) status.
Accounting history
On this page, you can view the accounting history of affiliates: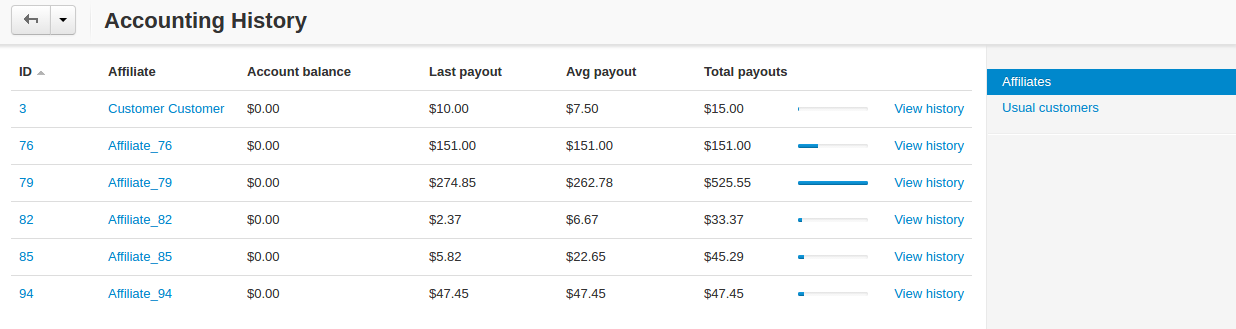
You can also see the amount of granted reward points to customers. Note that reward points are displayed here only after the order status changes to the successful one.

Affiliate tiers trees
The add-on allows users to register under another user using a special affiliate url, users who register under a specific user are assigned to this user’s tree. This page shows affiliates on all levels.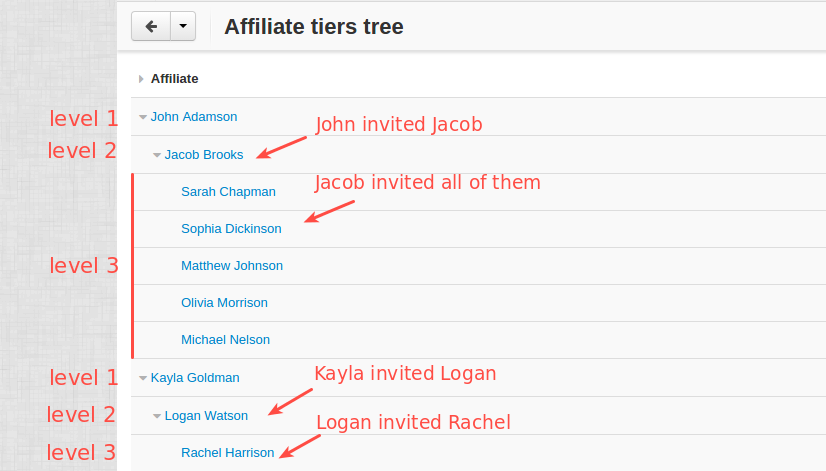
You’ll need to specify percentage of commissions that each level of affiliation should receive on the Plan editing page in the Multi tier affiliates tab.
Managing affiliate promotions
There are two possible ways of how you can set up affiliate promotions.
Unique promo code for each affiliate
This option lets you give a promo code for each affiliate, which they can spread and get a commission. The promo code will be unique for each affiliate and can consist of any characters, like G6J7Y, or SALE127-rw, or anything you like.
To use this functionality, leave the Use multiple promotions box empty in the add-on settings.
How it works
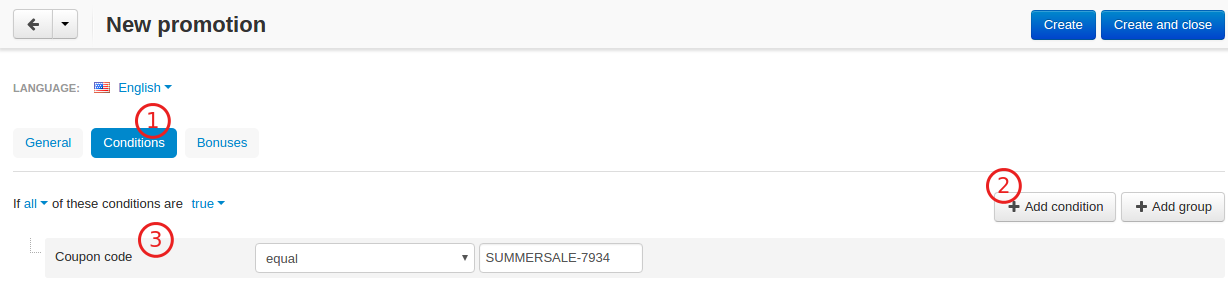
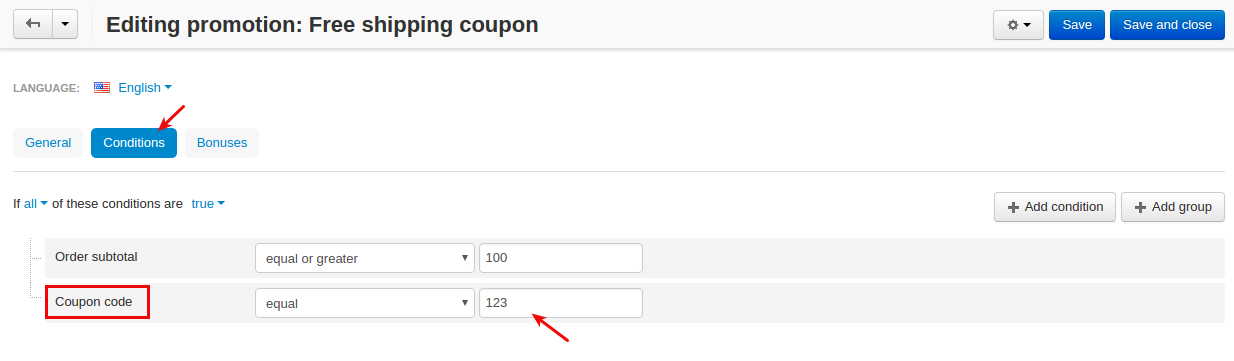
- Create a promotion with a coupon code under Marketing > Promotions.
- Set up a commission for the use of this coupon code in the corresponding plan by going to Marketing > Affiliates > Plans: Pro affiliates.
- Open the desired affiliate and assign the created coupon code to them (Marketing > Affiliates > Affiliates).
- Act on the behalf of the affiliate and make sure the coupon code is available under My account > Affiliates.
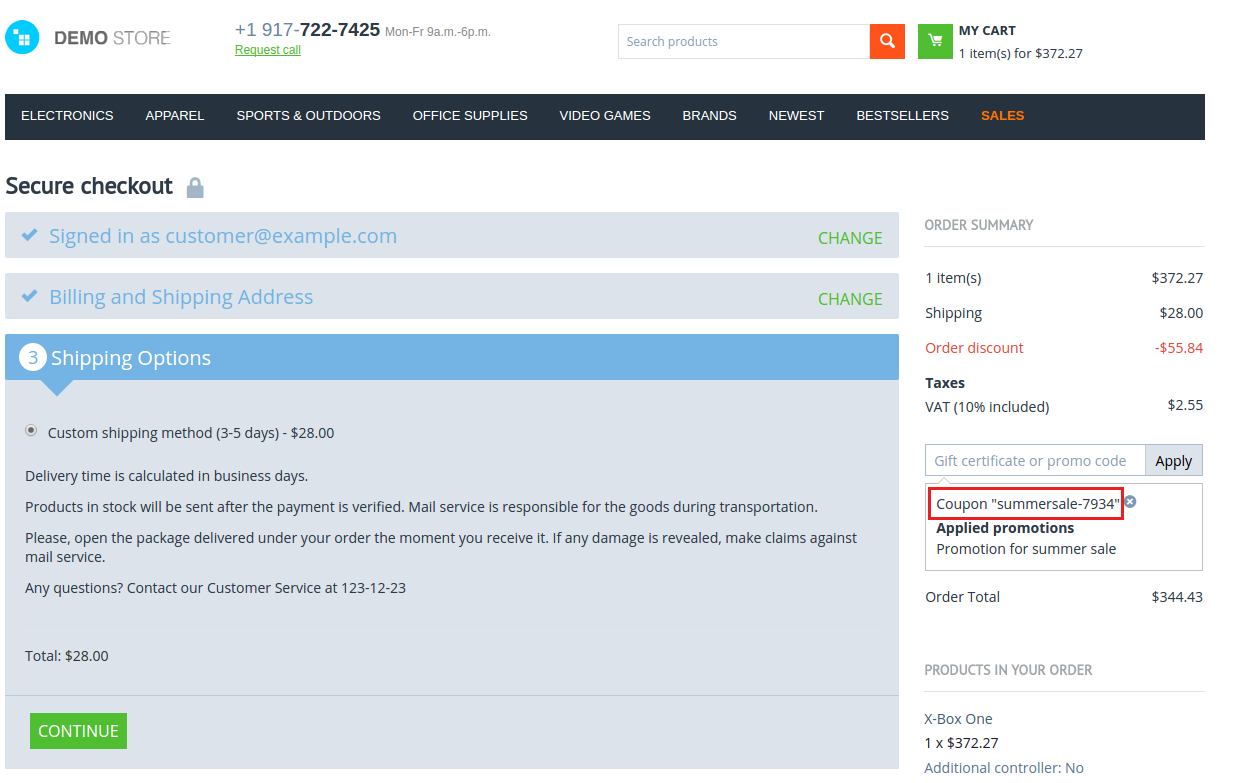
- The customer applies the coupon code given by the affiliate at checkout and gets the appropriate bonus.
- Check to make sure the affiliate received the commission set in the affiliate plan. To do this, go to Marketing > Affiliates > Approve commissions.
Multiple promotions for each affiliate plan
This option lets you create multiple promotions for each affiliate plan. In this case a promo code can be used by different affiliates. The promo code will consist of a prefix (or an affiliate id, if you choose so) and the promo code itself. For instance, 145-JK5F.
To use this functionality, select the Use multiple promotions box in the add-on settings.
How it works
- Create a promotion with a coupon code or use an existing one created in the Marketing > Promotions section.
- On the editing page of the Affiliate plan (Marketing - Affiliates - Plans) in the Coupons tab, select the necessary promotion and specify a commission for it.
Now the affiliate should see a coupon code in their account on the storefront (My account > Affiliates). This is the code that should be provided to the customer.
Hint
You may want to make the coupon code shorter by using the Affiliate ID is used as coupon prefix setting of the add-on. In this case the coupon code will look like 14-123, where 14 is the affiliate ID and 123 is the coupon code. You can also set up a delimiter between the prefix and coupon code by using the corresponding setting.
For more information, please see the Available settings section.
The customer applies the coupon code on the cart/checkout page and enjoys their bonus.

- Check to make sure the affiliate received the commission set in the affiliate plan. To do this, go to Marketing > Affiliates > Approve commissions.
Adding affiliate blocks to the storefront
With the Affiliate add-on, you also have the ability to add the Affiliate block to any page you want.
The affiliate template
The Affiliate block with the affiliate template shows quick links to the pages from the affiliate account.
- Go to Design - Layouts.
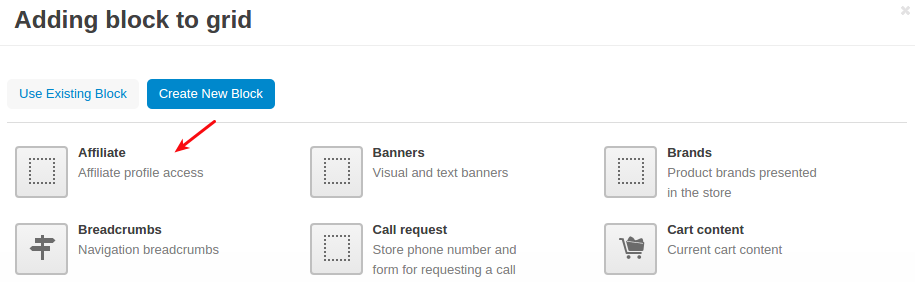
- Decide where you want to add a block.
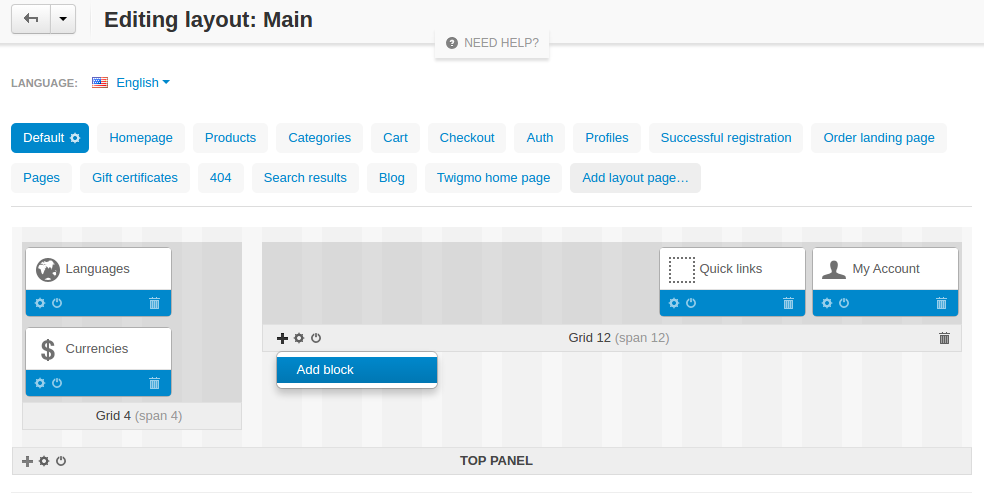
- Choose Affiliate block.
- Give it a name and select the Affiliate template.
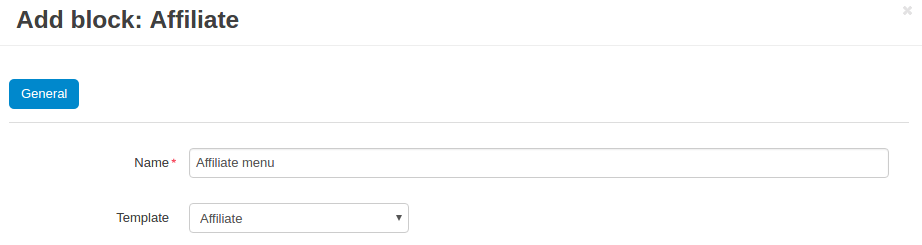
- Click Create.
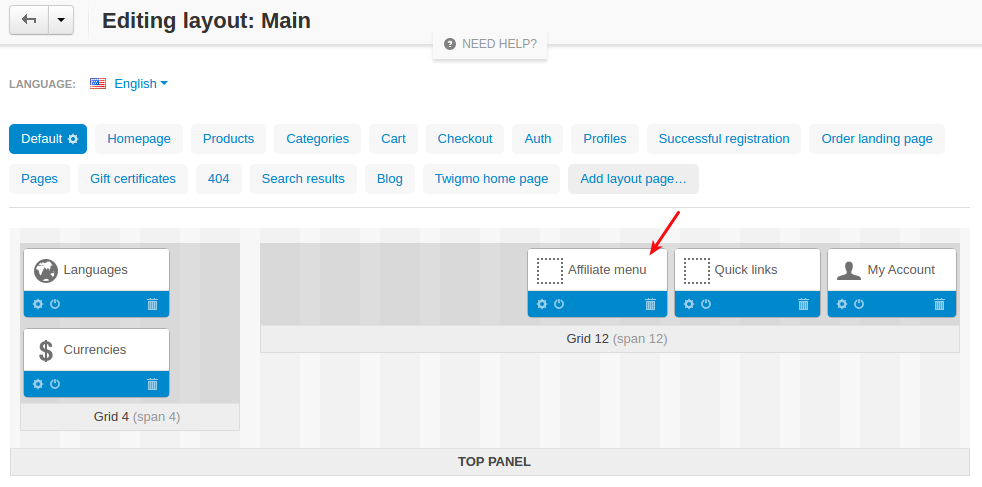
Here’s the created block in the layout.
The affiliate code template
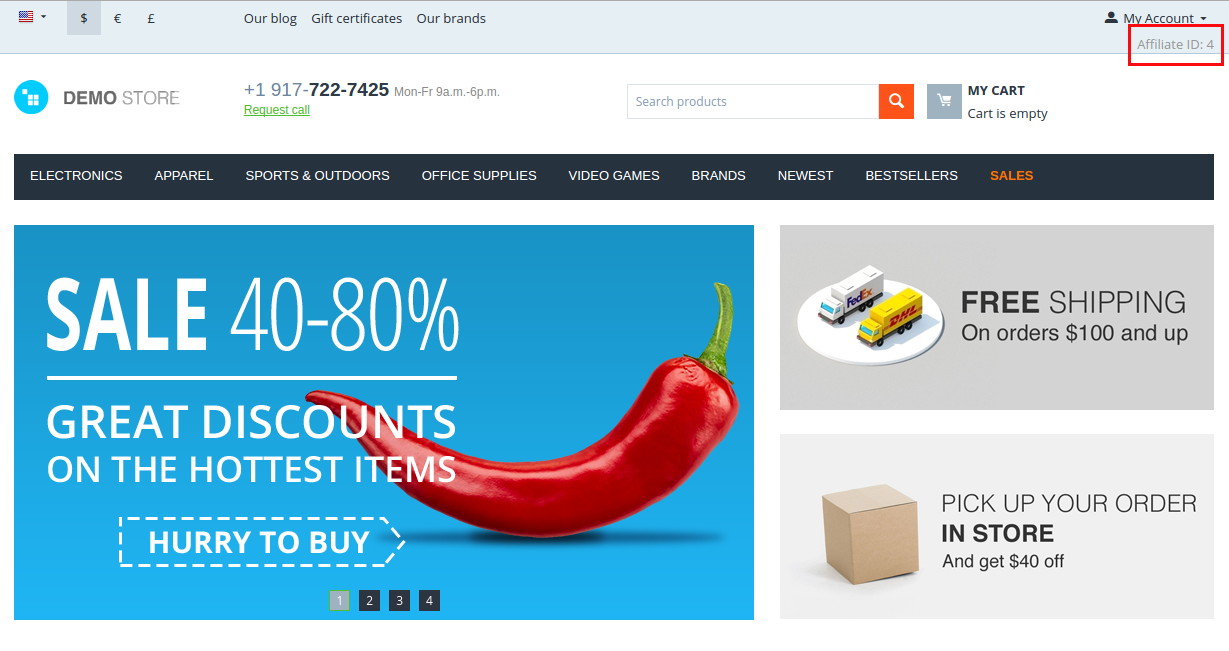
The Affiliate block with the affiliate code template shows the affiliate ID.
- Go to Design - Layouts.
- Decide where you want to add a block.
- Choose Affiliate block.
- Give it a name and select the Affiliate code template.
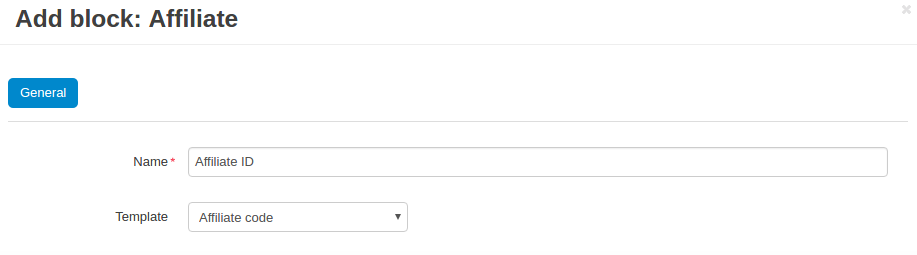
- Click Create.
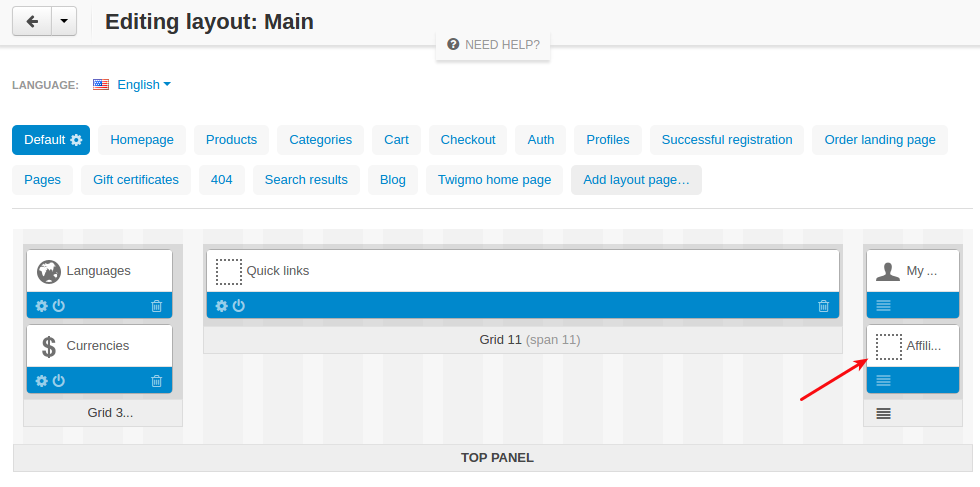
Here’s the created block in the layout.
What the affiliate will see
General information
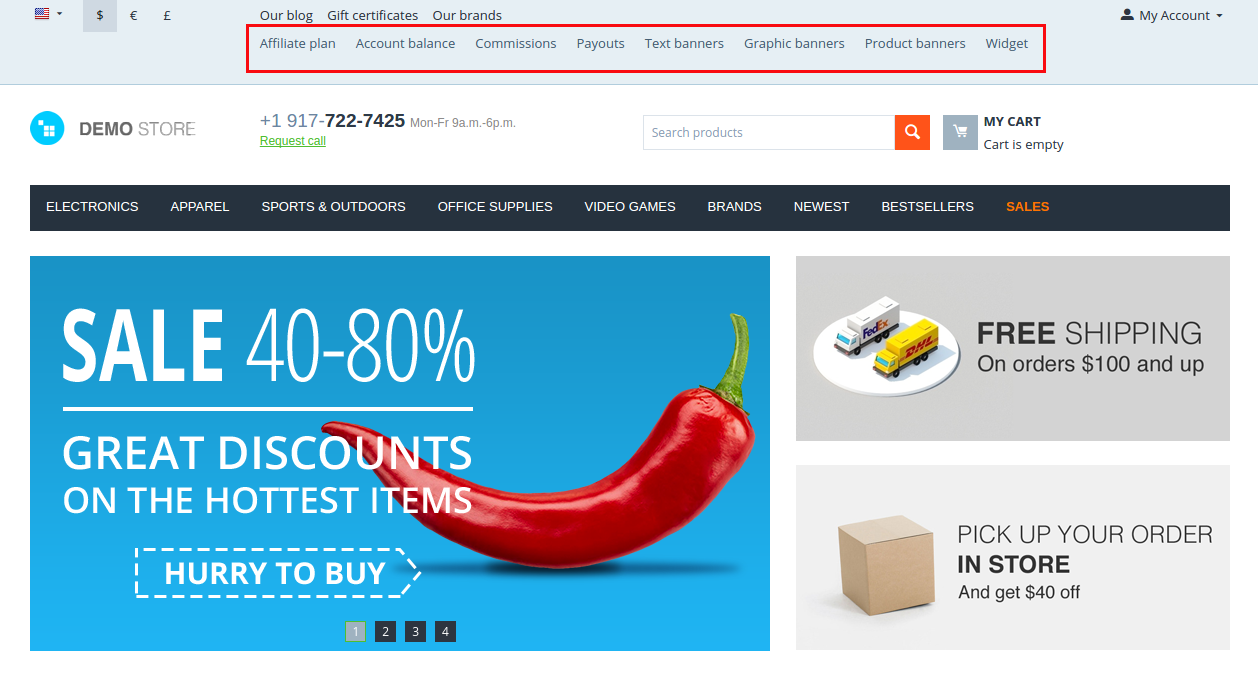
The main functionality of affiliates is available in the My Account → Affiliate menu.
Only approved affiliates can access their accounts. So if the affiliate is awaiting approval, they cannot access their account.
Here, the affiliates can view all available banners created for the administrator. They can get the code of each banner to place it on their websites.
They can also examine the details of their affiliate plans, see what actions they did and what bonuses they will get for them.
These features make the relations between the affiliates and the store administrator as transparent as possible.
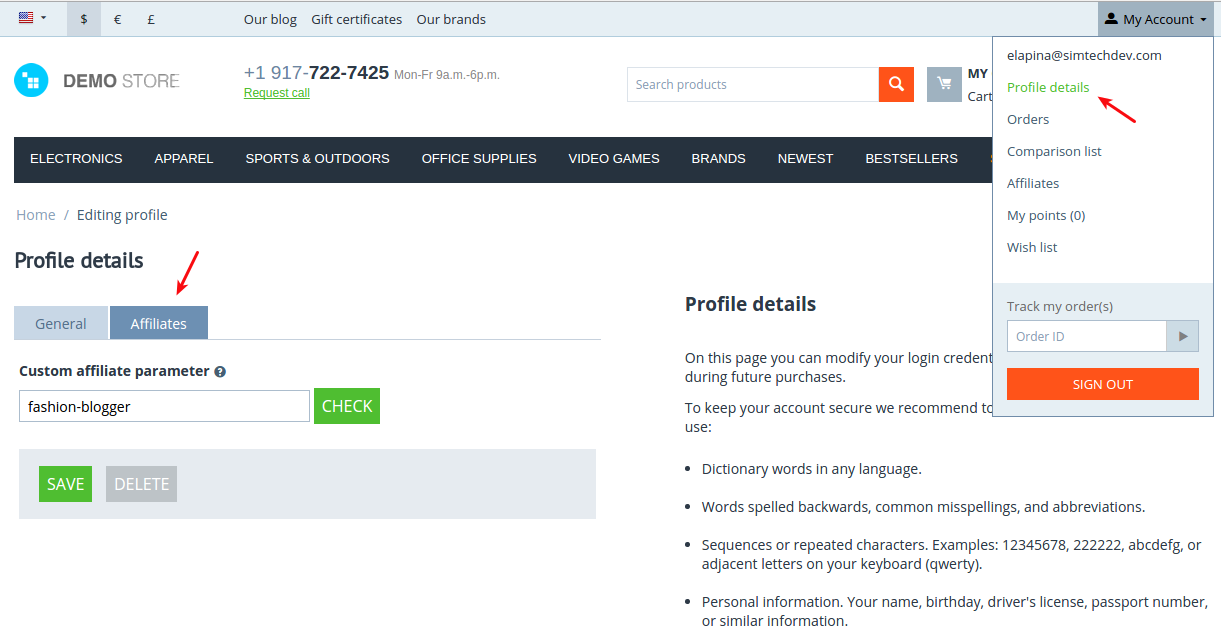
Custom affiliate parameter
Another useful feature is that affiliates can customize the affiliate parameter to make the URLs look more user-friendly. They can do that in the profile details in the Affiliates tab. Enter a new parameter to the Custom affiliate parameter field and it will replace the aff_id parameter. For example, www.example.com/affiliates/fashion-blogger, where affiliates is defined by the admin in the add-on settings and fashion-blogger is entered by an affiliate in this field.
Video tutorial
Check out a detailed video tutorial on how to create user-friends URLs.
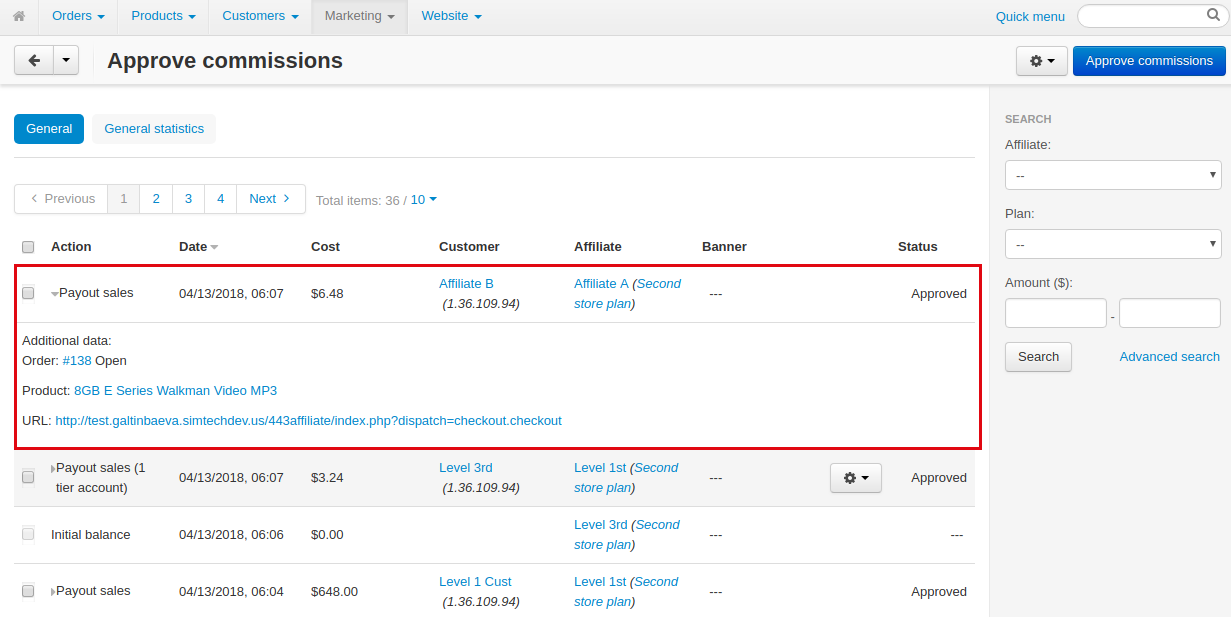
Giving commissions for affiliate orders
If an affiliate places an order by the link from another affiliate, the affiliate inviter will get a commission. But the invited affiliate does not get a commission for their orders.
Example: Affiliate A shares a link to a product to Affiliate B. Affiliate B buys a product by this link.
When the order is placed, Affiliate A gets a payout sales commission for the order placed by Affiliate B.
The same works for commissions for inviting new affiliates.
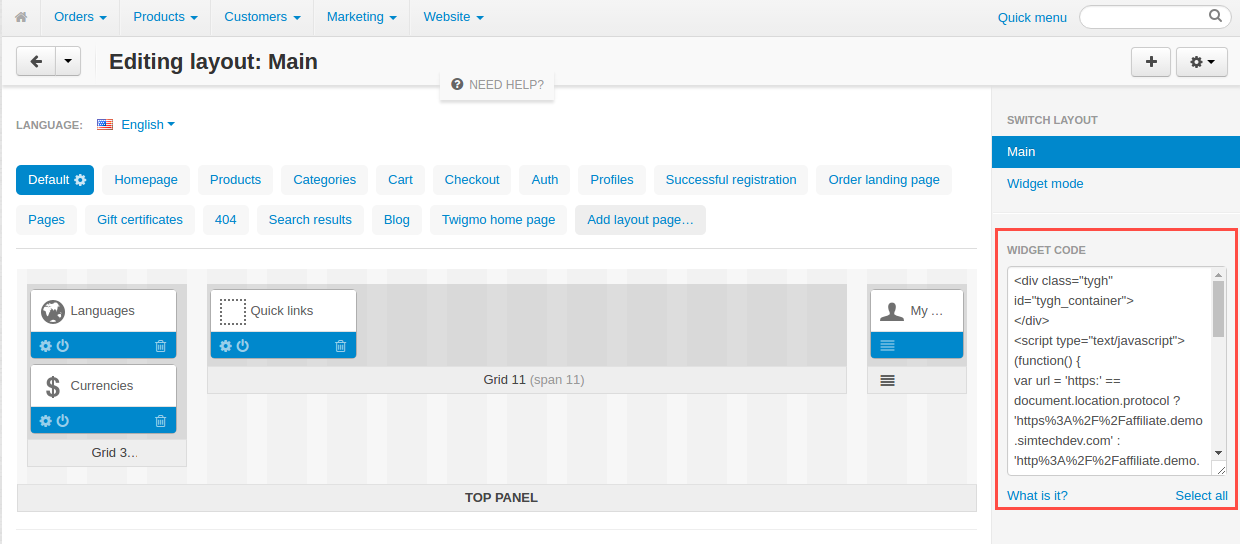
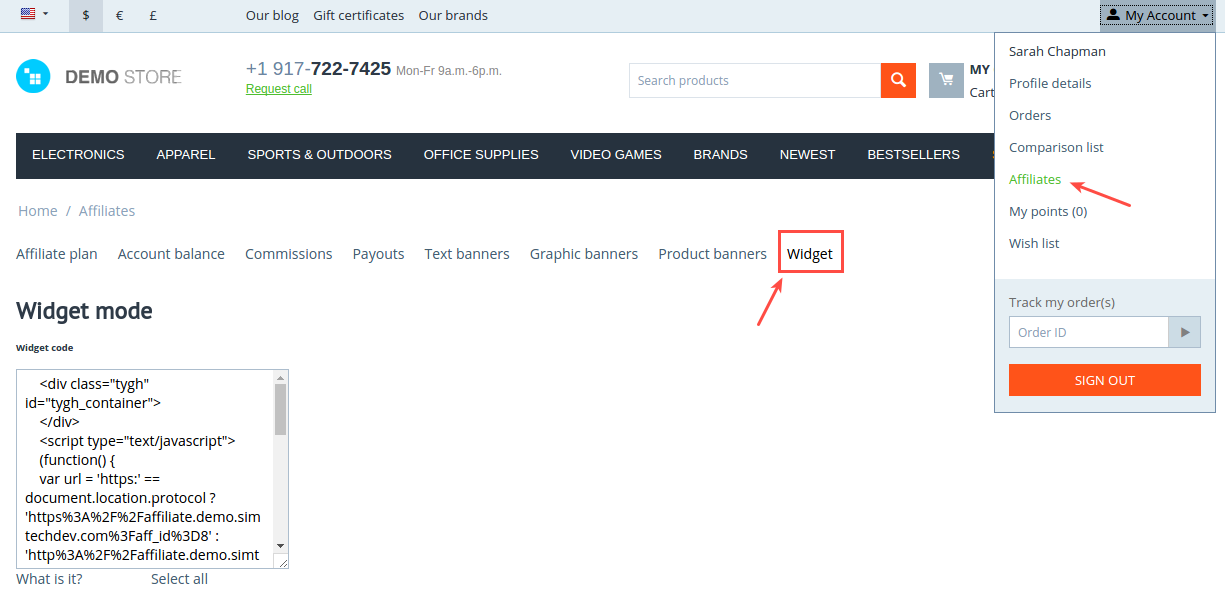
How to provide affiliates with widget code and how affiliates can use it
The widget code can be found under Design > Layouts.
To make the widget code available to affiliates:
- Click the gear button next to the Widget mode and select Properties.
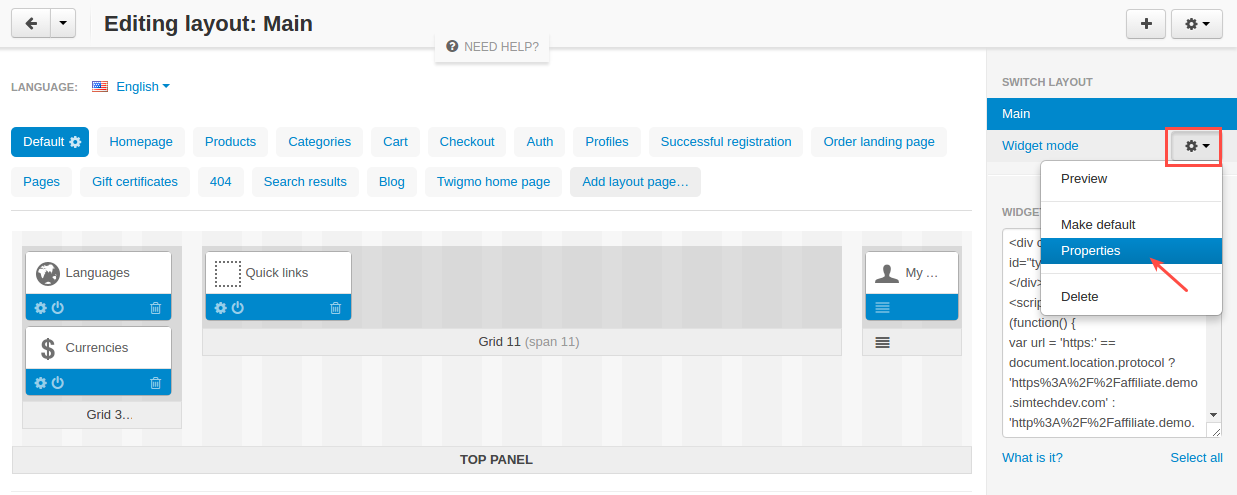
- Select the Show to affiliate checkbox.

- Click Save.
The affiliates will see the widget code in their profile in the Widget tab. They can use this code to embed your store into another site. For example, a blogger who promotes your products can create a page on their blog and when followers buy something from the widget, the blogger will get a commission from sales.
Tip
This guide should help you with adding your site to a WordPress Page.
What the customer will see
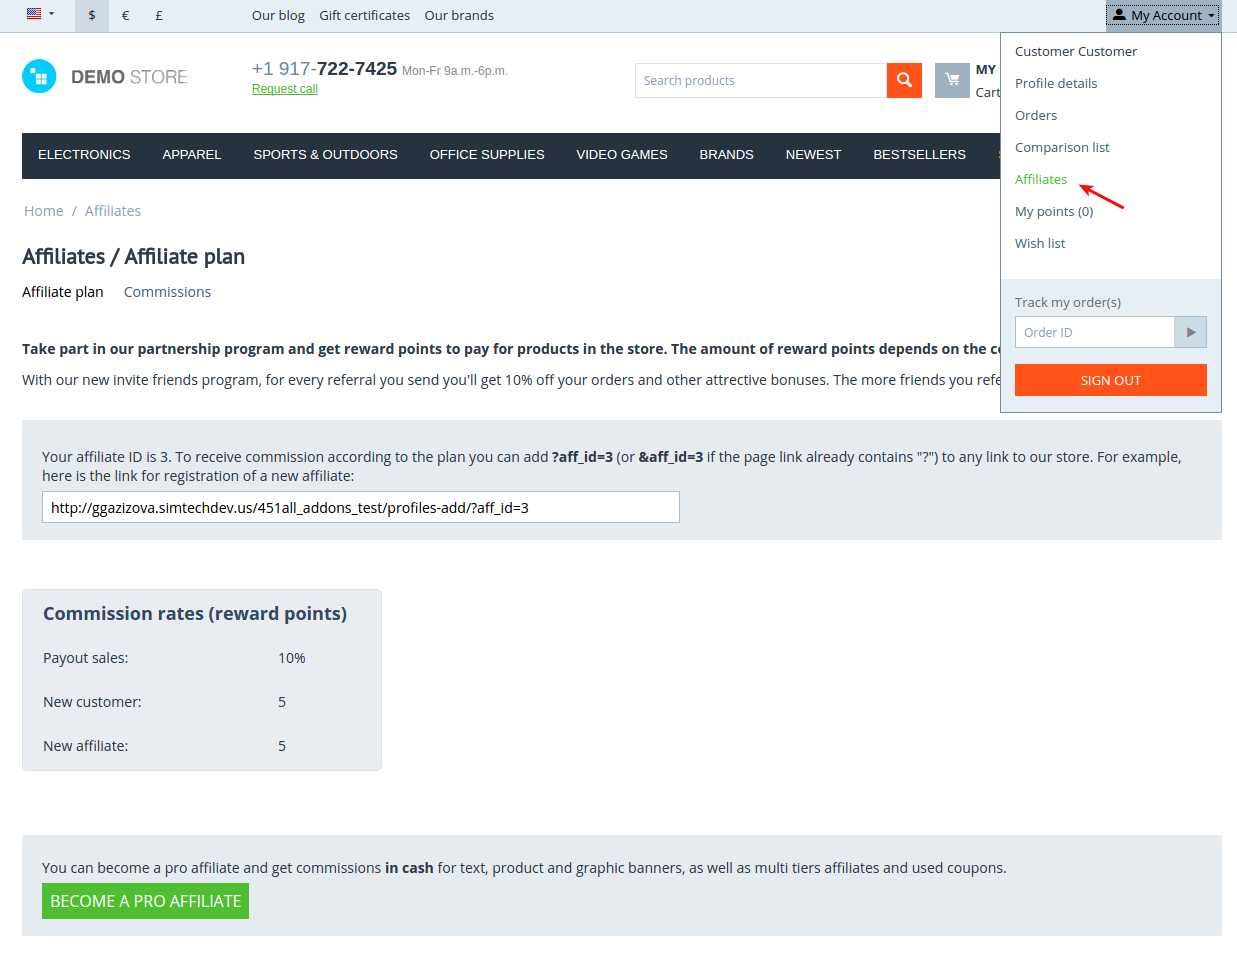
Usual customers can also become affiliates in your store and get reward points to pay for products. The amount of reward points depends on the commission rates of the plan.
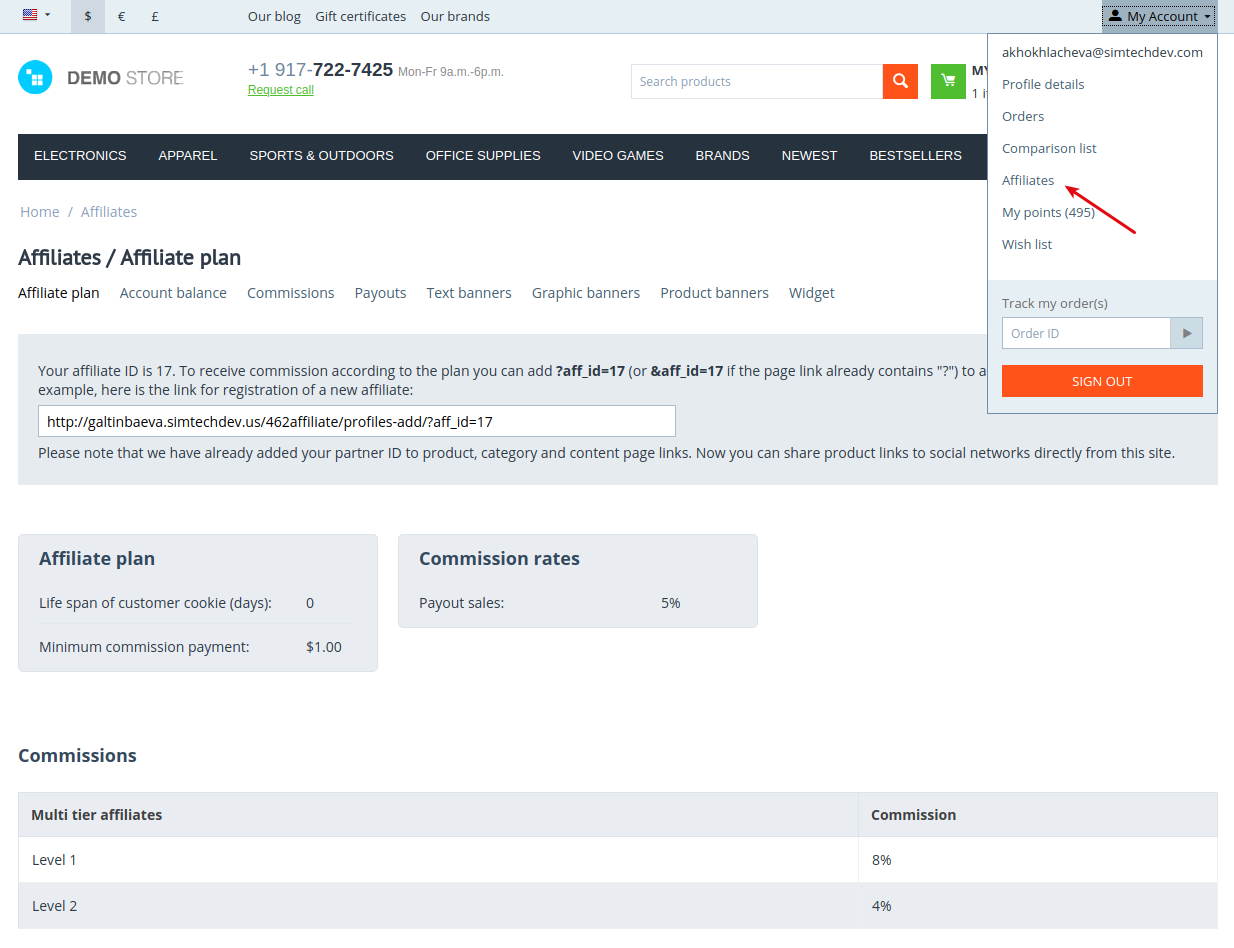
Once the customer registers in the store, the Affiliates option will get available under My Account → Affiliates.
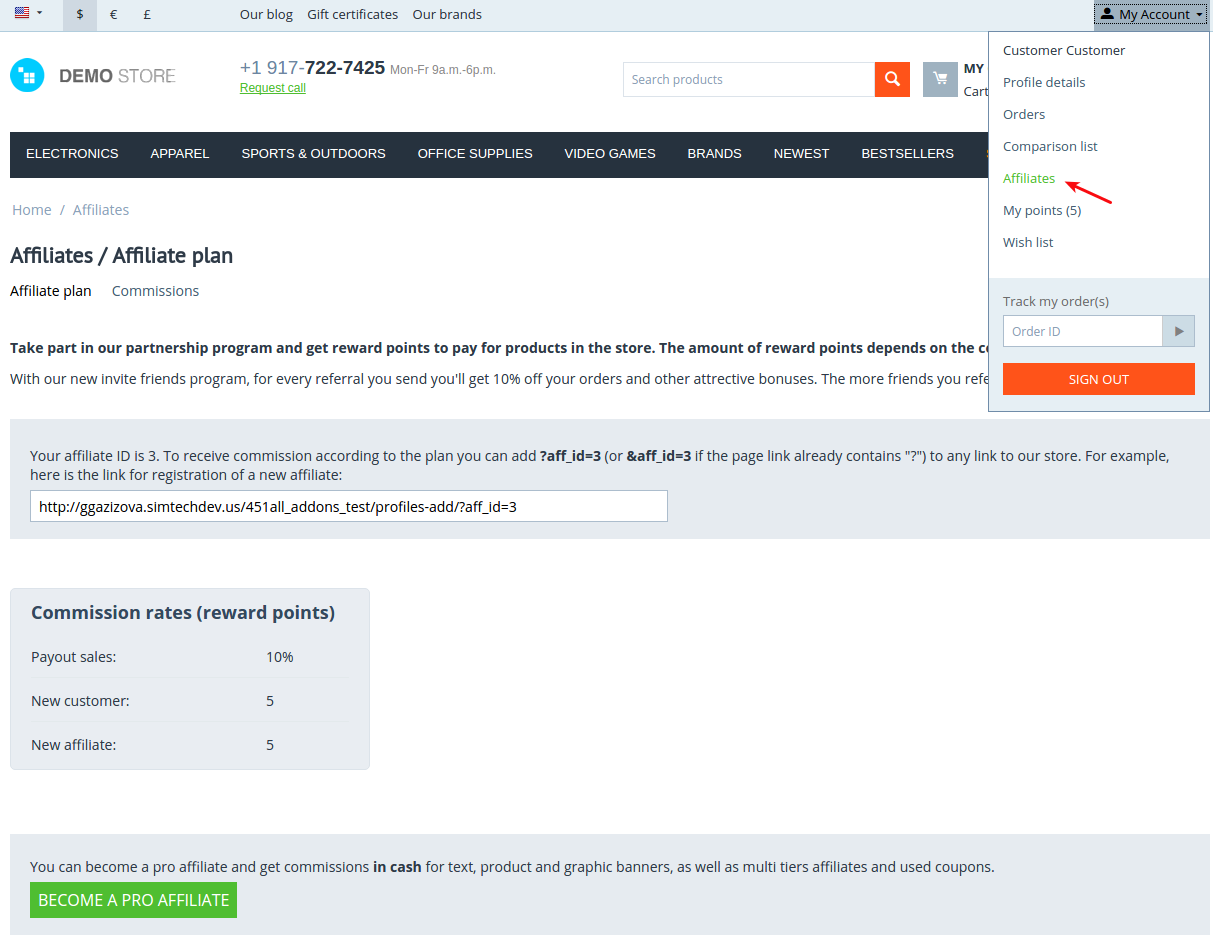
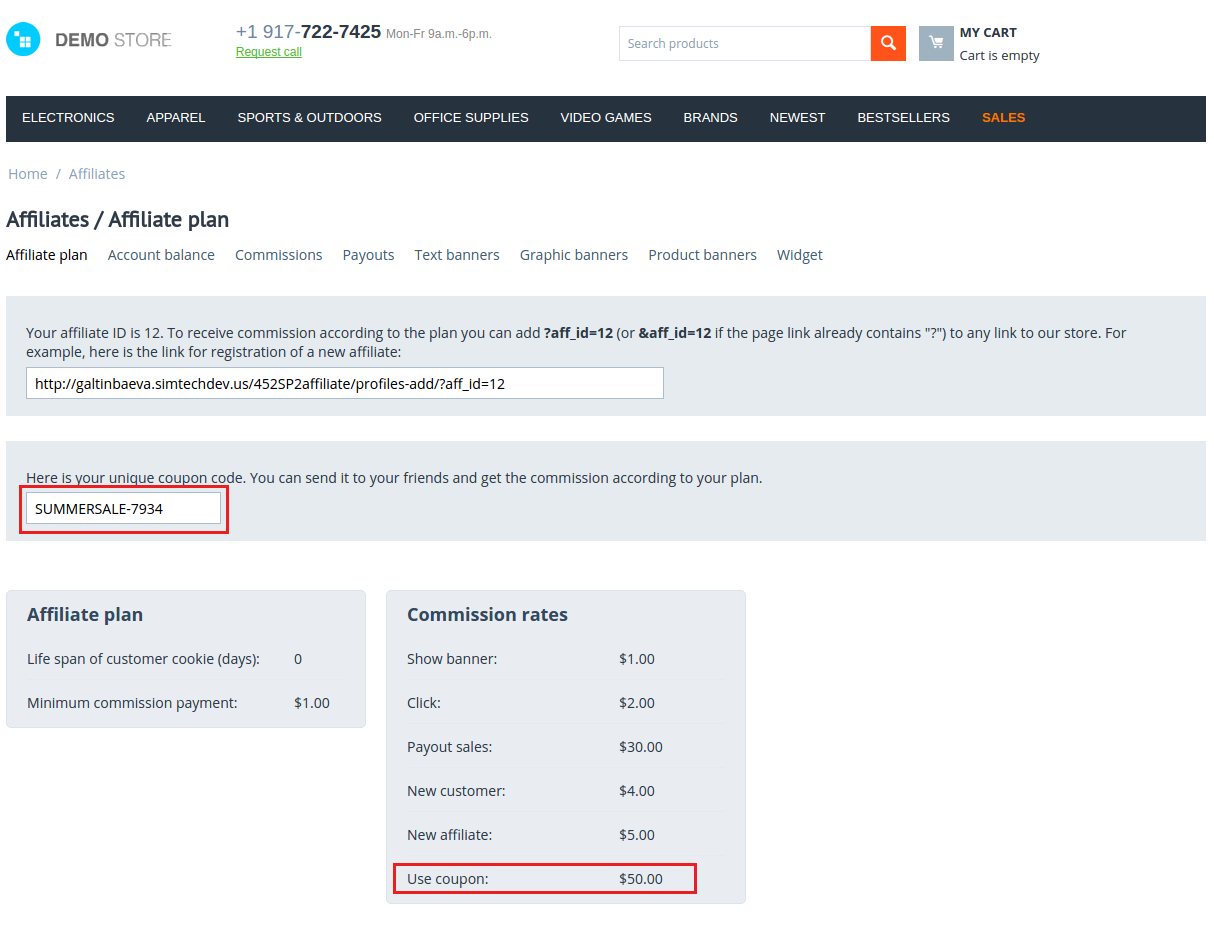
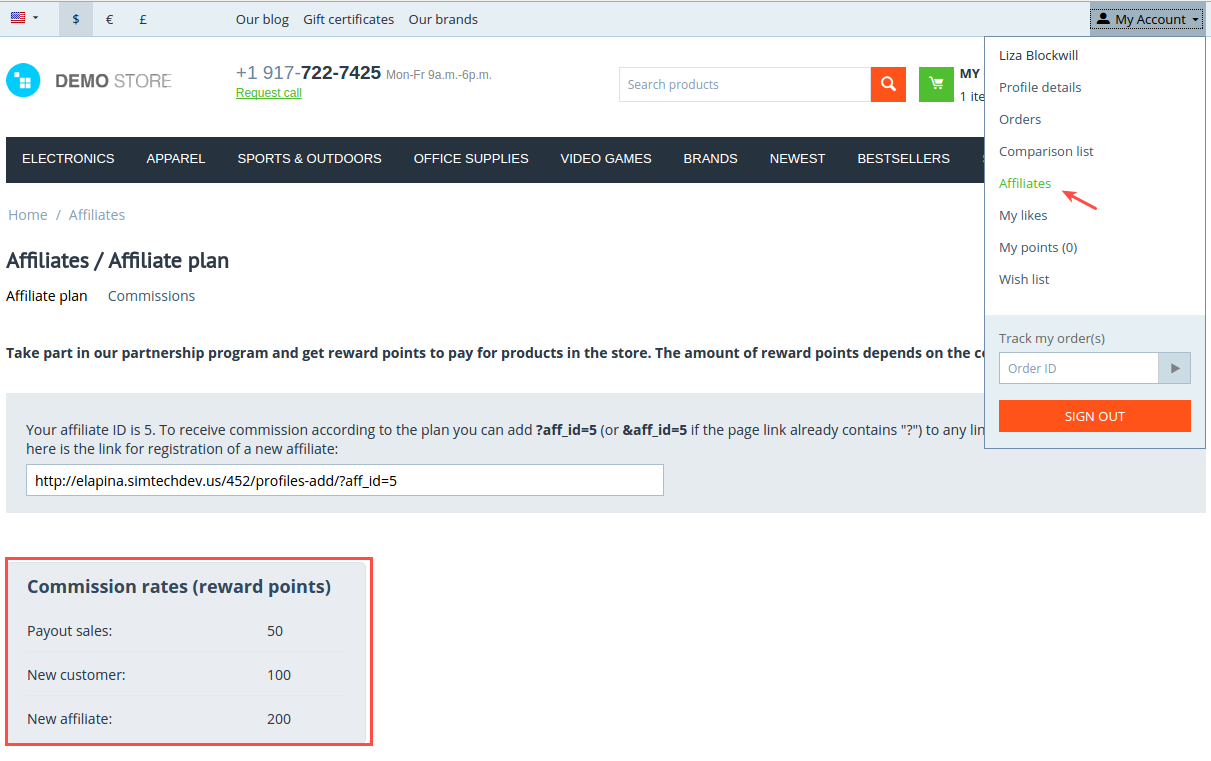
On this page, customers can see their affiliate ID, which they need to add to the store URL and share it to get reward points.
They can also see the commission rates of their affiliate plan—how many reward points they can get for inviting new customers or new affiliates to the store.
Additionally, a Become a pro affiliate button is available in case the customer chooses to become a pro affiliate to get full access to the Affiliates functionality and get commissions for certain actions.
Let’s see how it works.
Say, you have customer Liza who actively takes part in your Referral program. She knows how many reward points she can get for inviting new customers and affiliates as well as for their purchases.
She shares a referral link to the product (link containing the affiliate id) from the store with her friend Tom, and Tom uses the referral link to access the store and proceeds to make a purchase.
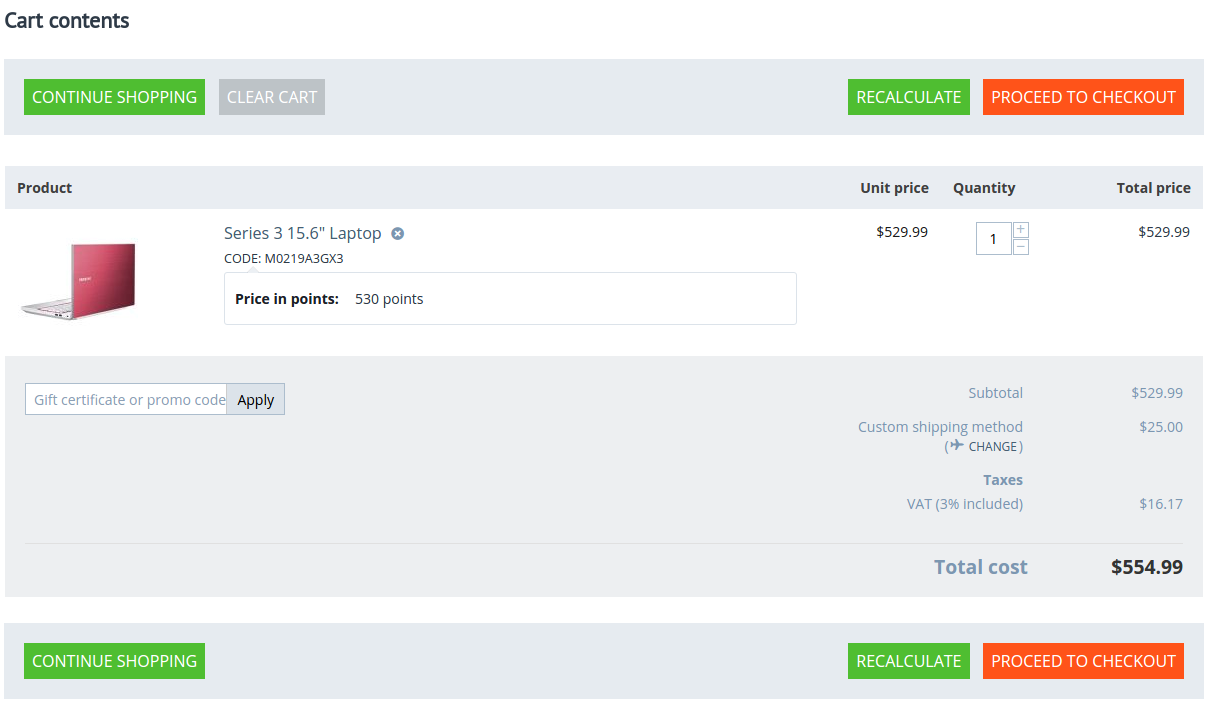
Once the order is placed, Liza can see the commission in her profile for the order Tom made. As you can see, it has the Open status at the moment.
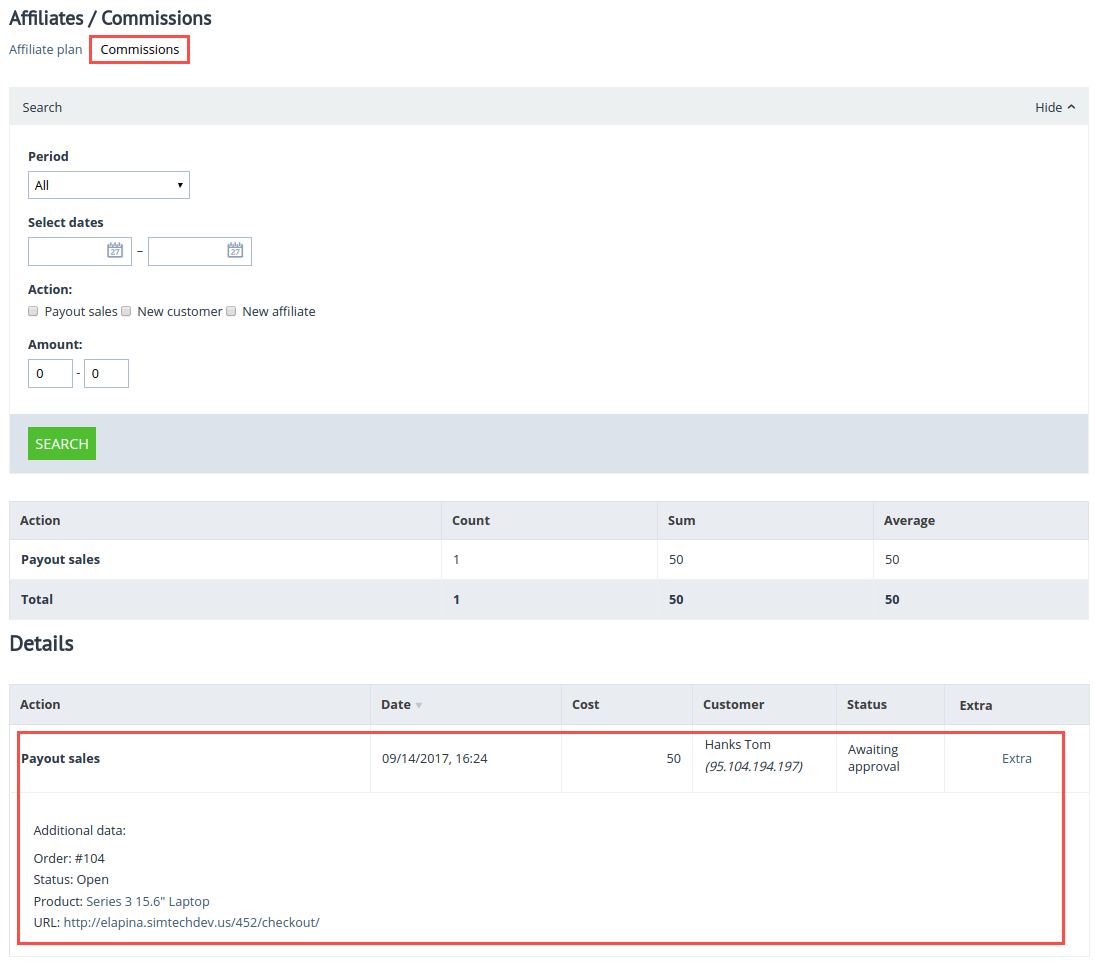
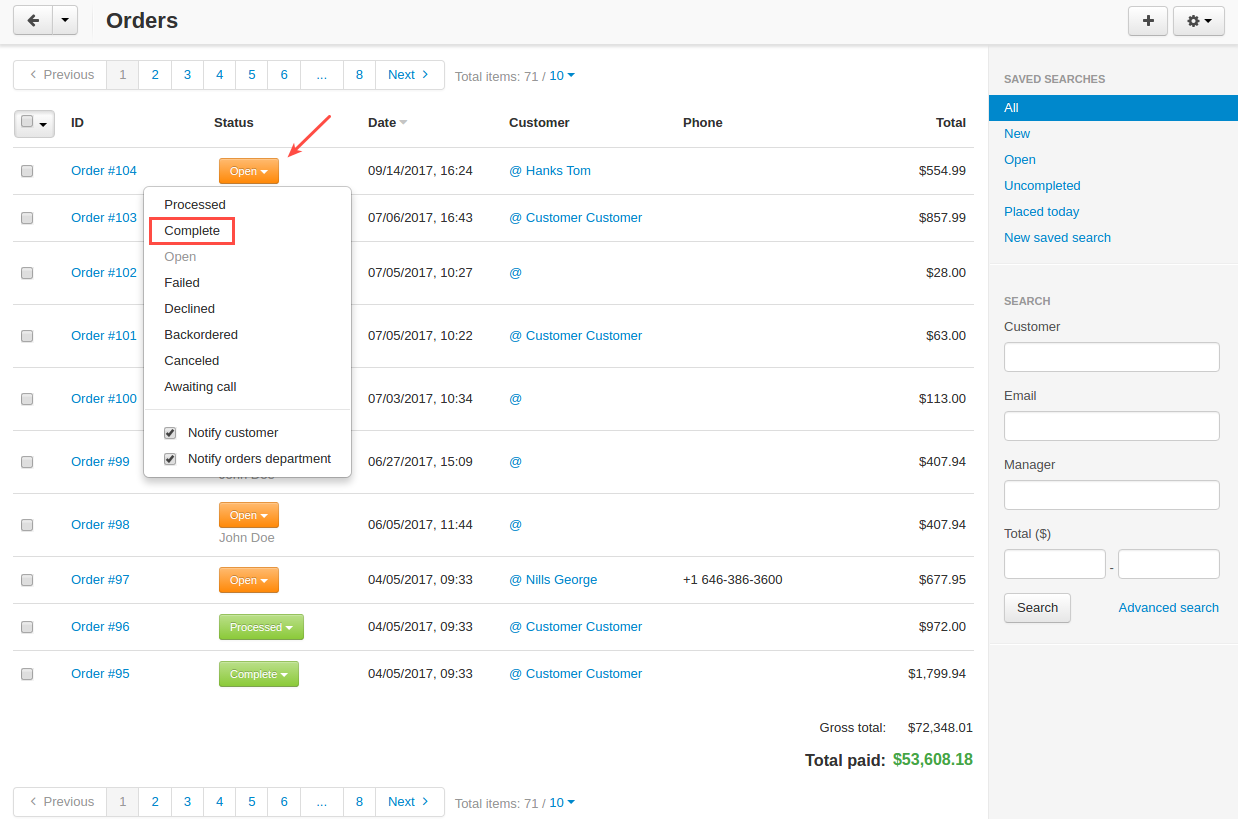
When the order status changes to the successful one (specified in the add-on settings),
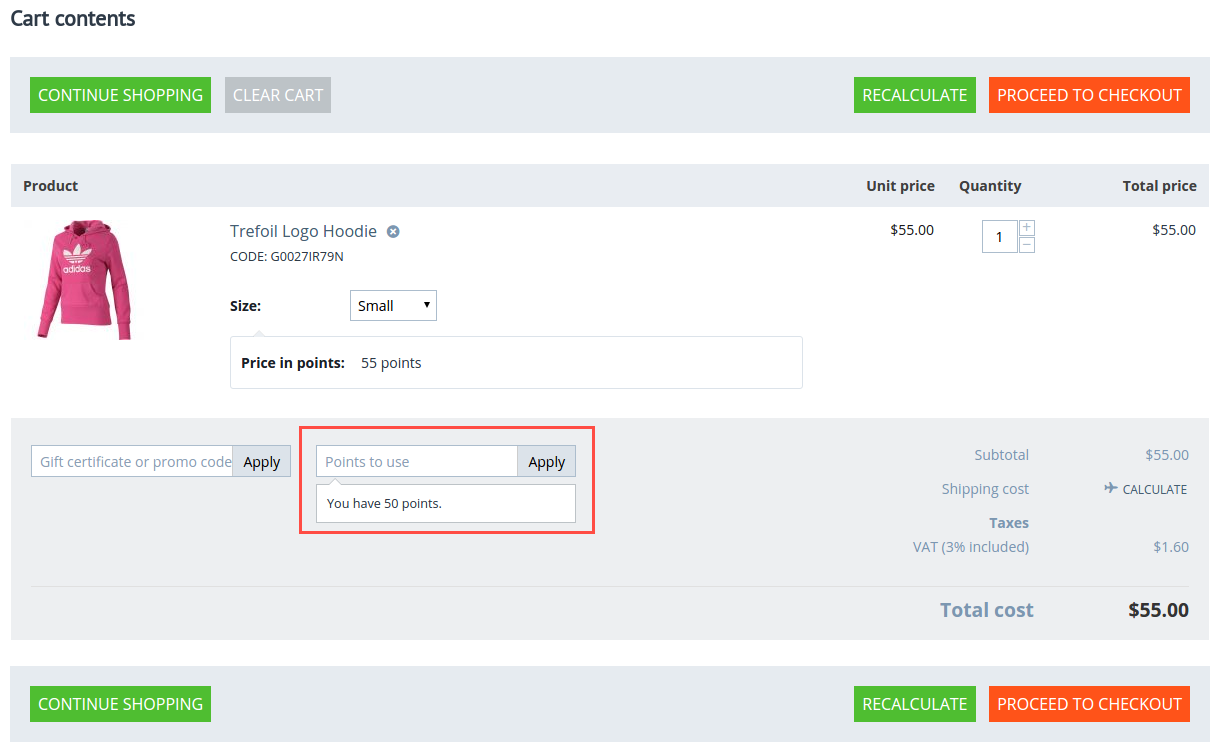
Liza will get reward points for Tom’s order that can be found in the profile details in the My points section.

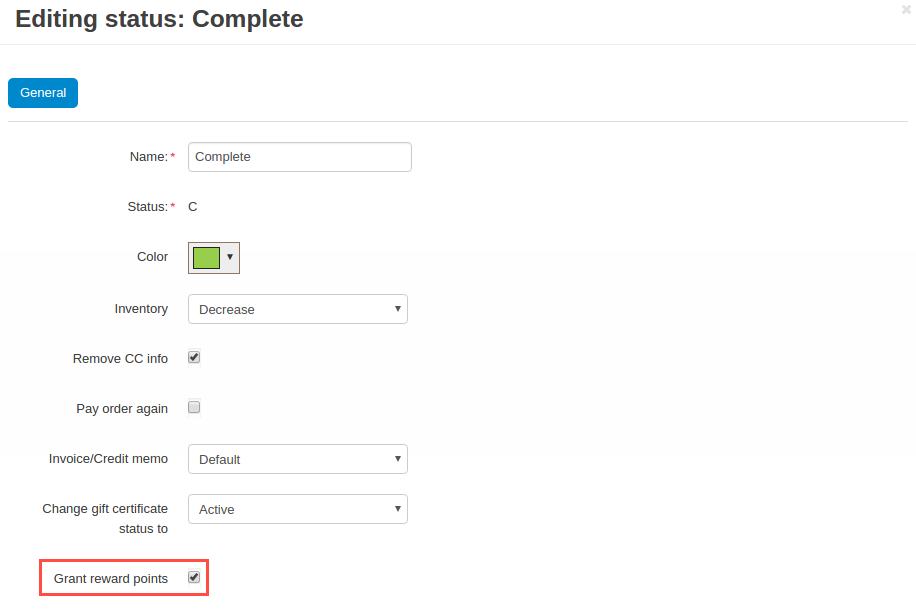
Important
Check to make sure that the Grant reward points checkbox is selected in the Status settings.
She can now spend her reward points when paying for products.
That’s it.
Questions & Feedback
Have any questions that weren't answered here? Need help with solving a problem in your online store? Want to report a bug in our software? Find out how to contact us.
Social sharing