Pro Banner
Overview
Make your brand stand out with our Pro Banner add-on. It allows you to show an eye-catching wide banner on any page of your store. It’s an extra enhancement to your nice-looking website. It will definitely help you attract more customers and increase the click-through rates of your banners.
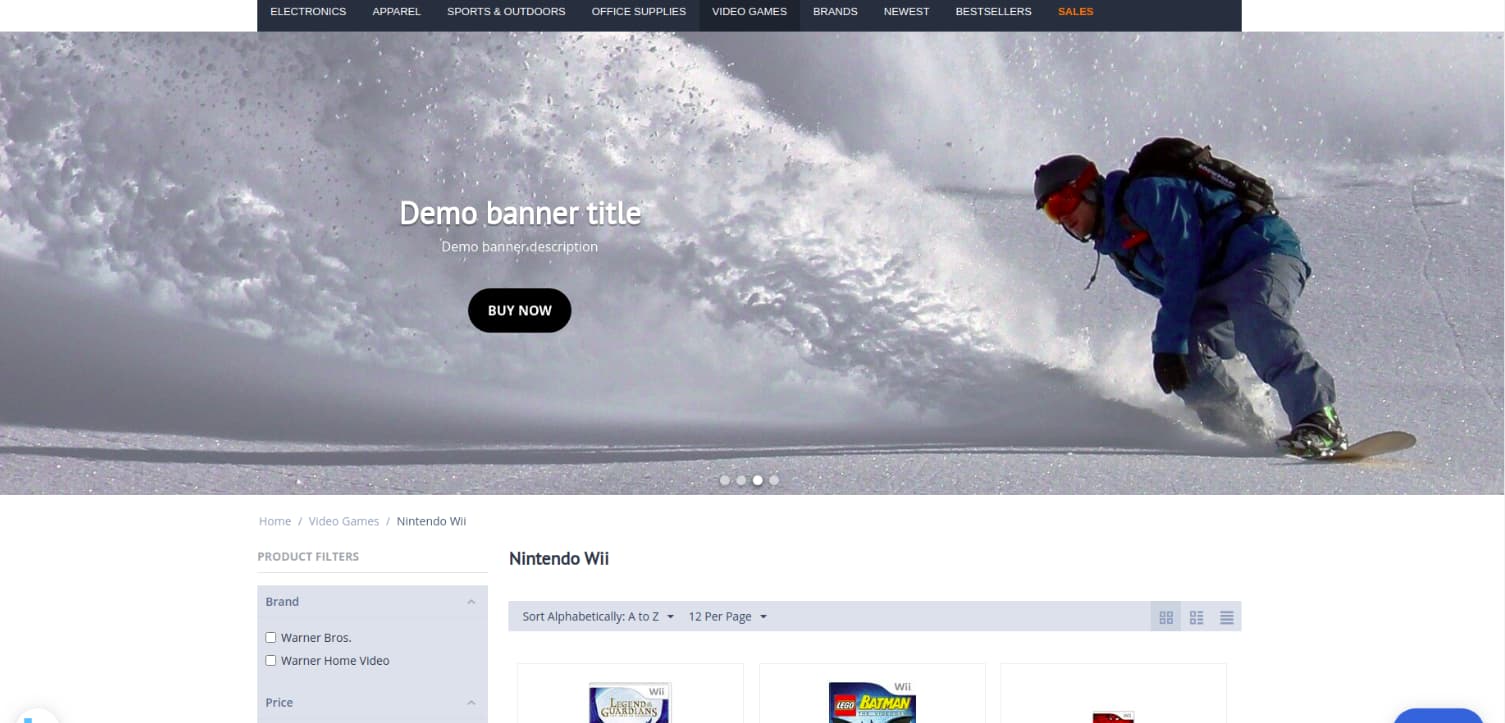
Here’s how it looks on the homepage:

and a category page:
Features
- Banner size change proportionally to the screen resolution
- Banner pagination
- Swipe left or right to browse through images on touch screens
- Automatic banner change
- Designed to display on desktops, tablets, and mobile devices
- Ability to upload images separately for mobile and UltraHD (4K) screens
- Customizable content container, banner title, banner description, button in the banner
- User-defined styles for banners
- Lazy-load for the better appearance during the loading
Compatibility
The add-on is compatible with CS-Cart and Multi-Vendor 4.12 and above. Minimum required PHP version is 5.6.
See more information about compatibility of our add-ons here.
Support
You are guaranteed a quality add-on supported by the future versions. If you need help, please contact us via our help desk system.
Demo
Check out the Pro Banner add-on in our demo store.
Note
Every half an hour the demo store is reset to the default state.
Managing in the admin panel
Installing the add-on
Install the Pro Banner add-on on the add-ons list page (Add-ons → Manage add-ons). Click the + button in the top right corner, select an archive and click Upload & install. You can now find the installed add-on in the list of installed add-ons, just make sure it is set to Active.
Setting up the add-on

- License key—Enter the license key to activate the add-on. You will receive this key in the order confirmation email. You can also see license keys for all your purchased add-ons in your HelpDesk account. Log in to HelpDesk, and navigate to the Licenses section:
Creating a Pro Banner
Step 1. Create a banner
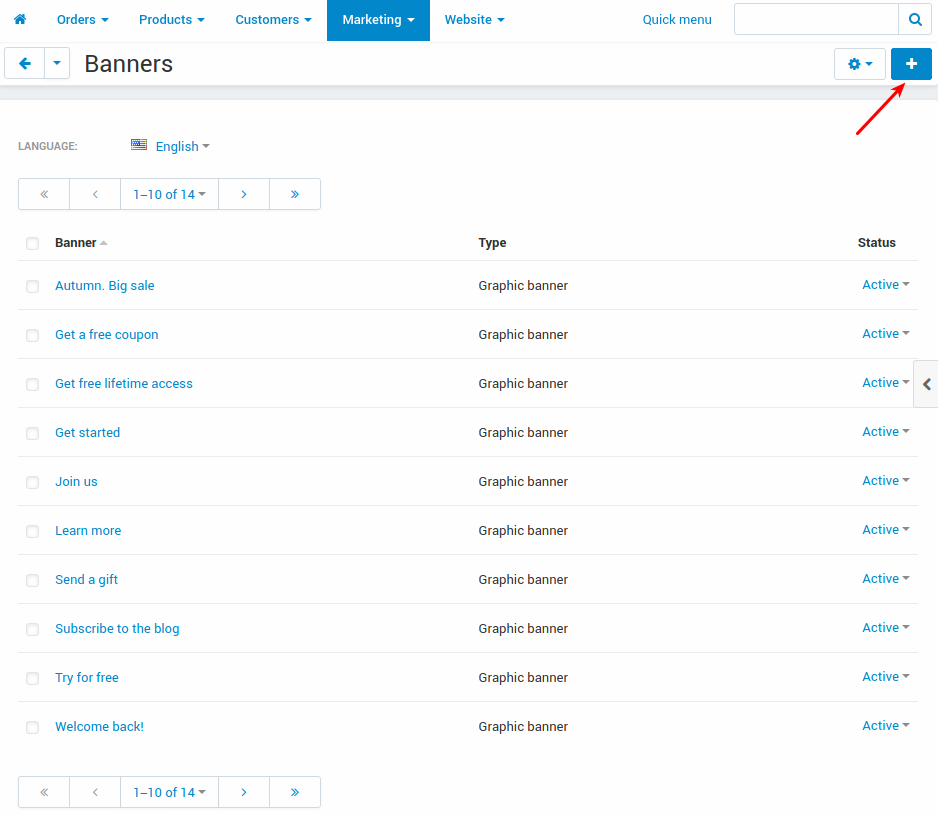
- In the admin panel, navigate to Marketing > Banners.
- Click the + button in the top right corner.
- Enter the name for the banner, select the Graphic banner type and upload an image.
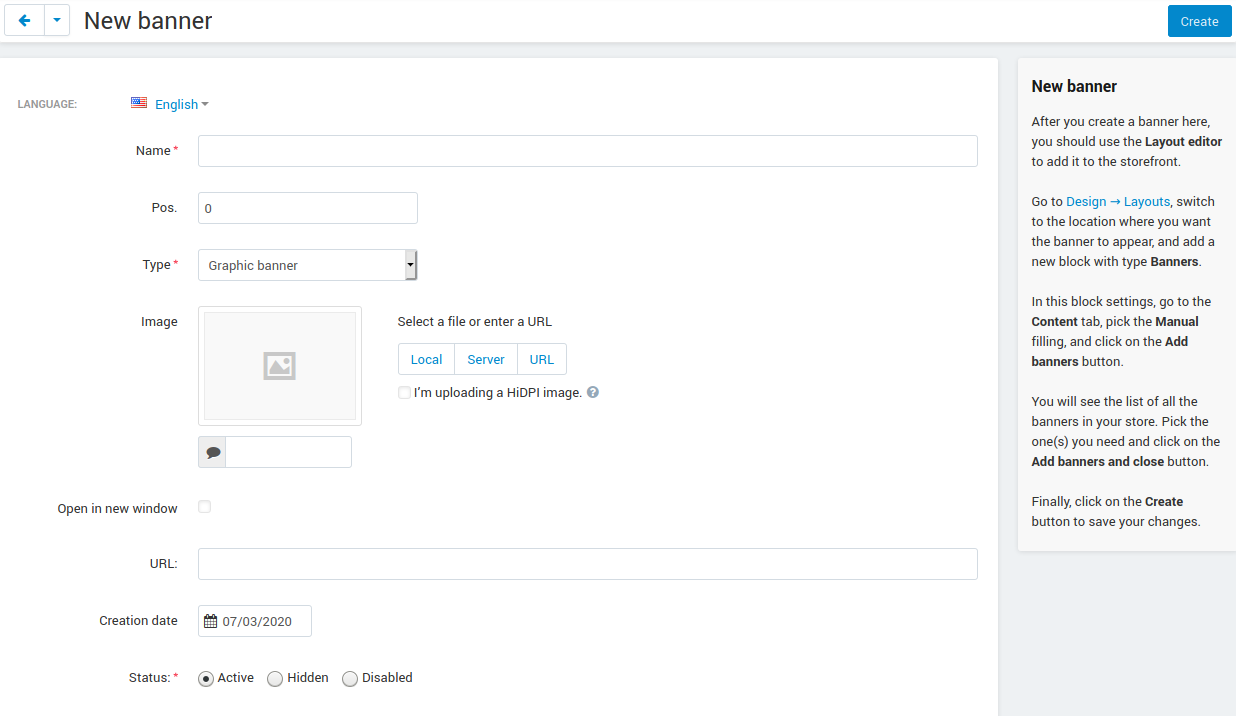
- Click Create.
- Upload additional images for mobile and Ultra HD (4K) screens if required.

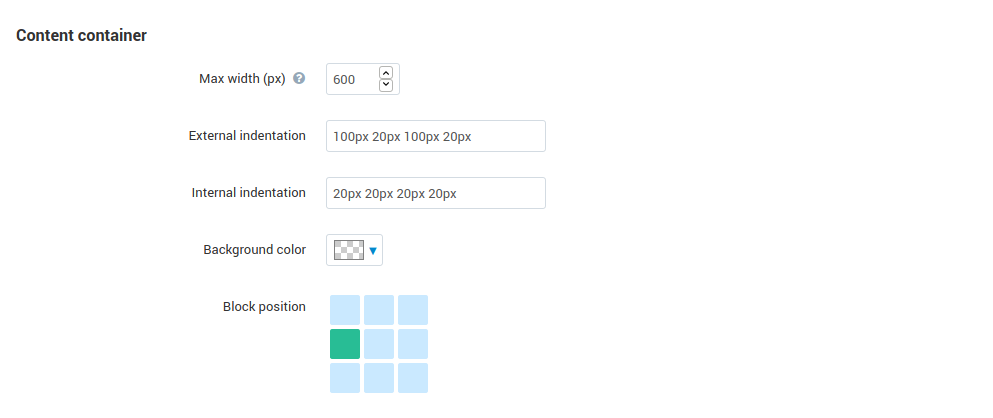
- Configure a container width, an external and internal indentication, a background color and a block position.
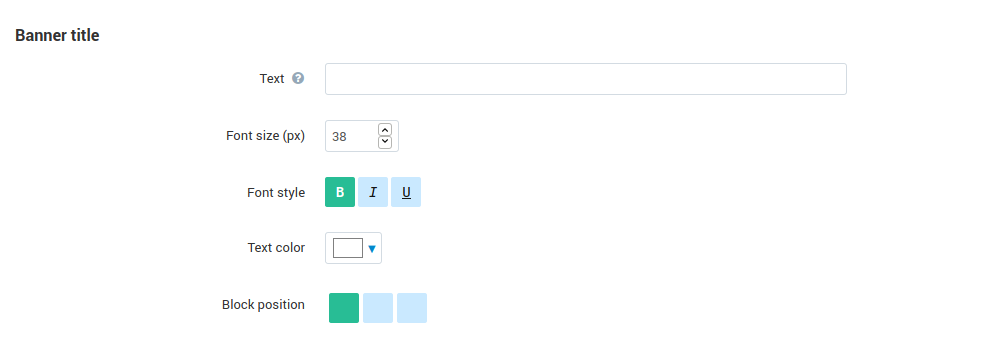
- Set up a font size, a style (such as bold, italic or underlined), a text color and a block position for banner title.
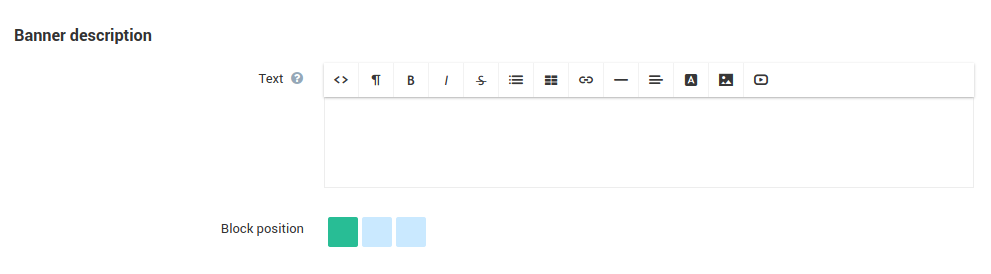
- Specify banner description (any HTML content can be added) and a block position.
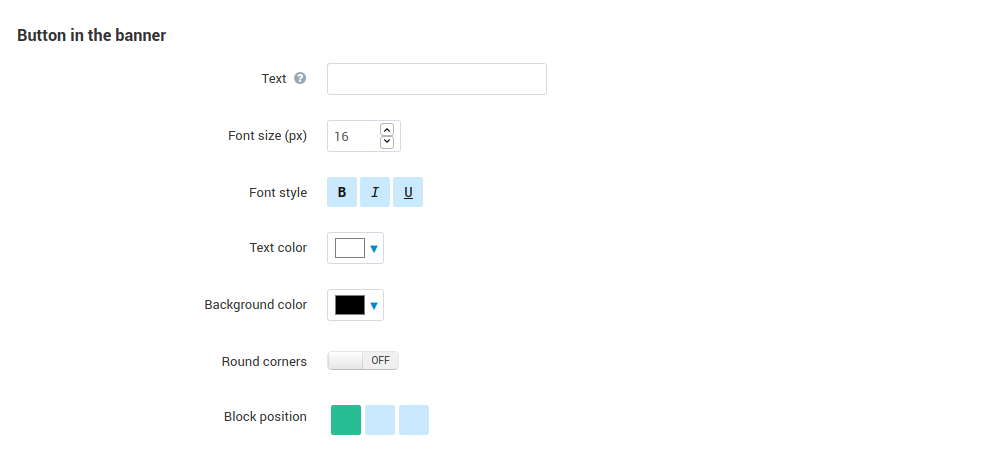
- You can specify a font size, a style (bold, italic or underlined), a text color and a background color for the button in the banner. Also you can round corners and choose a block position. The font is set in the Theme editor >> Fonts >> Buttons settings.
- Banners can also be styled with user styles:

Note
The add-on includes four demo banners for your store: demo banner - Sport, demo banner - Сamera, demo banner - Christmas, demo banner - Technology.
Click Save.
Step 2. Add the banner to the page
Follow the step-by-step guide below to add a Pro Banner to any page in your store.
- Navigate to Design > Layouts.
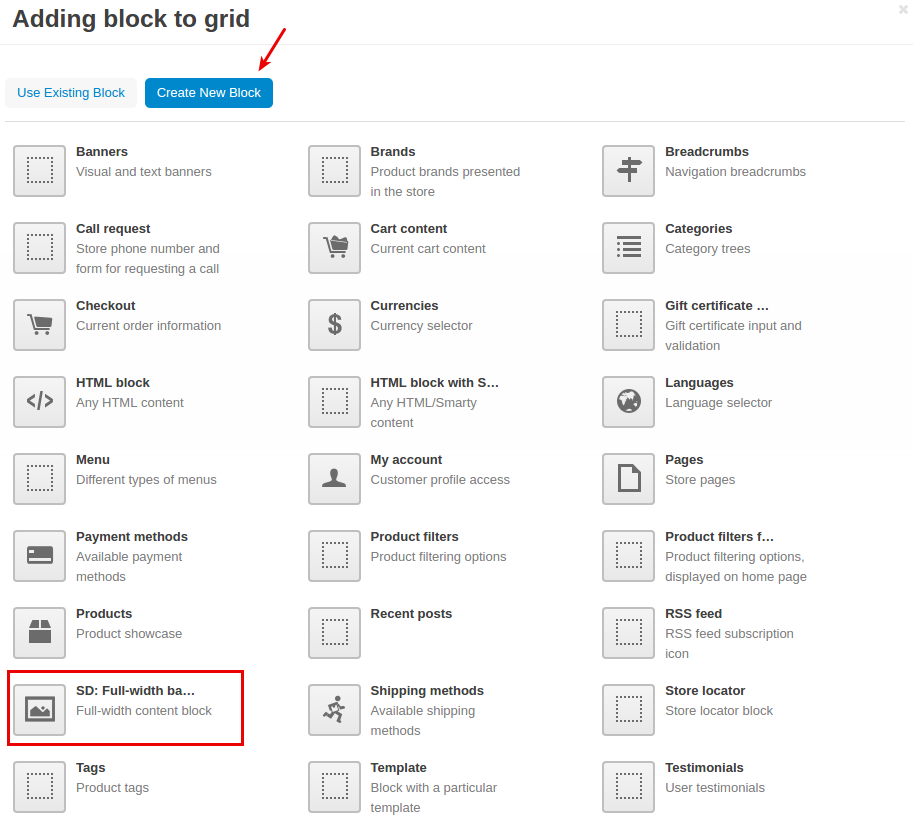
- Switch to the location where you want to show the banner and add a new Pro Banner block.
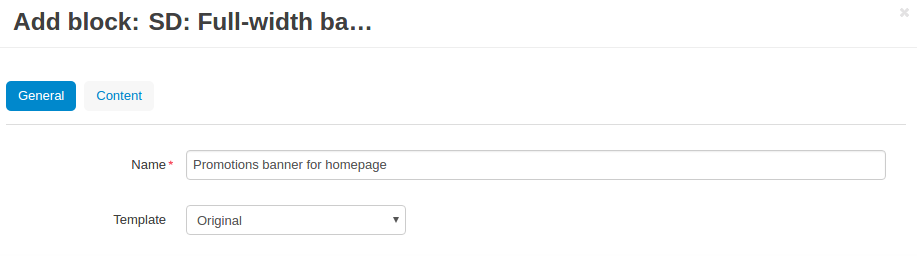
- In the General tab, enter a name for the block and select the template.
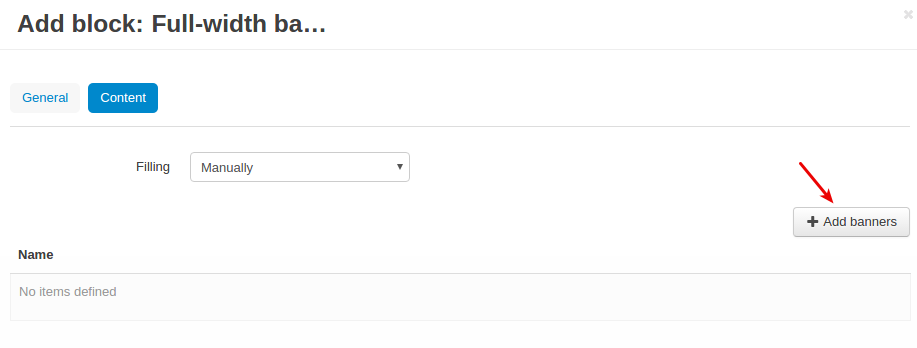
- In the Content tab, pick the Manually filling and click the Add banners button.
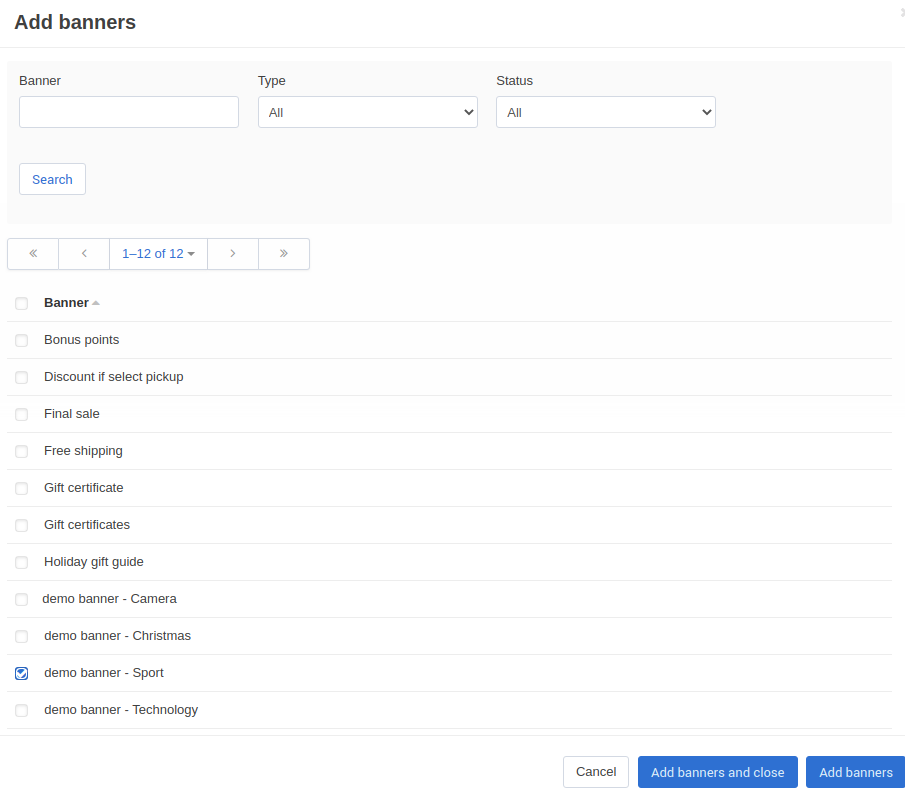
- You will see a list of all the banners in your store. Pick the one(s) you need and click the Add banners and close button.
- Finally, click Create to save your changes.
- Check out the banner on the storefront.
Questions & Feedback
Have any questions that weren't answered here? Need help with solving a problem in your online store? Want to report a bug in our software? Find out how to contact us.