IP Geolocation
Warning
Installation of the add-on requires advanced technical skills. It is created mainly for developers to use in further development.
Overview
The IP Geolocation add-on is a professional solution that adds the ability to determine the user’s location by IP address using the MaxMind databases.
MaxMind offers free and paid databases with the most up-to-date and accurate data available.
The advantages of the add-on are the following:
- Geolocation is determined at the server level without involving web browsers, which allows to offer content taking into account customer’s location at their first visit.
- Geodata is determined very quickly by local databases, it does not depend on external services.
- Extended data for multiple languages (country, region, city).
IP Geolocation adds the following functionality:
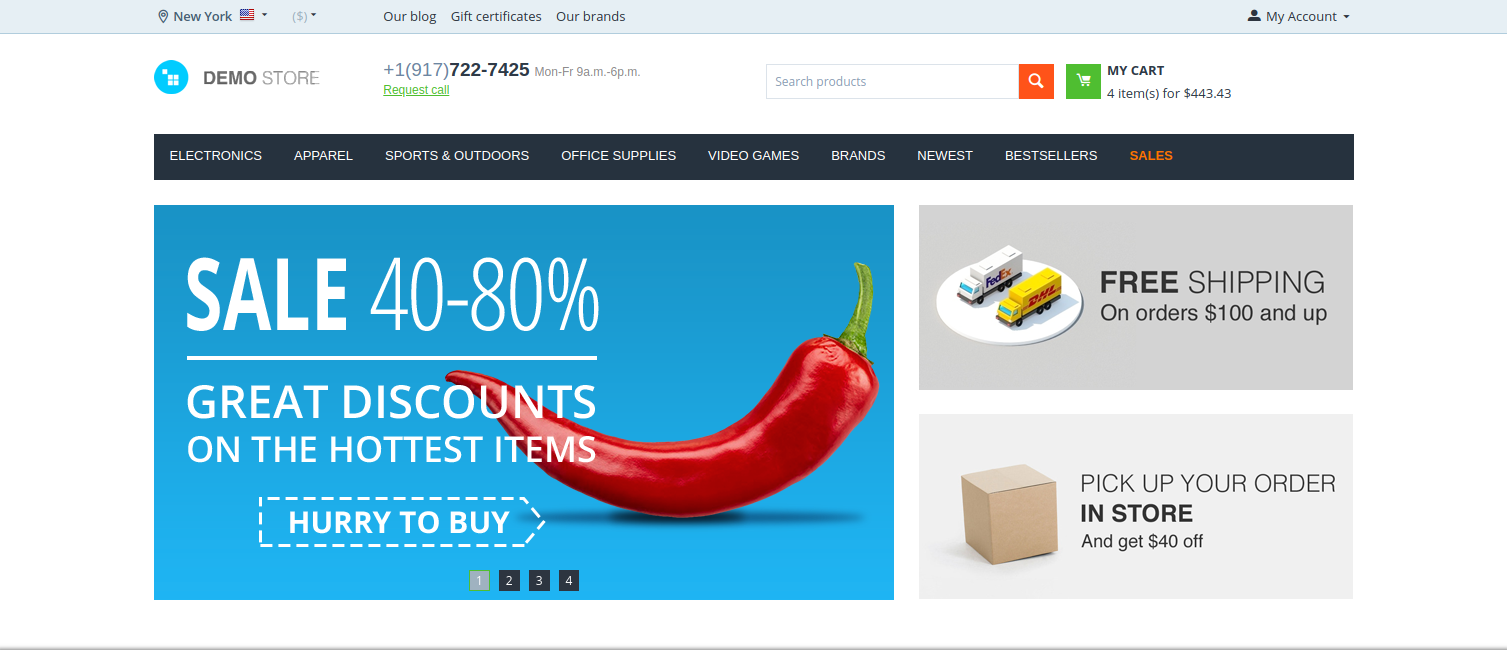
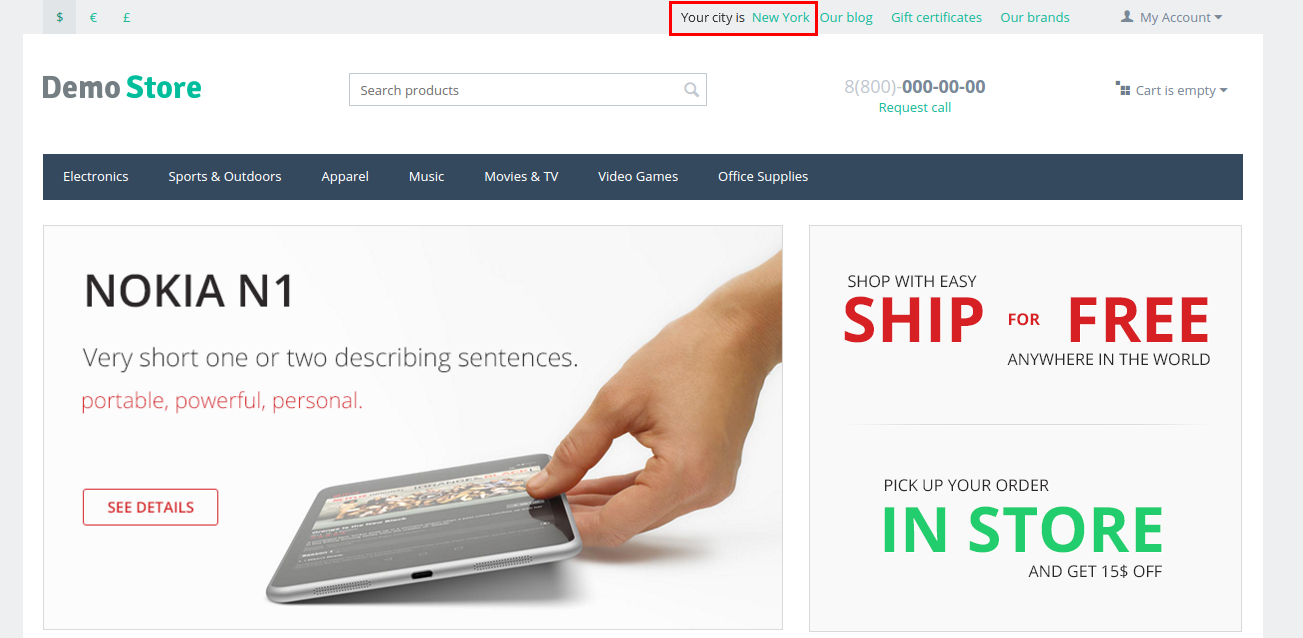
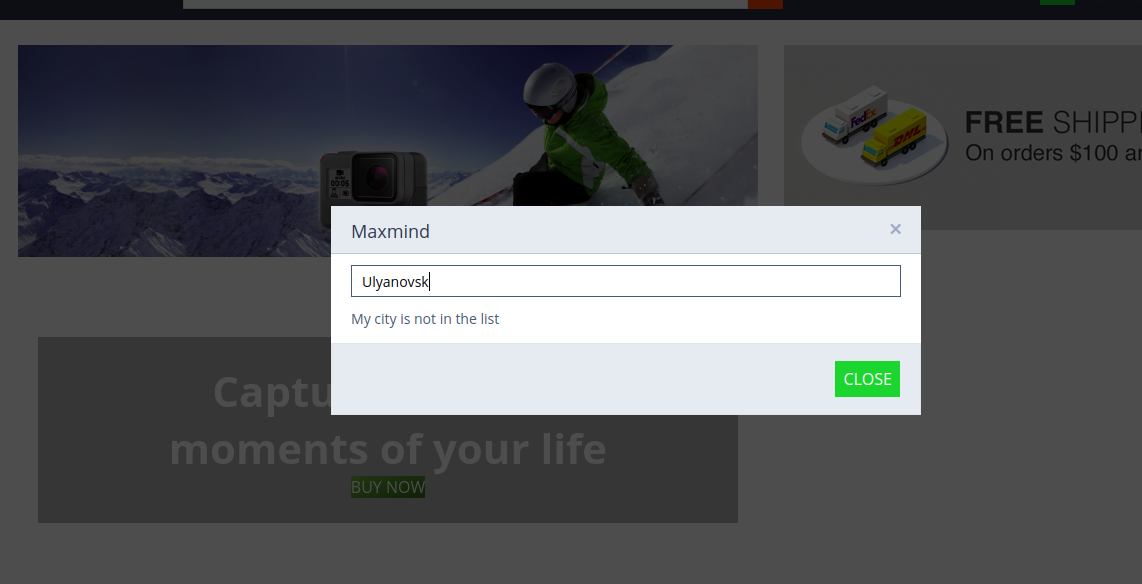
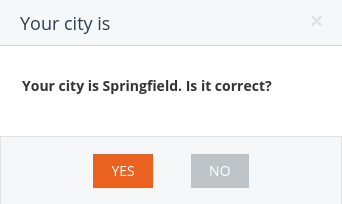
The customer’s city will be determined and displayed in the header of the storefront.
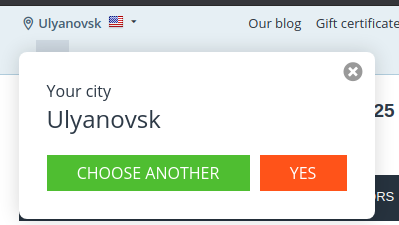
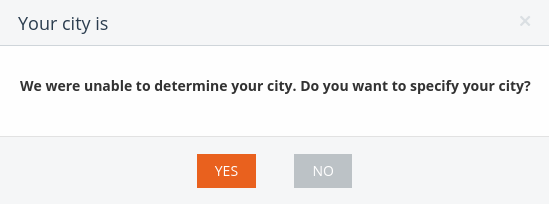
If the city is not determined, this pop-up will be displayed:
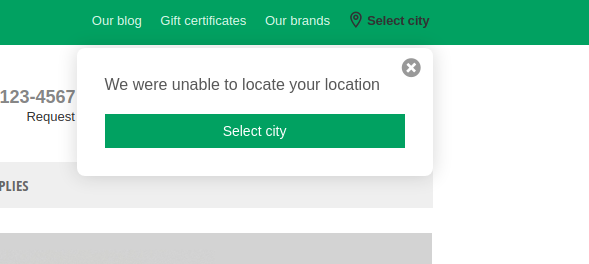
After clicking Select city, a customer will be able to specify the city manually.
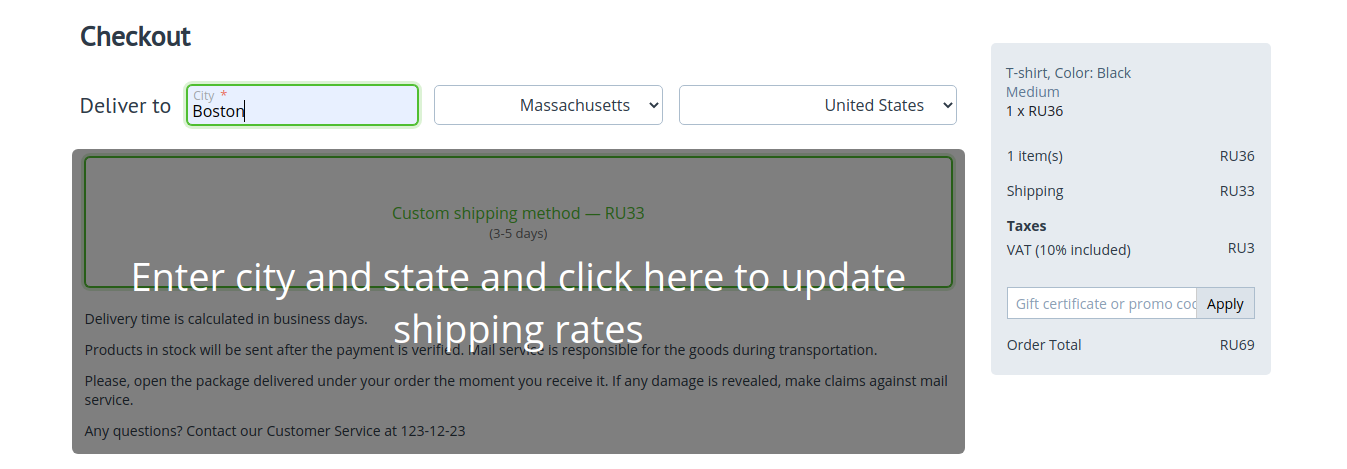
The country, region, city fields are auto-completed at checkout.
The store currency will be automatically set to the customer’s currency depending on their country.

The add-on allows to automatically determine the customer’s language in the store depending on their country.

Compatibility
The add-on is compatible with CS-Cart and Multi-Vendor 4.9 and above, but only versions 4.12.x and above are supported. Minimum required PHP version is 7.1.
See more information about compatibility of our add-ons here.
Support
You are guaranteed a quality add-on supported by the future versions. If you need help, please contact us via our help desk system.
Demo
Check out the IP Geolocation add-on in our demo store.
Note
Every half an hour the demo store is reset to the default state.
Managing in the admin panel
Installing the add-on
Install the “IP Geolocation” add-on on the add-ons list page (“Add-ons” → ”Manage add-ons”). Click the + button in the top right corner, select an archive and click Upload & install. You can now find the installed add-on in the list of installed add-ons, just make sure it is set to Active.
Available settings
The settings of the “IP Geolocation” add-on are divided in two sections:
- General
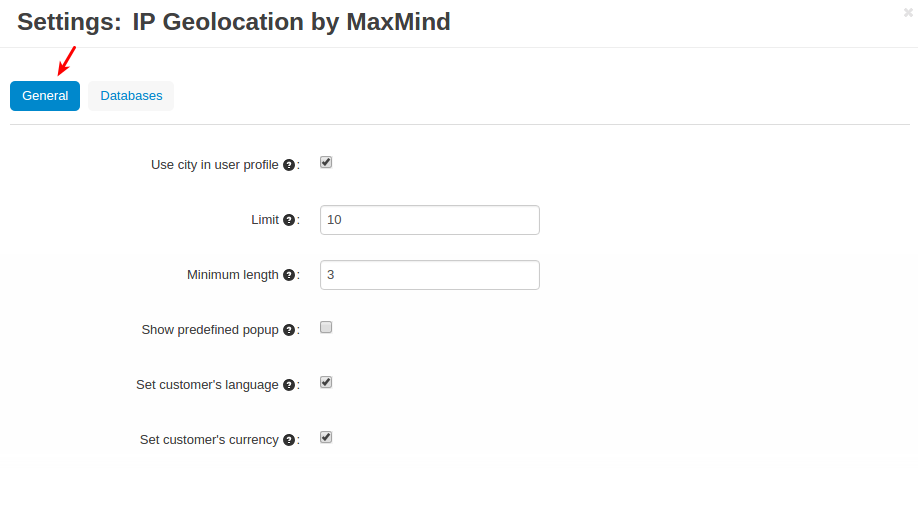
- Use city in user profile—if selected, the City field will be auto-complete during registration and at checkout.
- Limit—count of cities that will be displayed in the drop-down list. By default, its value is set to 10.
- Minimum length—minimum count of symbols that a user should enter before the drop-down list is displayed. By default, its value is set to 3.
- Show predefined popup—if selected, a pop-up window will be displayed to confirm the determined city.
- Set customer’s language—when a customer visits the store for the first time, the system will choose the language of the customer’s country (if it is installed)
- Set customer’s currency—when a customer visits the store for the first time, the system will choose the currency of the customer’s country (if it is installed)
- Databases
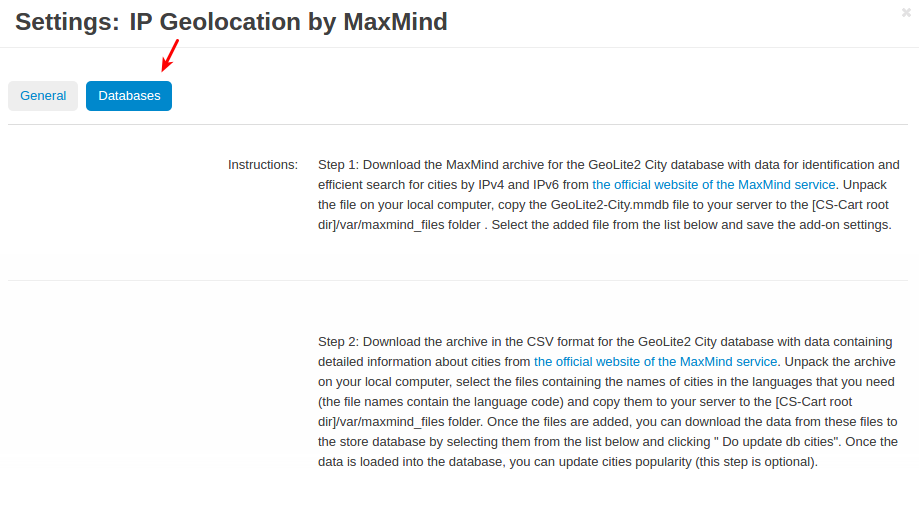
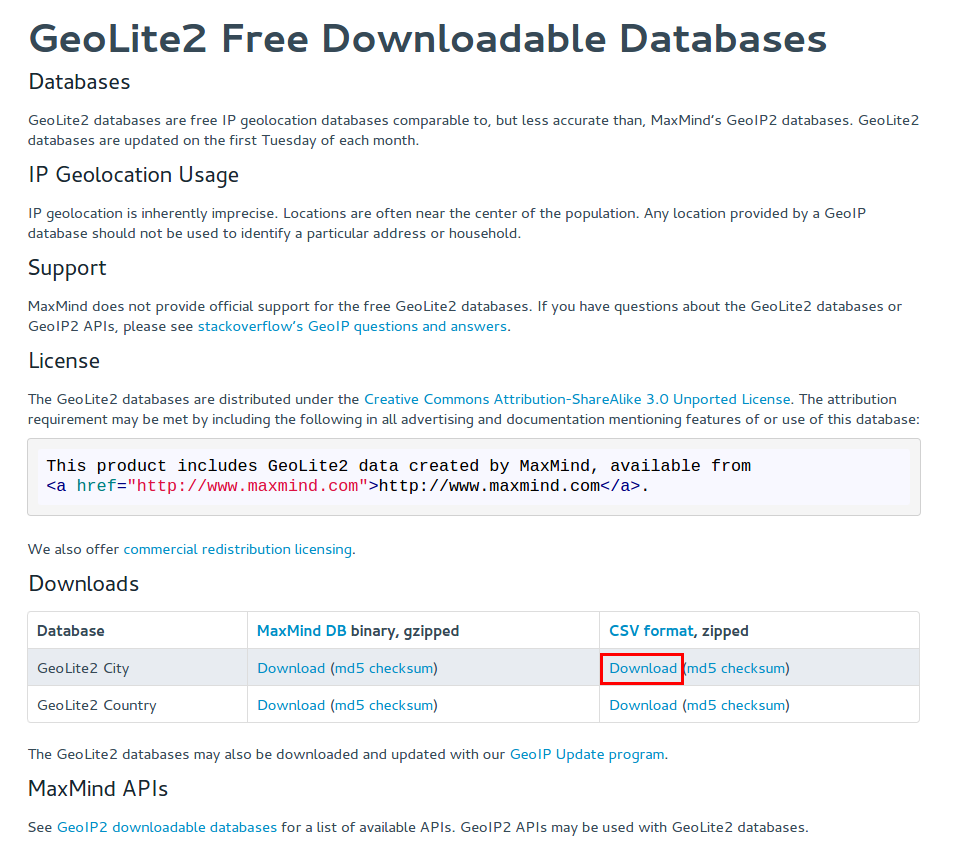
Follow the instructions to download the database archives from the MaxMind website and unpack them in the right directory. You should download these two archives:
- city database
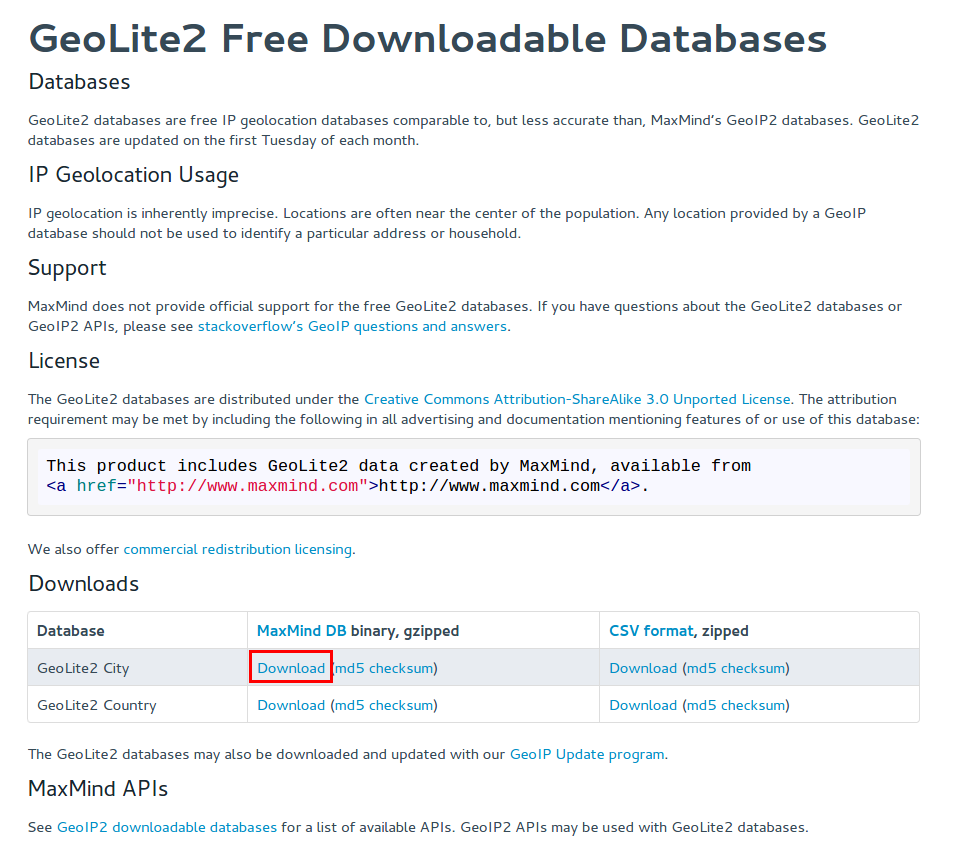
- CSV file
Note that you should take the CSV file that corresponds to the language used in your store from the downloaded archive. For example, for the English language it’s the GeoLite2-City-Locations-en.csv file.
Once you add the necessary files, click Save.
Open the add-on settings again and go to the Databases tab. You should see the names of the added files. Click the Update db cities button to update cities in the database.
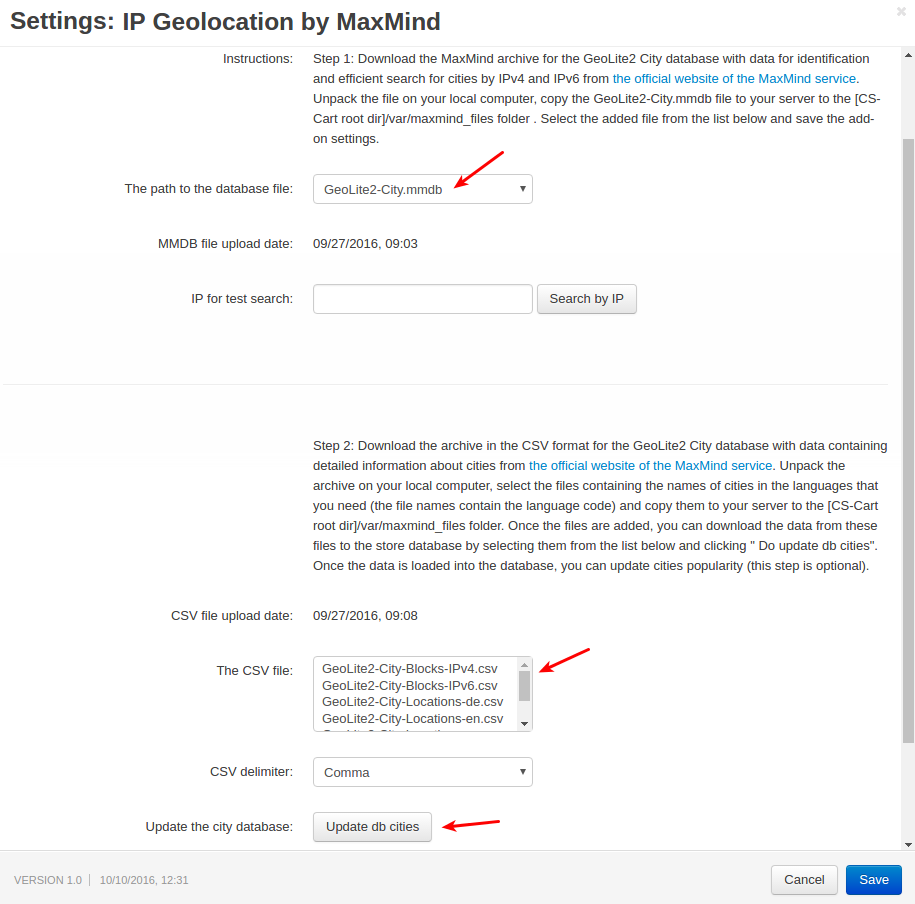
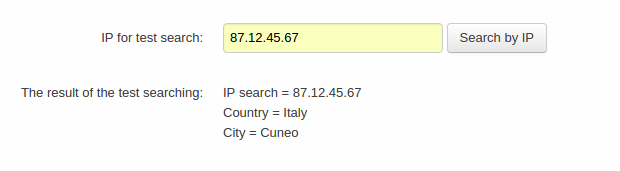
You will also see the IP for test search field added. This field is for testing purposes. Enter any IP address into the field to see the country and city of the entered IP address. For example:
Click Save.
Adding a block for the determined city
If you want to display a block with the determined city for customers in the storefront, follow these steps:

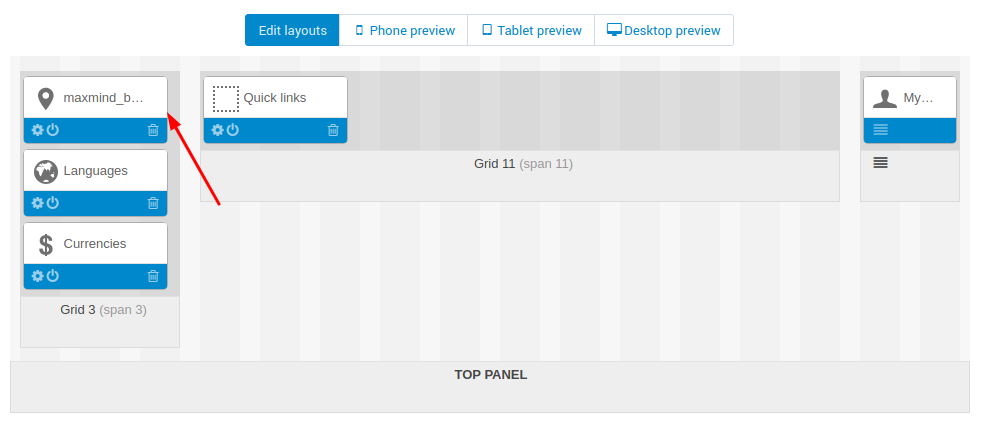
- In the admin panel, go to Design - Layouts.
- Locate the Top panel and add a new block by clicking the + button.
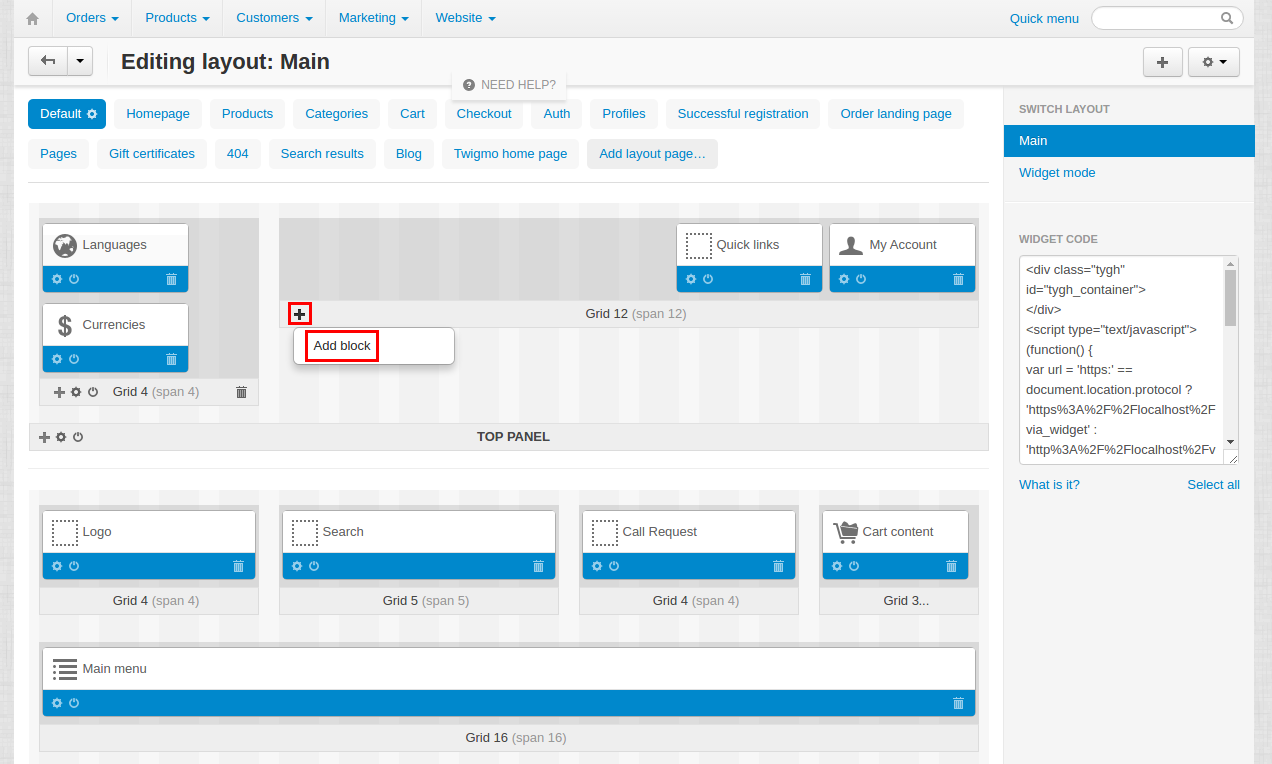
- In the pop-up window, go to the Create New Block tab and select the corresponding block.

- In the block settings, name the block and click Create.
- Make sure the block appeared in the layout.
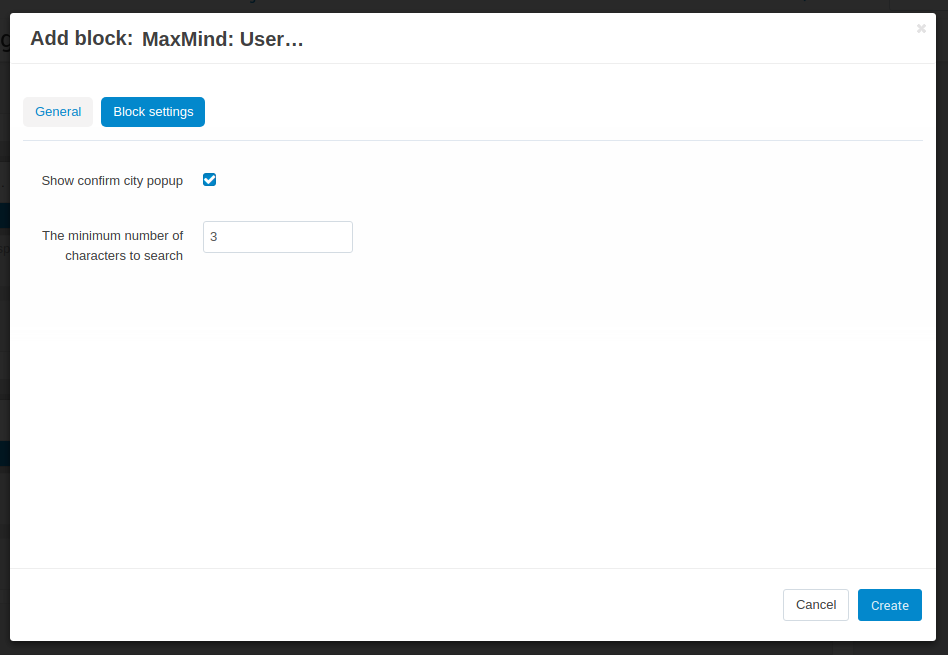
- Open the Block Settigs taband edit the pop-up show settings
- Go to the storefront to see the created block.
Setting up currencies
With the IP Geolocation add-on, the store currency will be automatically set to the customer’s currency depending on their country.

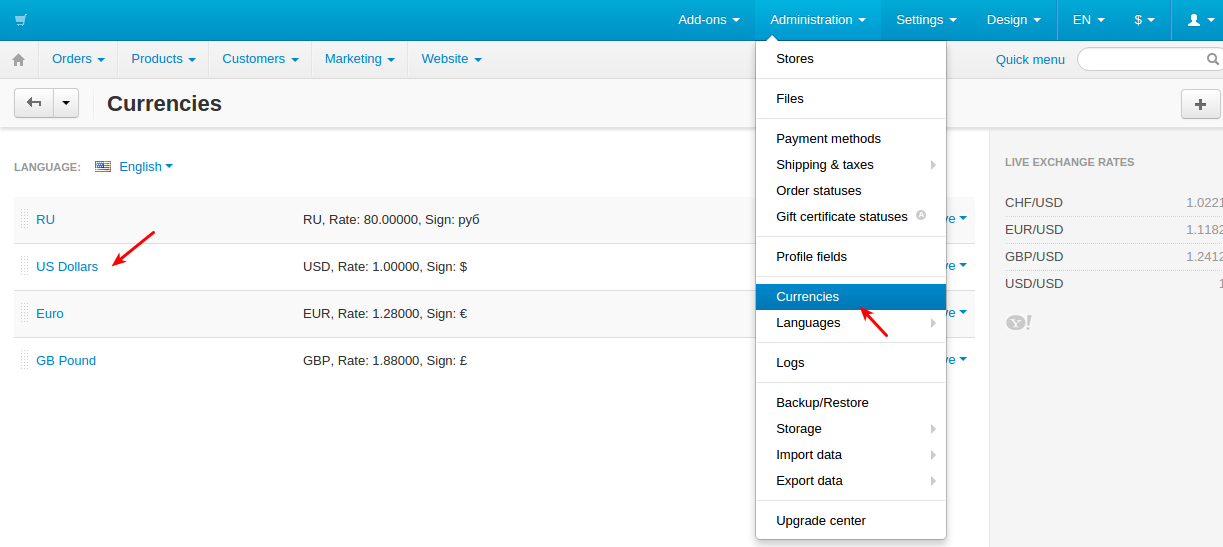
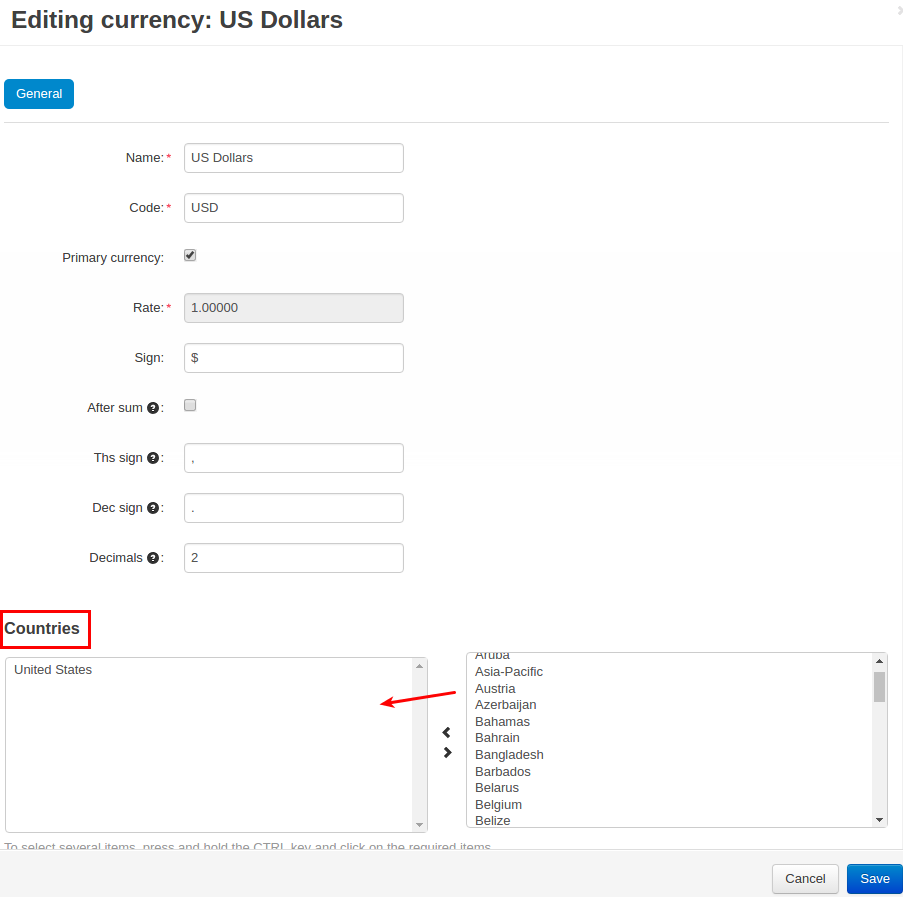
To do this, go to Administration - Currencies and select the necessary currency from the list of existing currencies or add a new one by using the + button.
On the currency editing page, select the countries you’d like to set the currency for and move them to the left section.
Setting up languages
The IP Geolocation add-on allows to automatically determine the customer’s language in the store depending on their country.

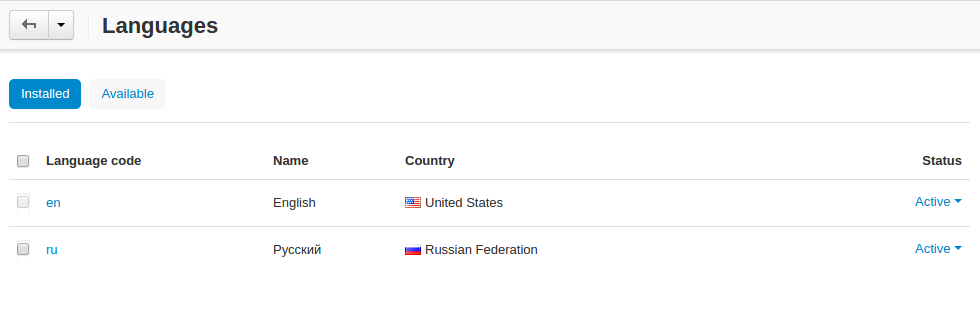
To make this feature work for your store, check to make sure that you have all the necessary languages installed in your store. To do this, go to Administration - Languages - Manage languages.
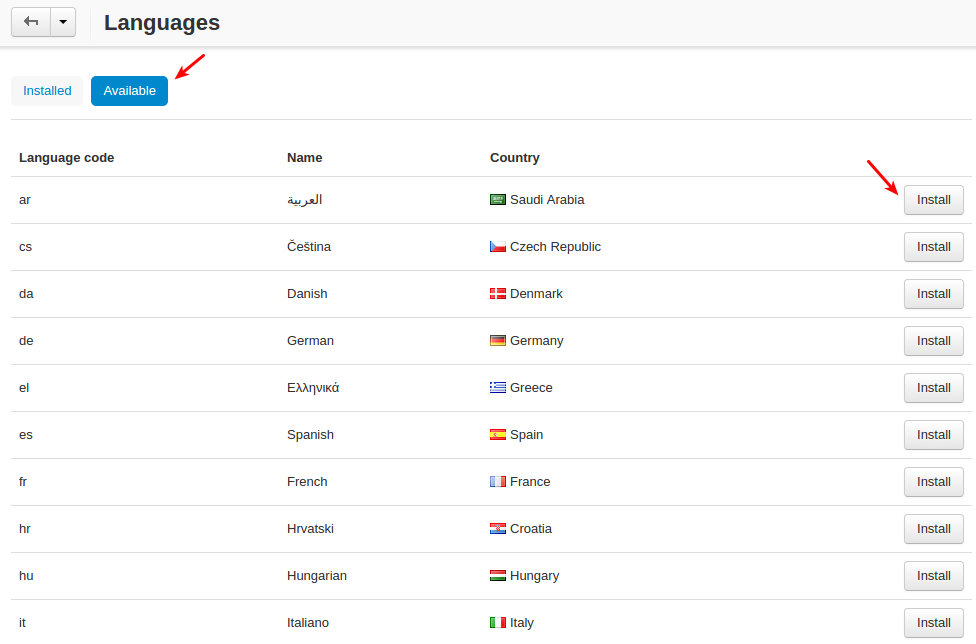
If you do not have the required language on the list, switch to the Available tab and install the desired language by clicking the corresponding button.
The city is not in the database
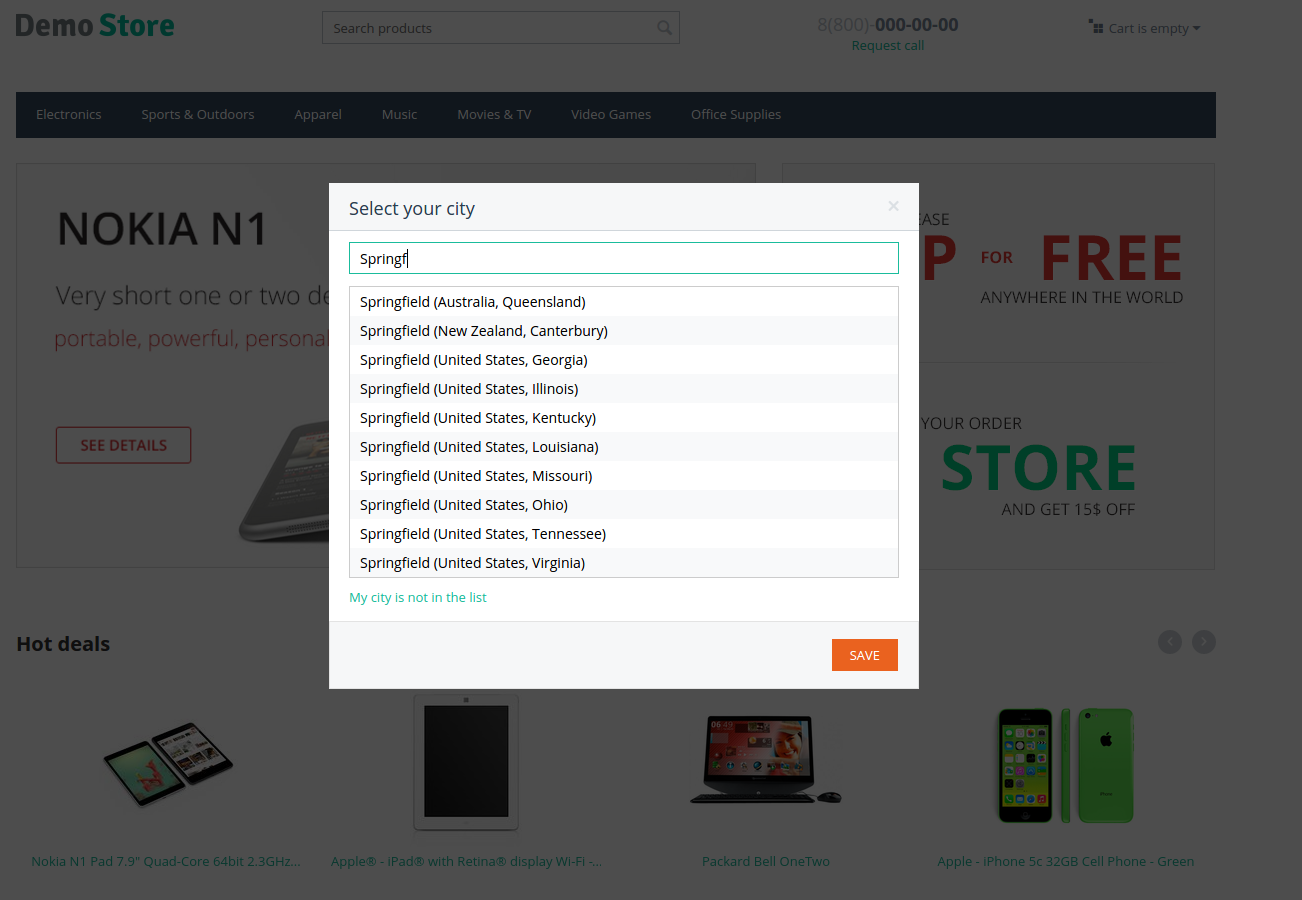
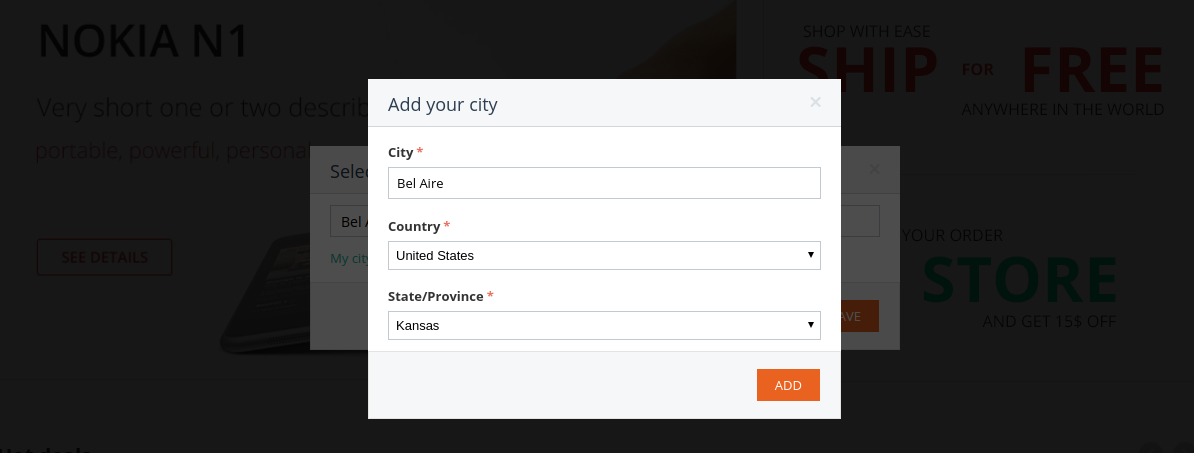
When the city is determined and the user wants to change it, but it is not in the MaxMind database, they can enter their city and click My city is not in the list.
Then the user will be offered to enter the Country and State/Province for the city and click Add.
Once the city is added, a notice will be displayed:

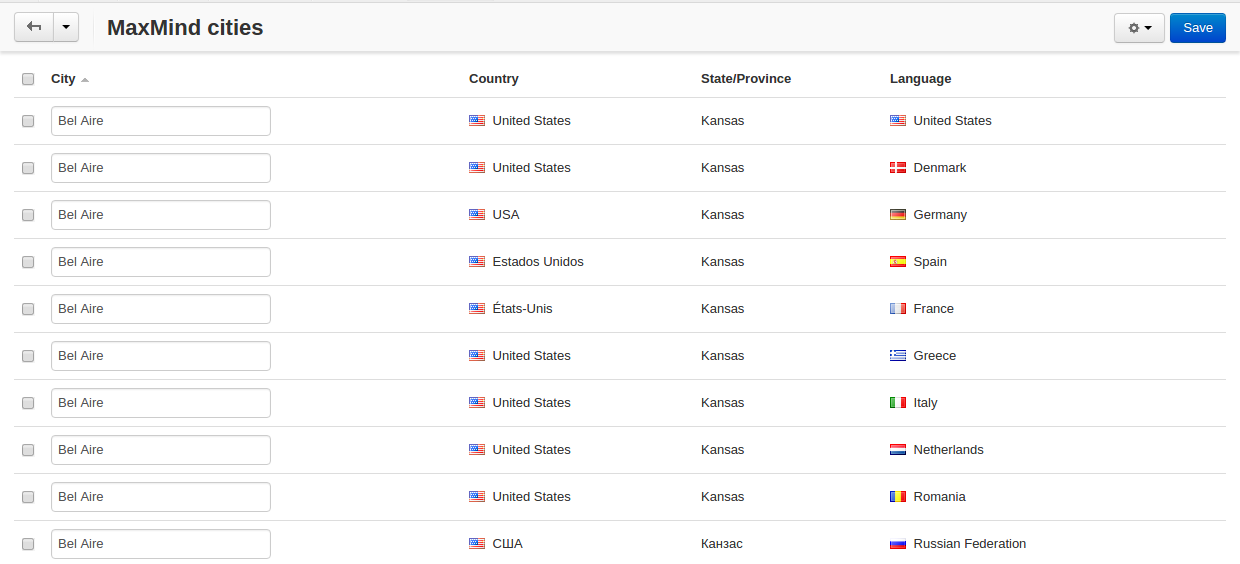
The added city will also appear in the admin panel. Go to Website - MaxMind cities to see it:
It is recommended to translate the name of the city into the corresponding language.
Changing content of the block and pop-ups
It is possible to change the content of the Your city is block (displayed in the header of the site) and pop-ups (that appear in case the city is determined and not determined) by creating hooks.
Content of the block

- Navigate to [CS-Cart dir root]/design/themes/[your_theme]/templates/addons/.
- Create a my_changes/hooks/geoip/ folder.
- Create a block_content.override.tpl file in the folder.
- Insert these lines into the file:
{if $geo_select.city_description}
Your city is
{/if}
- Replace Your city is with the text you want to display.
- Clear the store cache via the admin panel.
Content of the pop-ups
- city is determined
- city is not determined
- Navigate to [CS-Cart dir root]/design/themes/[your_theme]/templates/addons/.
- Create a my_changes/hooks/geoip/ folder.
- Create a popup_content.override.tpl file in the folder.
- Insert these lines into the file:
{if $geo_select}
{__("your_city_is")} {$geo_select.city_description}. {__("correct_city")}? {* when the city is identified *}
{else}
{__("cant_detect_city")}. {__("specify_your_city")}? {* when the city is not identified *}
{/if}
- Replace the variables with the ones you want to display.
- Clear the store cache via the admin panel.
Questions & Feedback
Have any questions that weren't answered here? Need help with solving a problem in your online store? Want to report a bug in our software? Find out how to contact us.