Instagram Widget
Overview
The Insragram Widget add-on embeds your Instagram video and photo feed on your marketplace storefront. You can set up updating on a schedule or enable real-time uploading of the feed.
Invite your Instagram followers to your marketplace and boost conversion rates and sales or display your latest posts from Instagram to any visitor of your e-commerce website.
Since 41% of Instagrammers state that they would follow a brand to take advantage of perks and giveaways, give followers that incentive. Provide them with bonuses, special offers, and insider announcements.

Features
- Showcasing and promotion of goods and services.
- Building a community around the brand by streaming your day-to-day non-business activities and engaging customers to follow you.
- Increasing trust and brand awareness.
Compatibility
The add-on is compatible with CS-Cart and Multi-Vendor 4.9 and above, but only versions 4.12.x and above are supported. Minimum required PHP version is 5.6.
See more information about compatibility of our add-ons here.
Support
You are guaranteed a quality add-on supported by the future versions. If you need help, please contact us via our help desk system.
Setting up Facebook application
Linking Facebook and Instagram accounts
To be able to use the add-on you first need to create Facebook and Instagram accounts.
Next, you need to link the Facebook and Instagram accounts
Instagram to Facebook
- Open you Instagram Profile page
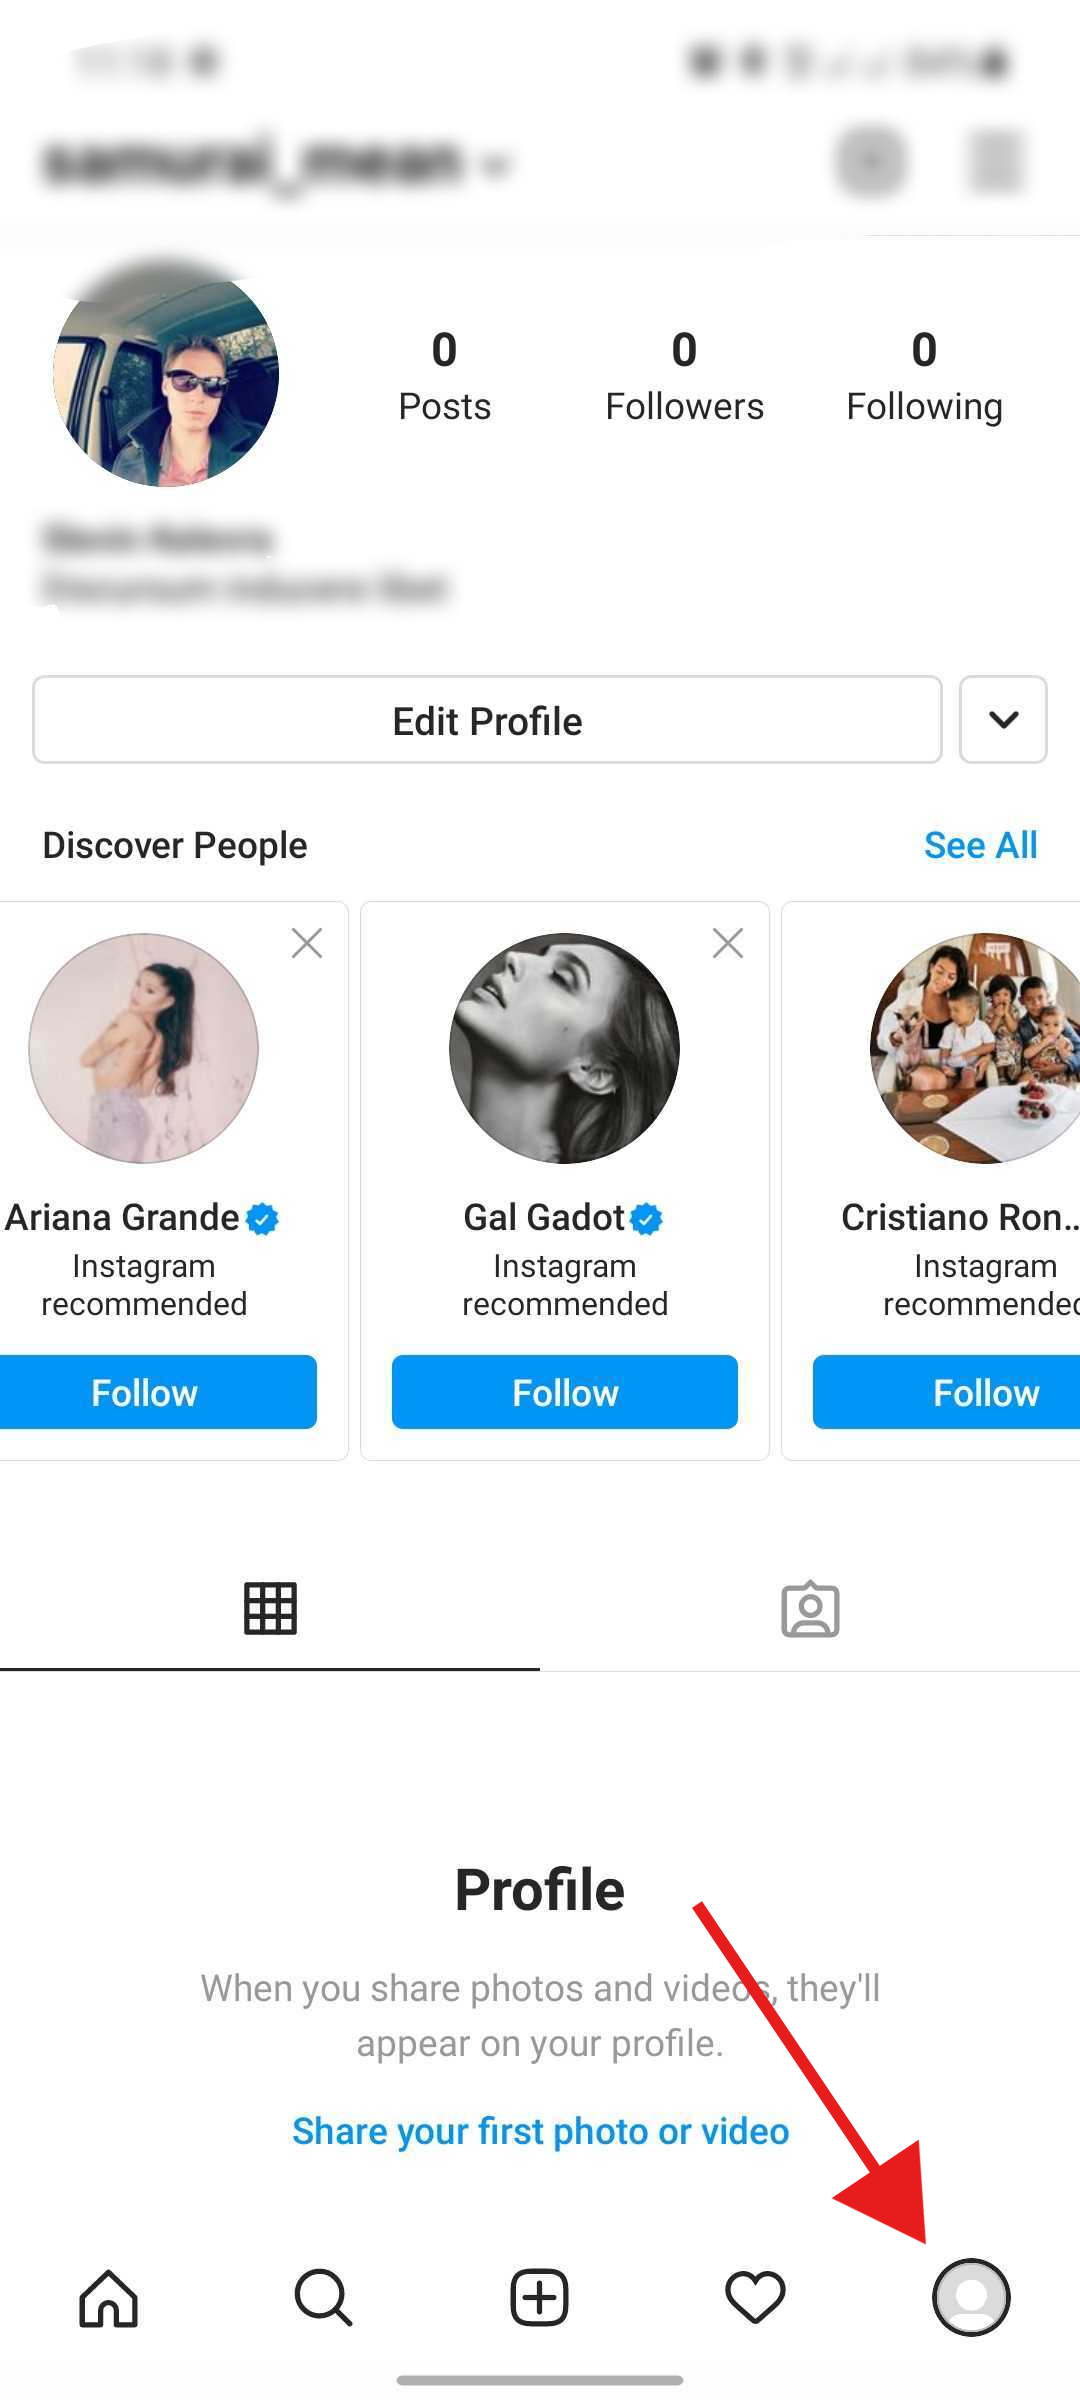
- Tap on the Setting option
- Select Account option in Setting menu
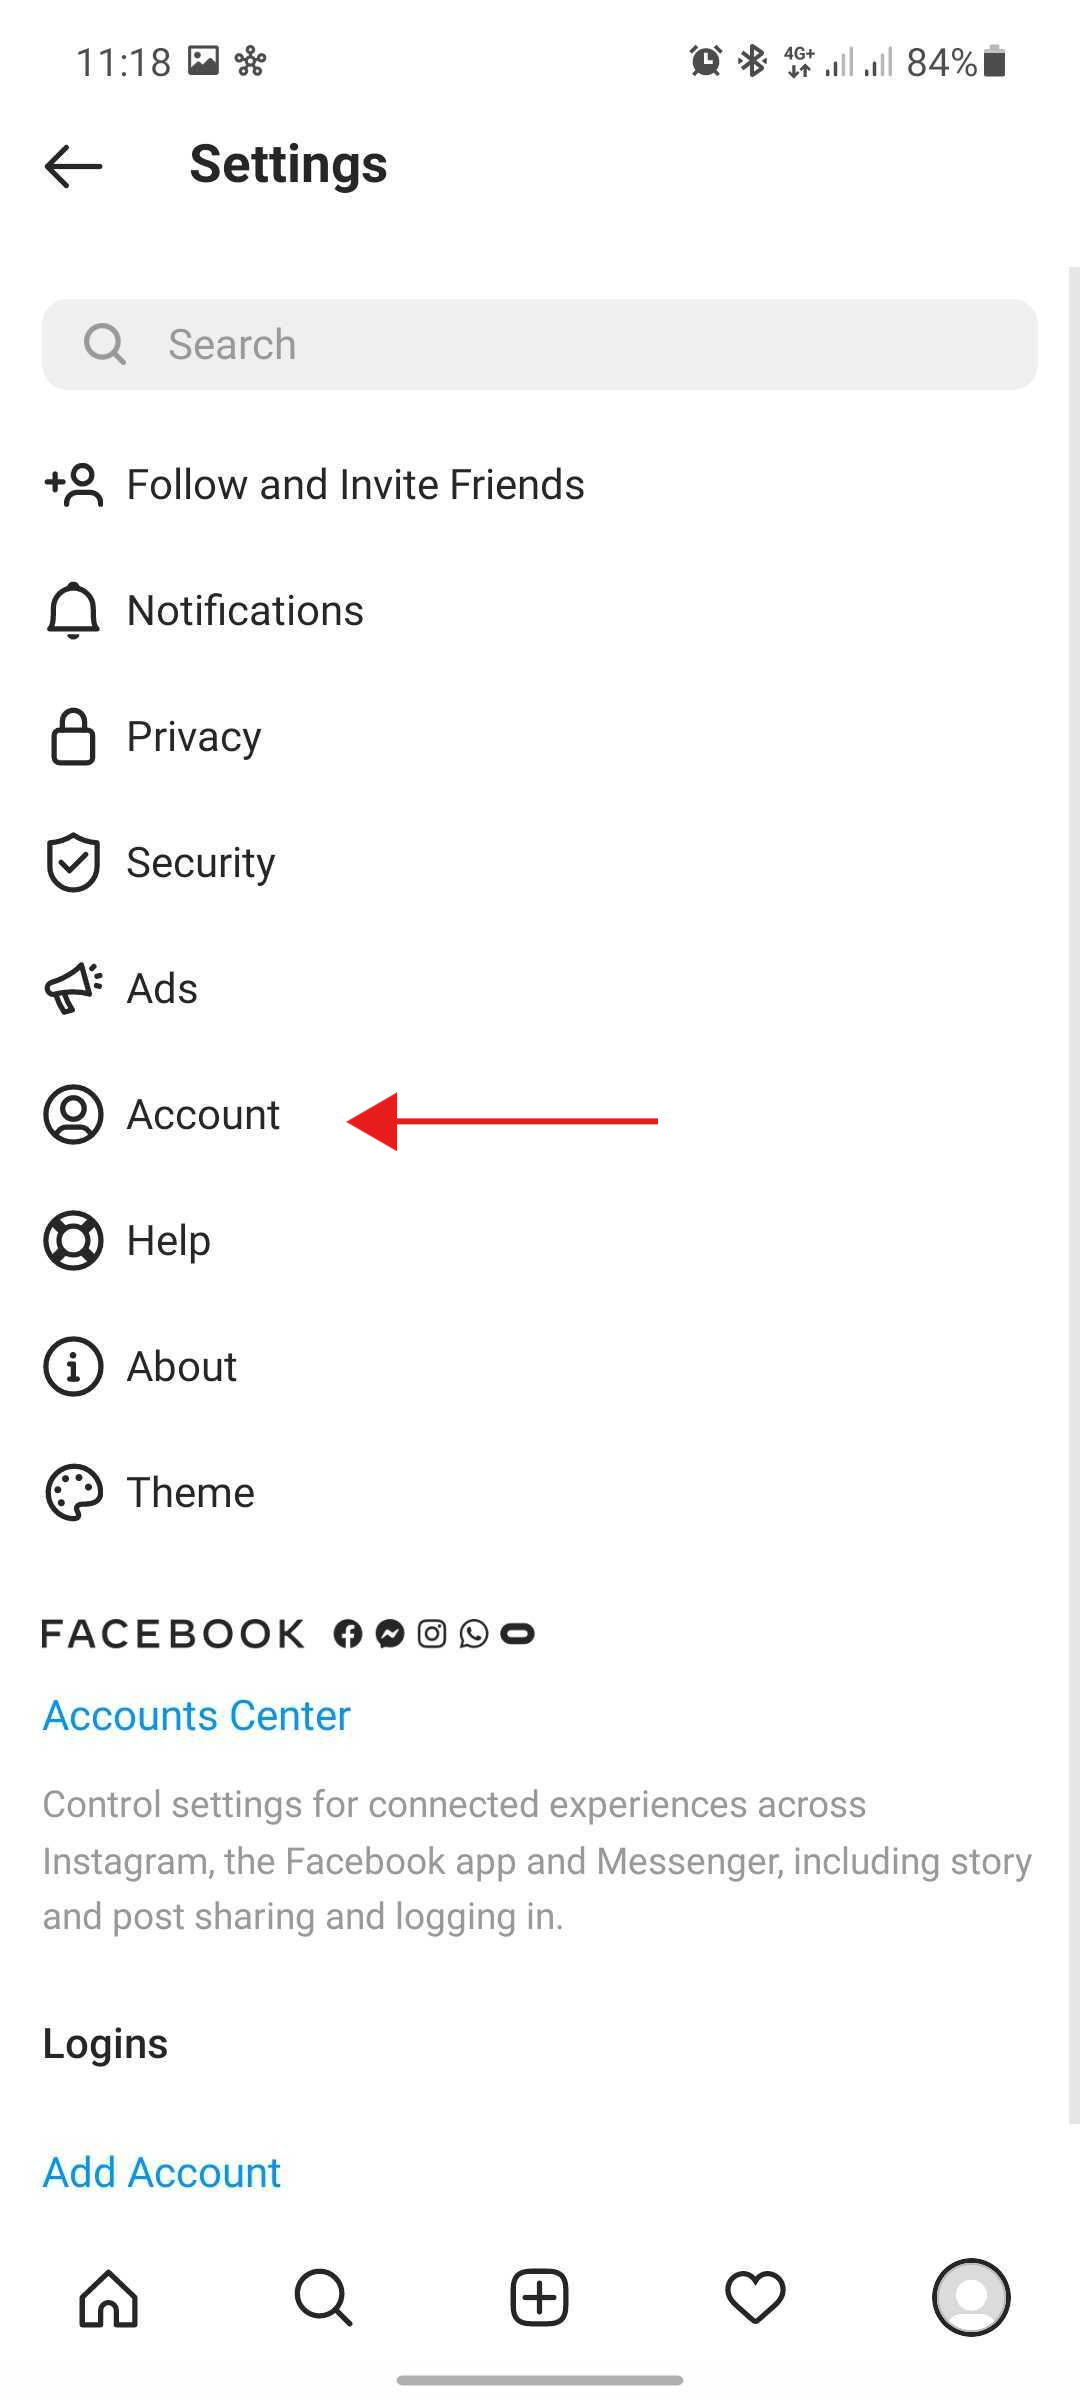
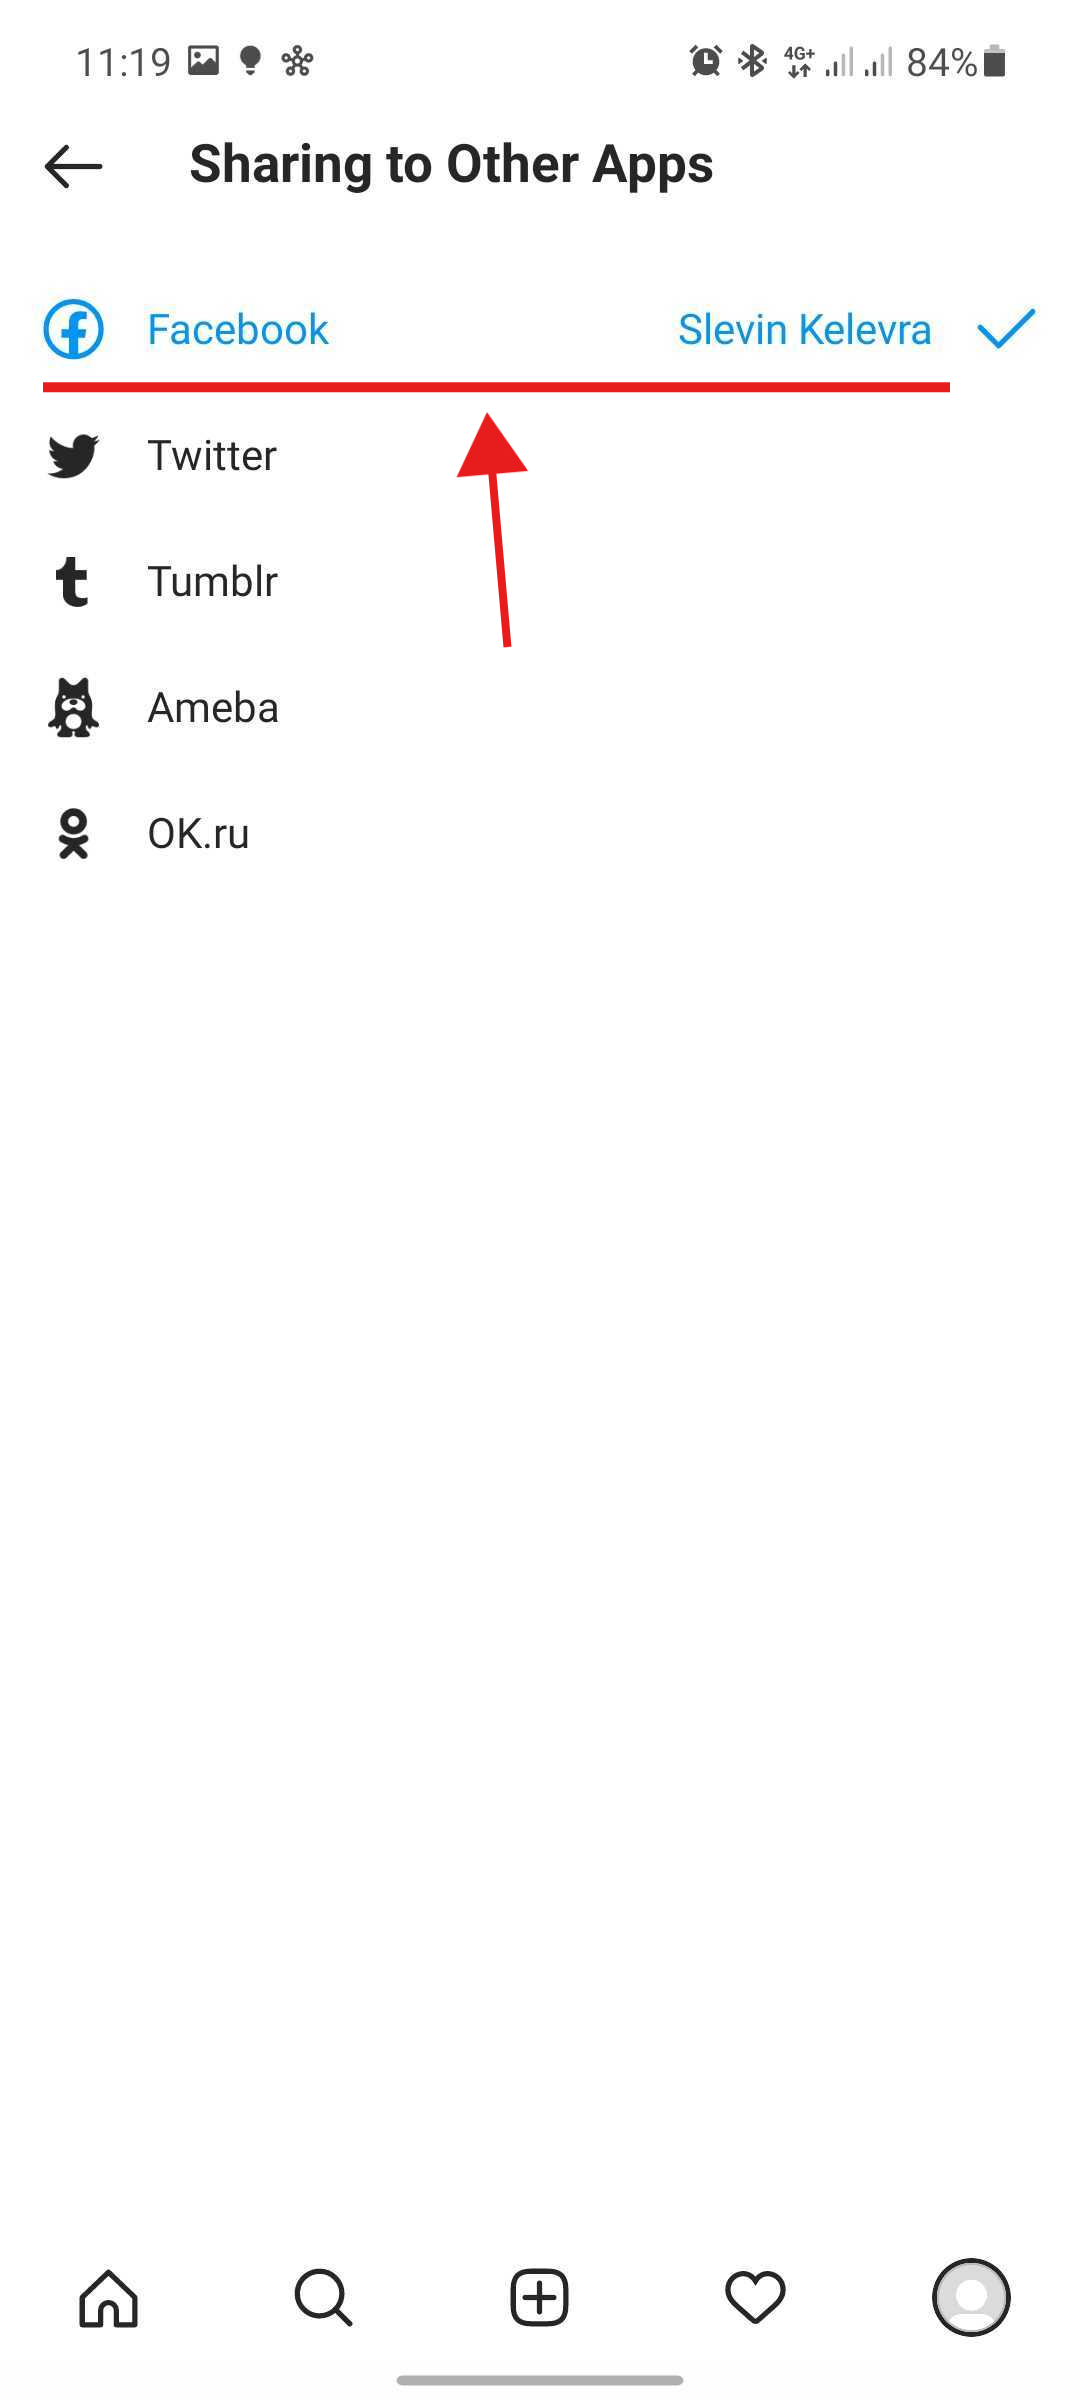
- Tap on the Sharing to Other Apps option in Account menu
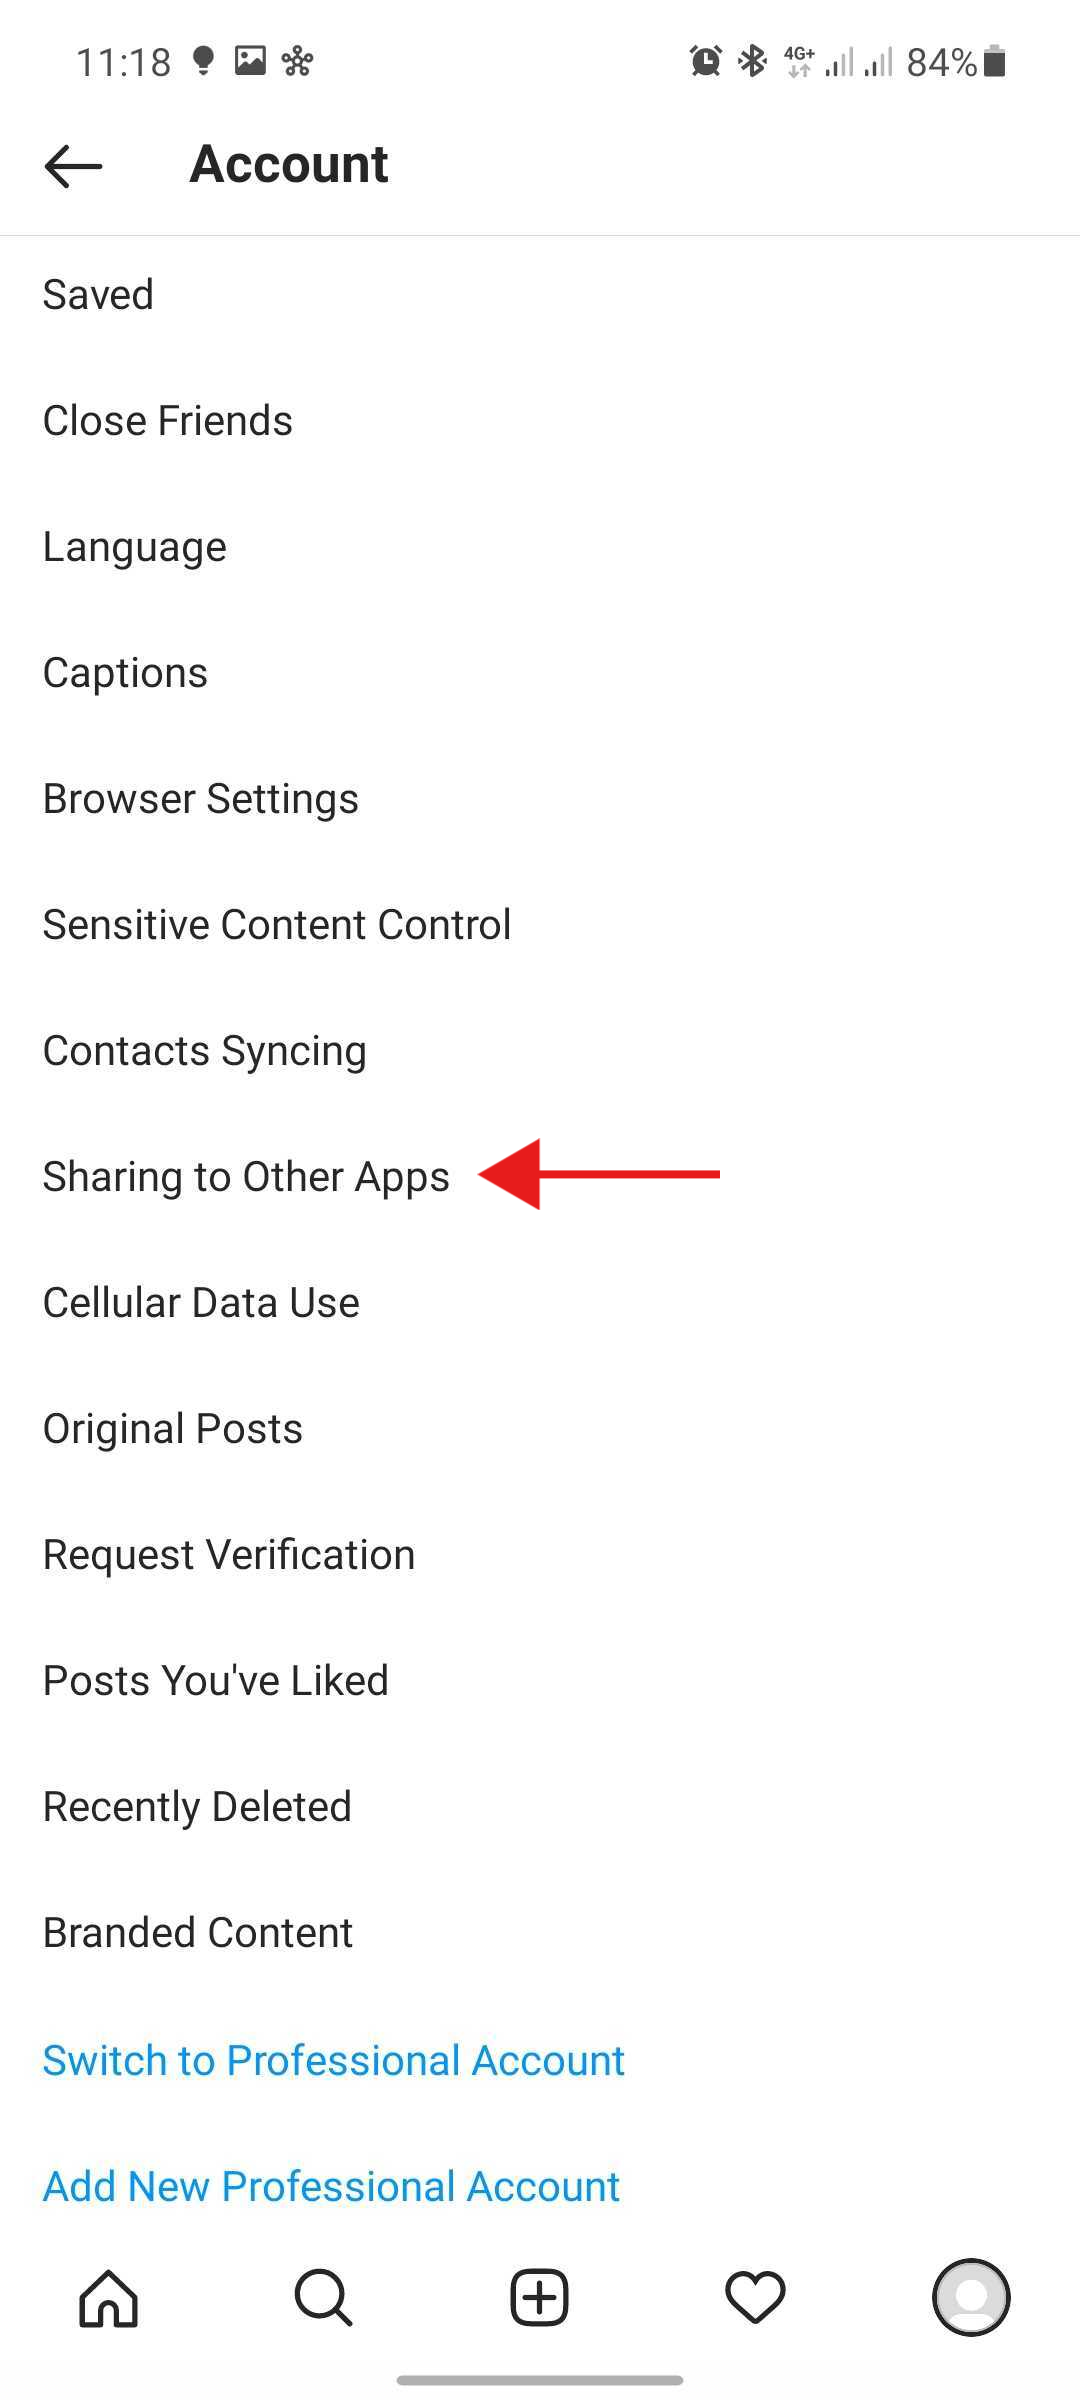
- Select your Facebook account
Facebook to Instagram
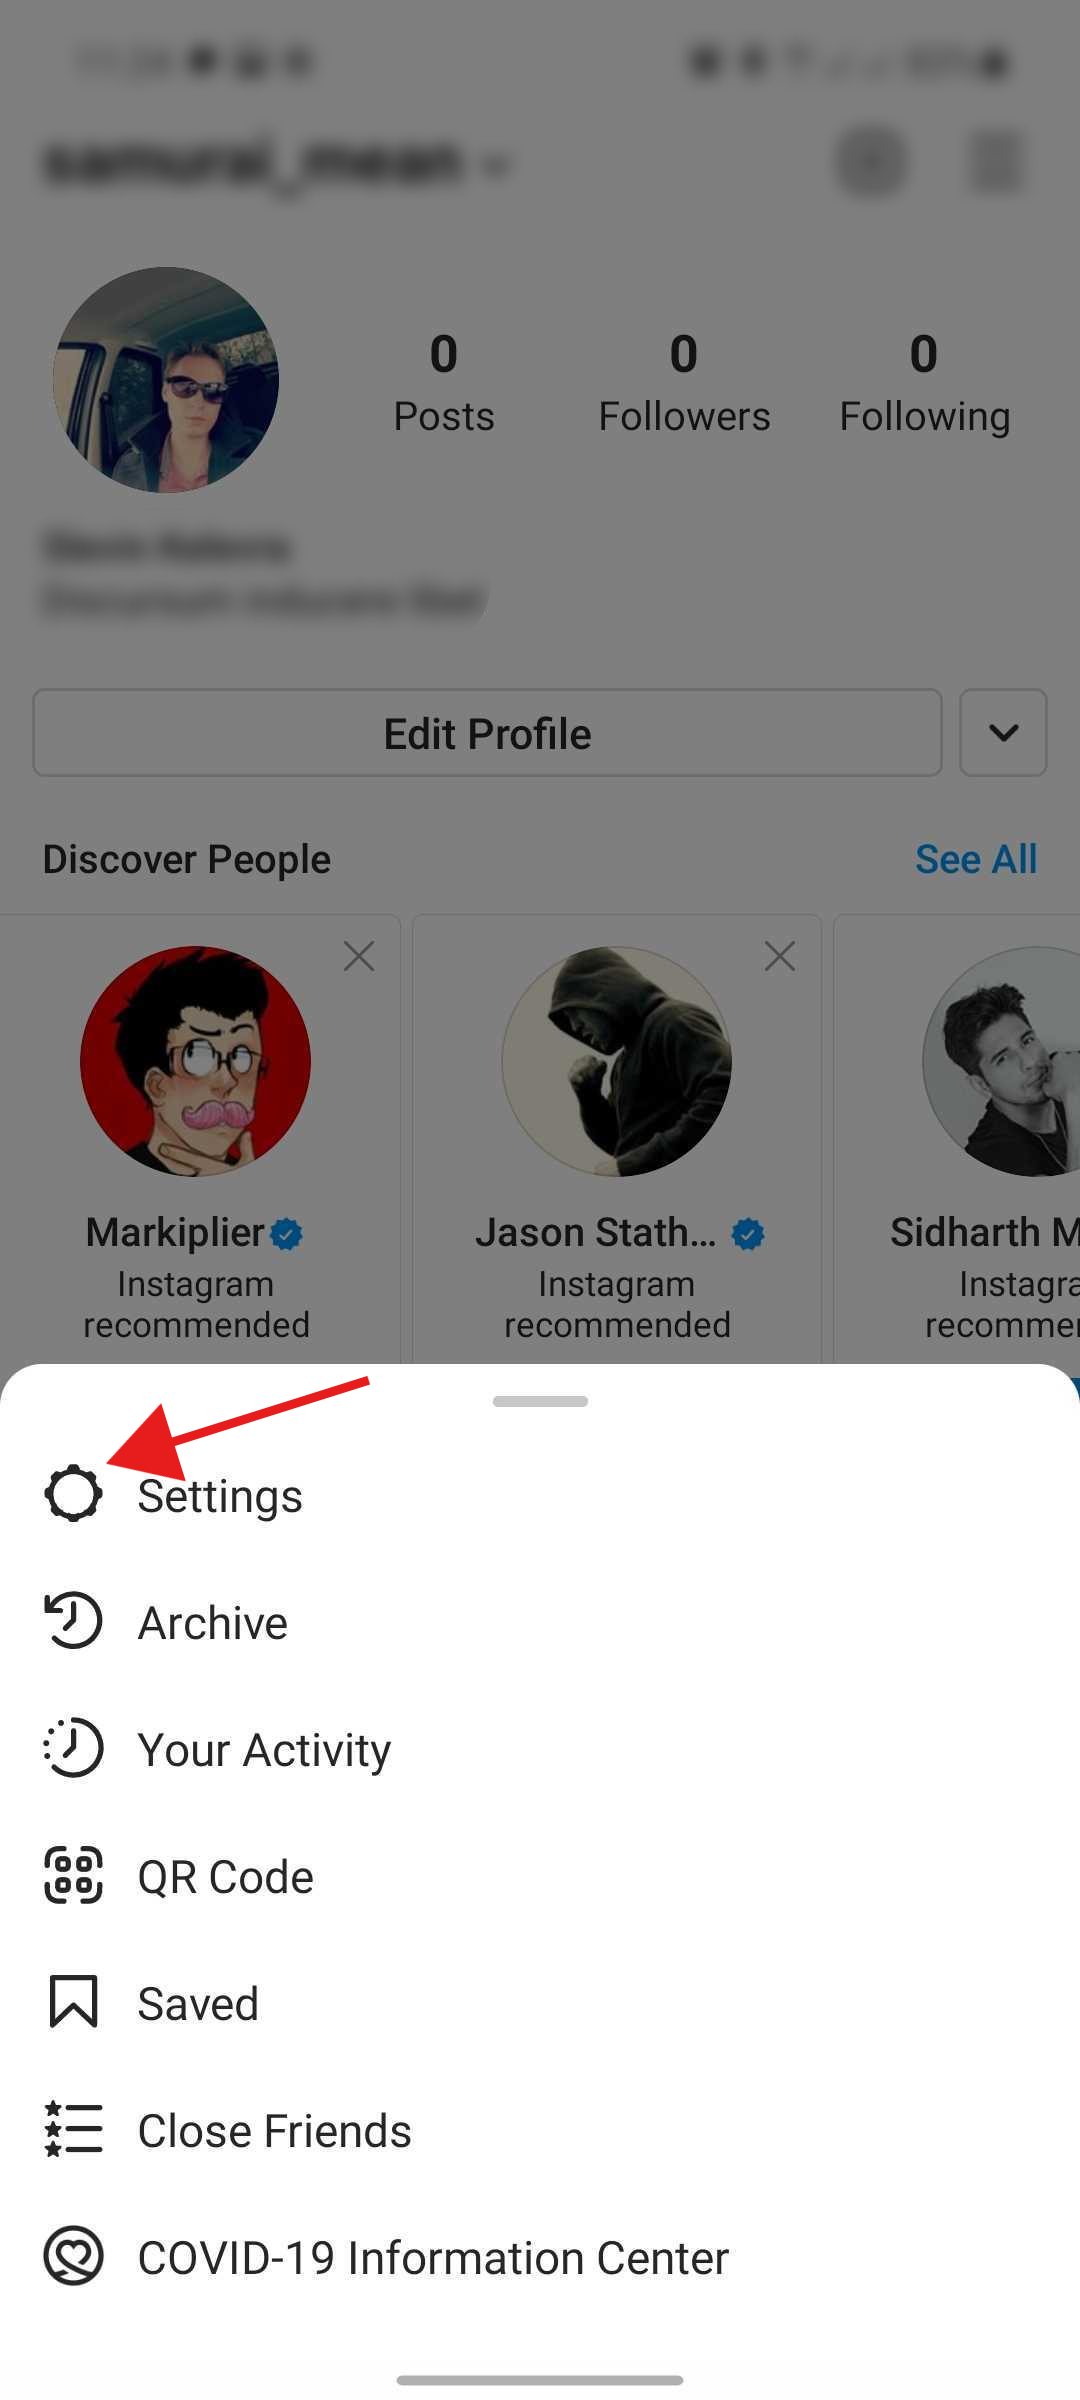
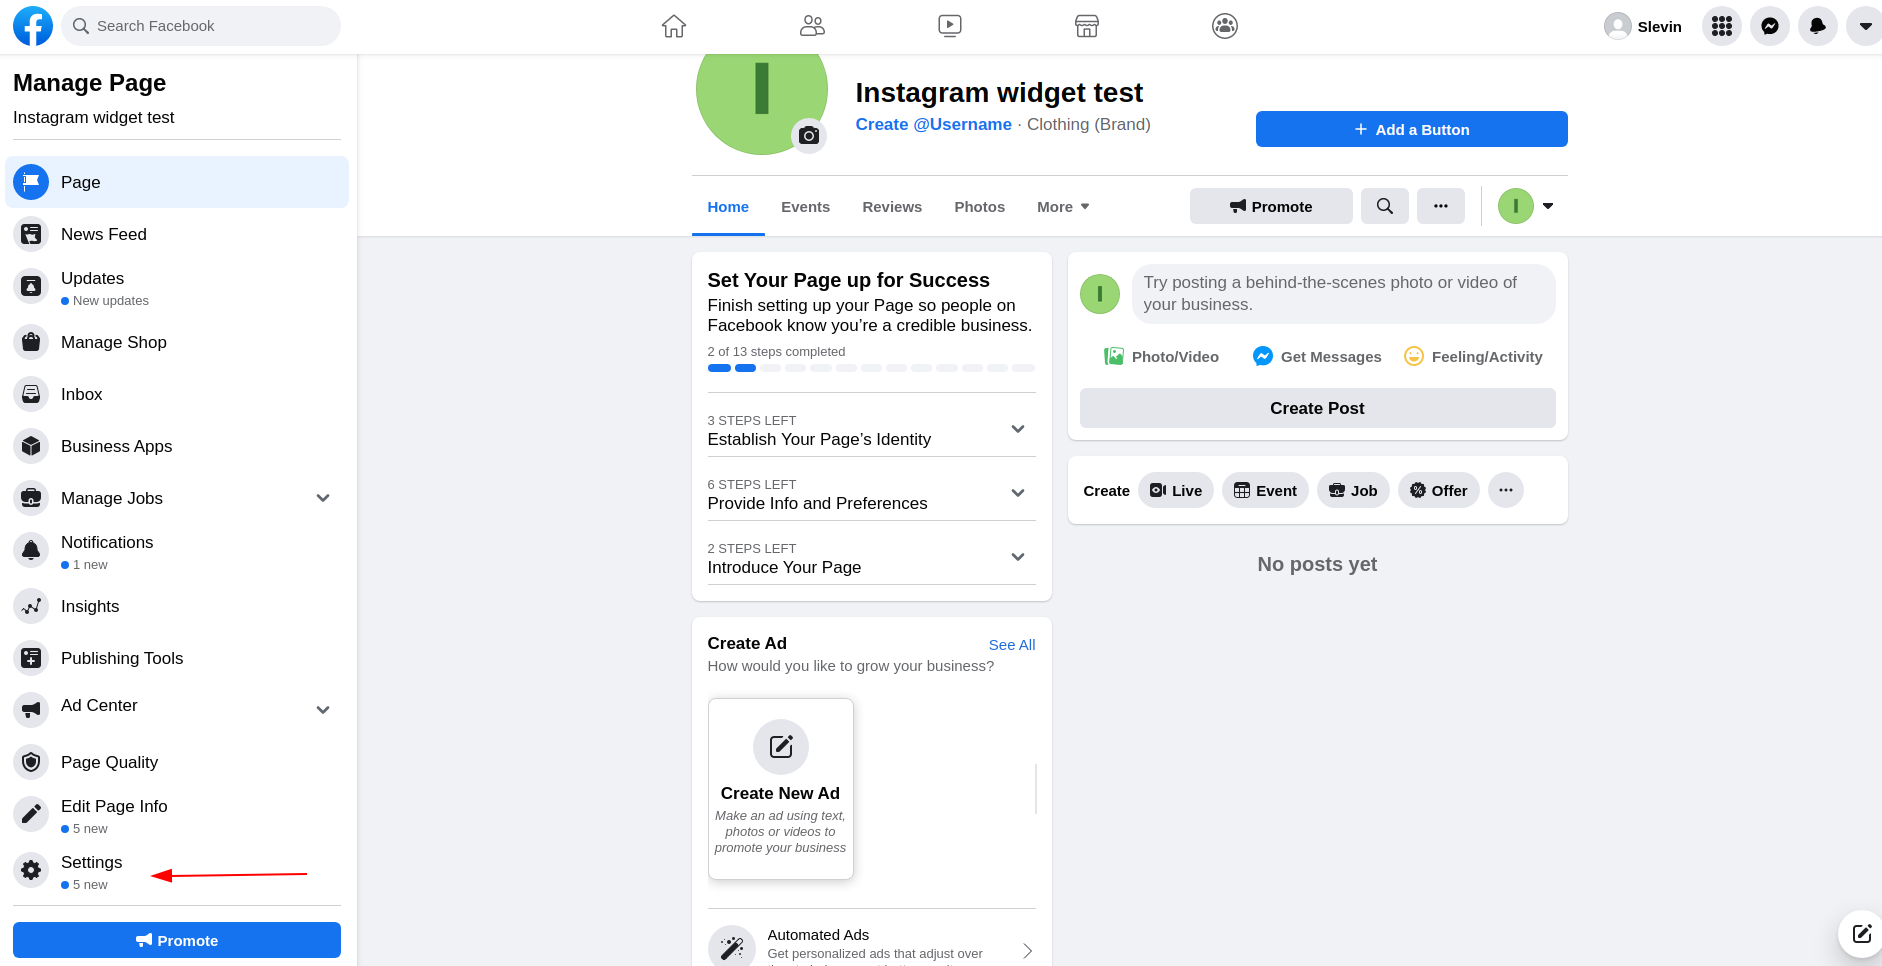
- Open your Facebook Business page and press Settings on the left menu
- Click the Instagram option on the left menu and push Connect Account button
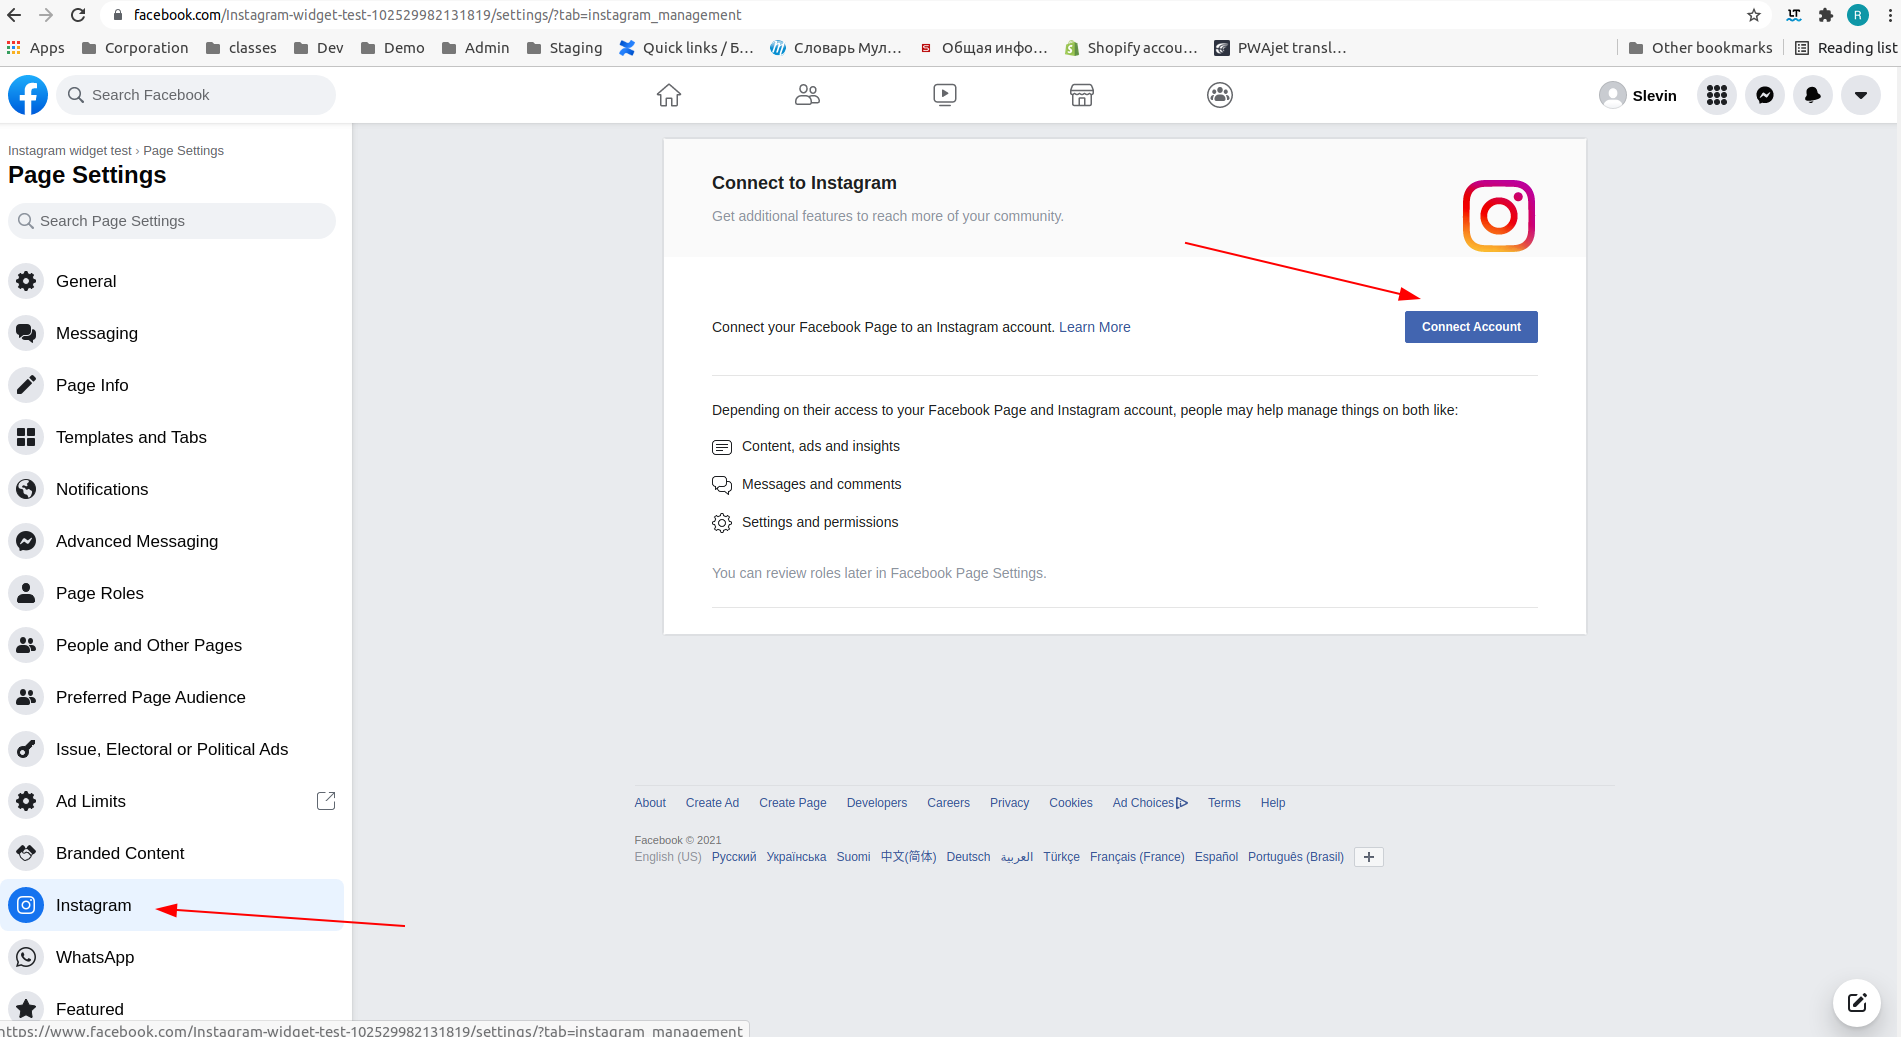
- Select your Instagram account and confirm connection
Create Facebook application
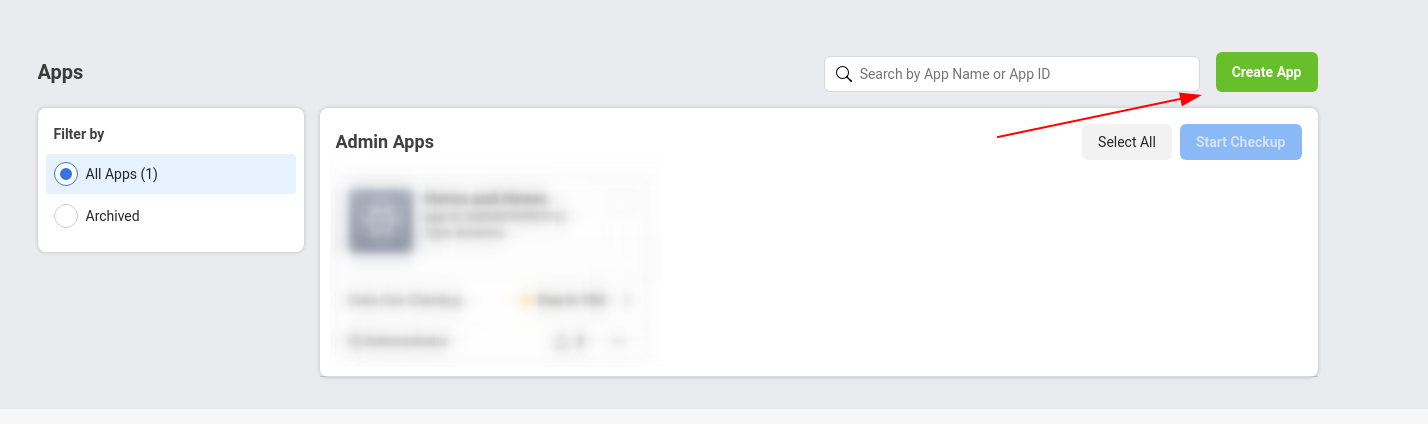
- Go to https://developers.facebook.com and create a new application.
- Select a type of an application
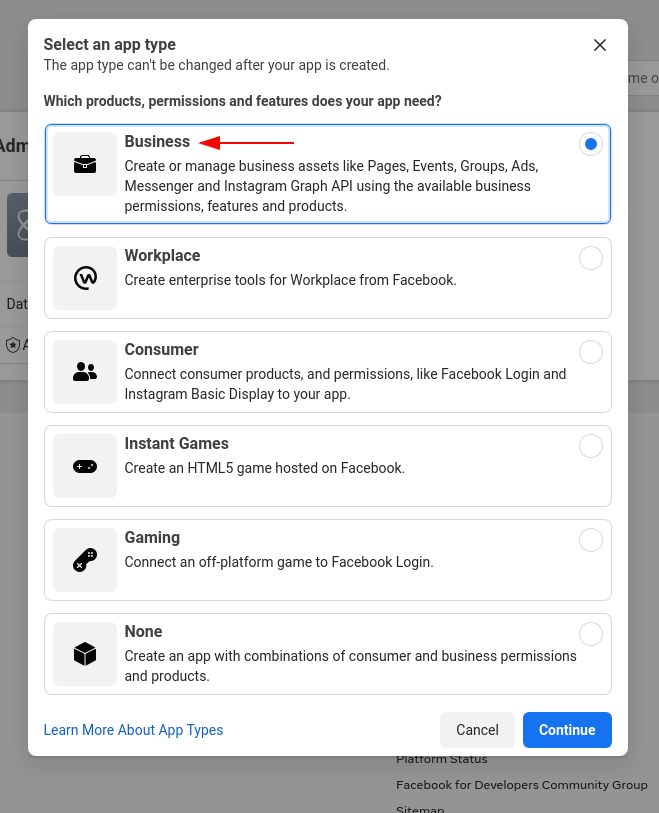
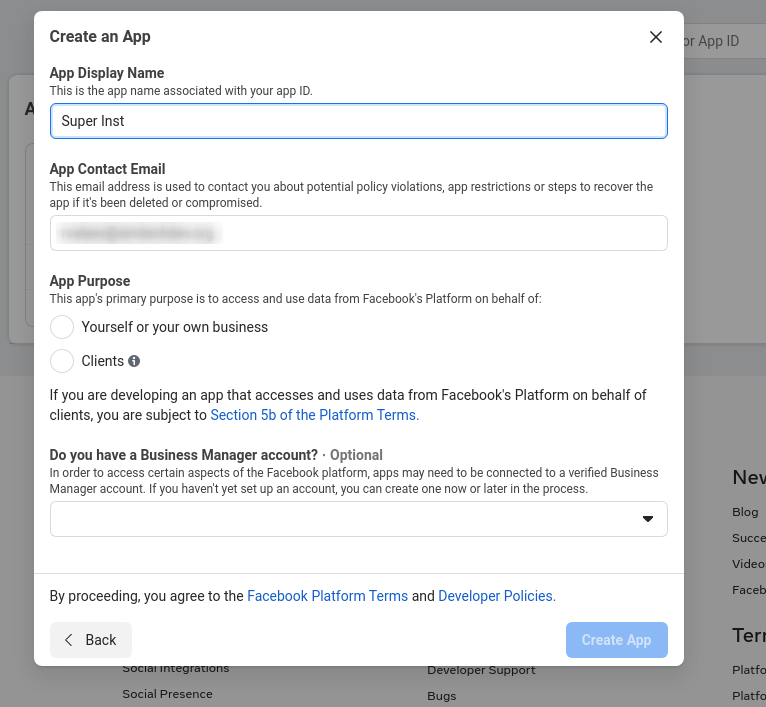
- Insert App Display Name and App Contact Email
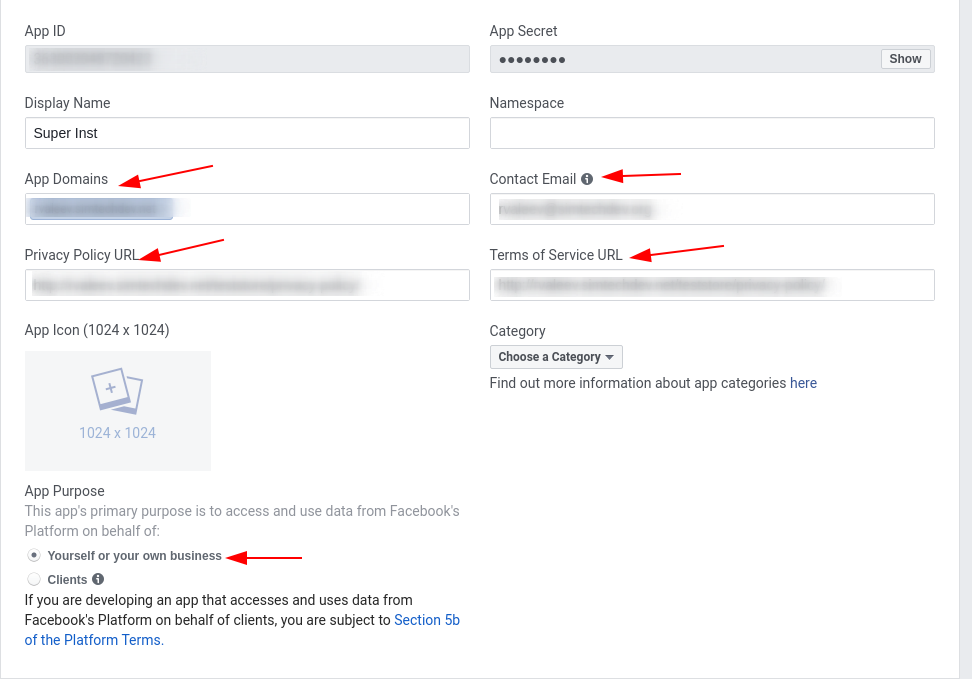
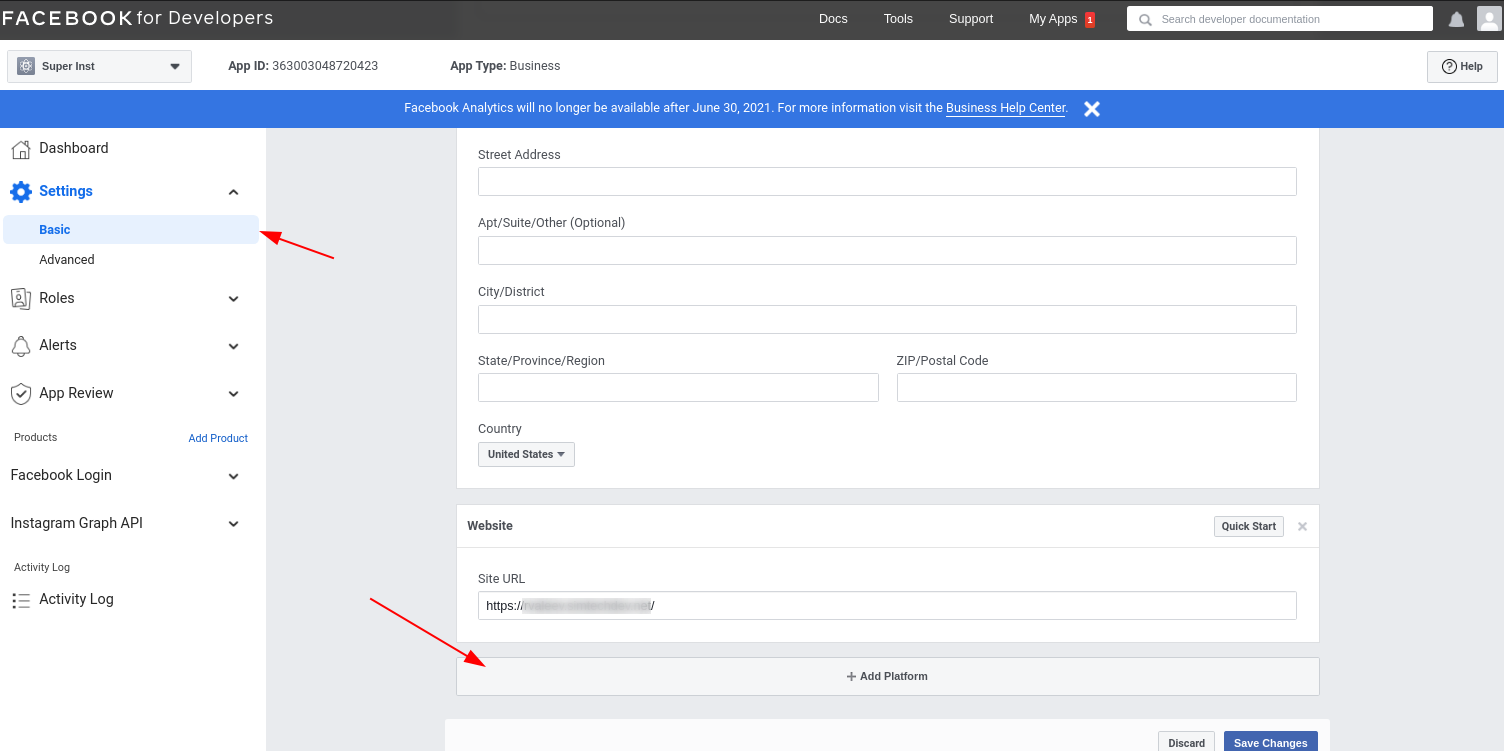
- Go to the app settings and select “Basic” in the left section. Fill in the “App Domains” and “Privacy Policy URL” fields, check “Yourself or your own business” under the “App purpose”.
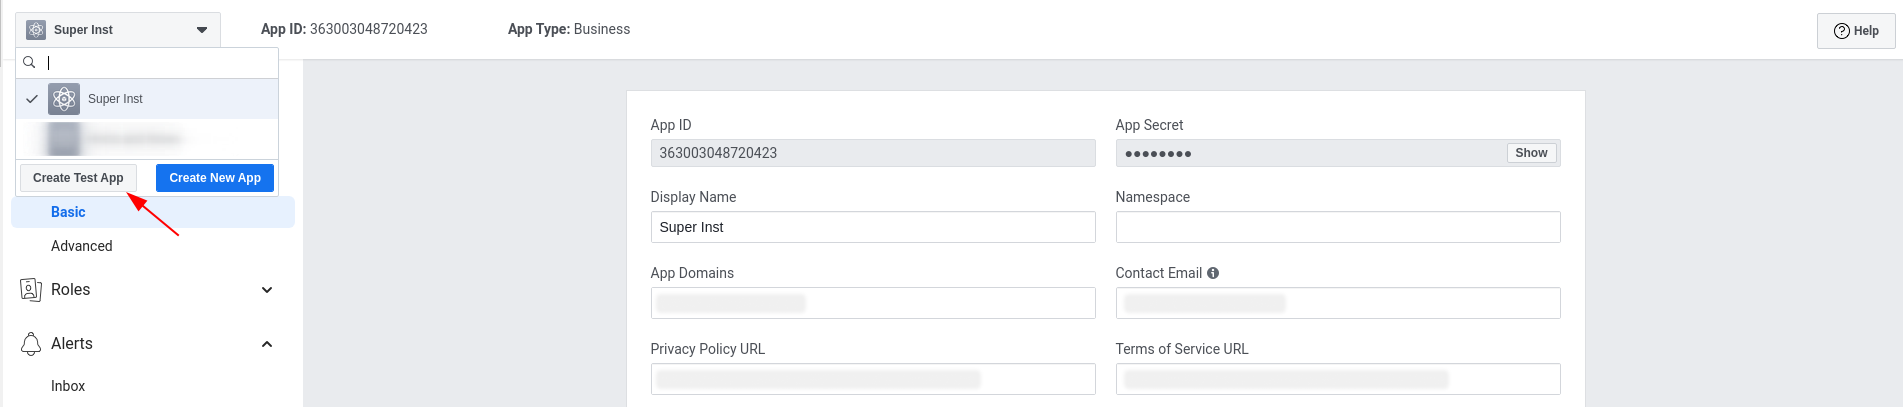
- Initial configuration of the add-on starts with creating a test version of your production Facebook app. In the Dashboard of your production app, click the down arrow next to the app name in the left navigation panel. Click “Create Test App”.
Setting up the test app
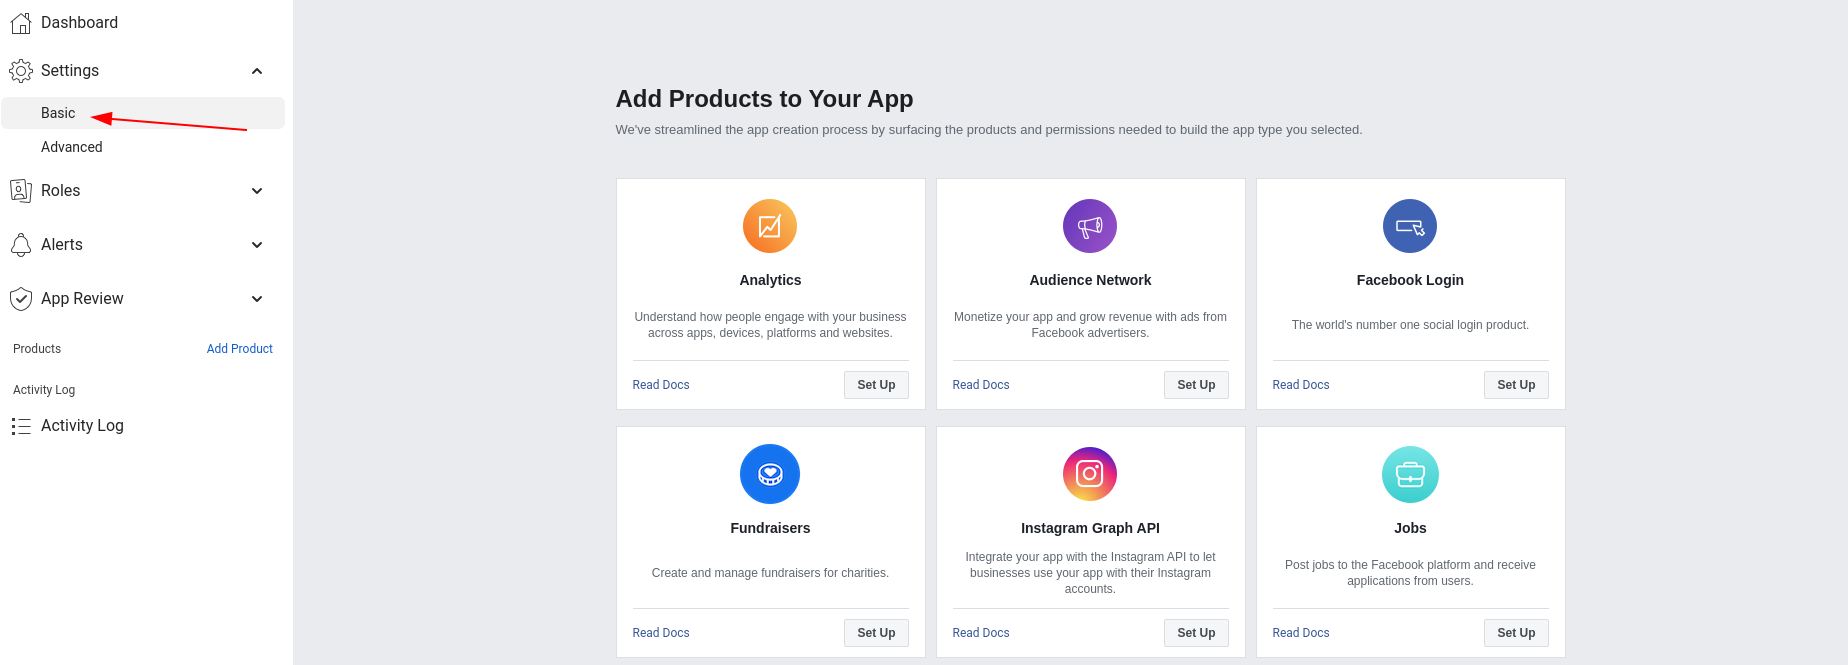
- Add the “Facebook Login” app and go to its settings.
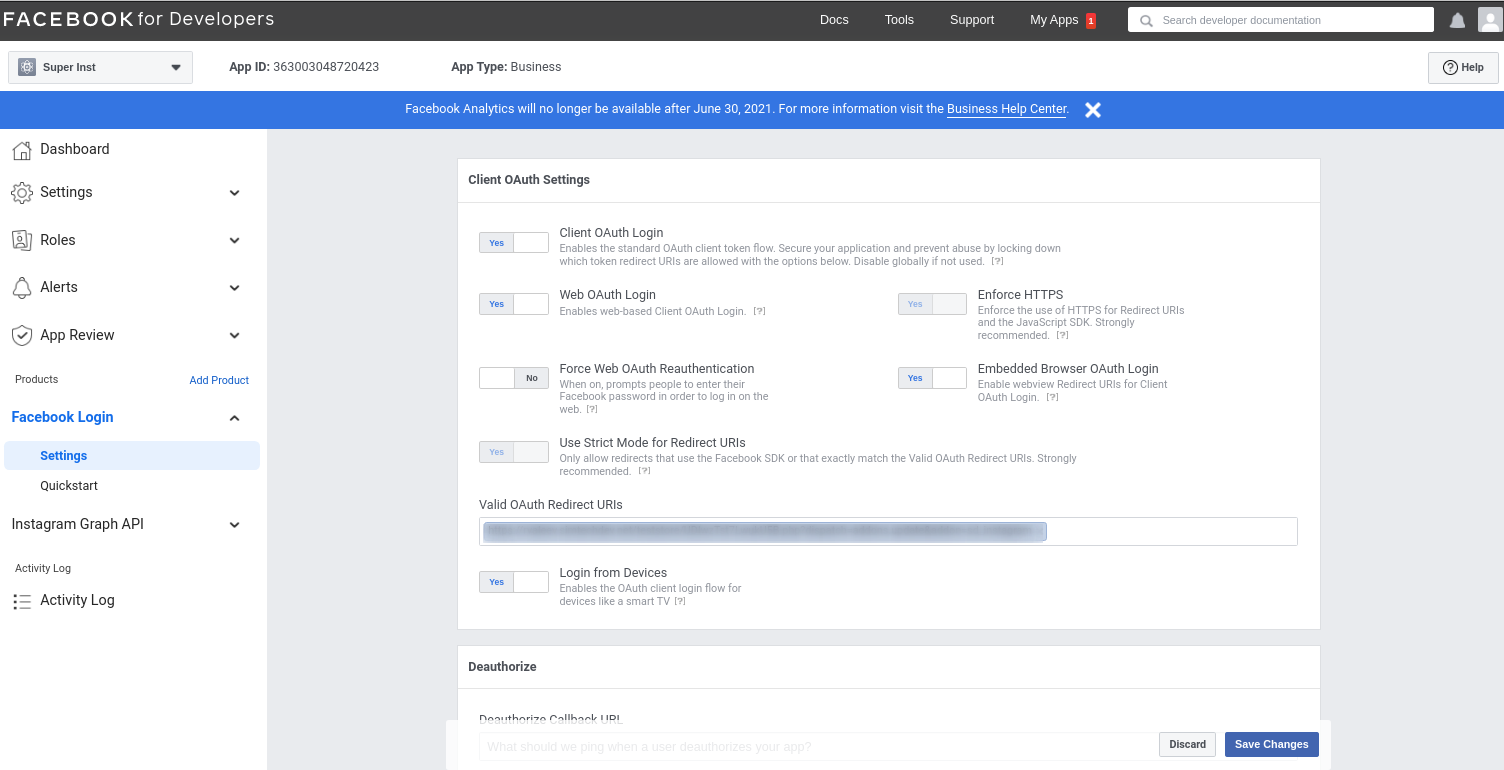
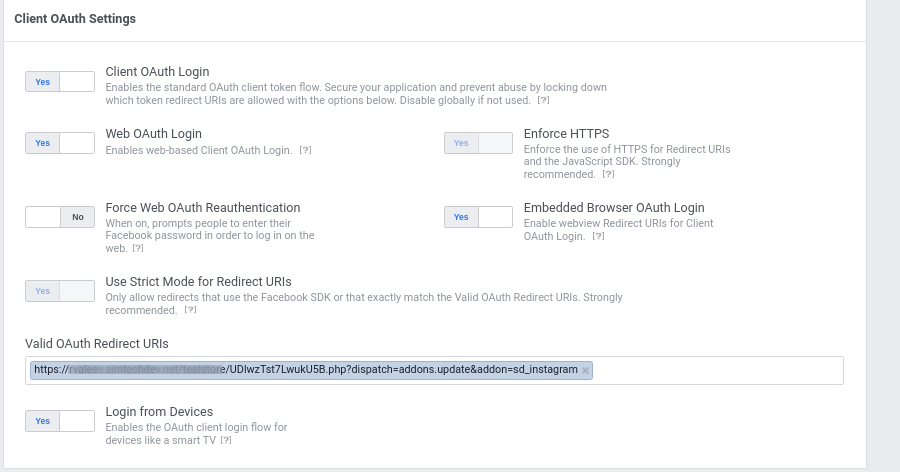
- Go to Admin Pannel of your Store/Marketplace and open the Setting tab of the Insragram Widget add-on
- Copy the link of the Setting tab and insert it into the “Valid OAuth Redirect URIs” field of the Facebook Login setting

- Go to the app settings, press Add Platform and add the URL of your store/marketplace
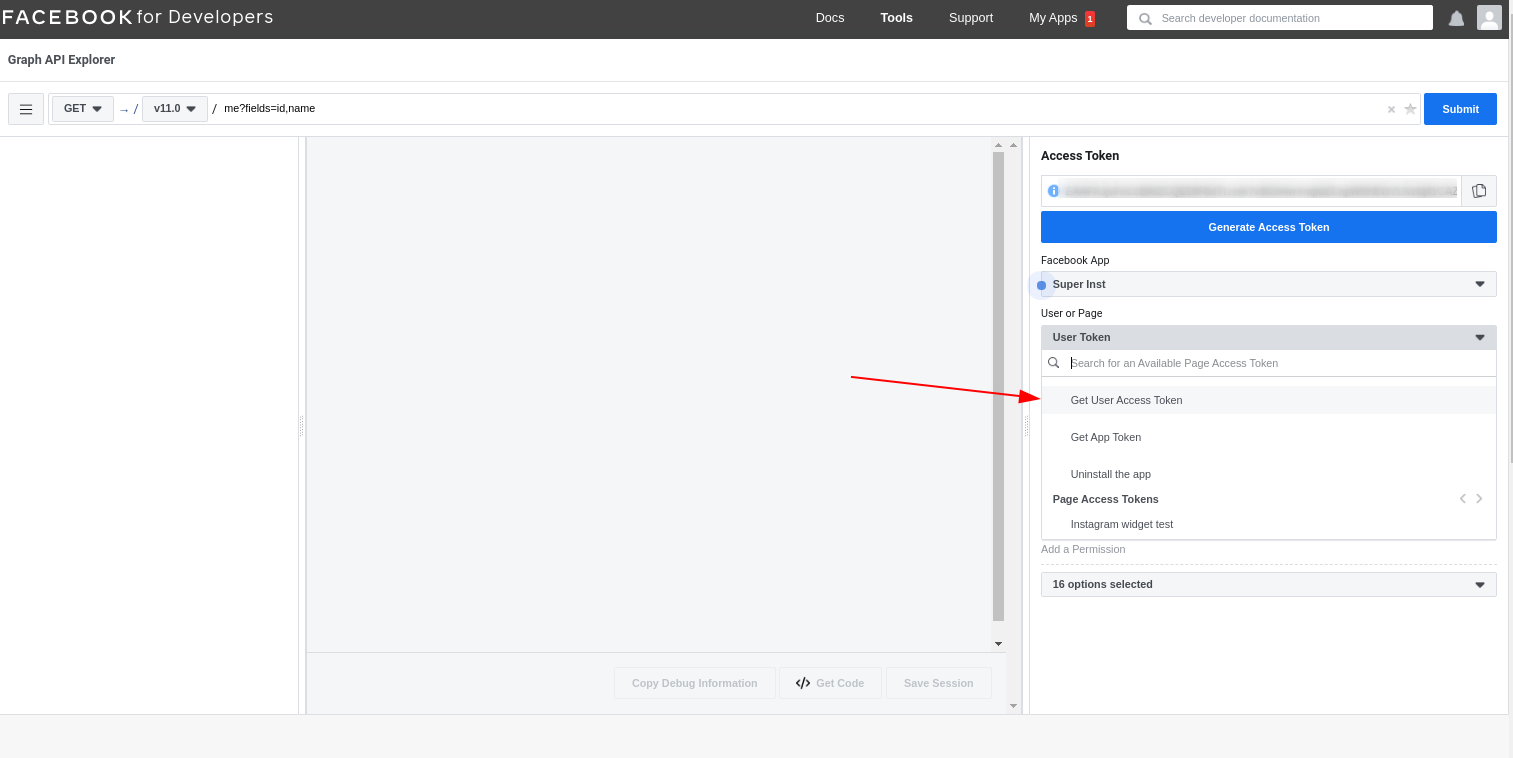
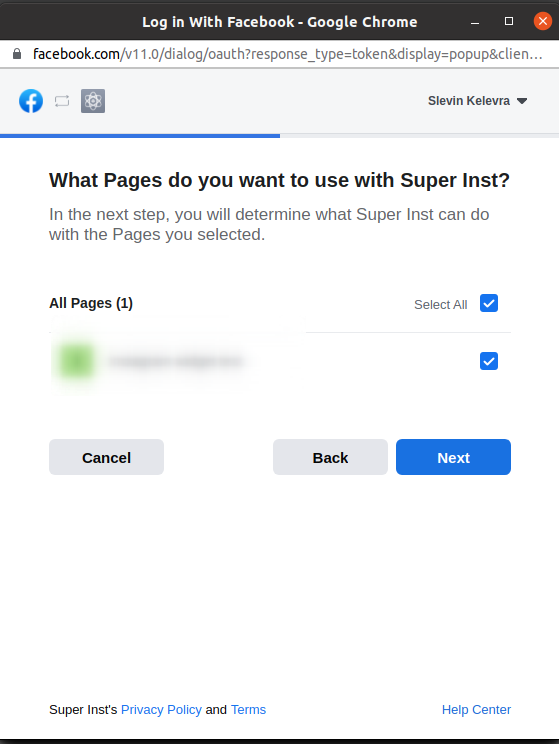
- Next, you need to get access to the test store. In order to do that you first need to go to https://developers.facebook.com/tools/explorer.
Open the User or Page list and select Get User Access Token.
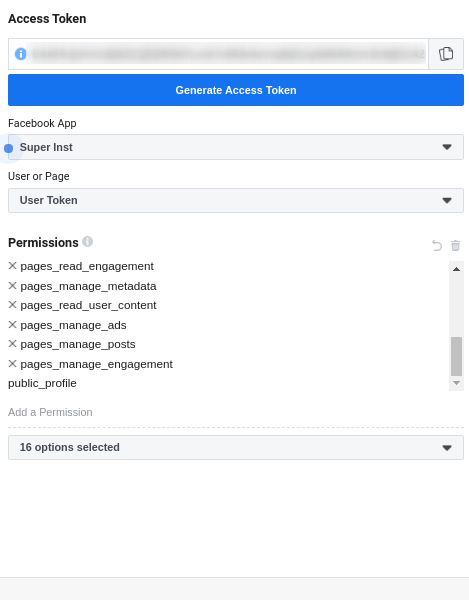
- Select following parameters in the “Permissions” section:
- page_events
- pages_manage_ads
- pages_manage_cta
- pages_manage_engagement
- pages_manage_instant_articles
- pages_manage_metadata
- pages_manage_posts
- pages_read_engagement
- pages_read_user_content
- pages_show_list
- instagram_basic
- instagram_content_publish
- instagram_manage_comments
- instagram_manage_insights
- instagram_manage_messages
- business_management
- Submit a me/accounts request. Data is missing now.
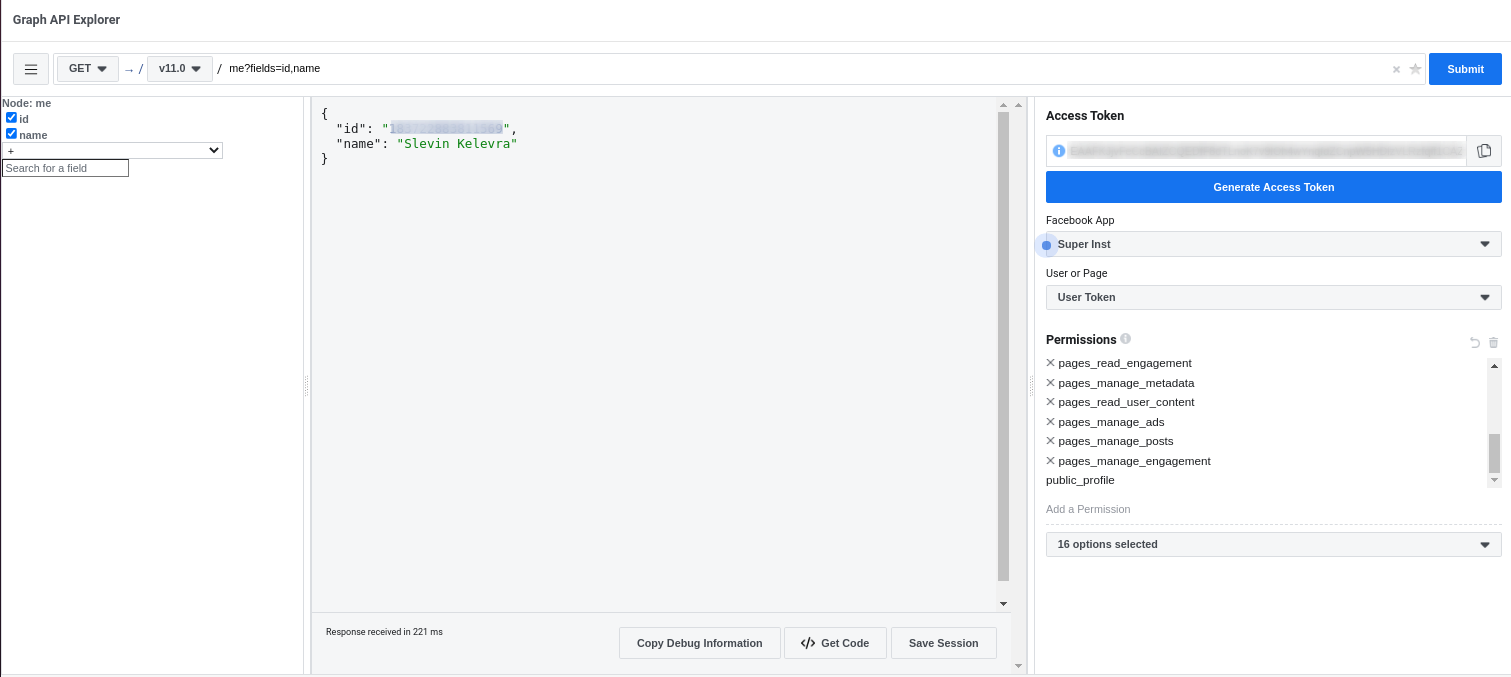
To get the data, you need to request access.
- Once you get the access, the page data is displayed in the space provided.
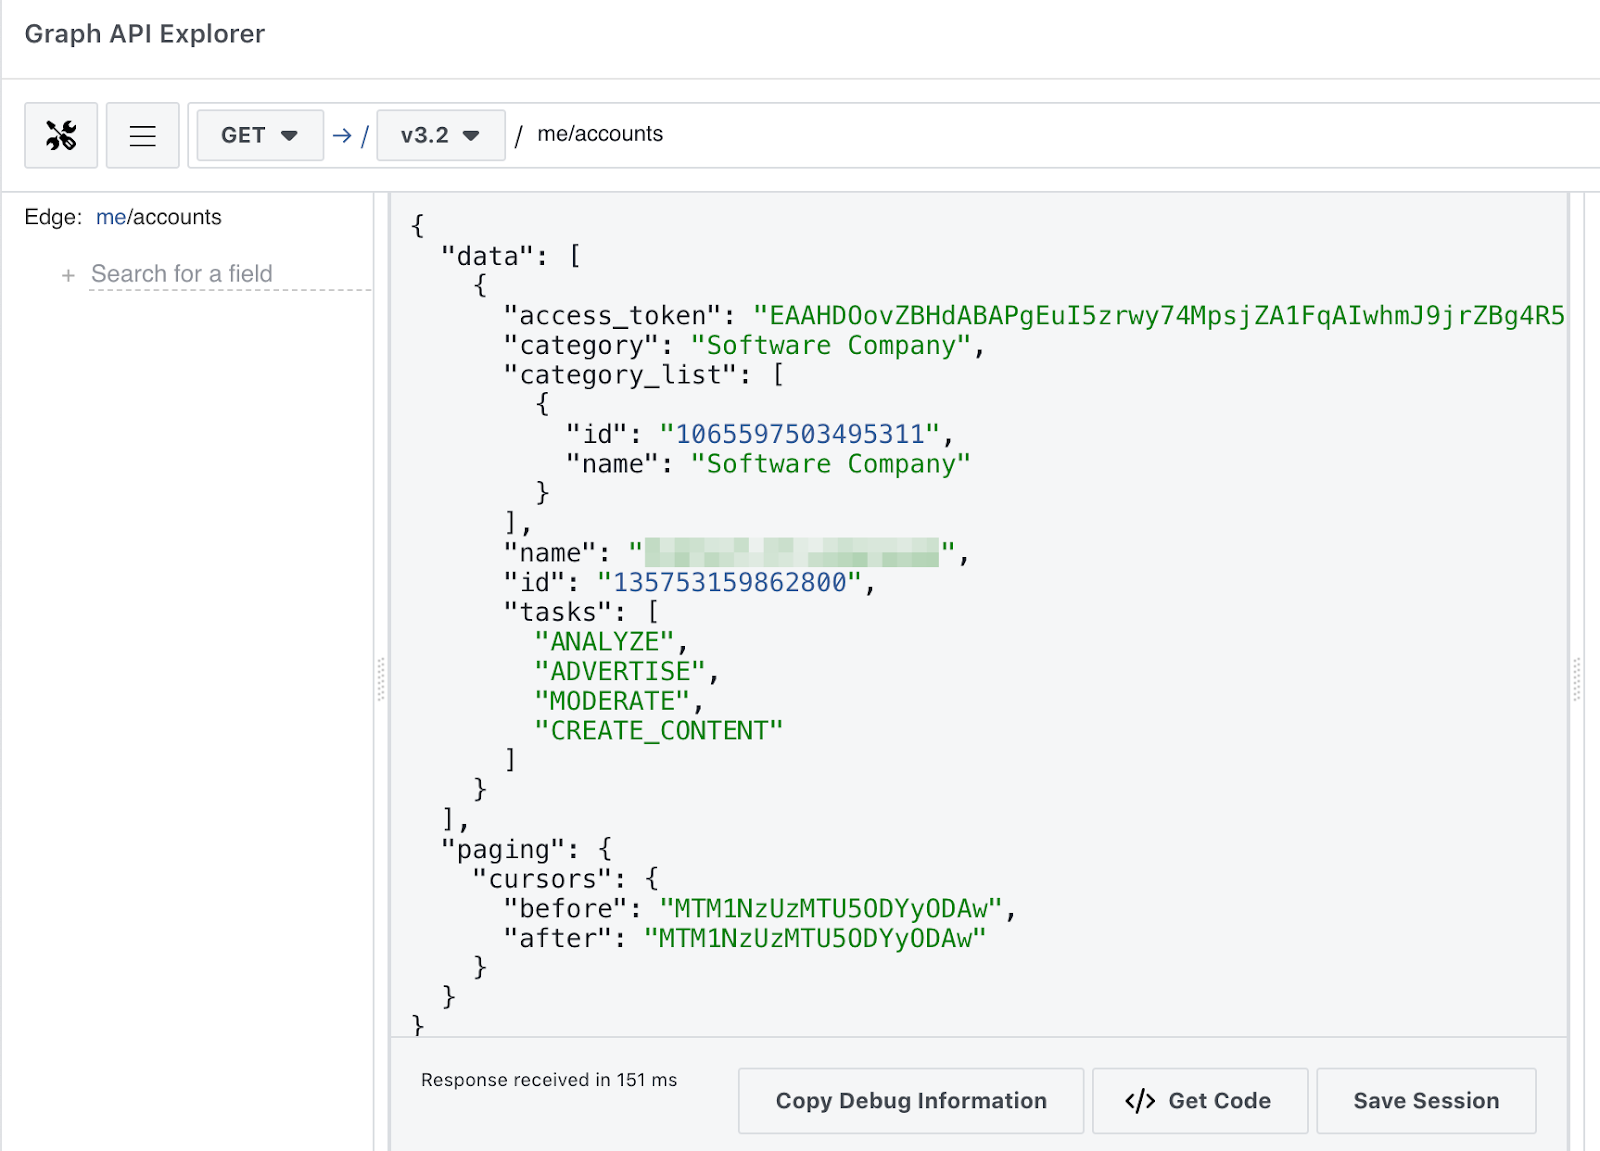
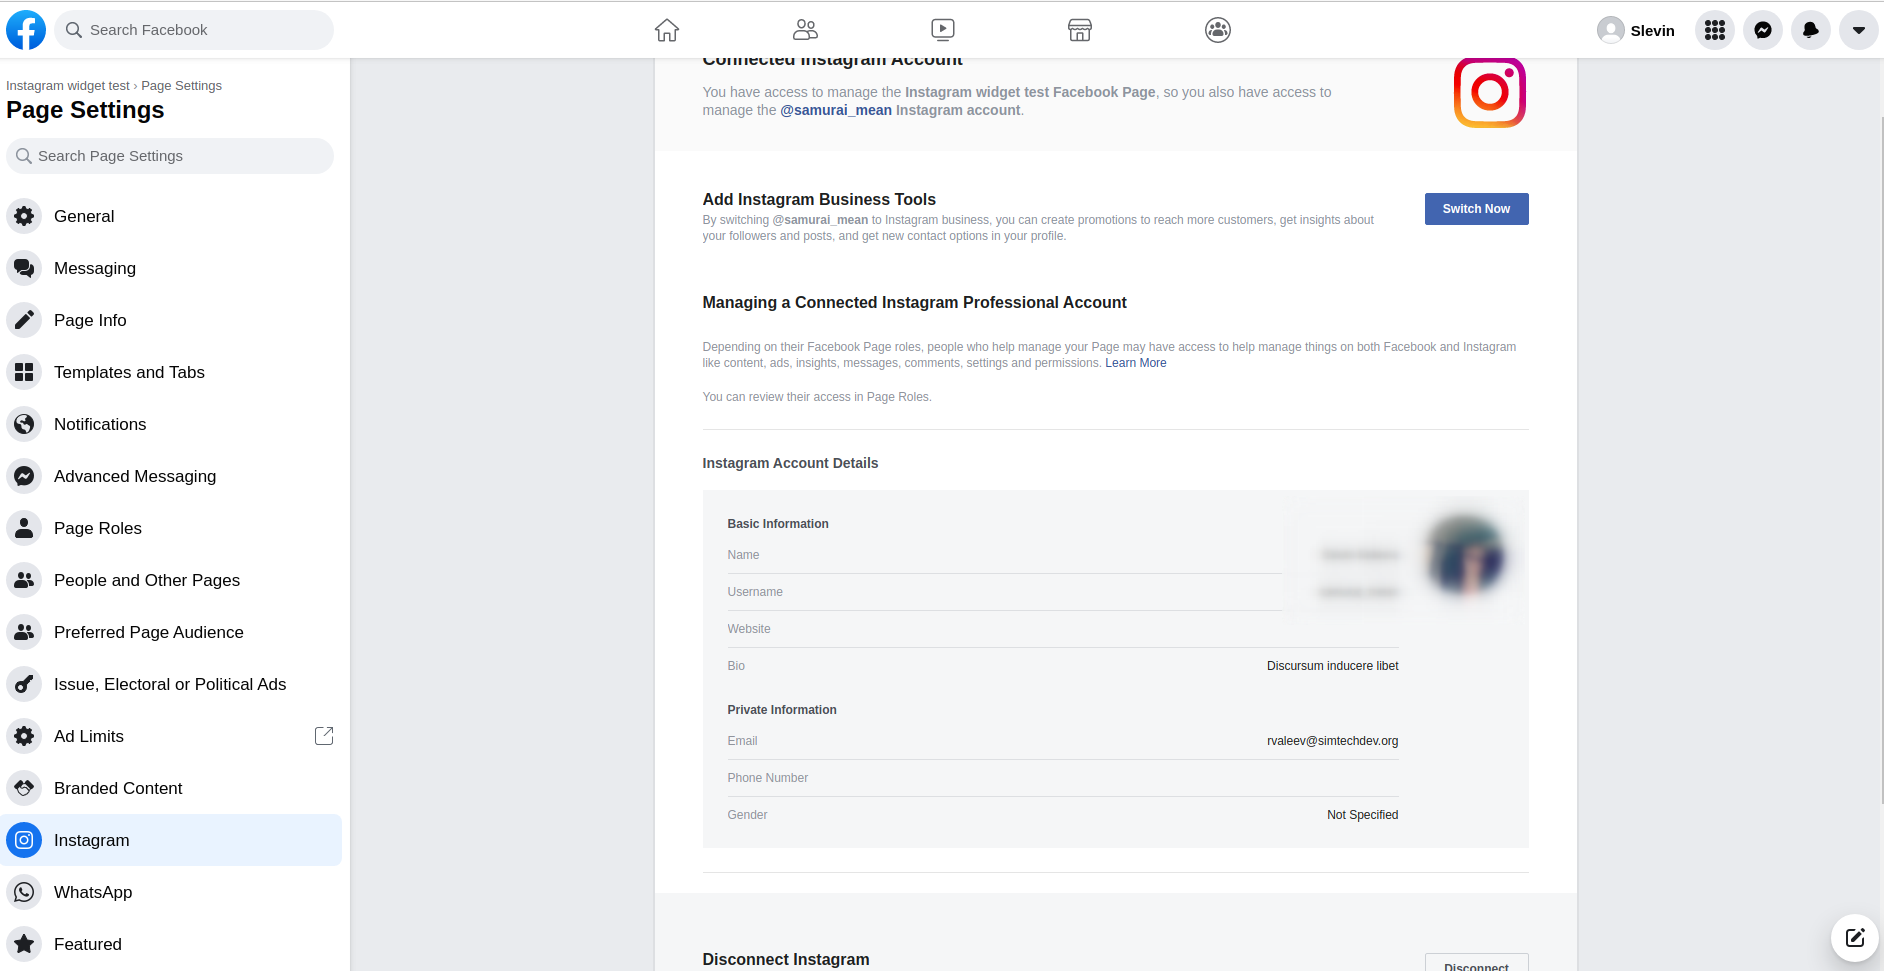
Go to Settings -> Basic and copy App ID and App Secret from the page. Now you are ready to proceed to the installation of the CS-Cart add-on.
Note
You could finish setting up of Facebook app on this step and go to installation and setting up of the Insragram Widget add-on step Managing in the admin panel. In this case, Insragram Widget add-on will work via the test Facebook app in your store. The test Facebook app would be enough if you are going to use only the main Facebook account.
Currently, Insragram Widget add-on works correctly with test Facebook app and you could use it on your own responsibility without getting reviews for the main app. Otherwise, you could continue setting Facebook on the step App review on Facebook.
Managing in the admin panel
Installing the add-on
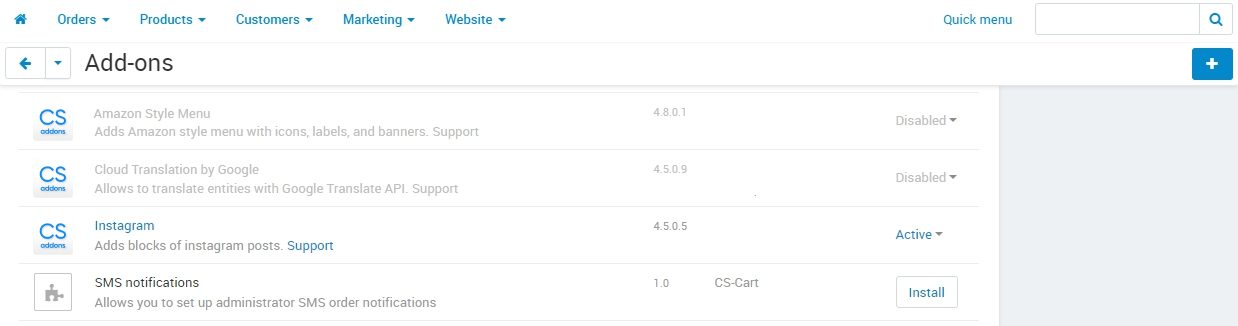
Install the Insragram Widget add-on on the add-ons list page (Add-ons → Manage add-ons). Click the + button in the top right corner, select an archive and click Upload & install. You can now find the installed add-on in the list of installed add-ons, just make sure it is set to Active.
Setting up the add-on
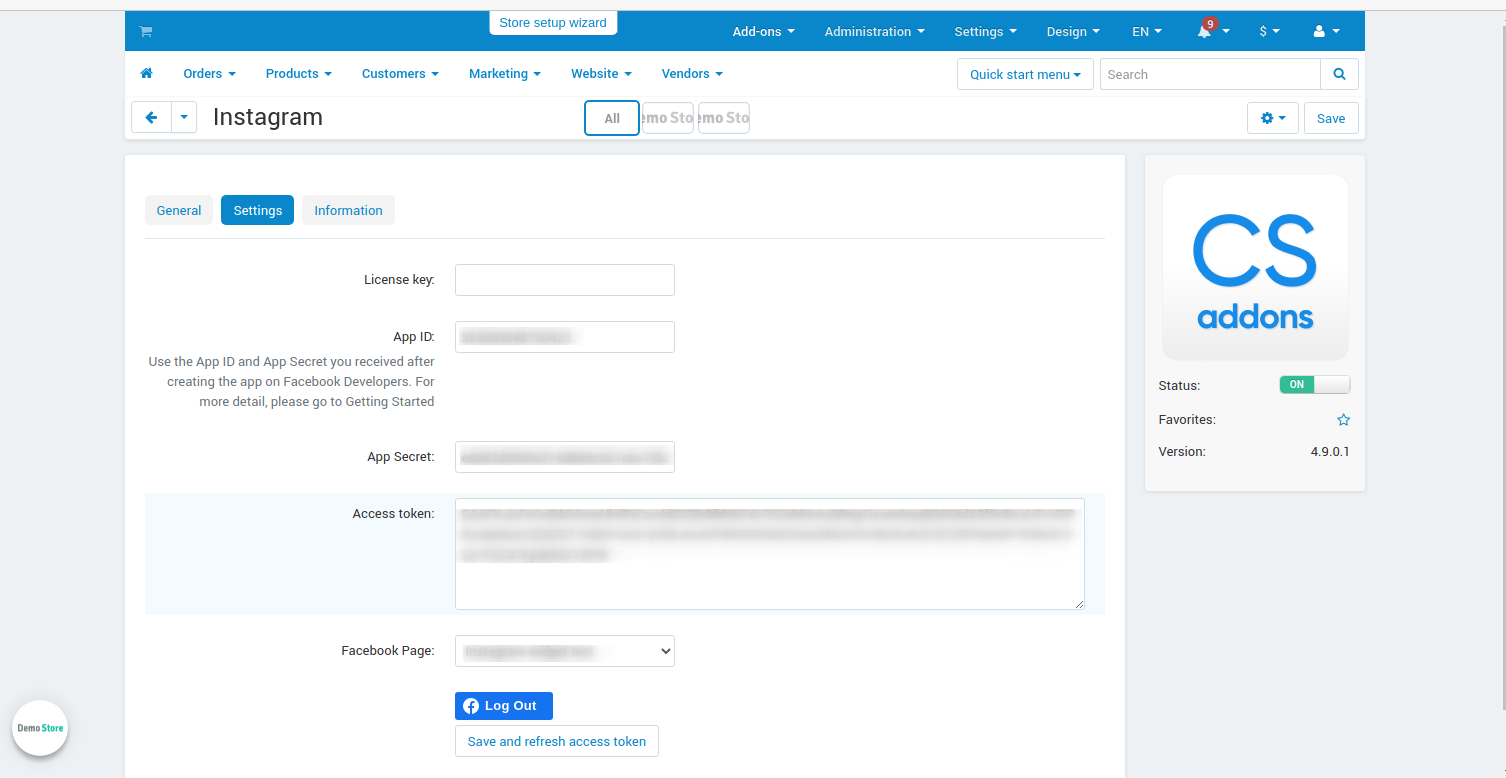
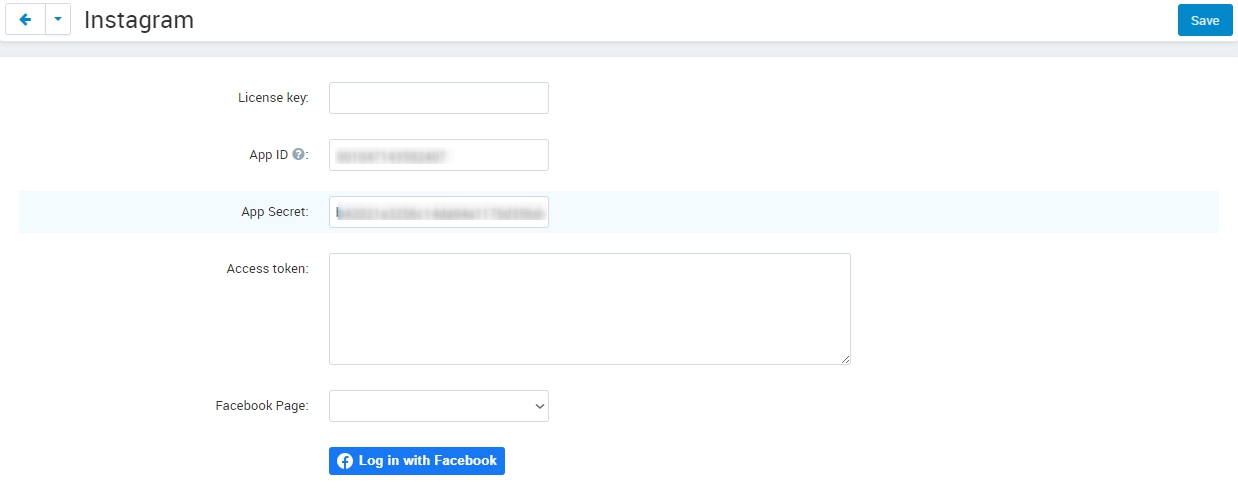
Here are available settings of the Insragram Widget add-on.
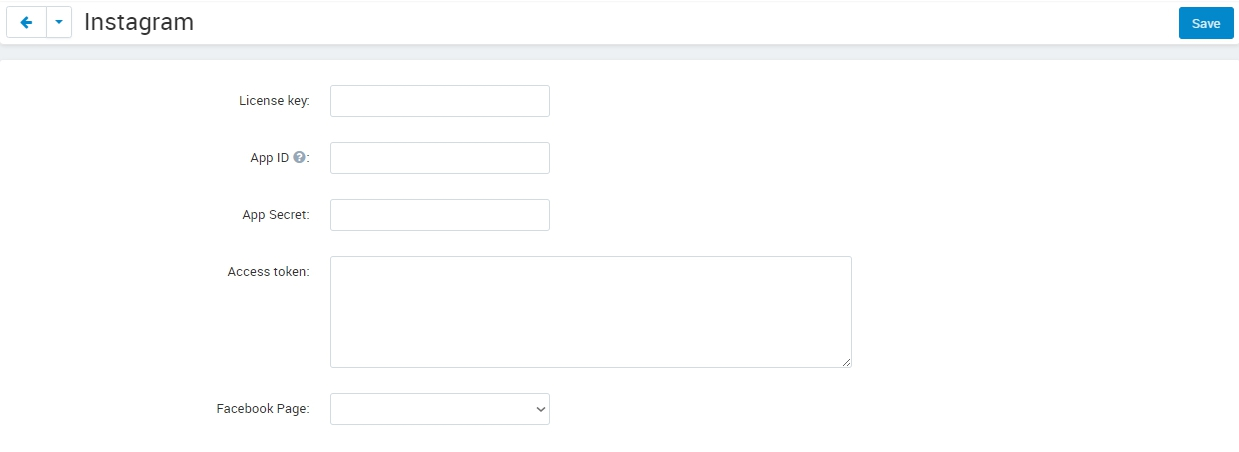
- License key—Enter the license key to activate the add-on. You will receive this key in the order confirmation email. You can also see license keys for all your purchased add-ons in your HelpDesk account.
- App IP—Use the App ID you received after creating the app on Facebook Developers in Setting up Facebook application.
- App Secret—Use the App Secret you received after creating the app on Facebook Developers in Setting up Facebook application.
- Access token—Will be filled automatically after logging in with Facebook (used for the access to Instagram page).
- Facebook Page—Choose Instagram account that will be shown in the block.
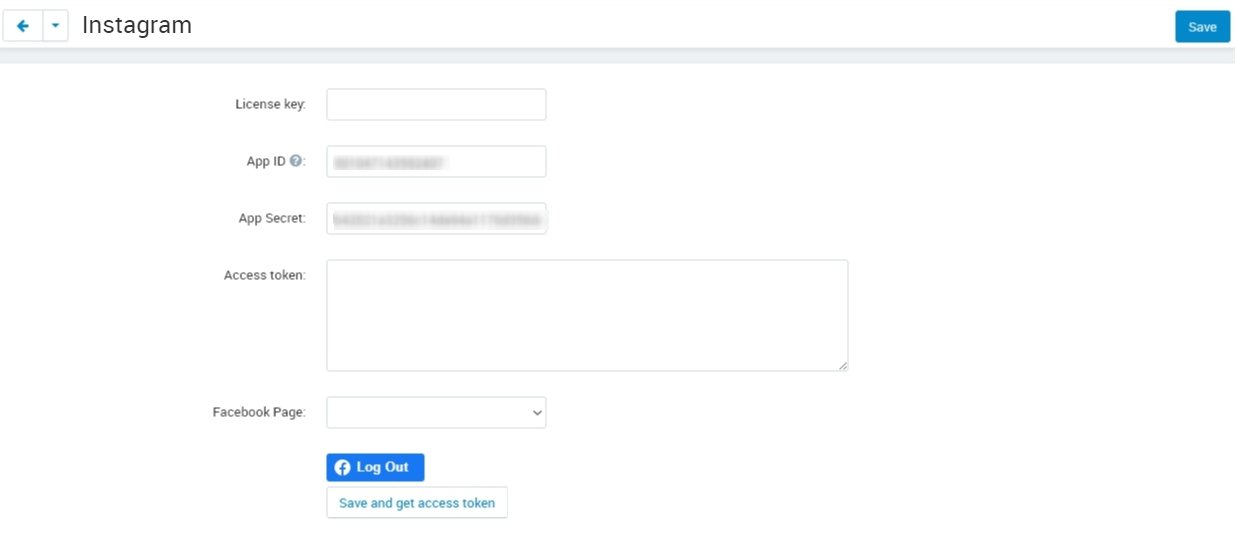
Follow steps below to configure the Insragram Widget add-on:
- Fill in App ID and App Secret fields.
- Press Save button in the right upper corner. Log in with Facebook button will be displayed.
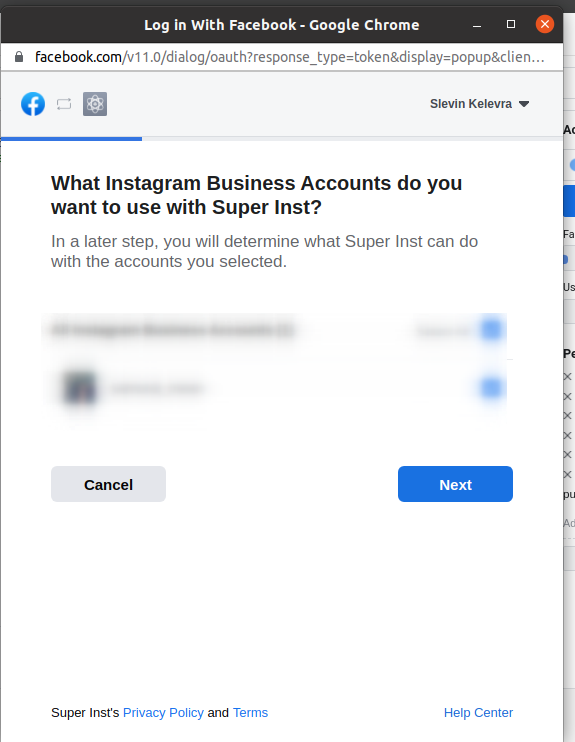
- Press Log in with Facebook button and fill in your data for Facebook authorization.

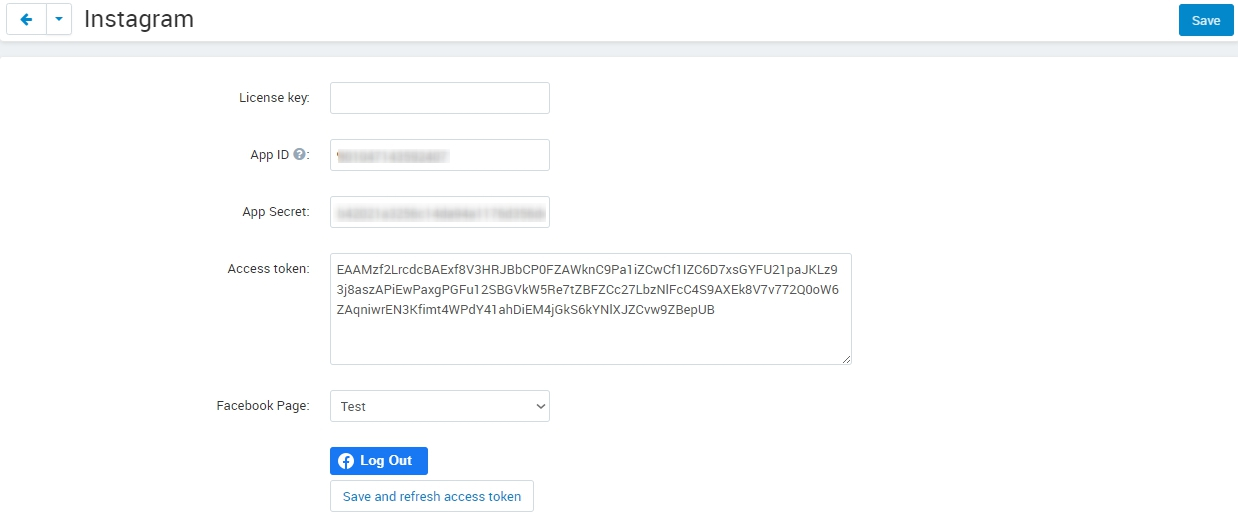
- After logging with Facebook, go back to add-on settings, choose the Instagram page in Facebook Page field and press Save and get access token button.
Access token field will be filled automatically.
Insragram Widget add-on configuring is finished. The next step is adding a block to a layout.
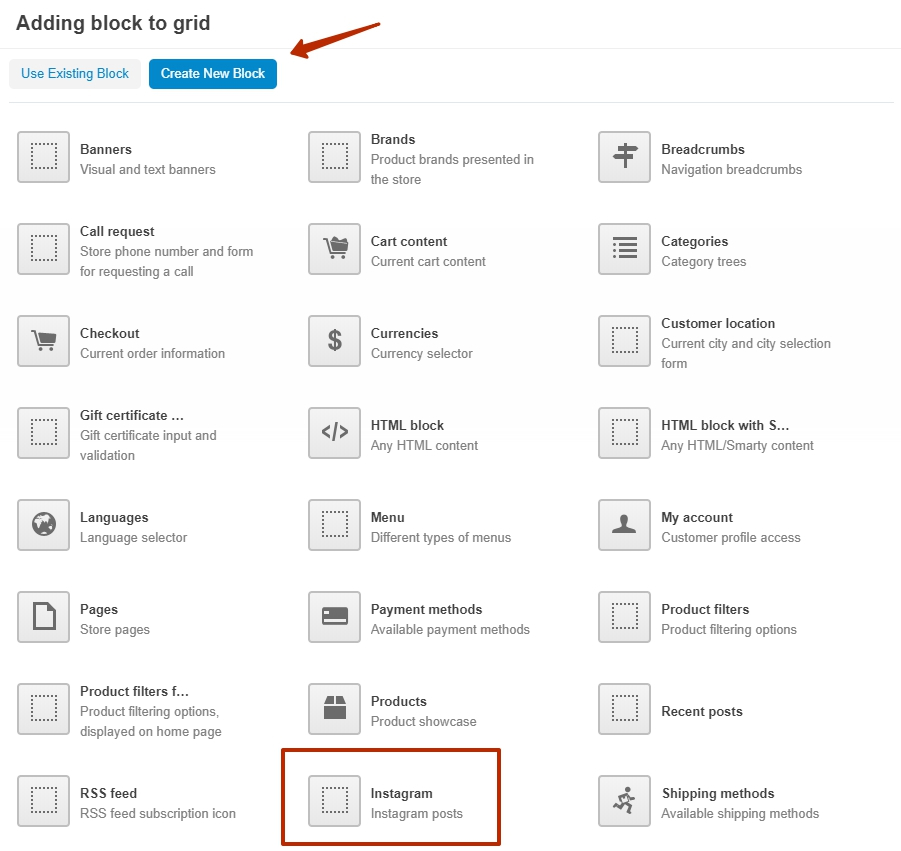
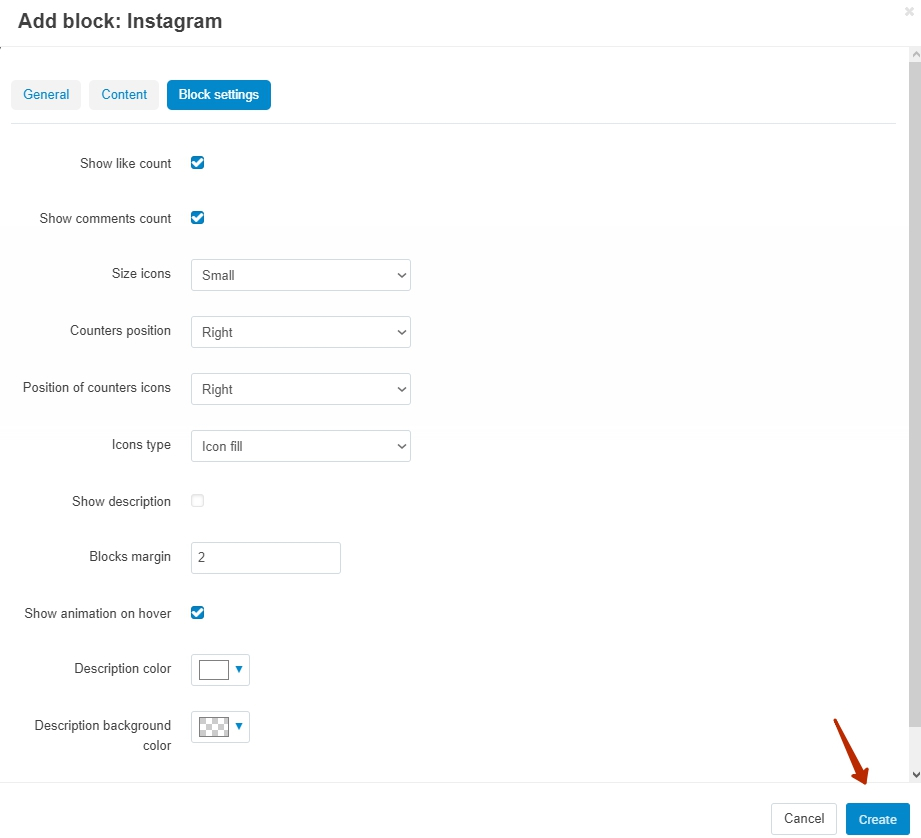
- Go to Design > Layouts.
- Add a new block. Select the Instagram block.
- Name the block and select the template.
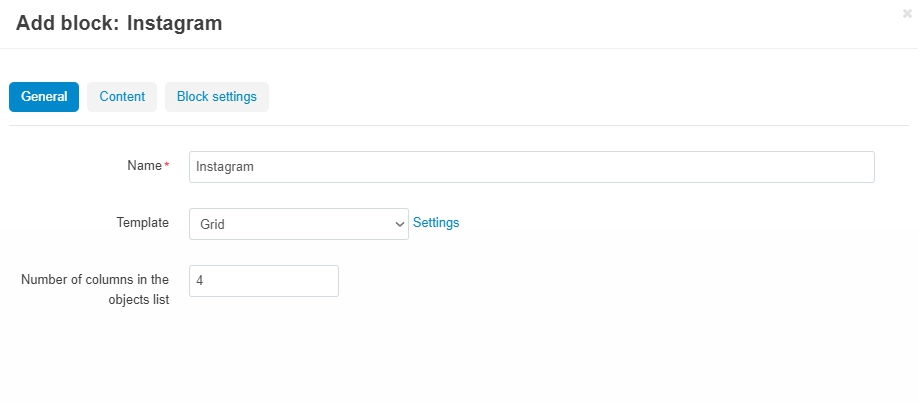
- Configure settings on the Content and Block settings tabs according to your needs and press Create.
App review on Facebook
Once the add-on is set up on the store website with the test Facebook app, the manage_pages and instagram_basic access you received requires review.
You begin the process in the App Review section of your App Dashboard. In the “Add additional permissions and features” section select manage_pages and submit for approval. Add the Instagram product, and in the instagram_basic section, submit for the product review. Once approved, go to the CS-Cart add-on settings and replace App ID and App Secret of your test app with App ID and App Secret of the production app.
Manage_pages review
In the “Tell us how you’re using this permission or feature” section, specify “Show Instagram posts on my home page”.
Select “Server-to-Server” and add the description:
- Install add-on of Instagram.
- Enter App ID and secret.
- Select available account with Instagram.
- Show my instagram posts on the storefront home page.
Record a screencast showing how you set up the add-on. In the View Notes dialogue for the permission submission, provide a description for how you will use the data returned by any endpoints that require the permission, and the screencast. Click the Submit For Review button at the bottom of the page.
Once the settings are set up and the permissions reviewed, the Instagram posts should appear on the storefront page.
Instagram_basic review
Please follow Facebook instructions: https://developers.facebook.com/docs/instagram-api/getting-started/?locale=en_US#screencast
Description for getting permissions
Please, find the description for getting instagram_basic and manage_pages permissions below.
instagram_basic permission
Why the instagram_basic permission is required and what it is used for: this permission is required to receive the content of Instagram accounts associated with a business Facebook account. This permission is used to receive content and its subsequent display on the storefront.
manage_pages permission
Why the manage_pages permission is required and what it is used for: this permission is needed to get a list of Facebook pages associated with Instagram profiles and to choose which one will be used to display content on the storefront. This permission is used to select which of the Facebook pages associated with Instagram profiles will be used to display content on the storefront.
Application description and access to the store for checking
Please, find the application description and providing access to the store for checking below.
As the add-on’s settings may be reset in the process of testing and the Instagram block content may stop displaying on the storefront, please do not change the add-on’s settings despite the both reviews approved.
test user: xxxxxxxxxx
password test user: xxxxxxxxxxxxx
- Navigate to https://www.domain_________.com/admin.php
- Navigate to menu Add-ons > Manage Add-ons > Instagram
- Please, don’t change settings
- To view widget, navigate to https://www.domain_________.com/view_your_widget
All of the above can be seen on the screencast: https://youtu.be/3vNZTBDUveY
Questions & Feedback
Have any questions that weren't answered here? Need help with solving a problem in your online store? Want to report a bug in our software? Find out how to contact us.