MailChimp PRO
Overview
The MailChimp E-Commerce add-on was designed to integrate the E-Commerce features of the Mailchimp service. It connects pop-ups, abandoned carts’ and order notifications to your store on CS-Cart or Multi-Vendor platform. The integration delivers an effective blend of marketing tools and the online store functionality to get visitors back to their purchases.
Features
- Support of multiple storefronts - to connect every Mailchimp store to every storefront you’ve got in your CS-Cart platform.
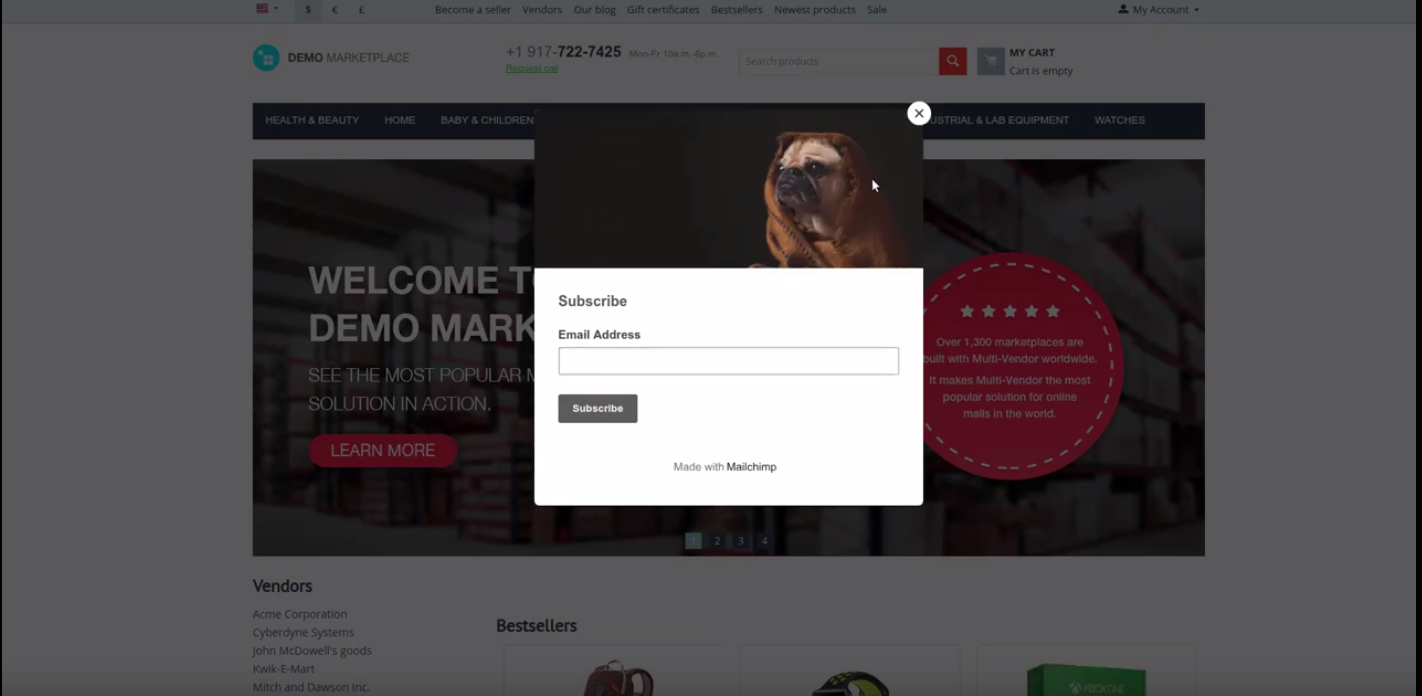
- Activation of a popup created in Mailchimp - to prompt quicker decisions.
- Export of catalogs by cron or manually - to make your inventory data available in Mailchimp in few clicks.
- Export of abandoned carts by cron or manually - to connect abandoned carts to Mailchimp on a schedule or upon your manual command.
- Export of orders - to click and enjoy automated fetching of purchases.
- Ability to create and manage a Mailchimp store - to connect your freshly-baked Mailchimp store to an audience based on the settings assigned in the add-on.
- Ability to discard the created Mailchimp store from the add-on settings - to remove the entity quick and easy.
- Unregistered users that mentioned their emails, receive the reminder about the abandoned cart.
Compatibility
The add-on is compatible with CS-Cart and Multi-Vendor 4.9 and above, but only versions 4.12.x and above are supported. Minimum required PHP version is 5.6.
See more information about compatibility of our add-ons here.
Support
You are guaranteed a quality add-on supported by the future versions. If you need help, please contact us via our help desk system.
Getting started with MailChimp
Creating account in MailChimp
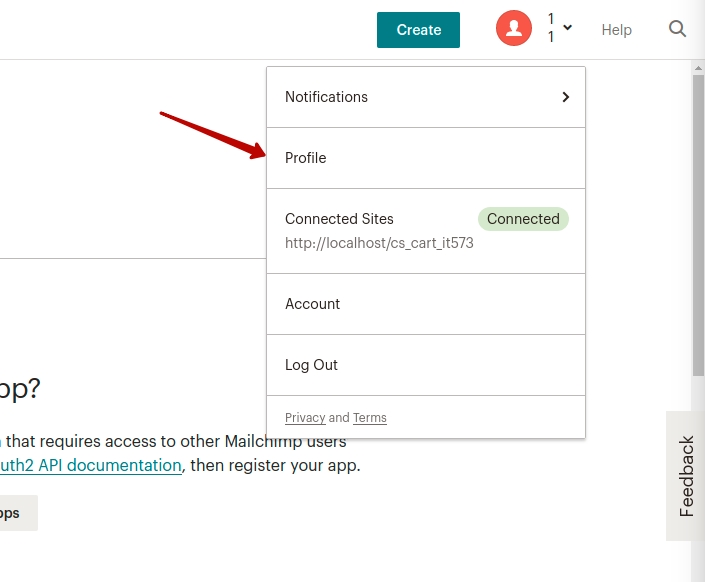
To create an account in MailChimp, go to https://mailchimp.com, click Login/Register and go to Profile.
Getting API Key
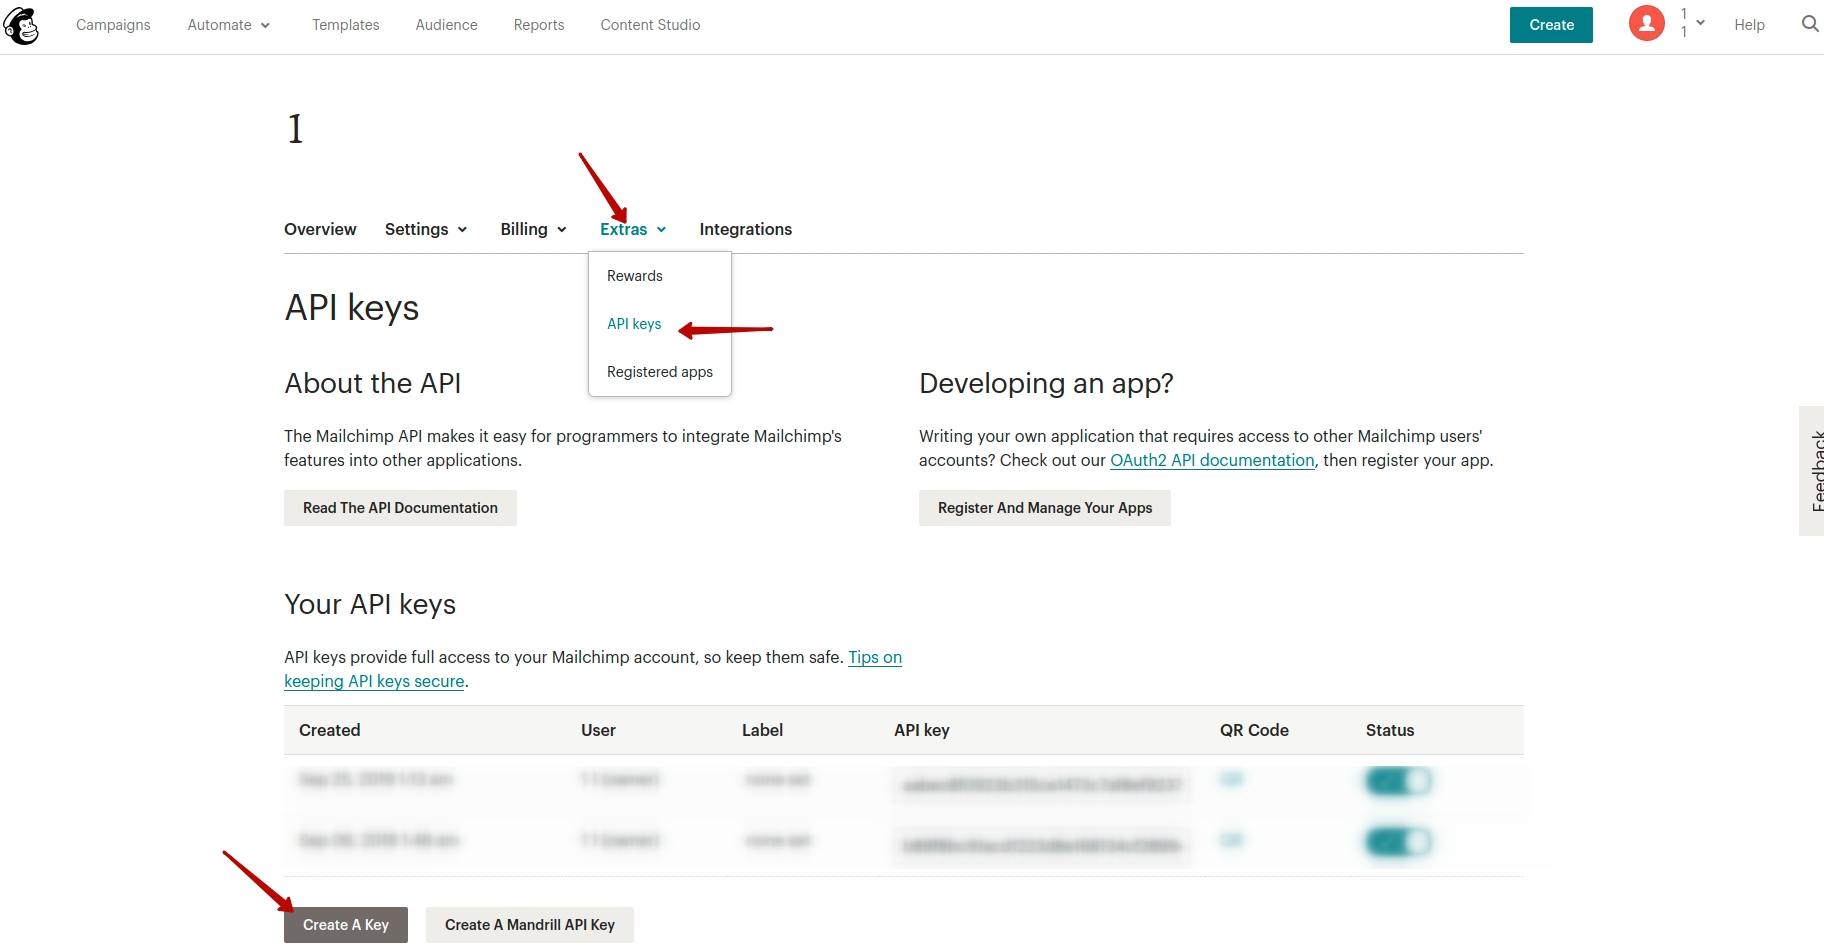
After authorization, get the API Key in Extras > API keys > Create A Key.
Managing in the admin panel
Installing the add-on
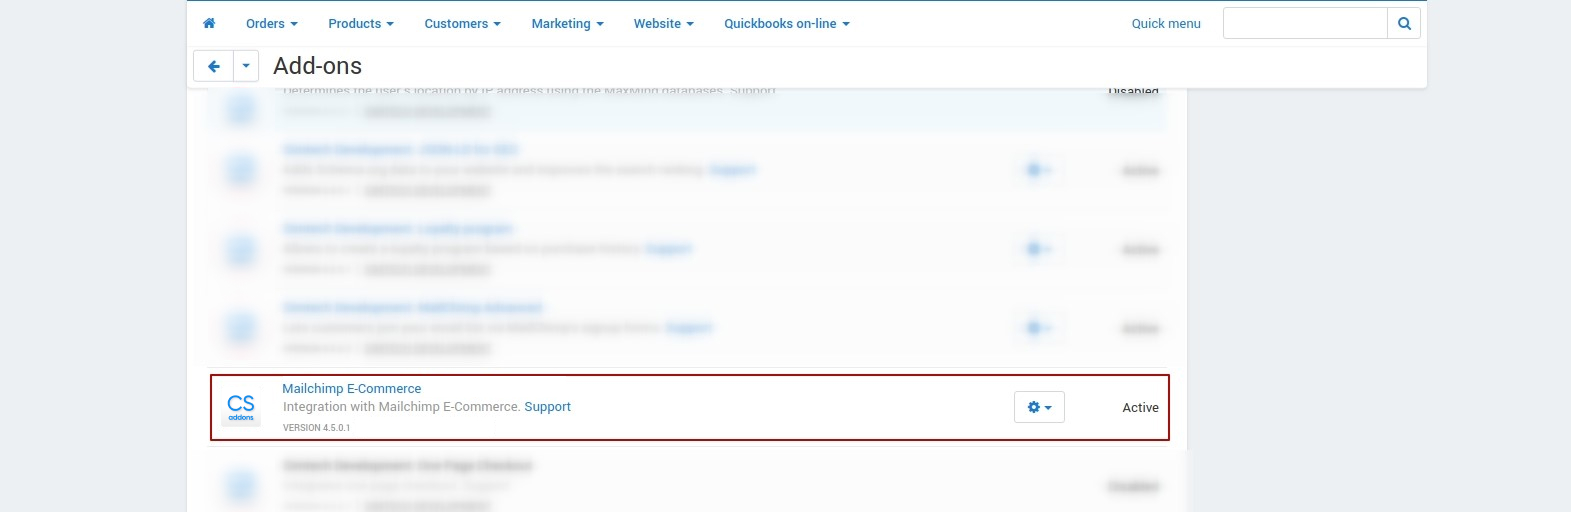
Install the MailChimp PRO add-on on the add-ons list page (Add-ons → Manage add-ons). Click the + button in the top right corner, select an archive and click Upload & install. You can now find the installed add-on in the list of installed add-ons, just make sure it is set to Active.
Setting up the add-on
To set up the add-on, configure the following settings:
General
- License key—Enter the license key to activate the add-on. You will receive this key in the order confirmation email. You can also see license keys for all your purchased add-ons in your HelpDesk account.
- API key MailChimp—Enter your API key (for details, see Getting API Key).
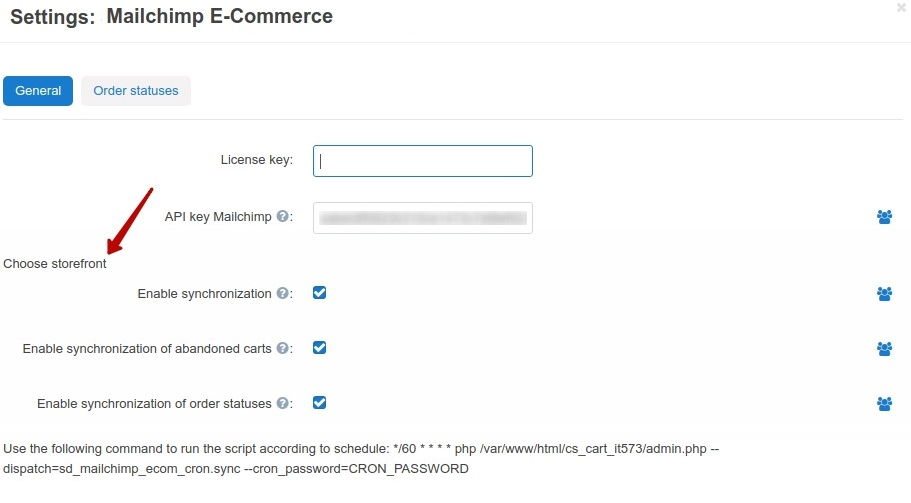
Connecting the store to MailChimp block:
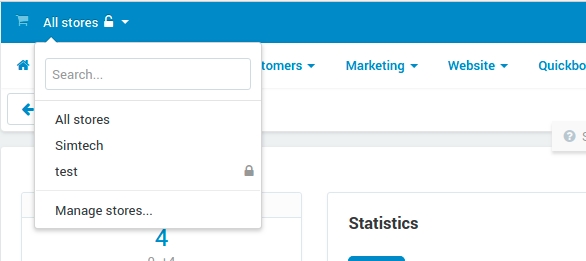
- Choose store—If this label is displayed, then you need to switch to a specific storefront (relevant for Ultimate edition with several storefronts).
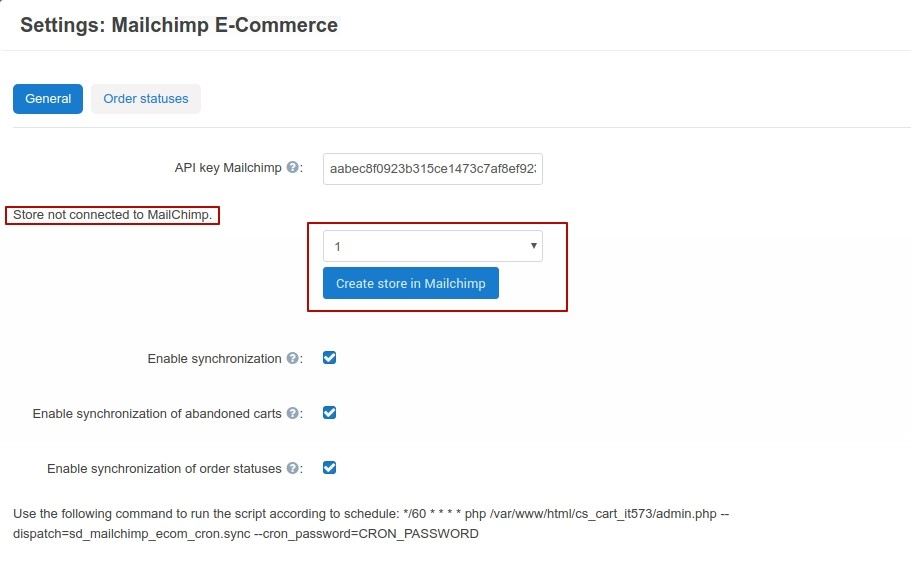
After the storefront is chosen, one of the following options will be available:
- The dialog for creating a store in MailChimp, where you need to choose Audience that will be connected with the new store.
- The dialog for deleting a MailChimp store and buttons for manually exporting products and abandoned carts.
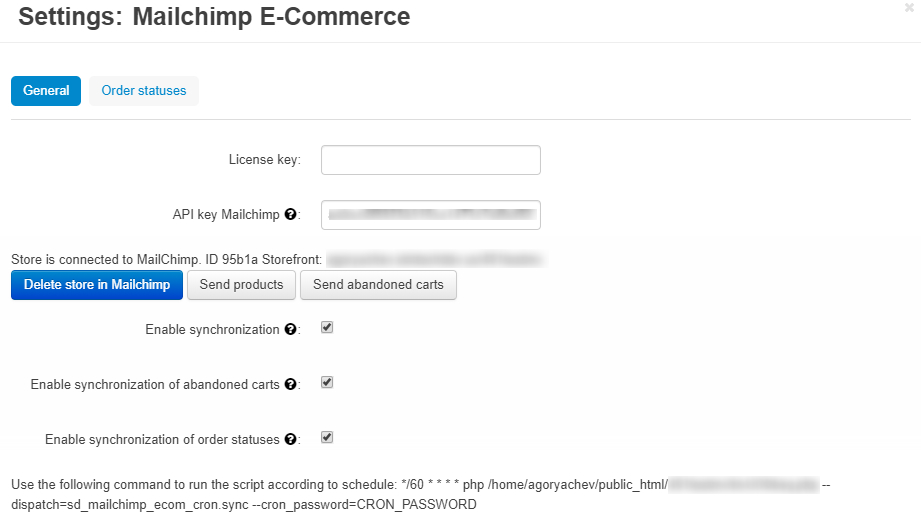
- Send products—Manual products synchronization between CS-Cart store and MailChimp.
- Send abandoned carts—Manual abandoned carts synchronization between CS-Cart store and MailChimp.
Note
During the first add-on installation, it is recommended to provide manual exporting of products in MailChimp after the store creating.
- Enable synchronization—If enabled, synchronization will be performed according to the cron (about setting up the cron read in Setting up the cron on the server); provides access to additional synchronization settings.
- Enable synchronization of abandoned carts—If enabled, synchronization of abandoned carts will be performed according to the cron.
- Enable synchronization of order statuses—If enabled, synchronization will be performed when the status of the order is changed. Configure the status matching on the Order Statuses tab in MailChimp PRO add-on settings (Order statuses).
Note
MailChimp PRO add-on exports orders that were created after enabling synchronization in the add-on settings. Orders created before enabling synchronization will not be exported.
Order statuses
Open Order statuses tab in the MailChimp PRO add-on settings to set up order statuses corresponding to the statuses in MailChimp.
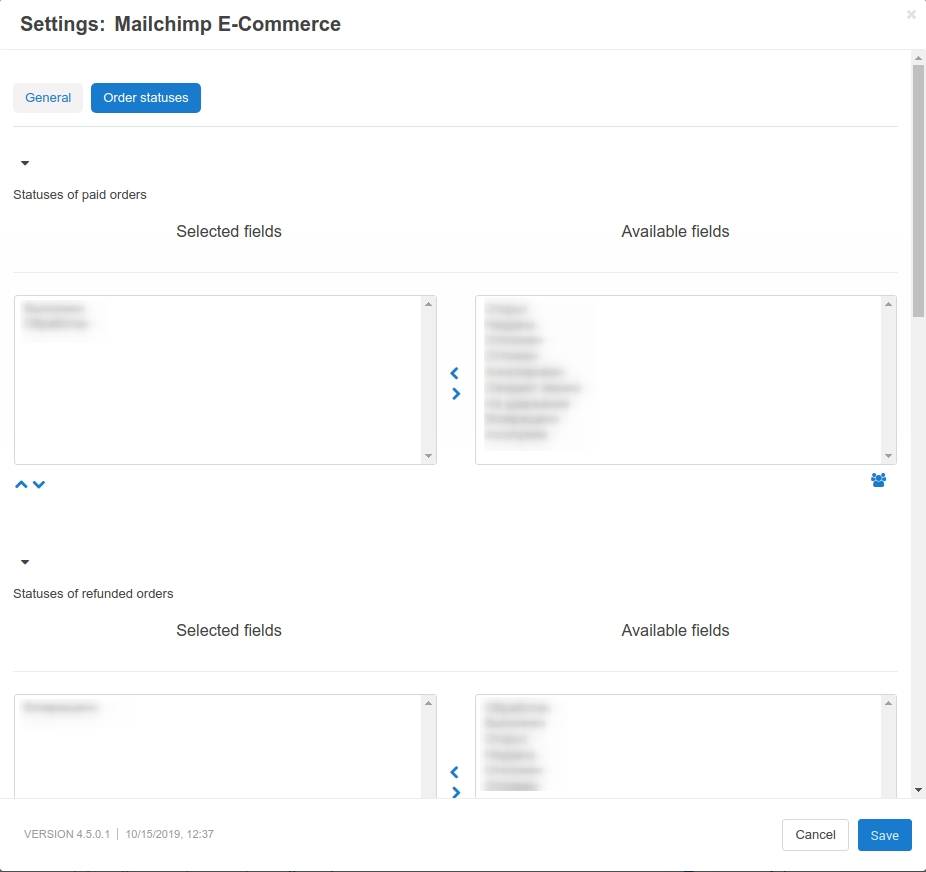
Note
If several order statuses in Mailchimp will correspond with the same statuses from CS-Cart, the first match will be used.
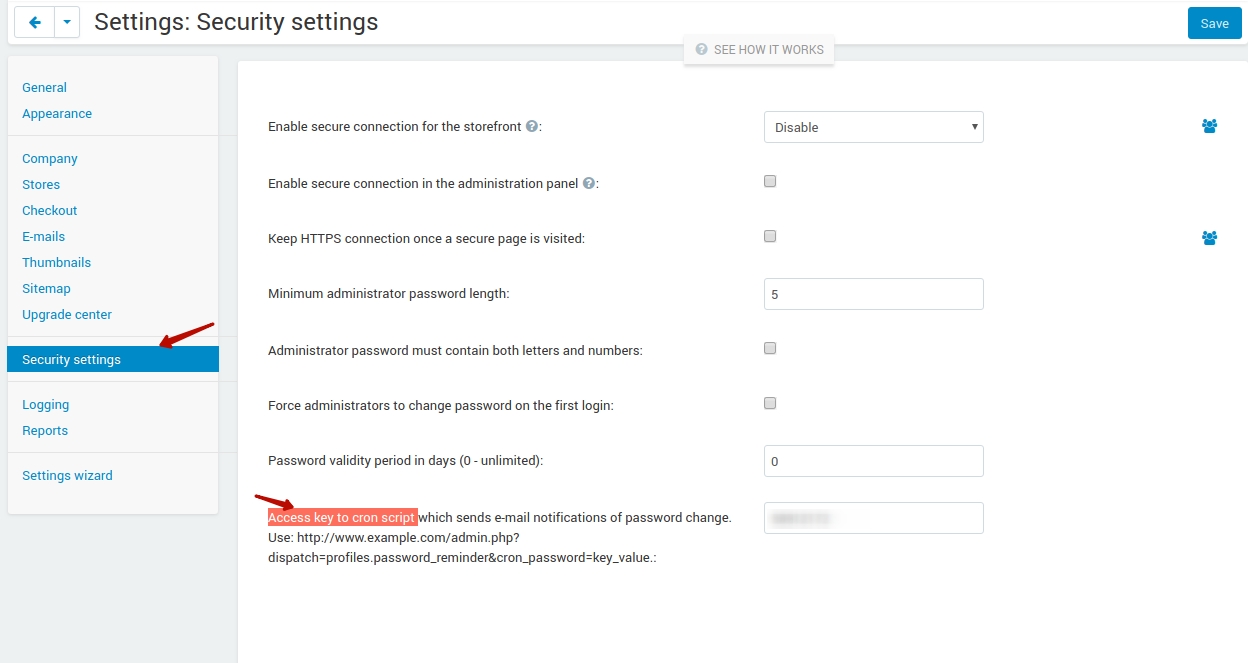
Setting up the cron on the server
To automatically send notifications, you need to configure the cron job on the server. The command for cron could be found in the MailChimp PRO add-on settings in the General tab.

In this command, you need to replace the password with the one from the store settings: Settings > Security settings > Access key to cron script.
Note
The frequency of launching the cron should be chosen based on which mailings will be performed. If you use the full functionality, the recommended time is every 60 minutes.
Creating and editing the main objects in MailChimp
Creating templates
For creating templates, go to MailChimp account and open the Connected Sites page: Menu > Connected sites > YOURSTORE. To add a template, click Add opposite the corresponding object, edit its content and publish.
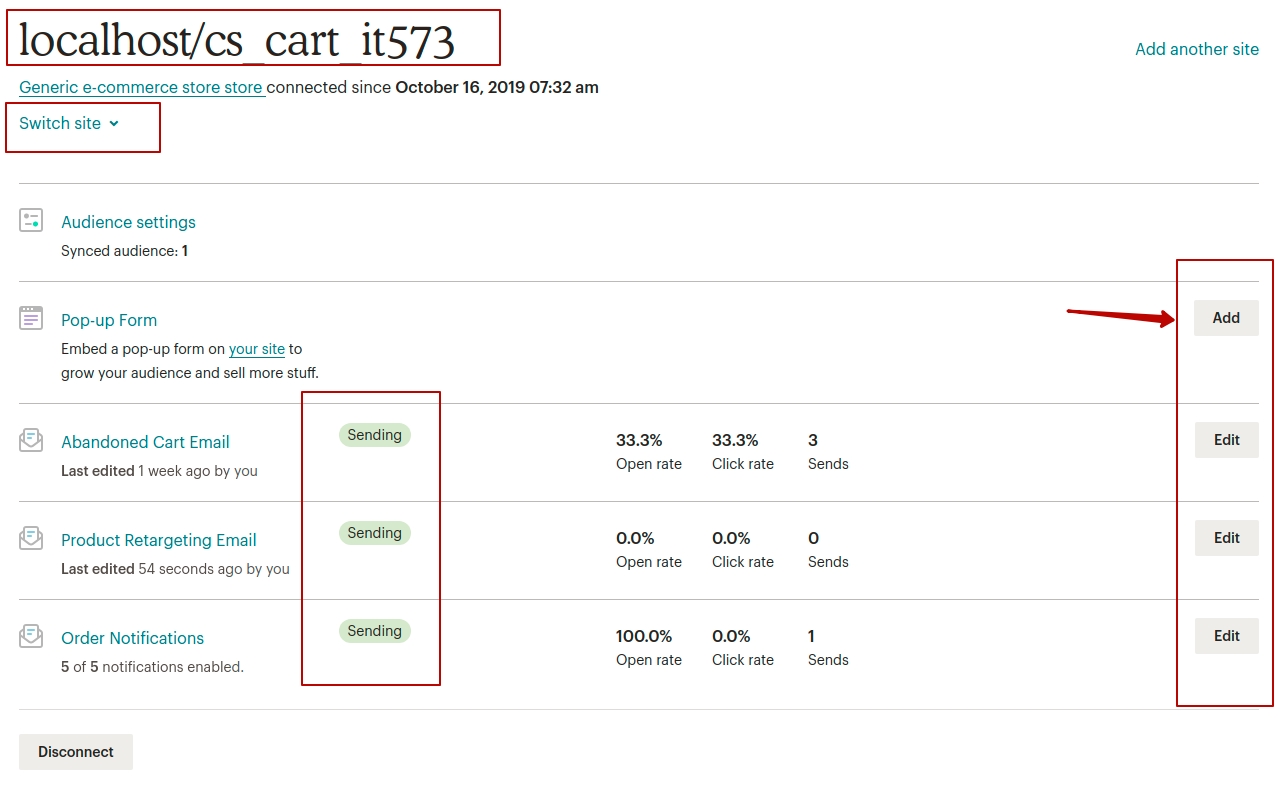
Note
The pop-up will be shown in the store within an hour after publishinig.
See common steps in our video: https://youtu.be/FfAr7bUHOzQ
Comparison of the default CS-Cart email marketing, MailChimp Light, MailChimp PRO
Find the comparison table for default CS-Cart email marketing, MailChimp Light and MailChimp PRO below.
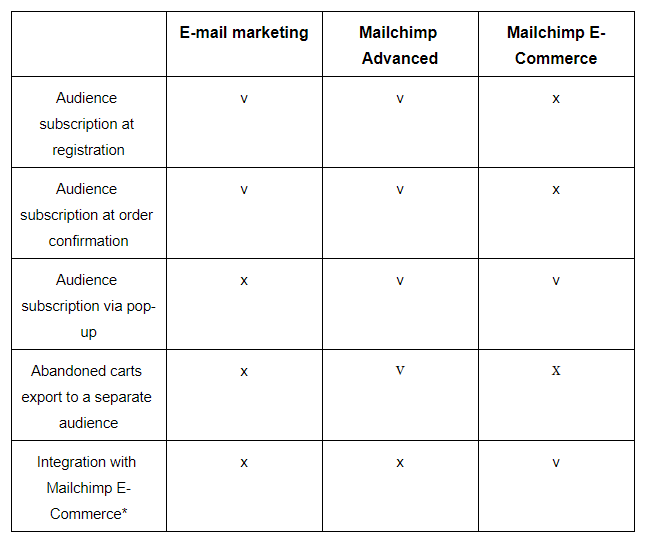
MailChimp PRO add-on exports the following entities: Store, Products, Carts, Orders, Customers.
Questions & Feedback
Have any questions that weren't answered here? Need help with solving a problem in your online store? Want to report a bug in our software? Find out how to contact us.