Product Labels
Overview
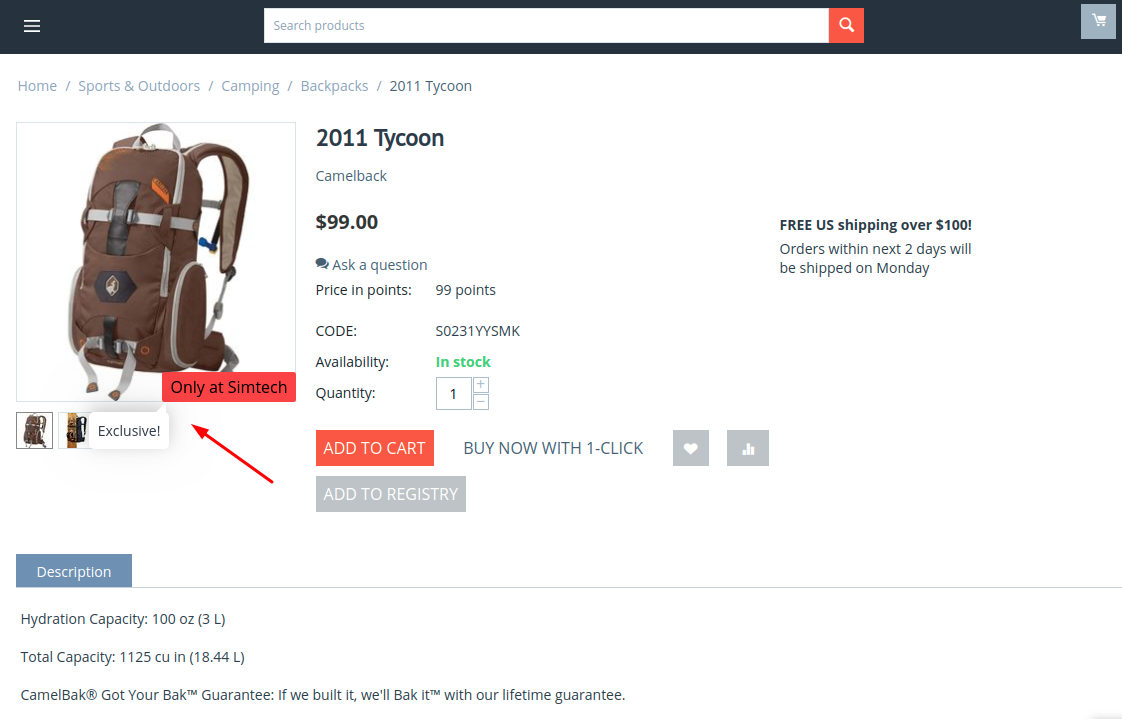
The Product Labels add-on allows to show unlimited promotional tags like “NEW”, “HIT”, “BLACK FRIDAY”, “CYBER MONDAY”, “NEW SEASON”, “NEW COLLECTION”, “ONLY AT”, “FREE SETUP”, “PRESENT” for products on the product listing page and product details page, which will help you make your business stand out and attract customers’ attention.
The add-on allows you to create and attach an unlimited number of custom labels to products and flexibly customize them. It also replaces default labels with its own ones and allows you to add graphic labels.

Key features
- create text and graphic labels;
- attach labels to products on the Add-ons tab of product properties;
- attach default labels to products using cron job;
- replace the default labels Sale and Free Shipping;
- search for labels on the product list in the admin panel;
- label filters;
- ability to limit the number of labels displayed according to their priority;
- change priority when dragging on the label list;
- settings for displaying labels on different types of grids;
- ability to customize the look and feel of default and custom labels;
- labels are displayed on a quick view of the product and on its detailed page, on a homepage and in the lists on the category page.
- hide labels on hover
- apply main product labels to its variations
To learn how to use new functionality, follow quick and easy steps below.
Compatibility
The add-on is compatible with CS-Cart and Multi-Vendor 4.10 and above, but only versions 4.12.x and above are supported. Minimum required PHP version is 7.1.
See more information about compatibility of our add-ons here.
Support
You are guaranteed a quality add-on supported by the future versions. If you need help, please contact us via our help desk system.
Demo
Check out the Product Labels add-on in our demo store.
Note
Every half an hour the demo store is reset to the default state.
Managing in the admin panel
Installing the add-on
Install the “Product Labels” add-on on the add-ons list page (“Add-ons” → ”Manage add-ons”). Click the + button in the top right corner, select an archive and click Upload & install. You can now find the installed add-on in the list of installed add-ons, just make sure it is set to Active.
Setting up the add-on
Here are available settings for the add-on:
Label type settings
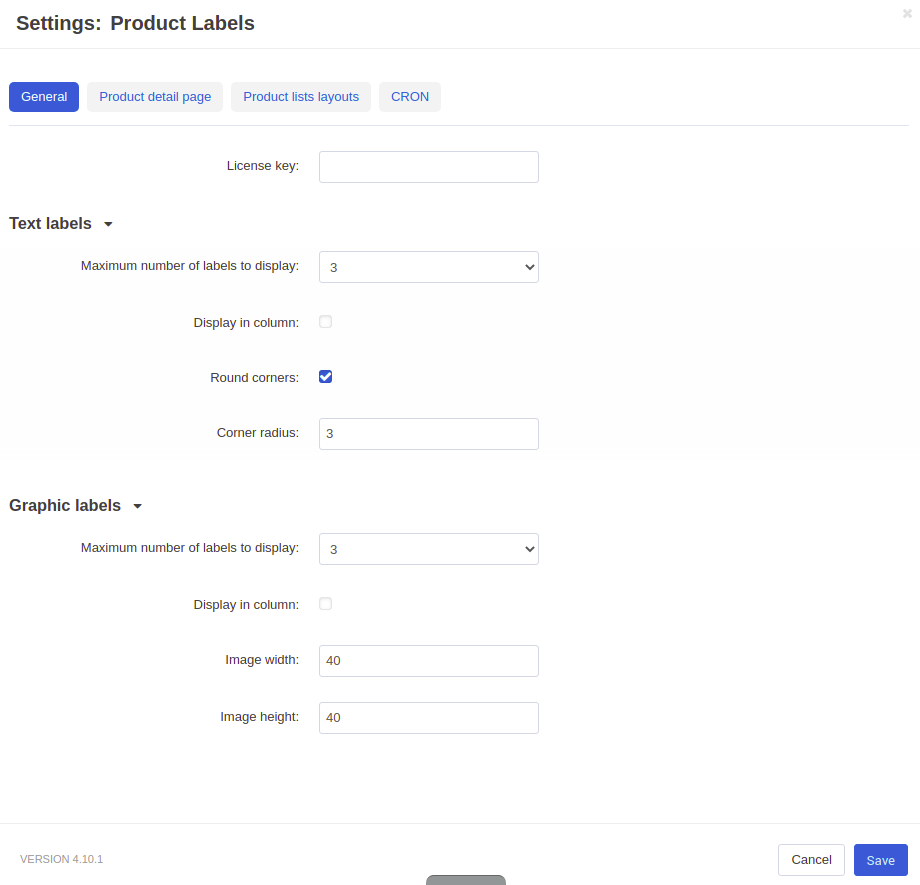
- Maximum number of labels to display - Allows you to limit the number of labels that will be displayed for the product. Labels will be displayed according to their priority. Available for text and graphic labels.
- Display in column - Allows you to display labels in a column. By default, labels are displayed in a line. This setting is available for text and graphic labels.
- Font size-Determines the font size in pixels. Available only for text labels.
Label display settings on a product page
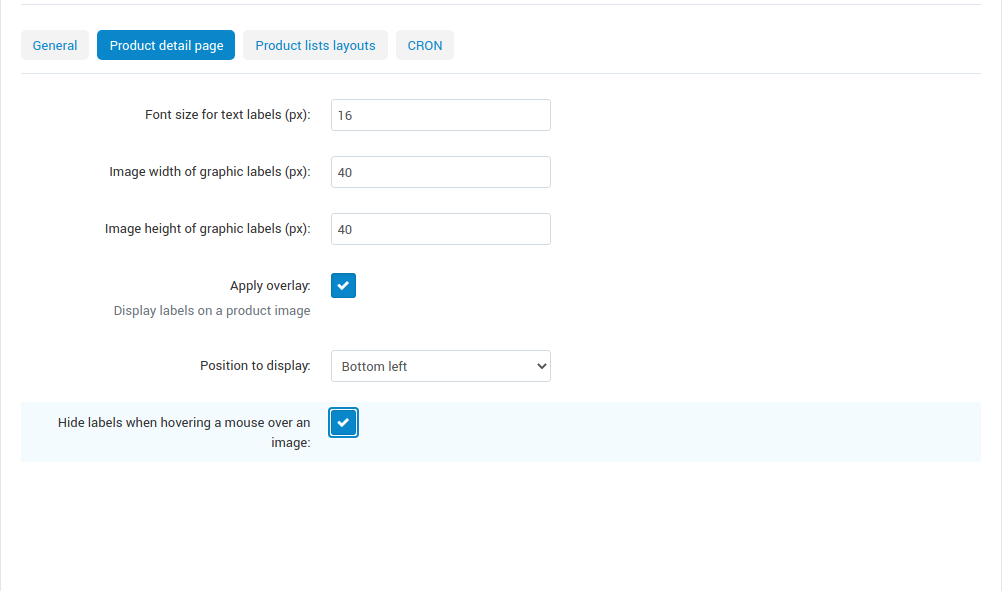
- Font size for text labels (px) — Determines the font size for text labels on the product page.
- Image width of graphic labels (px) — Determines the image width for graphic labels on the product page.
- Image height of graphic labels (px) — Determines the image height for graphic labels on the product page.
- Apply overlay — Enables displaying labels on the product image. When disabled, labels will be displayed next to the name of the product.
- Position to display — Determines the position of the label on the product image. This setting appears when using overlay.
- Hide labels when hovering a mouse over an image — Determines the ability to hide the label image on hover
Product lists layouts settings
Products list layouts are used on category, search, vendor’s store pages, etc. To customize the display of labels in products blocks, navigate to the Design > Layouts, find the block you need and use the template settings to control the labels.
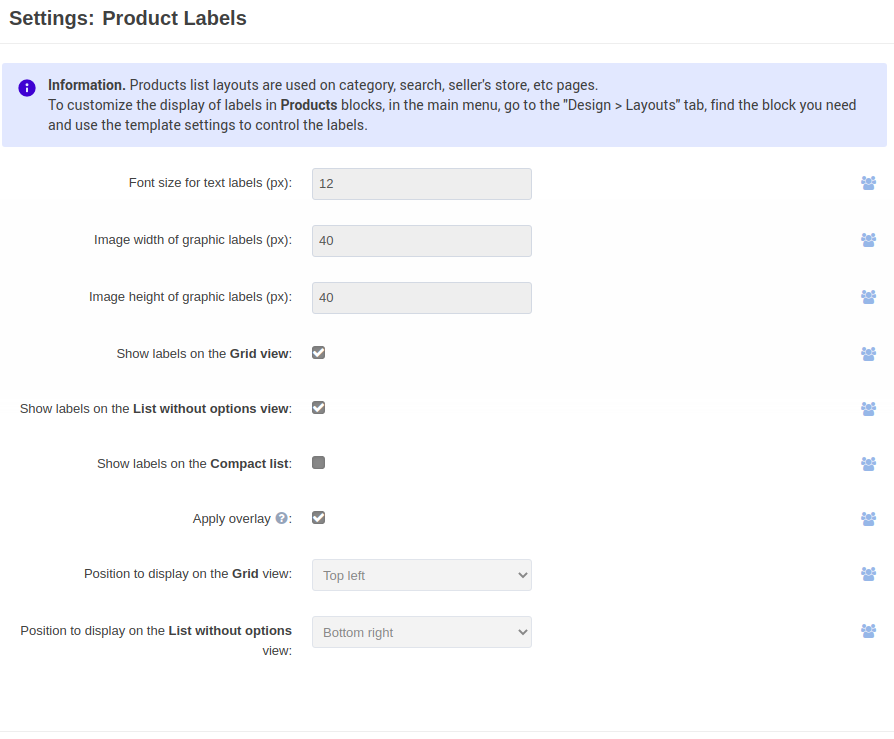
- Font size for text labels (px) — Determines the font size for text labels on the product page.
- Image width of graphic labels (px) — Determines the image width for graphic labels on the product page.
- Image height of graphic labels (px) — Determines the image height for graphic labels on the product page.
- Show labels on the Grid view, Show labels on the List without options view and Show labels on the Compact list — Choose product list views where labels will be displayed.
- Apply overlay — Enables displaying labels on the product image. When disabled, labels will be displayed next to the name of the product.
- Position to display on the Grid view — Determines the position of the label on the Grid view.
- Position to display on the List without options — Determines the position of the List without options view.
Cron settings
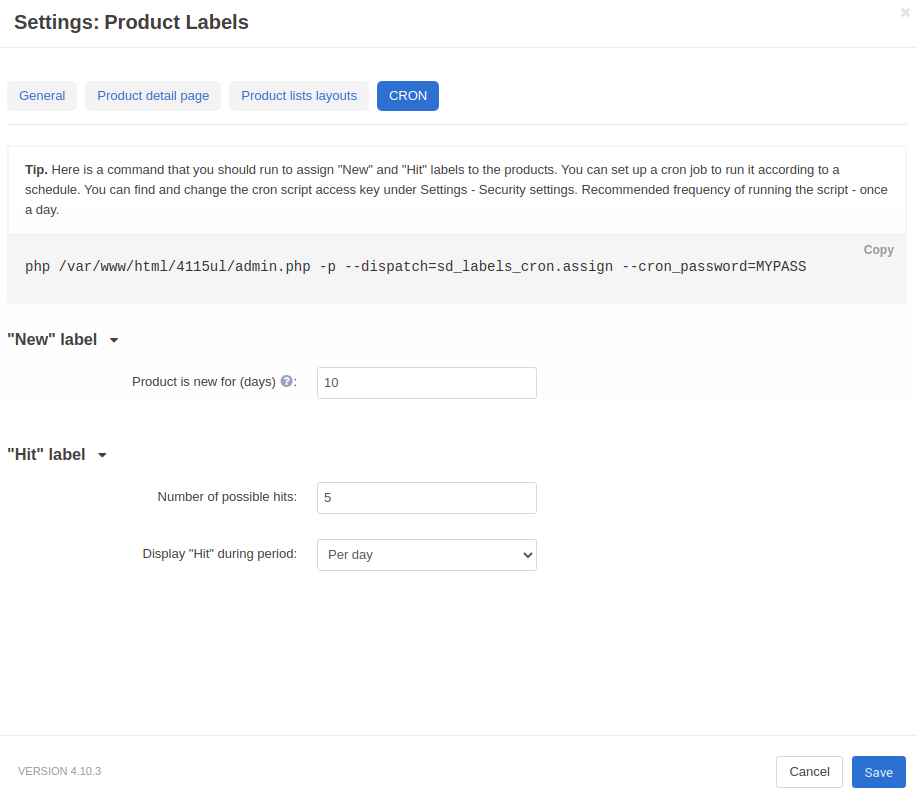
New and Hit labels
New and Hit labels can be assigned automatically using the cron job. You may find all the information needed to configure the cron and automatically add/remove the labels on the Cron tab in the add-on settings.
Note
Only labels that were added automatically are automatically removed. If you added the label manually, it cannot be removed by cron.
New label can be automatically attached to the newly created products.
- Product in new for (days) - Allows you to specify how many days the product will be considered new.
Hit label can be automatically attached to the best-selling products.
- Number of possible hits - Determines the maximum number of products to which you can automatically attach a Hit label.
- Display “Hit” during period - The period for which the number of purchases of products will be calculated.
The recommended frequency for launching the cron job is once a day.
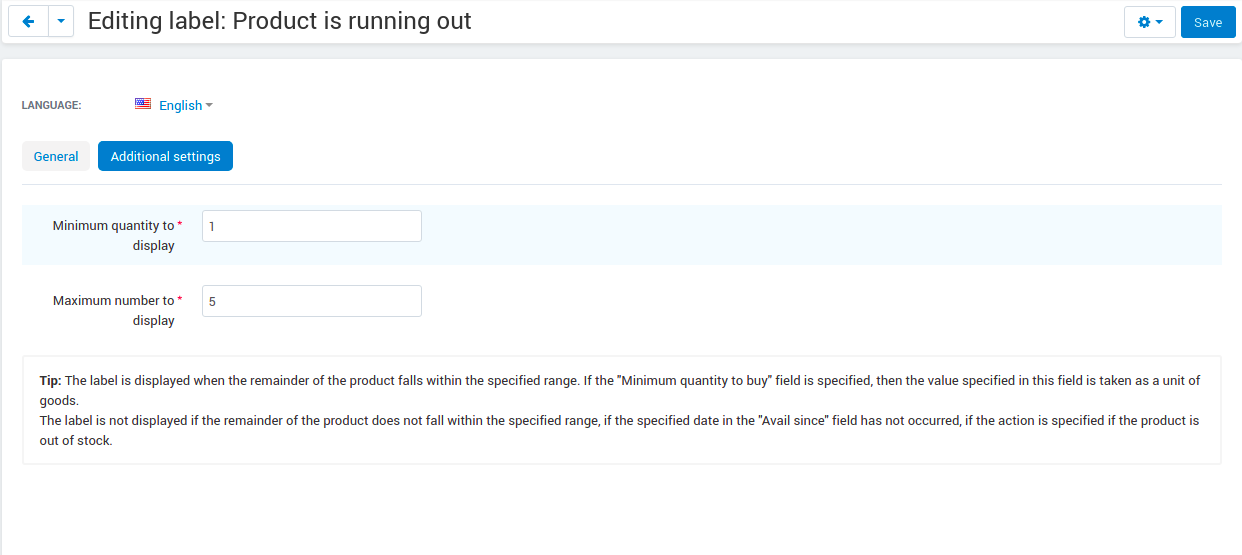
Product is running out
The label Product is running out is automatically assigned to the product when its quantity is close to 0. The label has additional settings where minimum and maximum values for display can be set.
Open the Additional Settings tab in “Product is running out” label settings page to configure the range of the label display.
Minimum quantity to display - the least product quantity, when the label is still active. The label disables when the quantity amount is lower than the set value.
Maximum number to display - the maximum product quantity, required for the label display. When the quantity amount of product has reached the value, the label is activated.
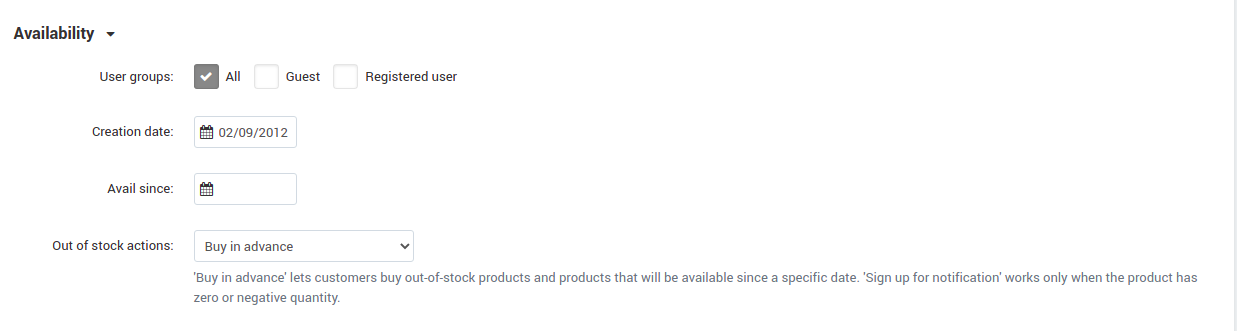
On backorder
The label On backorder is assigned to the products with available Buy in advance (Preorder) option.
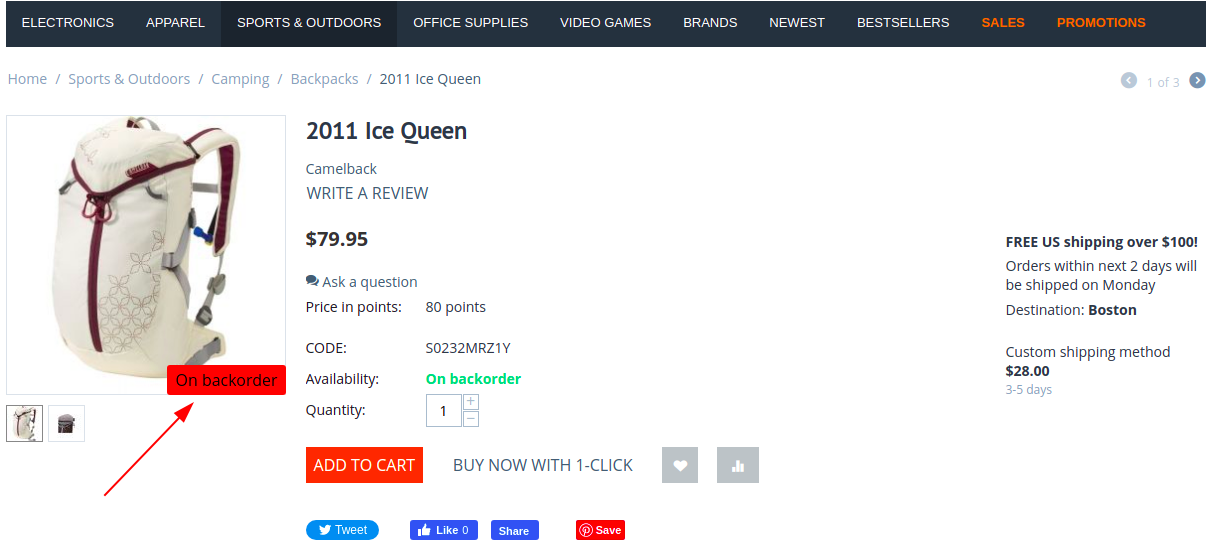
The label is assigned to the product in following cases:
- The quantity of the products in stock equals 0;
- The quantity of the products in sttock is below the required one for selling;
- Product is in stock, but available since the particular date and “Buy in Advance” option is available.
Settings in the block manager
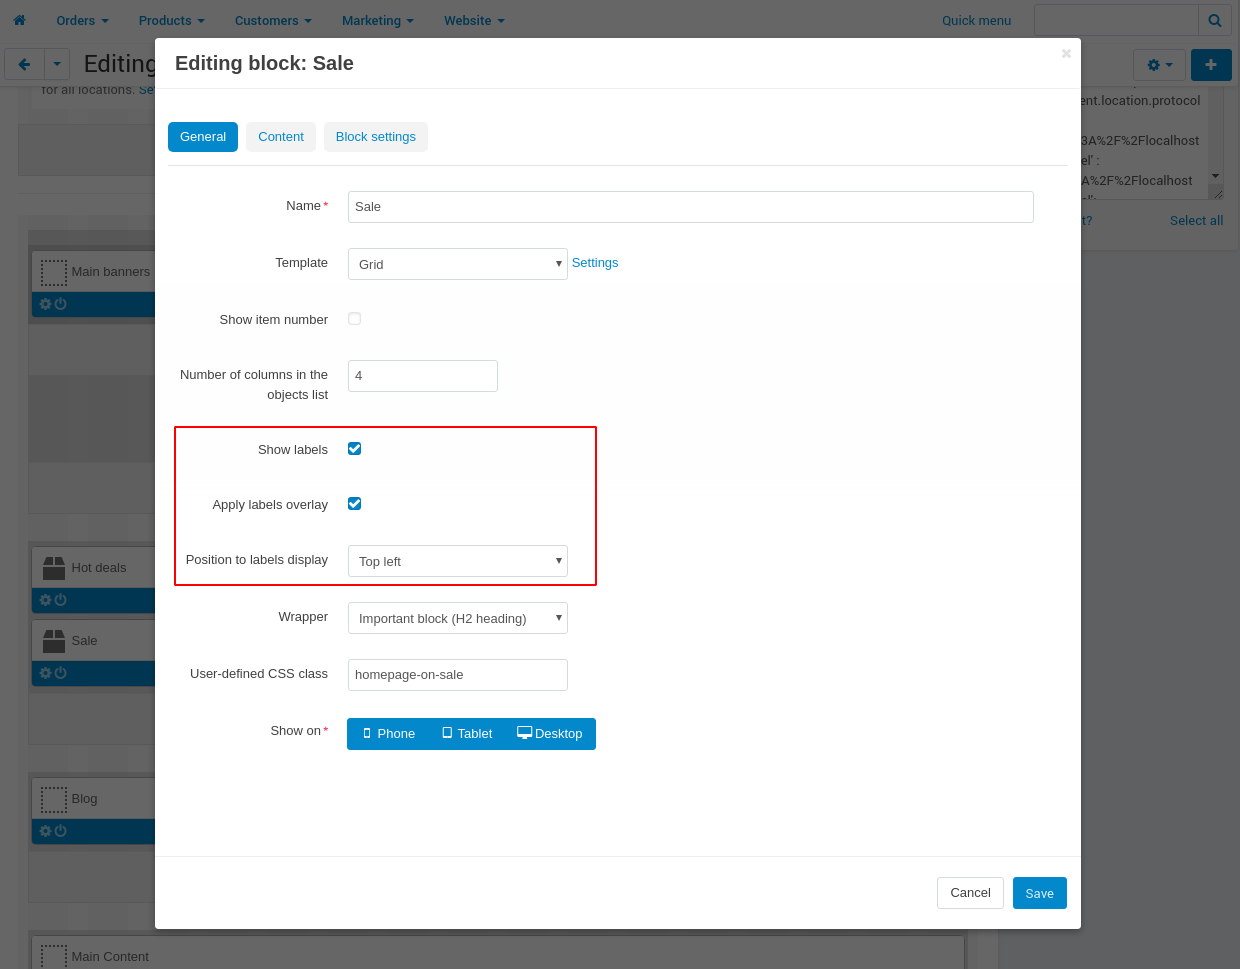
The display of blocks can be customized for specific product blocks with the help of the following settings:
- Show labels - Turn on / off labels displayfor a specific block;
- Apply labels overlay - Enables displaying labels on the product image;
- Position to labels display - Determines the position of the label on the product image if the Apply labels overlay setting is enabled.
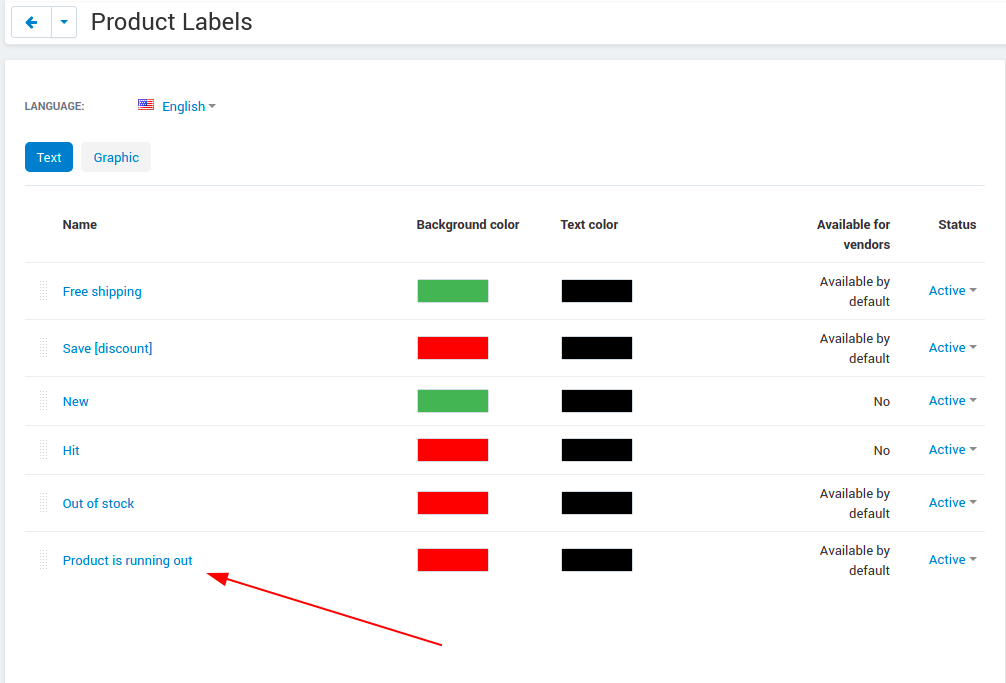
Managing labels
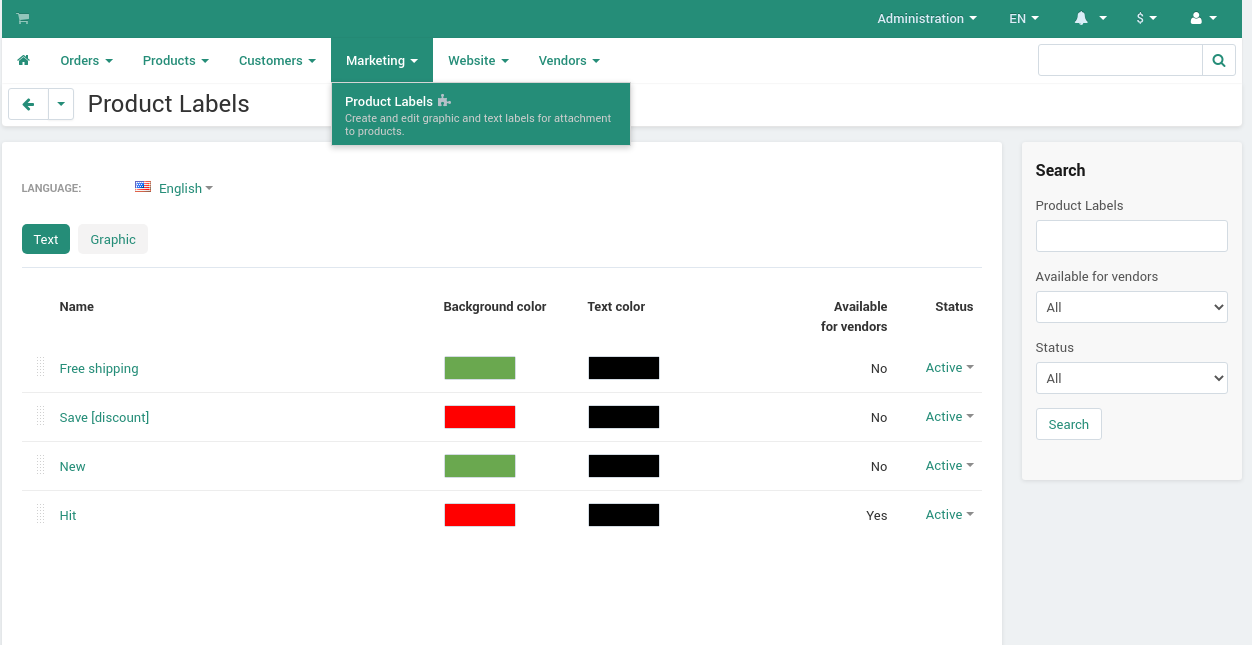
You can manage labels on the Marketing -> Product Labels page.
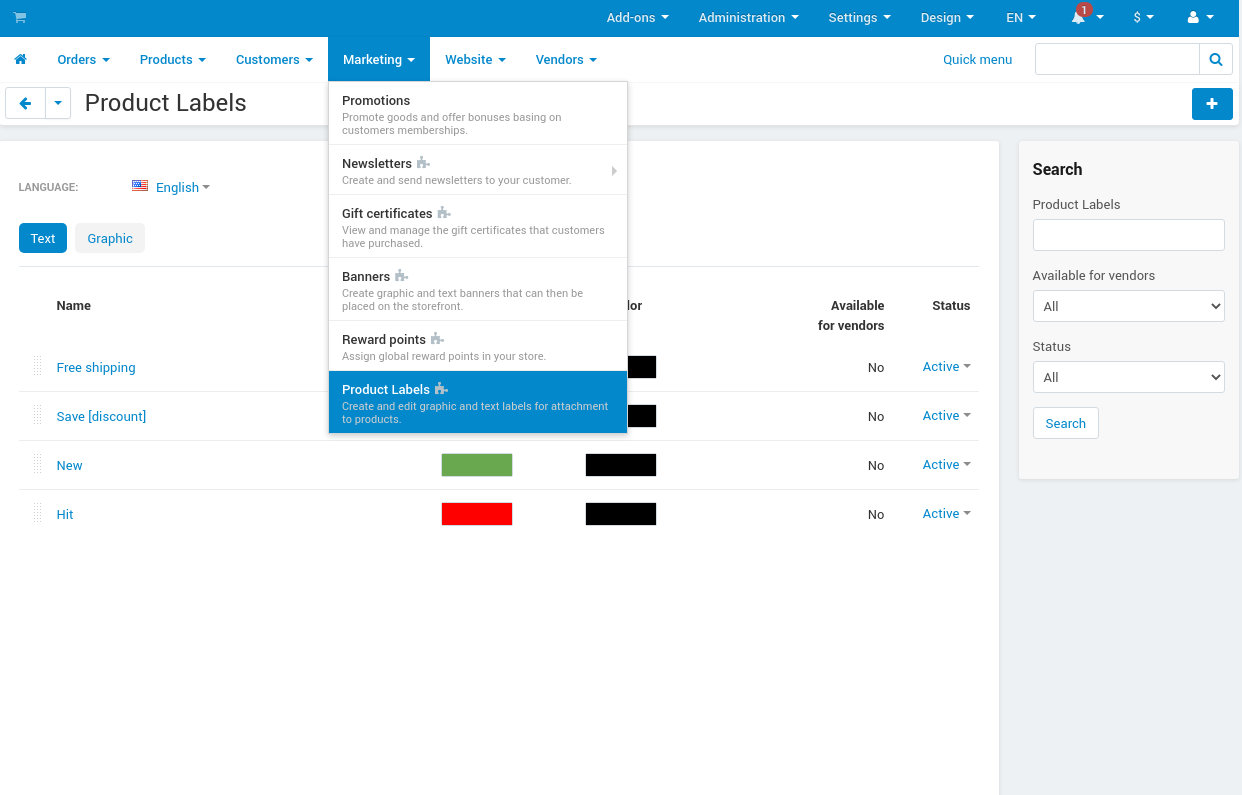
There are 2 types of labels: text and graphic. You may find them on the corresponding tabs. The add-on adds 6 types of labels by default.
- Hit - Label for highlighting the best-selling products. It can be assigned automatically using the cron.
- New - Label for highlighting new products. It also can be automatically assigned to all recently created products using the cron.
- Free shipping - Replaces the default CS-Cart free shipping label. You can adjust the background color and text color or rename the label.
- Save [discount] - Replaces the default CS-Cart discount label. The background color and text color are customizable as well. It can be renamed. The [discount] in the label name is substituted with the percent of the discount.
- Only at [company] - Allows you to highlight products that are available only in this store. The label may be renamed. The [company] in the name of the label is substituted with the storefront name.
- Out of stock - It is assigned automatically to the out-of-stock products.
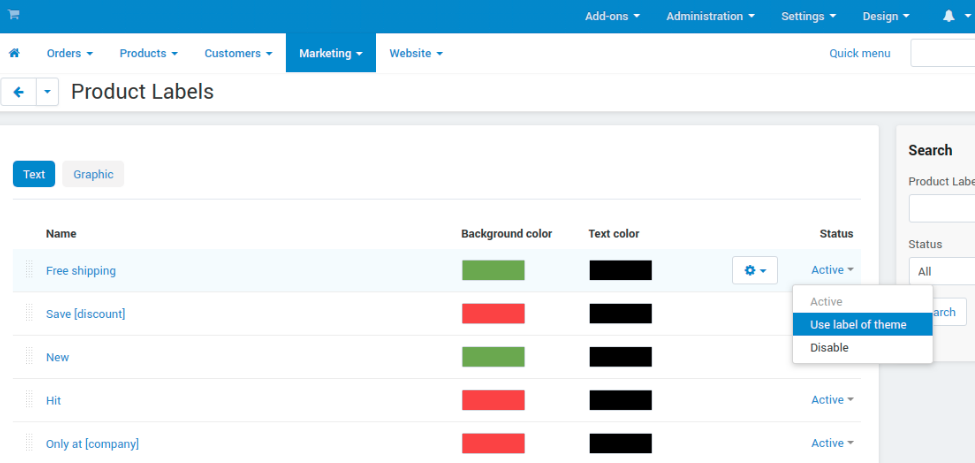
Note
Default labels cannot be deleted, they can only be disabled. They replace the default CS-Cart labels or add special functionality. But you may use the theme labels instead if there are some in your theme, just set the Use label of theme status for default labels.
How to create a new label
The administrator can create an unlimited number of custom labels. Click a + button on a Marketing - Product Labels page. A new window with label settings will open.
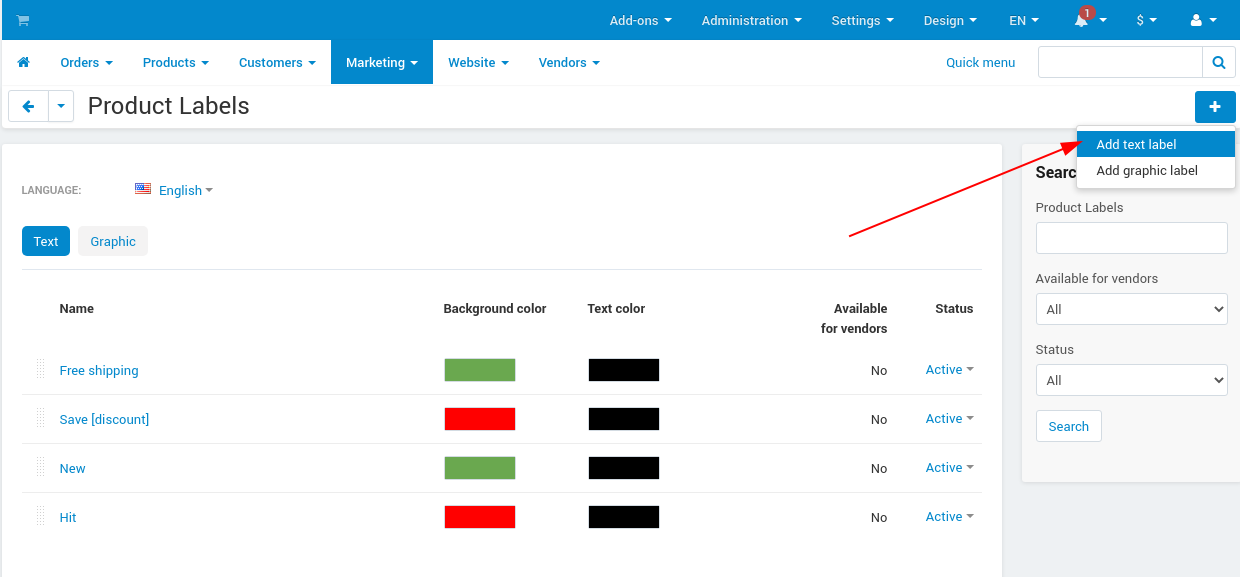
Text and graphic labels have different settings.
Text labels settings
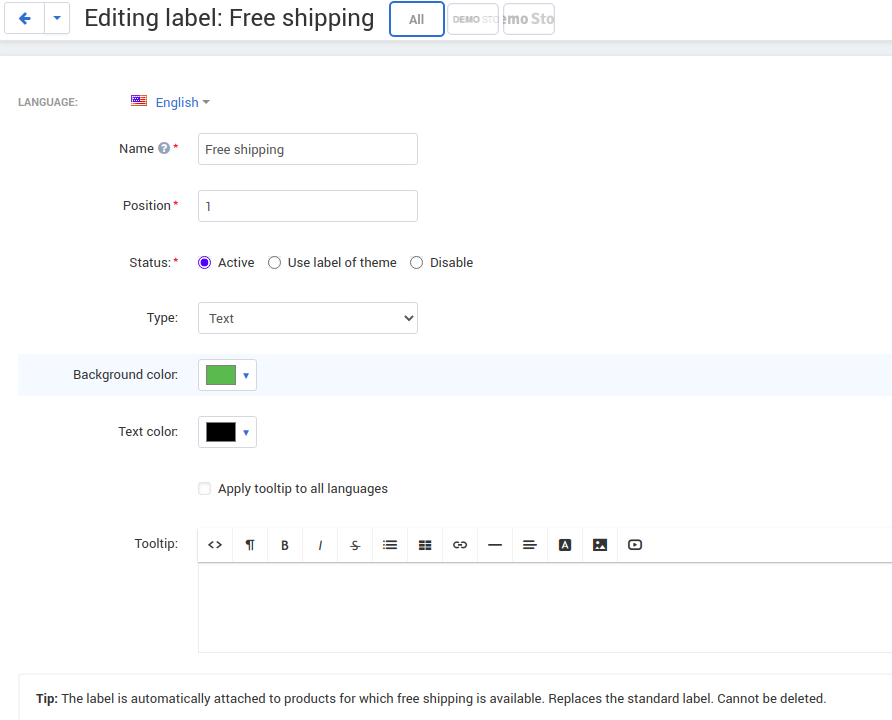
- Name-The name of the label which will be displayed on the storefront.
- Position - The position of the label, its priority. If the number of product labels exceeds the limit for the displayed labels specified in the add-on settings, then those labels with a higher priority will be displayed.
- Type - Choose the label type (Text or Graphic).
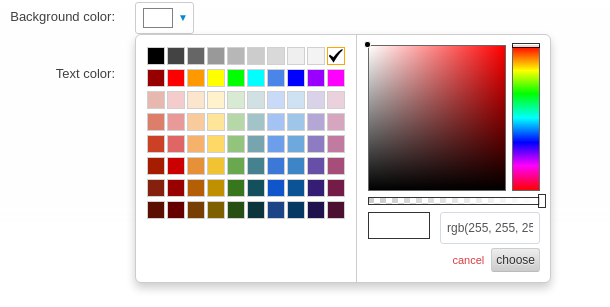
- Background color - Allows to select the color using the palette and set the transparency of the background color of the text label.
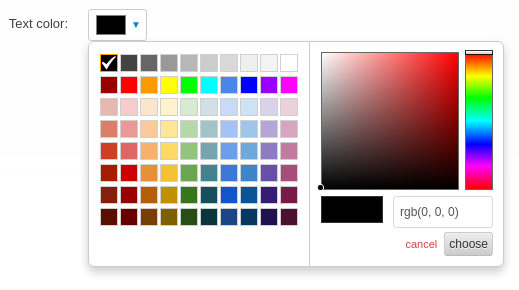
- Text color - Allows to select the text color for the text label using the palette.
- Tooltip - Add a text for tooltip for the label. It will be displayed when hovering over the label.
- Apply tooltip to all languages - Check the setting to save the changes for all languages. Otherwise, they will bw saved only for the chosen language.
Graphic labels settings
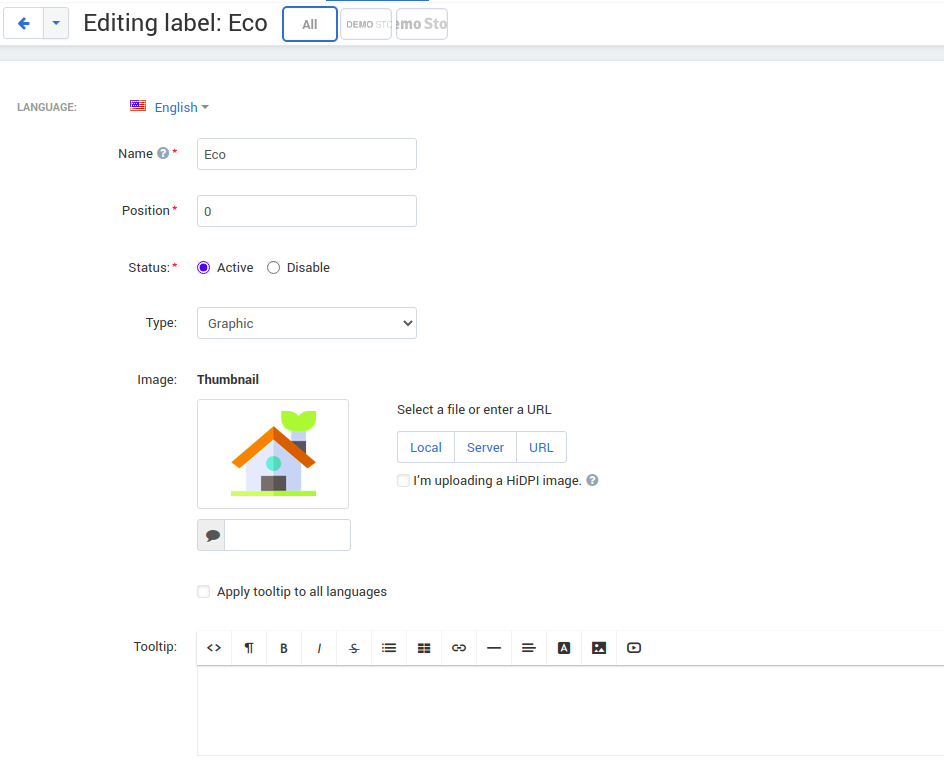
- Name - The name of the label which will be displayed on the storefront.
- Position - The position of the label, its priority. If the number of product labels exceeds the limit for the displayed labels specified in the add-on settings, then those labels with a higher priority will be displayed.
- Type - Choose the label type (Text or Graphic).
- Image - A form for uploading a graphic label image. The size of graphic labels is common for all labels and is set in the add-on settings.
- Tooltip - Add a text for tooltip for the label. It will be displayed when hovering over the label.
- Apply tooltip to all languages - Check the setting to save the changes for all languages. Otherwise, they will bw saved only for the chosen language.
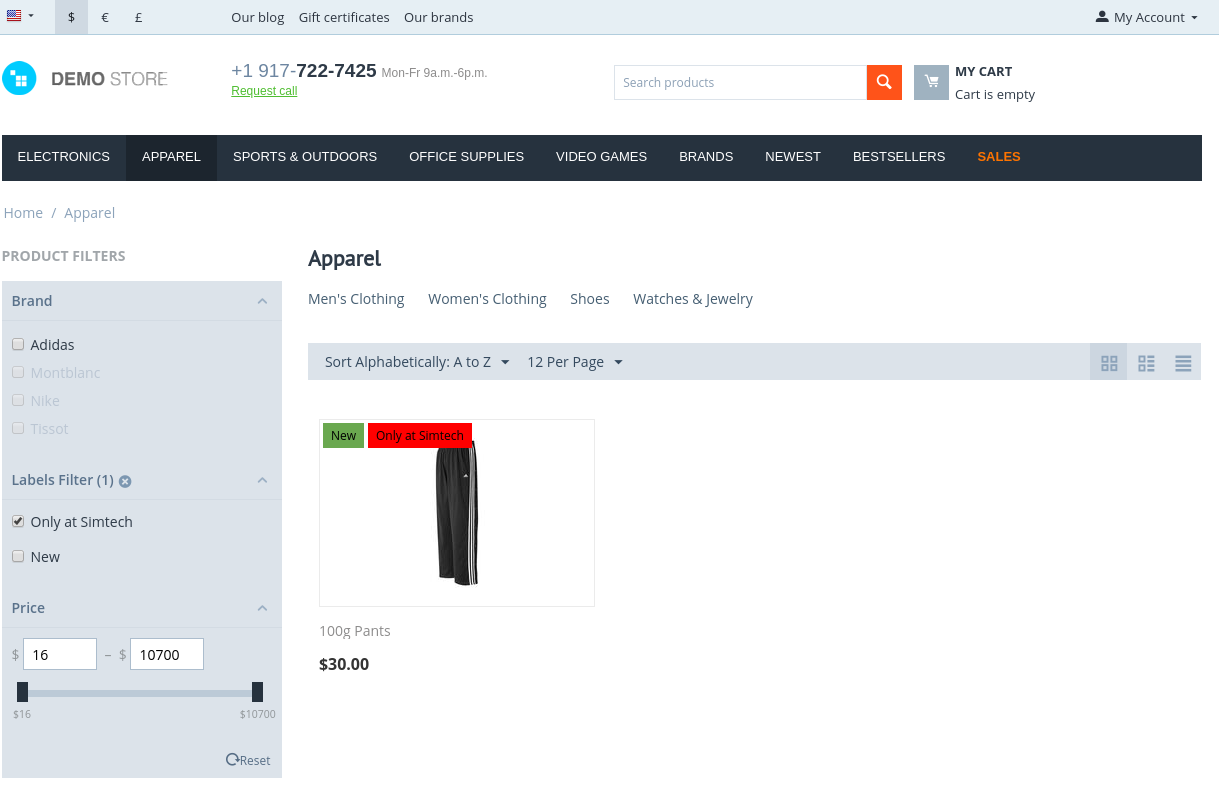
How to create a label filter
The add-on allows filtering products on the storefront by the labels attached to them. To create a filter, navigate to the Products -> Filters tab, click on + button and select Product Labels in the Filter by field.
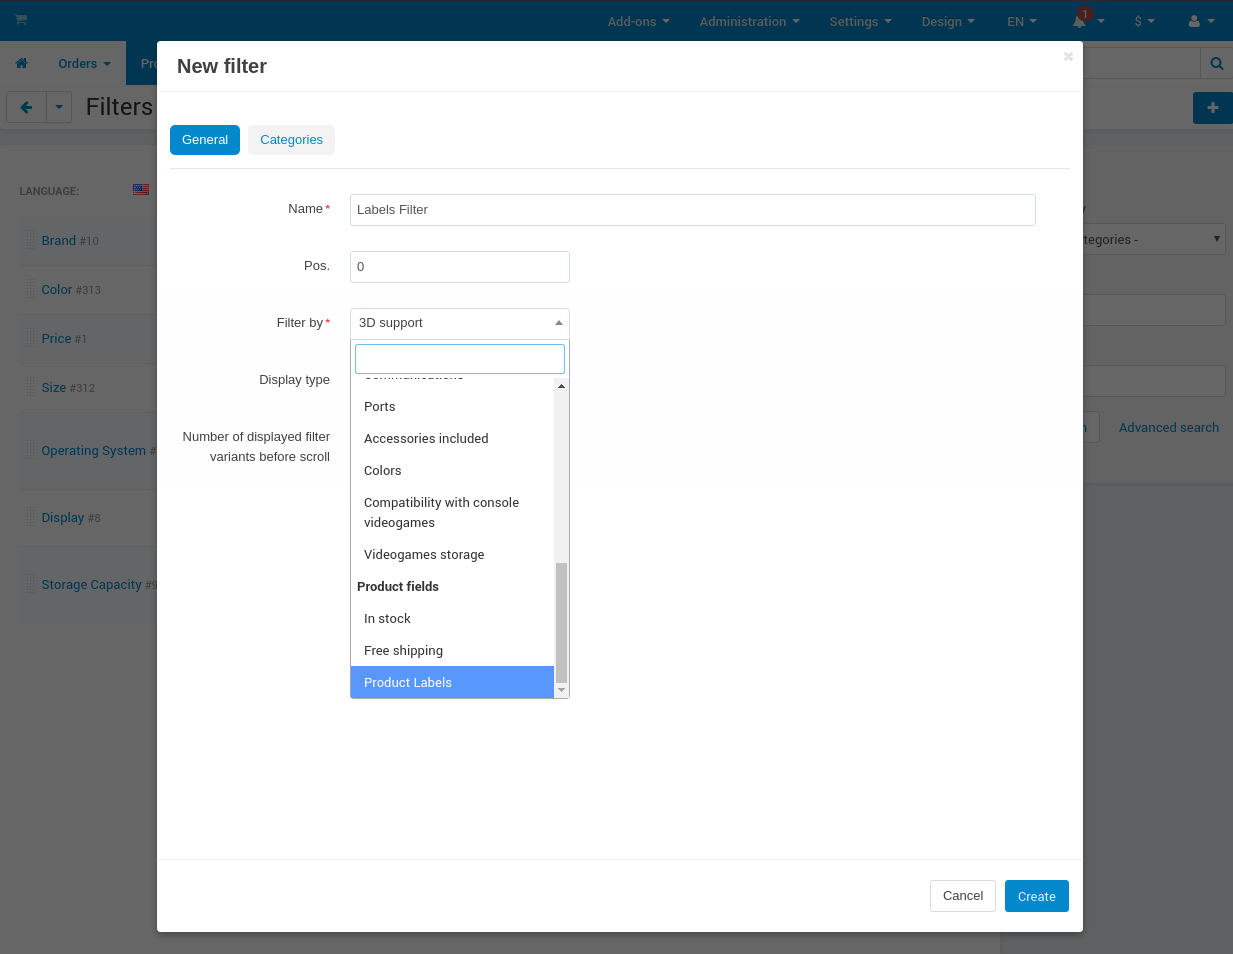
The filter will appear on the storefront on the pages with product lists (for example, product categories and search pages) and will contain the names of the labels that are attached to the products in the list.
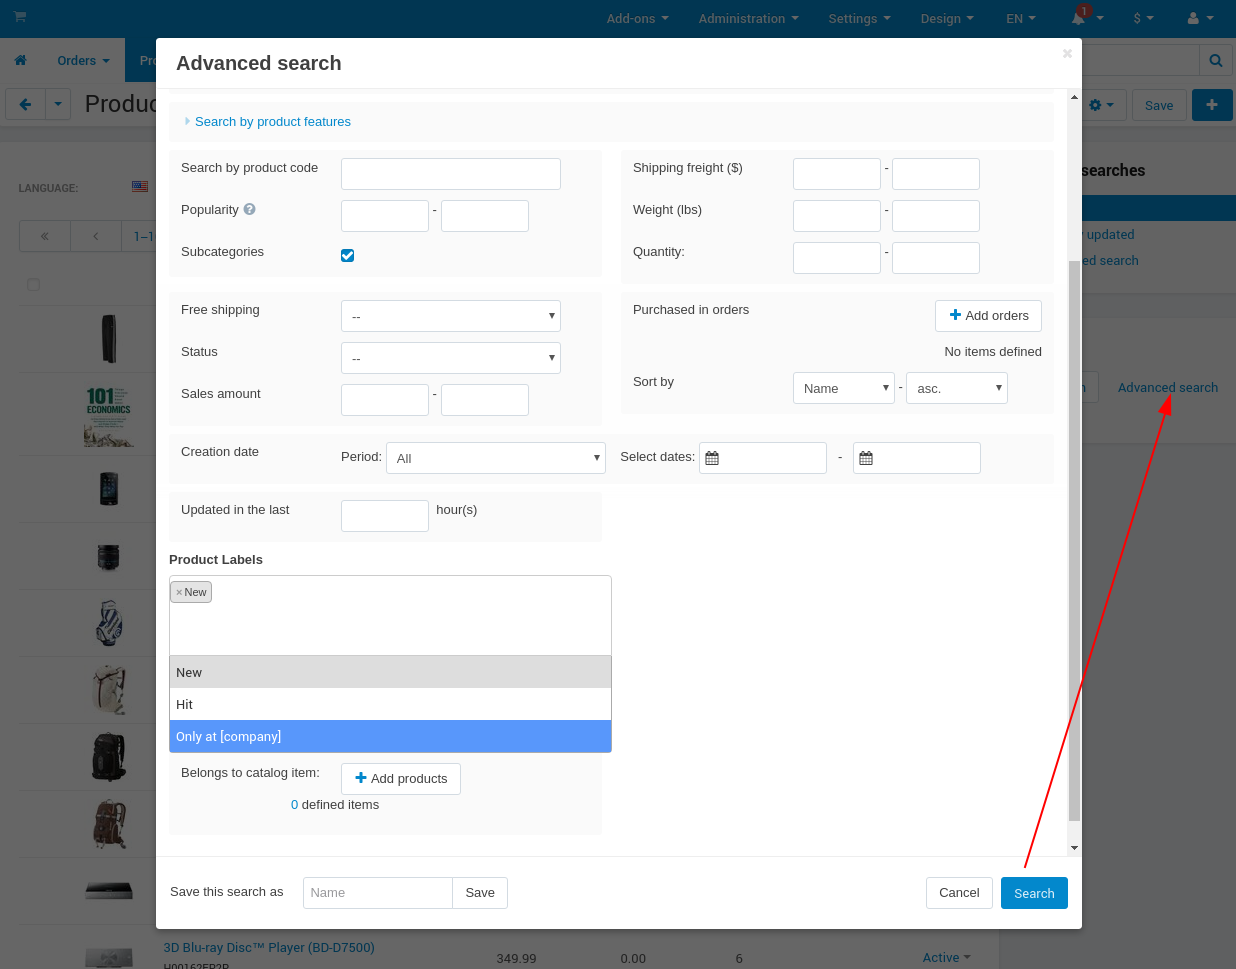
How to search for products in the admin panel by labels attached to them
The add-on adds the ability for the store administrator to search for products by the labels attached to them. Navigate to the Products -> Products tab, open the advanced search (by clicking the Advanced search button) and select the desired labels in the Product Labels field.
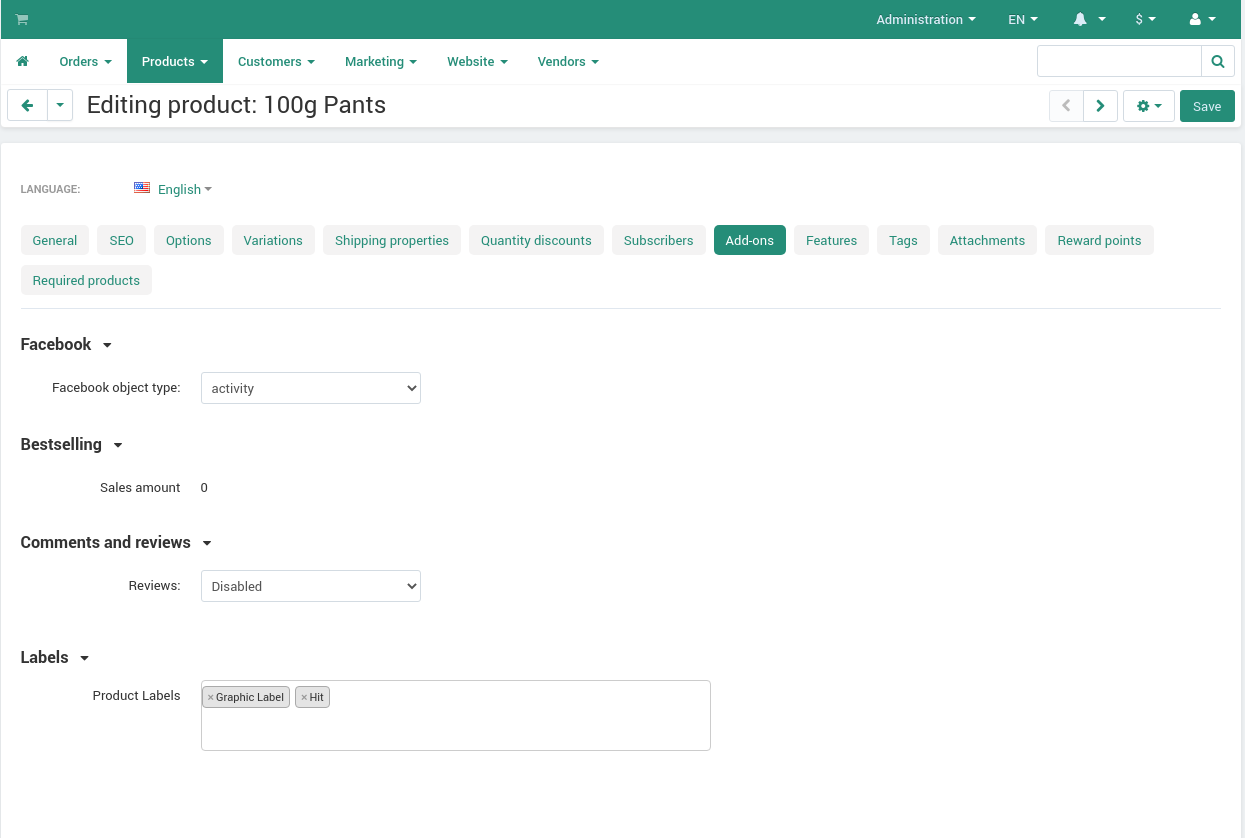
Adding labels to products
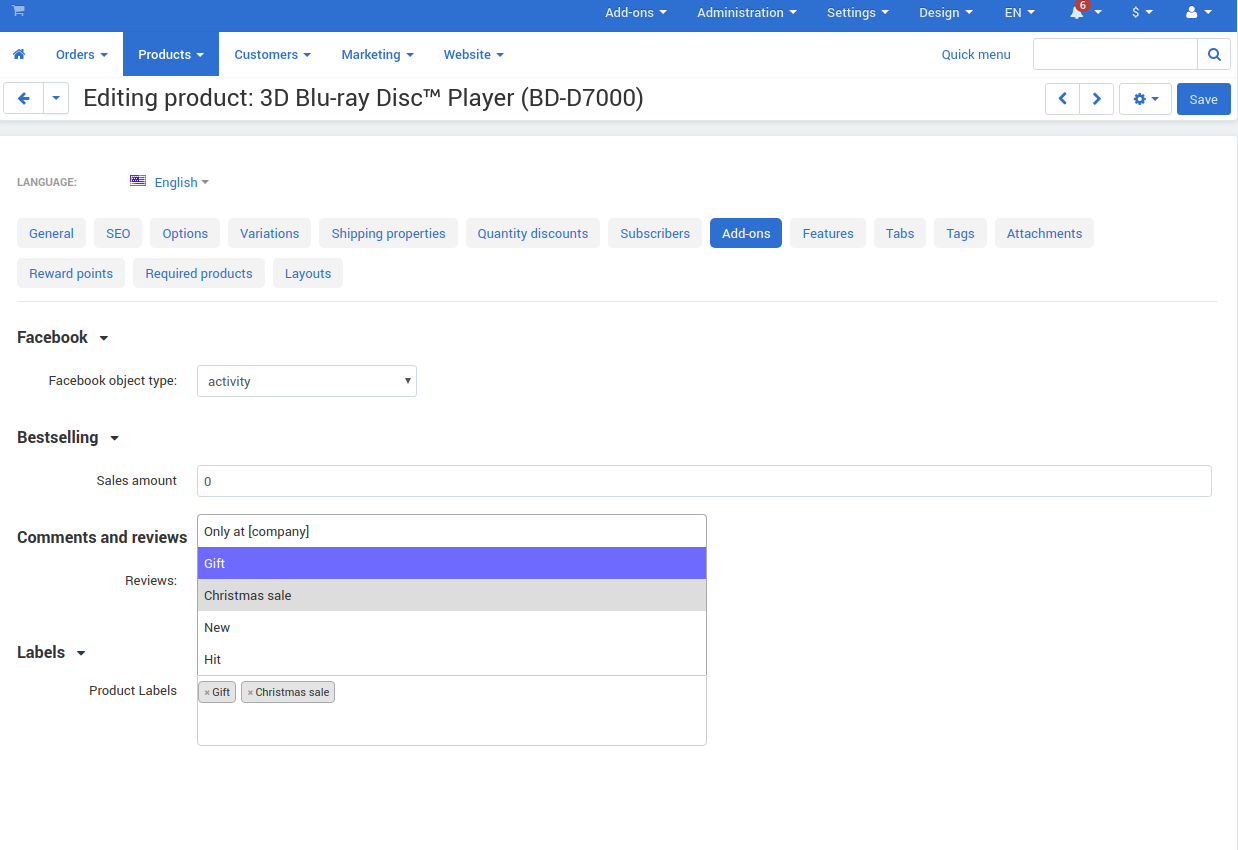
Labels can be attached to Products on the Add-ons tab in the product properties.
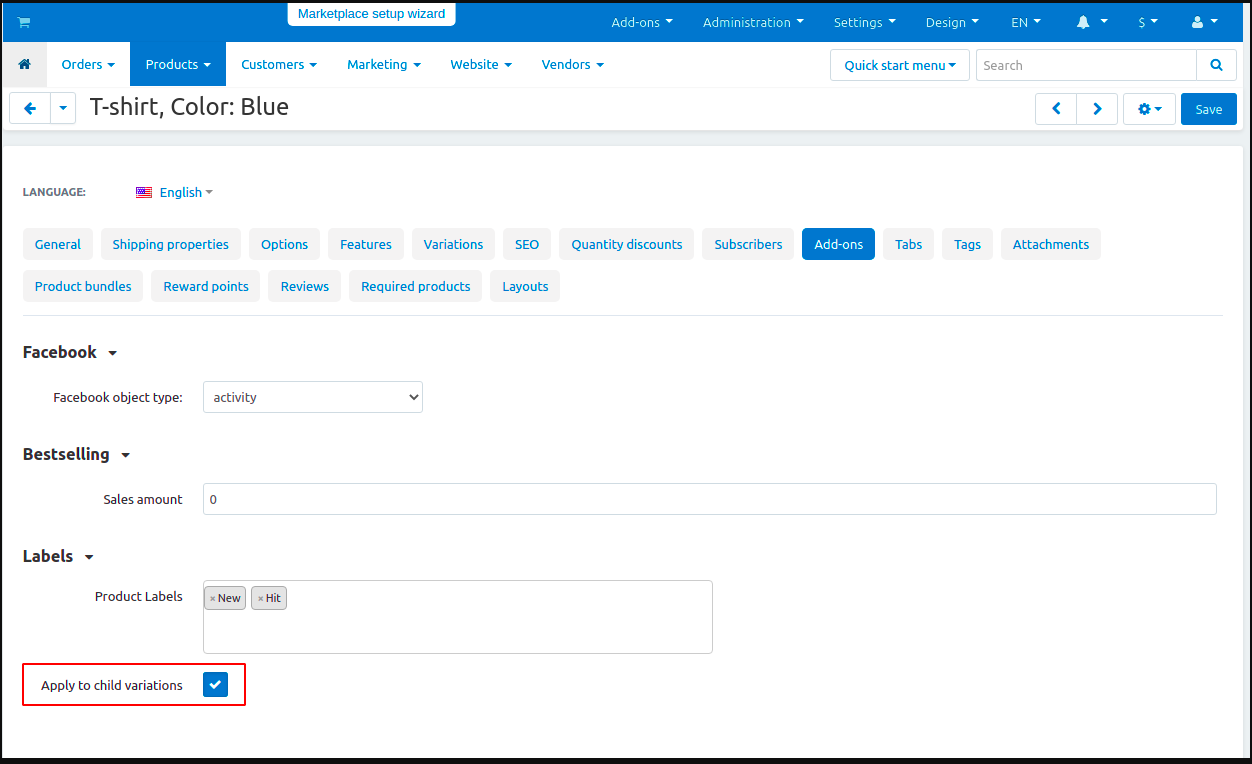
In case variations are attached to the product, its labels can also be applied to variations by selecting the “Apply to child variations” options in the Add-on tab
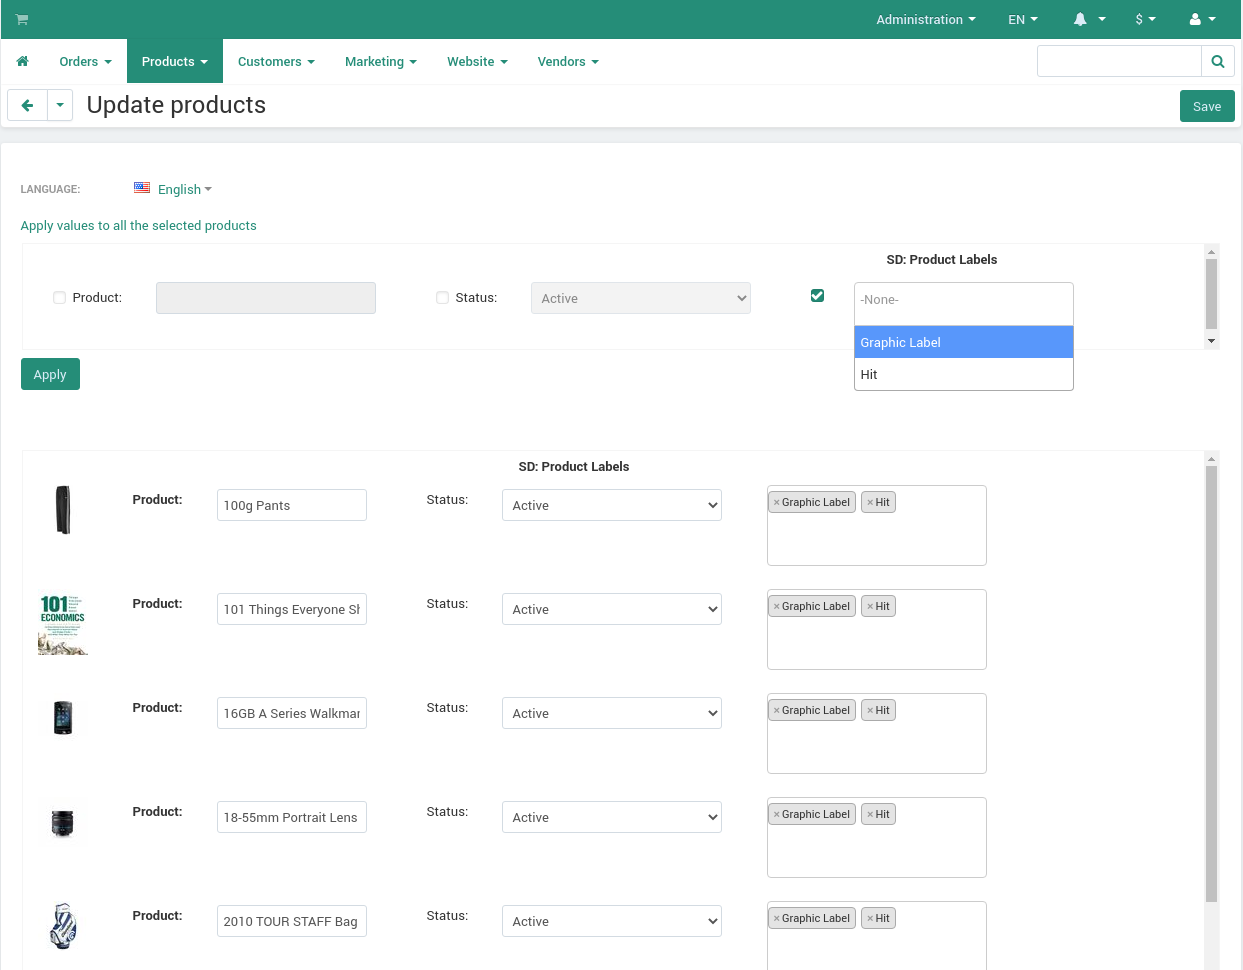
Bulk labels editing
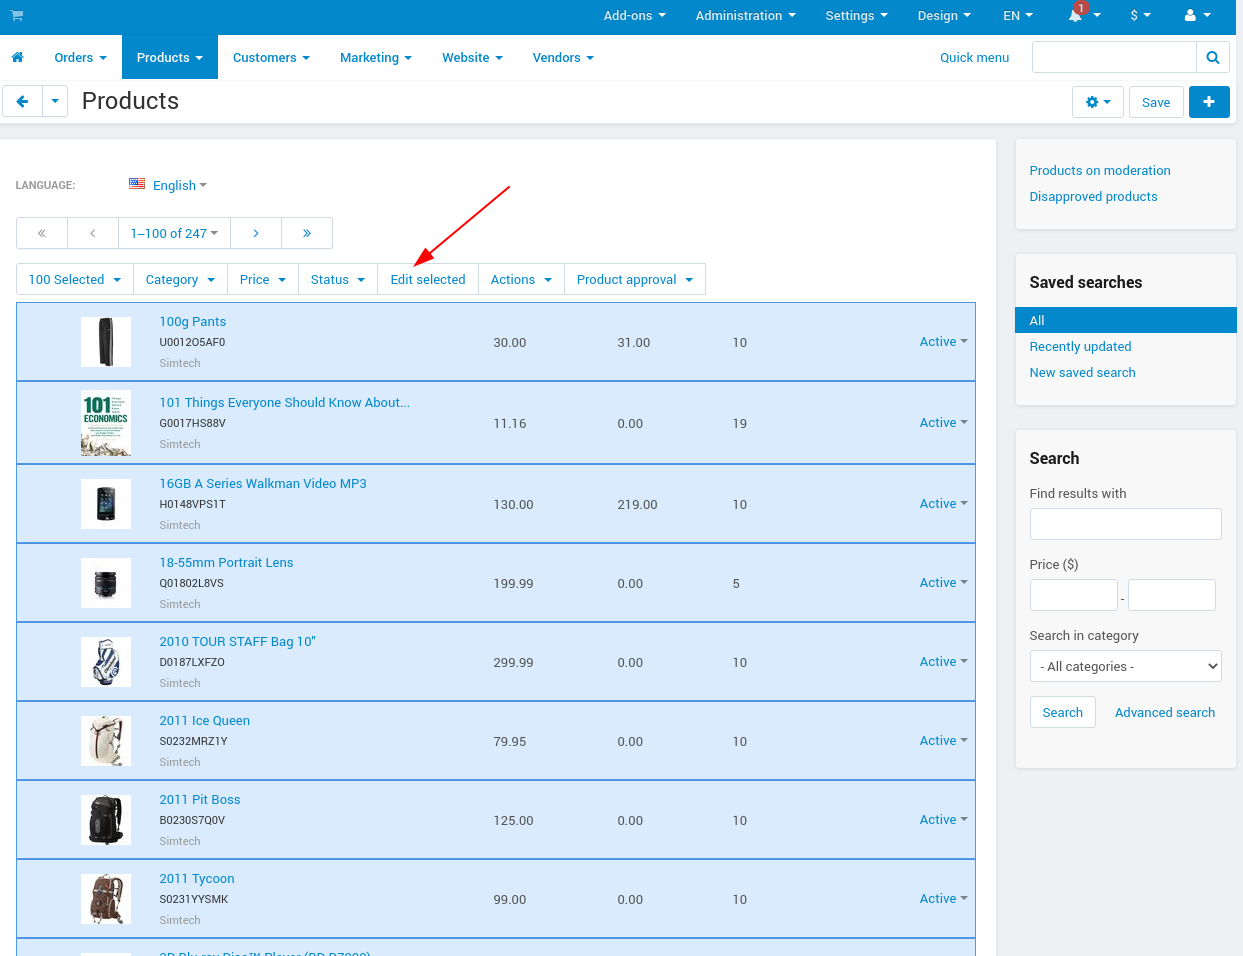
To add labels for multiple products:
- In the admin panel, go to Products - Products.
- Select the products you want to edit and click Edit selected.
- Select from the list of options available for bulk editing Product Labels
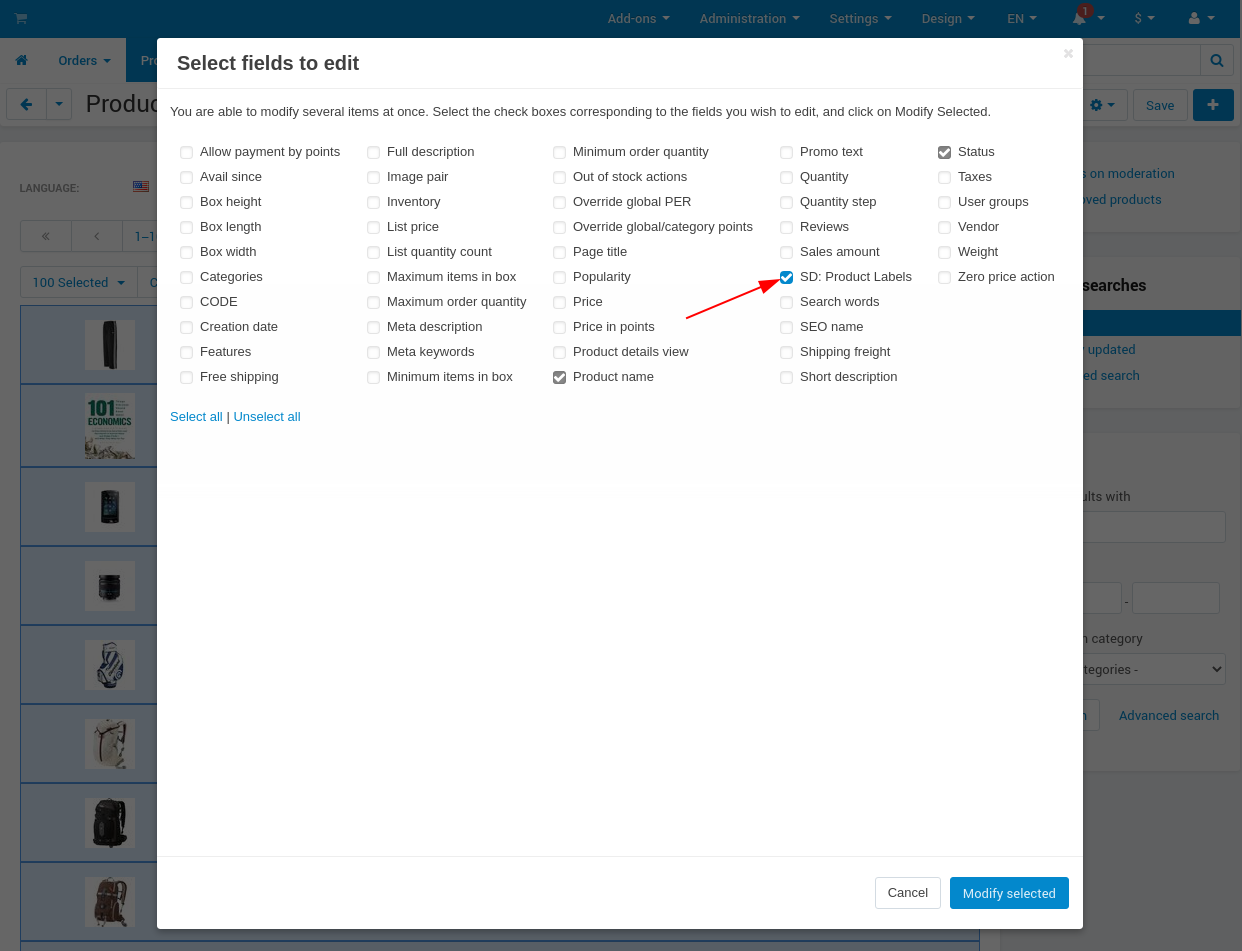
- Choose the necessary labels for each product separately, or for all at once by pressing the button Apply values to all the selected products.

Exporting product data
Go to Administration - Export data - Products.
Find Label fields and move them to the Exported fields section.

Specify all the required information and export products.
Importing product data
Go to Administration - Import data - Products.
Configure the import preset. On the Fields mapping tab, you can find the new options for fields mapping.
You can see new fields added:
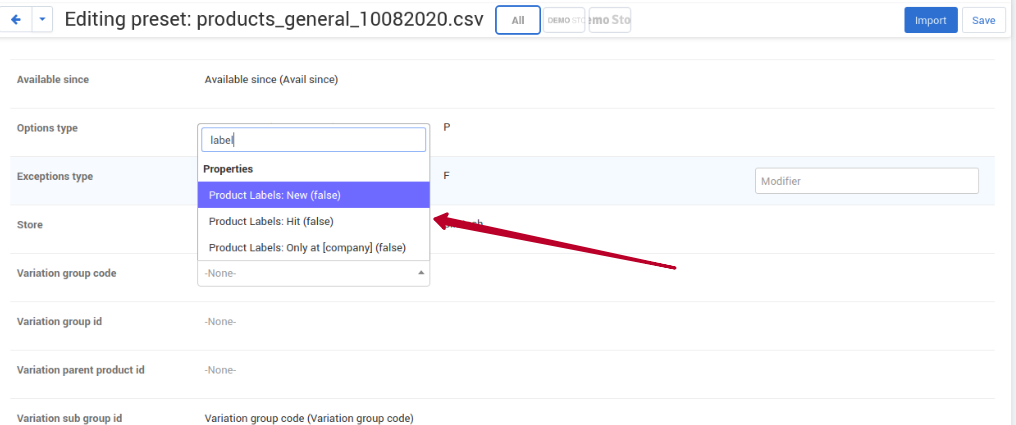
To learn more about import and export, visit the CS-Cart documentation.
Additional functionality for Multi-Vendor stores
How to enable labels for vendors
The add-on provides the site administrator with the ability to set up labels that vendors are allowed to attach to their products. Just follow the simple steps below:
- Enable the Allow vendors to attach labels setting in the vendor plan properties.
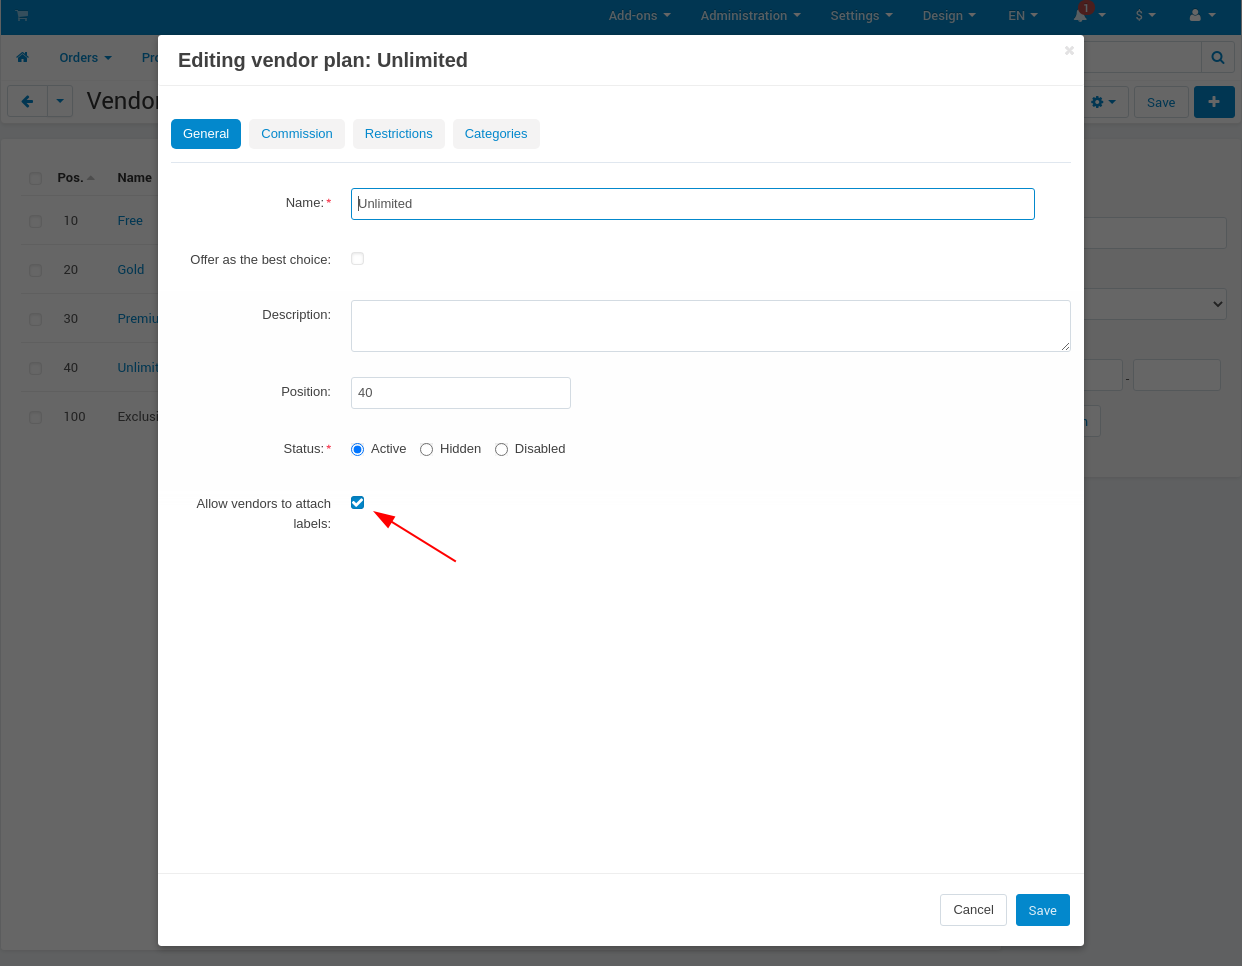
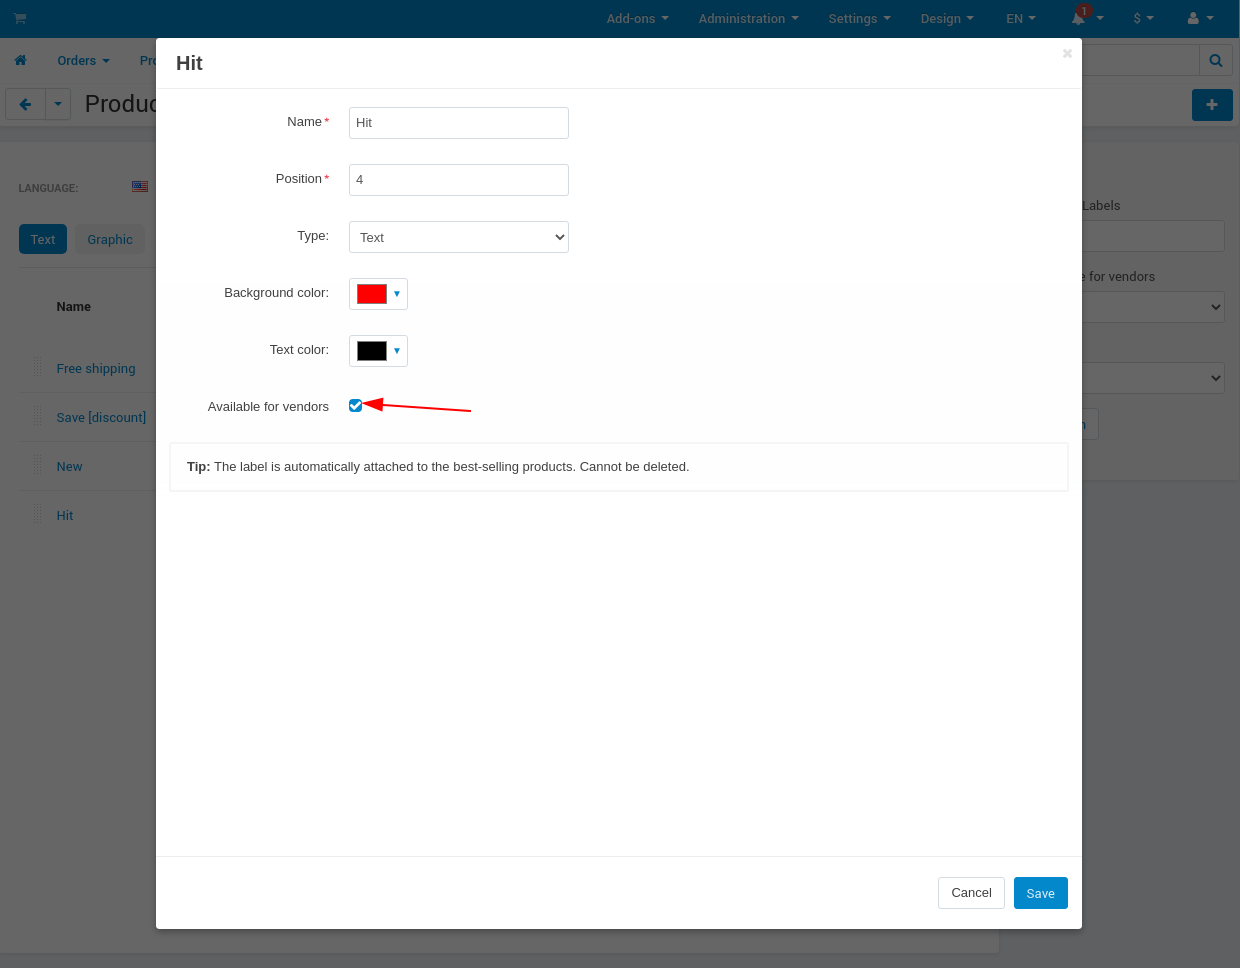
- Select labels that you would like to be available to vendors and tick the Available for vendors checkbox in their settings.
What vendors will see
Vendors who are allowed to use labels have access to the Marketing - Product Labels tab.
They can find all created labels and see which ones they can attach to products. Vendors are not able to change the labels on that page.
Vendors can attach the available labels to products either in the product properties, or by using bulk labels editing.
Questions & Feedback
Have any questions that weren't answered here? Need help with solving a problem in your online store? Want to report a bug in our software? Find out how to contact us.