How To: Move Your Store to Another Server
Note
Tutorial Difficulty: 2 / 3
This article provides the instructions on how to move your store to a different server. These instructions are useful, if you decide to change your hosting provider or upload your local installation to a remote server, or the other way round.
Important
The details of some steps in this instruction depend on the servers you’re moving to and from. If you have never installed CS-Cart or Multi-Vendor before, please read the installation instructions and learn about the 3 steps to make your store more secure.
Step 1. Back Up the Database of Your Existing Store
To back up the database of your existing store, complete the following steps:
1.1. Log in to the Administration panel of your store.
1.2. Go to Administration → Backup/Restore.
1.3. Press the + button to create a new backup file.
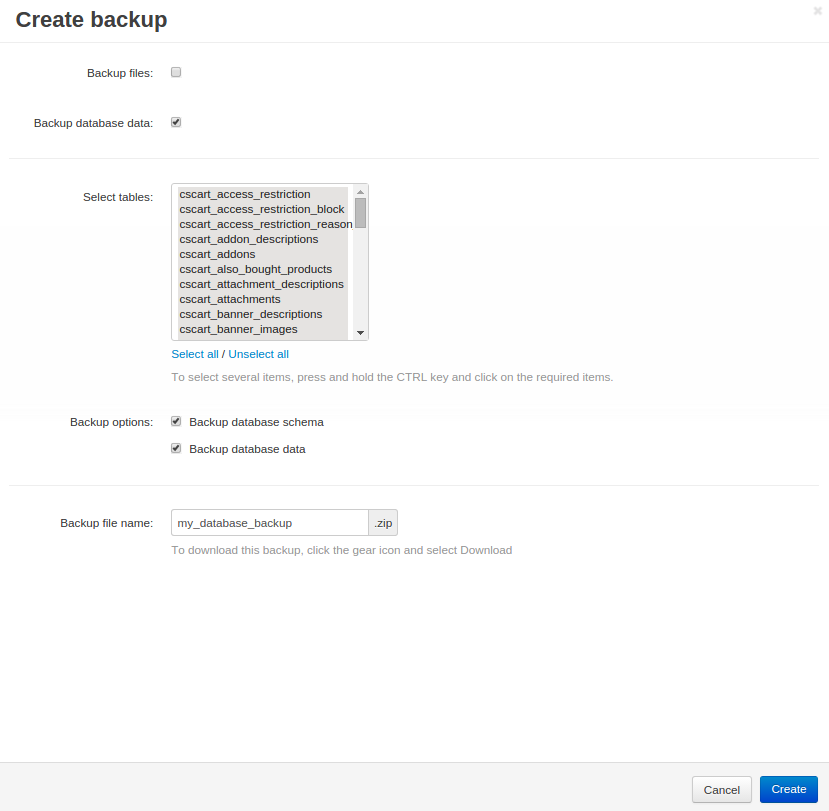
1.4. Configure the backup settings:
- Leave the Backup files checkbox unticked.
Note
The Backup files checkbox doesn’t back up all the files of your store: we will copy the files manually in Step 2.
- Tick the Backup database data checkbox.
- Tlick Select all under the Select tables list.
- Tick the Backup database data and Backup database schema checkboxes.
- Name your backup file, for example my_database_backup.
- Click the Create button.
1.5. Click the backup name to download it to your local machine. You’ll need that backup file for Step 5.

Step 2. Copy the Files of Your Store to the New Server
2.1. Make an archive with all the files of your store. The way you make an archive depends on your installation:
- If your old store is installed on a host with cPanel, go to cPanel → Files → File Manager, select all the files of your store, and click Compress. Then select the newly created archive and click Download.
Important
cPanel File Manager may not show hidden files like .htaccess. Before you try to create an archive, go to Settings (top right corner of the screen) and tick the Show hidden files (.dotfiles) checkbox. That way you’ll make sure that all files of your store are in the archive.
- If your old store is installed on a local machine, find the installation directory and make an archive with your favourite file archiver.
Important
The path to the installation directory depends on your web server and operating system. For example, c:/xampp/htdocs is the default path for XAMPP on a Windows machine.
2.2. Copy the archive with your store to the document root of the new server.
2.3. Unpack the archive on the new server.
Step 3. Edit config.local.php
After you unpack the archive with your store, make some changes the config.local.php file:
Important
You must have a database on your new server before you proceed. Contact your hosting provider or server administrator for database credentials, or read the installation instructions to learn how to create databases on various servers.
3.1. Open config.local.php in an FTP client or the file manager of your host’s control panel.
3.2. Edit the following lines according to the instructions:
| What should I change? | How should I change it? |
|---|---|
$config['db_host'] = 'DB_host'; |
If the database and the website are stored on the same server (as they usually are), replace DB_host with localhost. |
$config['db_name'] = 'DB_name'; |
Replace DB_name with the name of the new server’s database. |
$config['db_user'] = 'DB_username'; |
Replace DB_username with the name of the user of the new server’s database. |
$config['db_password'] = 'DB_password'; |
Replace DB_password with the database user’s password. |
$config['http_host'] = 'example.com'; |
Replace example.com with your store’s domain name. Make sure this domain name points to your new server, or you won’t be able to access your website by using it. |
$config['http_path'] = ''; |
If the files of your store are located in the server’s document root, leave it as is. If you want your store to be available at domain.com/cs-cart, put all the files of your store into the cs-cart folder in your website’s document root and change the line to this: $config['http_path'] = '/cs-cart';. |
$config['https_host'] = 'example.com'; |
Replace example.com with the name of the secure server host. Usually it is the same as your domain name. |
$config['https_path'] = '/subfolder'; |
If the files of your store are located in the server’s document root, leave it as is. If you want your store to be available at domain.com/cs-cart, put all the files of your store into the cs-cart folder in your website’s document root and change the line to this: $config['http_path'] = '/cs-cart';. |
Step 4. Clear the Cache of Your Store on the New Server
After you unpack the files of your store, make sure to clear the cache by deleting or renaming the cache folder in the var directory of your store on the new server.
Step 5. Restore the Database on the New Server
The way you restore the database depends on the server you’re moving to. In this tutorial we describe 2 ways to do it—use the method that suits you best.
Important
You will need a new empty database on your new server: restoring the database backup will overwrite all data in the database.
If your new server uses cPanel, create a database and database user as described in the Step 1 of this tutorial. To create a database on a VPS/VDS, use Step 3 of this tutorial.
Way 1. PhpMyAdmin
To restore a database backup with phpMyAdmin, complete the following steps:
- Log in to phpMyAdmin.
Hint
If your new server uses cPanel, you can find phpMyAdmin under Databases → phpMyAdmin. Some servers may require you to enter your login and password. Contact your hosting provider or server administrator for details.
- Select your database from the list on the right.
- Click Import in the top menu.
- Click Choose File and select the database you downloaded during Step 1.5.
- Set Character set to utf-8.
- Set Format to SQL.
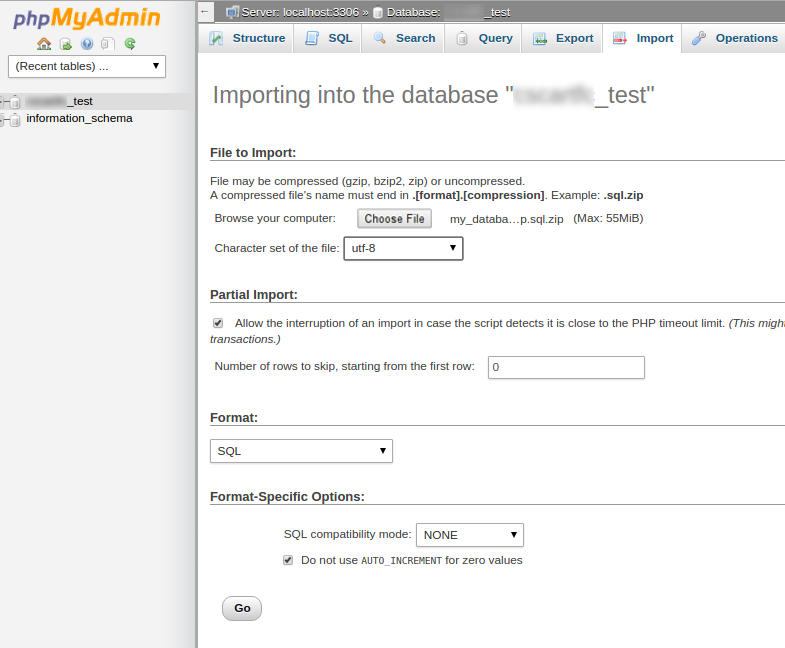
- Click Go.
- Wait until the import is completed. You’ll see a message when it’s done.

Way 2. SSH and MySQL
To restore a database backup via SSH, complete the following steps:
- Connect to your server via SSH.
ssh username@host
Note
Contact your hosting provider or server administrator for the username and host credentials, as well as your password.
- Enter your SSH password.
Note
Your cursor won’t move and you won’t see any changes while you type your password. That is normal.
- Upload your database backup to the var/backups directory on the remote server.
scp path/to/my_database_backup.sql.zip username@host:/root/folder/of/your/store/var/backups
- Unpack the .zip archive with your database backup on the remote server.
cd root/folder/of/your/store/var/backups
unzip my_database_backup.sql.zip
- Import the database.
mysql -u[username] -p DB_name < my_database_backup.sql
- Enter your MySQL password.
Make sure to replace [username] with your MySQL username, and replace DB_name with the name of your database from the Step 3.2. For example, if your username is root, and the database is called test, the command will look like this:
mysql -uroot -p test < my_database_backup.sql
Step 6. Update the Storefront URL
Note
Skip this step if you use Multi-Vendor.
This is an optional step. You need to update the URL of your storefront, if the URL of your store has changed. You also need to do this, if you moved the store from the local machine to a remote server, or the other way round:
6.1. Access the Administration panel of your store on the new server.
Important
The way you access the admin panel may be different, depending on whether you followed the 3 steps to make your store more secure before attempting to move your store to a new server.
6.2. Go to Administration → Stores.
6.3. Click the name of your storefront.

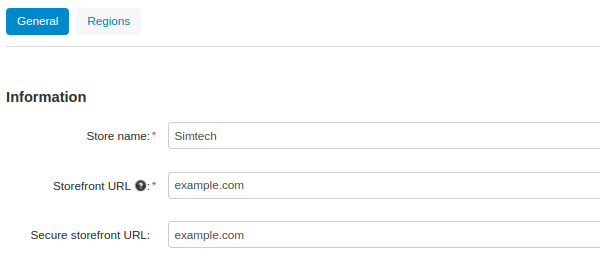
6.4. Change the Storefront URL and Secure storefront URL to the ones you specified in Step 3.2 as $config[‘http_host’] and $config[‘https_host’].
Questions & Feedback
Have any questions that weren't answered here? Need help with solving a problem in your online store? Want to report a bug in our software? Find out how to contact us.