Introduction to the Administration Panel
The Administration Panel (or the admin panel for short) is the primary tool for you to work with your online store. Here you can manage products and orders, offer discounts, interact with your customers, change the look of your store and do much more.
The admin panel is responsive: it adapts to the screen size of the device you view it from. That way, you can manage your store from mobile devices.
Connect to Your Admin Panel
To find the admin panel, open your online store’s website with a browser and add /admin.php to the end of the URL.
Important
If you already installed CS-Cart and renamed admin.php for security reasons, use the URL of your shop and the new name of the admin.php file, for example:
mynewshop.tk/my_admin_panel.php
For example, let’s log in to the admin panel of the CS-Cart Online Demo (demo.cs-cart.com). Navigate to: demo.cs-cart.com/admin.php

Enter the administrator’s email and password that you used during CS-Cart installation. In CS-Cart Online Demo the email and password are already there for you, so all you have to do is click the Sign in button.

The Dashboard
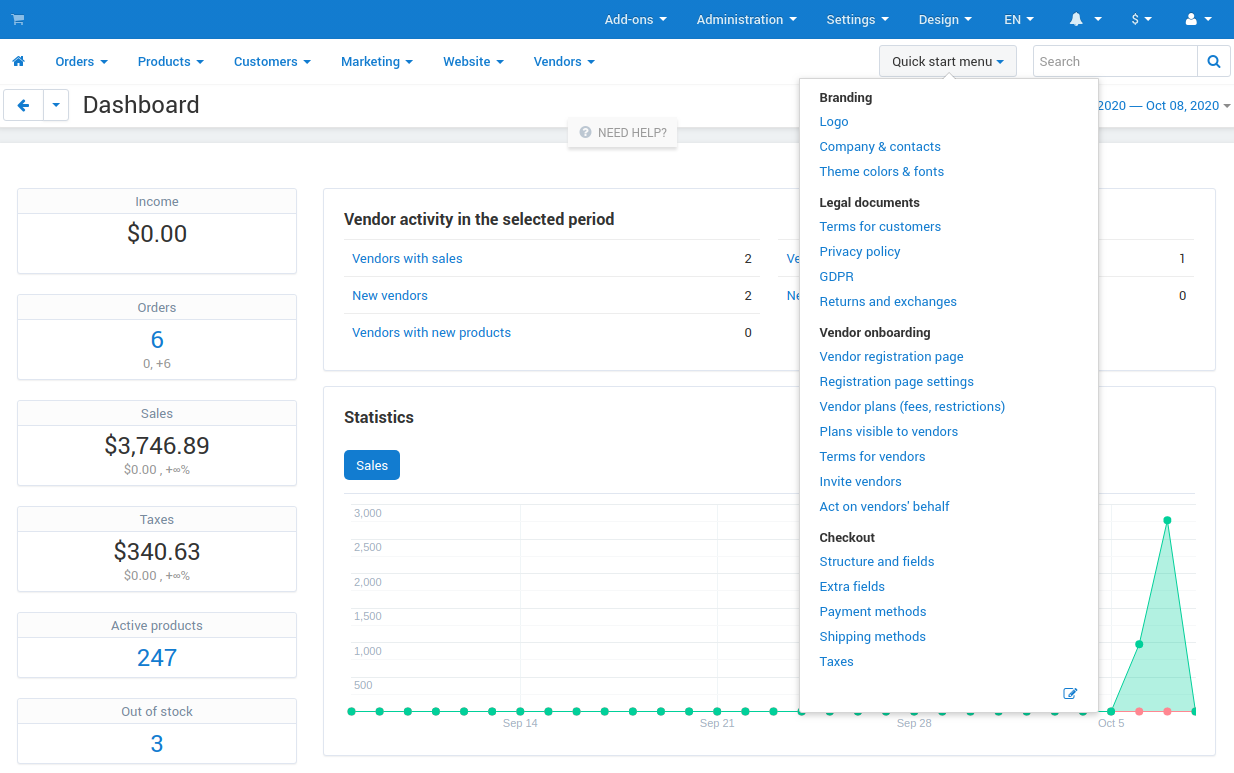
The first thing you’ll notice is the Dashboard, where you can check sales statistics, view recent orders and product changes. The Dashboard also provides information from the database, such as the number of active products and registered customers.

- Total number of orders, sales and taxes sums in your store.
- Monthly statistics of your store in the form of a diagram.
- Brief statistics of the store: the number of products, customers, pages, etc. Click on the number of items to go to the page with the detailed list of these items.
- Recent orders made in your store. Switch between the tabs to see orders with particular statuses.
- The number of orders with the particular status and total income received by the orders of this type.
- Brief variant of information, represented in the Administration → Logs section. Click the Show all link to view the full log.
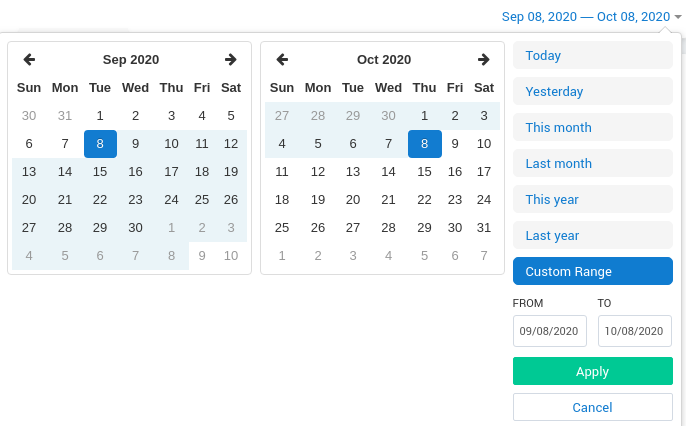
You can also choose the period of time, for which the information on the dashboard is displayed. Click on the period in the right upper corner of the page and choose the required period of time from the drop-down menu. Optionally, click Custom Range to define your own period and press Apply.

The Top Bar
Let’s take a look at the top bar:

- Add-ons—manage useful extensions that add more features to your store
- Administration—make backups of your store, import and export data, upgrade your store, edit your stores, payment and shipping methods, taxes and currencies
- Settings—configure various aspects of your store, such as weight measurement units, sitemap, default language of the Admin Panel, and e-mail settings
- Design—edit your store’s menus, change the look of your store and the structure of certain types of pages.
The top bar also lets you select the language of the admin panel and the currency to use on the Dashboard and in sales reports.
The Cart icon on the left side of the top bar allows you to go to the storefront. The storefront is what your customers see when they open your store.
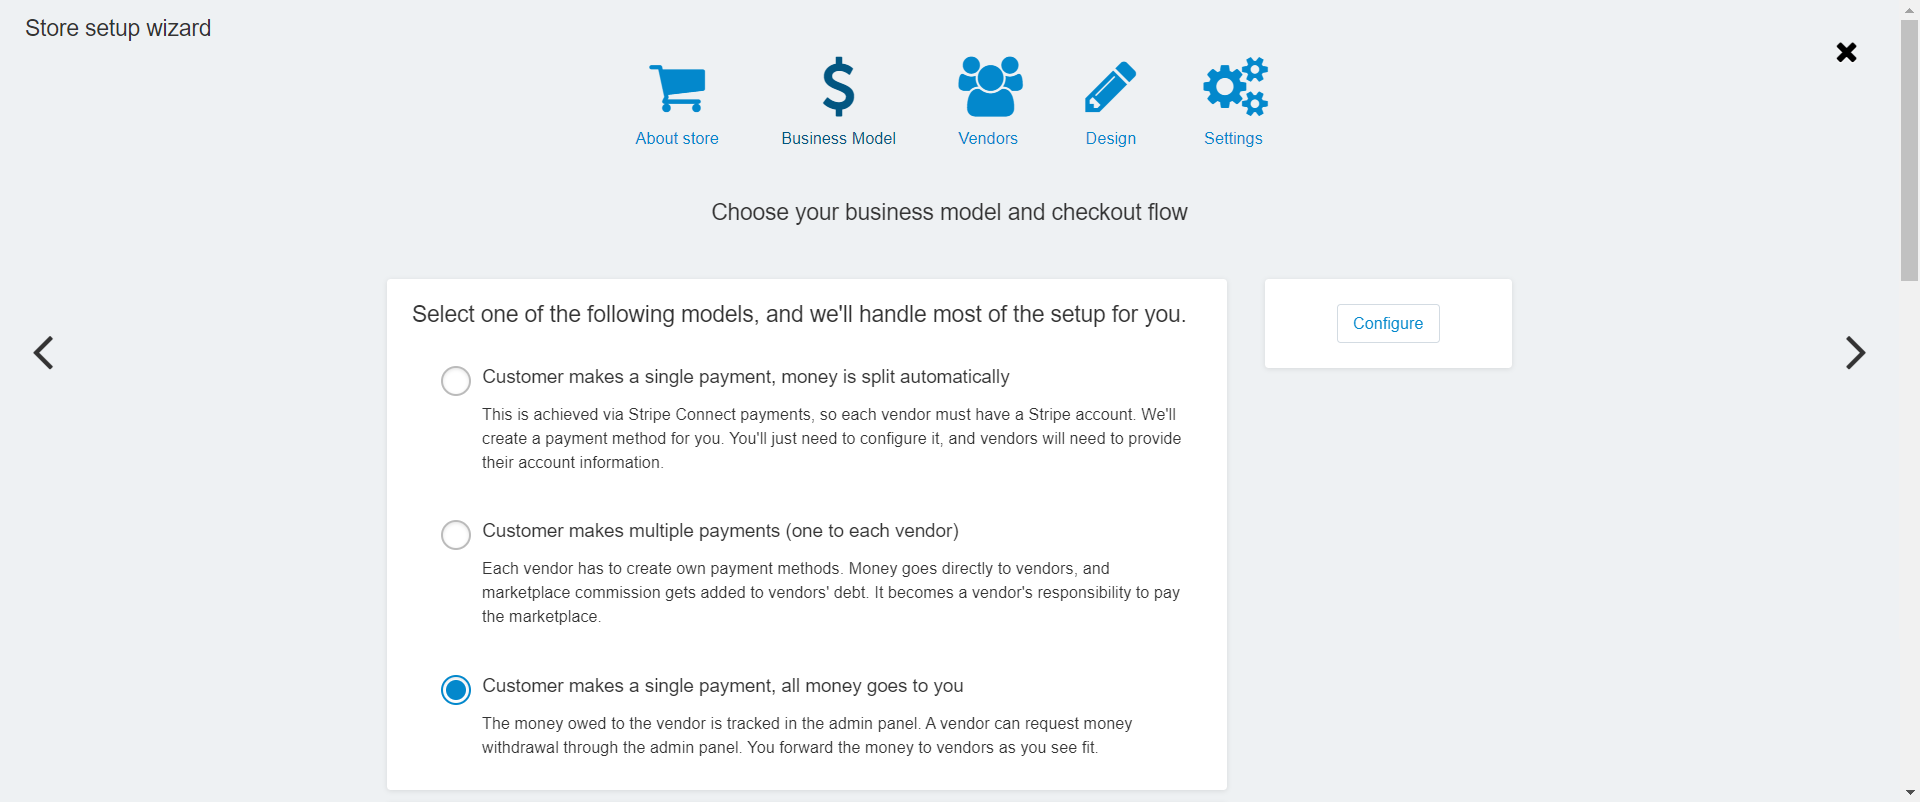
The Store Setup Wizard tab in Multi Vendor takes users to a special settings page. This functionality was developed to help with the initial setup and do some configuration for you.

The settings on this page repeat the settings in the store. For convenience, settings are structured by several tabs. Go through the tabs, select the store business model or design, set up work with vendors and other store elements.

Store Operations
The panel below the top bar serves to manage the operations of your store:

The Home icon takes you to the Dashboard
Orders—view sales reports and manage your orders and shipments
Products—edit products and their categories, features, filters, and options
Customers—manage the store’s administrators and registered customers, as well as user groups with different privileges
Marketing—promote your products, offer bonuses, and view the carts that the customers didn’t take to checkout
Website—create and publish pages, polls, forms and links, as well as to manage the SEO aspects of your store
Vendors (available only in Multi-Vendor)—manage vendors in your marketplace and control your accounting.
Note
Your Admin Panel may have additional menu subsections, depending on the add-ons you installed and activated.
Questions & Feedback
Have any questions that weren't answered here? Need help with solving a problem in your online store? Want to report a bug in our software? Find out how to contact us.
