How To: Attach Files to Products via Import
In CS-Cart and Multi-Vendor, you can attach files to products (for example, instructions or diagrams). To do this, you need the Attachments add-on. Normally, you can attach a file in the settings of any product, but if there are lots of products and files, it’s easier to do this using product import.
Before importing products with files, you need to upload those files somewhere. There are two options for where to store them:
- on an external server or servers (to save space on your store’s server);
- directly on your store’s server (you can upload files using the File editor).
Uploading Files to an External Server
Uploading files to an external server will save you space on the server with your CS-Cart installation. When a customer wants to download the file from the storefront, he will get it not from your store, but from the place where the file is stored.
Upload your files to any file hosting service.
Specify the links to your files in the imported file; for example:
http://www.example.com/test_file.pdf
Go to Add-ons → Manage add-ons.
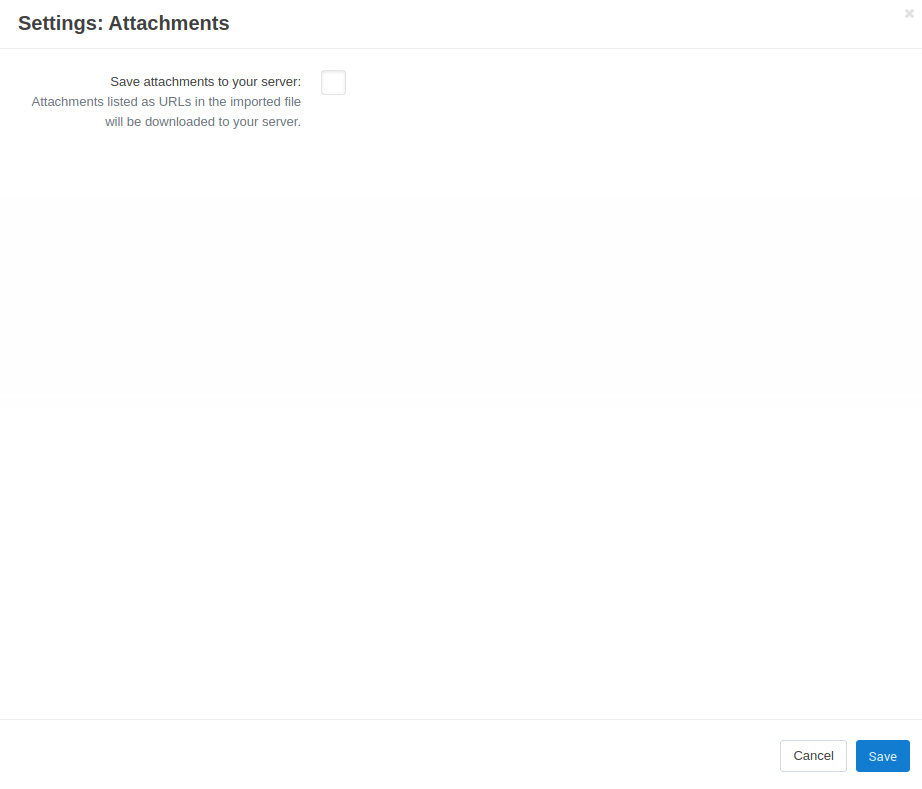
Find the Attachments add-on in the list, and click its name to open the settings.
Make sure the Save attachments to your server checkbox is unticked. It means that attachments listed as URLs in the imported file will remain on the external server, and won’t be copied to your store’s server.

Important
If the file on the external server is changed, the new file will be available to the customers. Saving attachments on your store’s server will help you to avoid this situation, but it slows down the importing and requires a lot of space on your server.
Uploading Files to Your Store’s Server
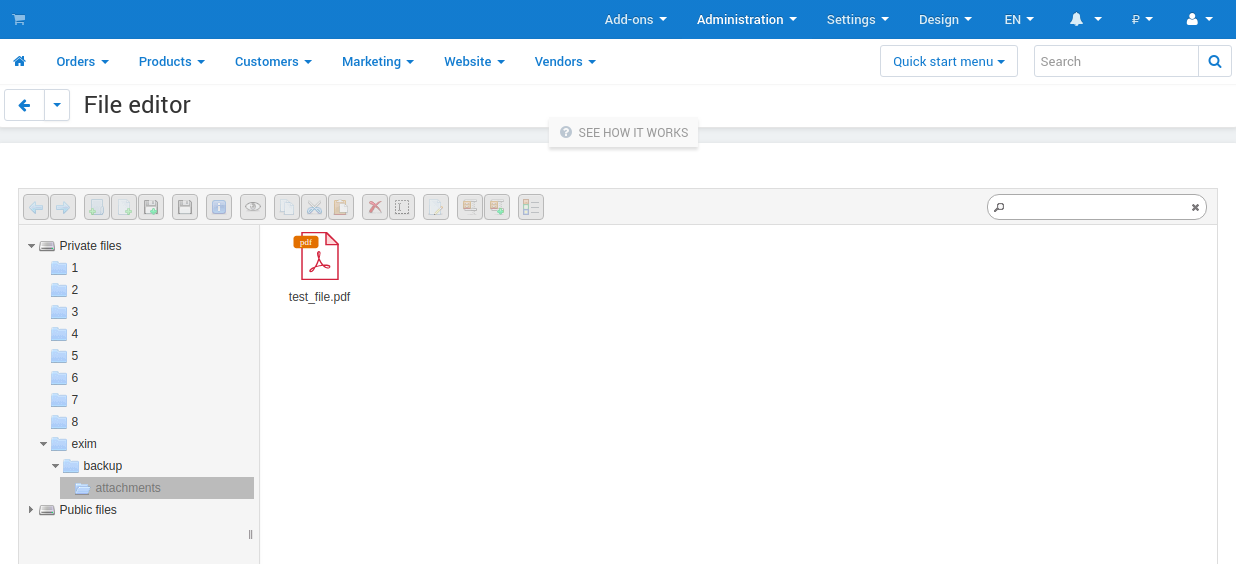
In the administration panel, go to Administration → Files.
Select Private files.
Go to exim/backup/attachments. If this folder does not exist, create it.
Upload your files there. Now you can refer to them in your imported file using one of the following ways:
Way 1. An absolute path from the root directory of your server to the file. For example:
/path/to/cs-cart/var/files/1/test_file.pdf
Way 2. A relative path to the image file from the Private files section. For example:
exim/backup/attachments/test_file.pdf
Way 3. Only the name of the file:
test_file.pdf

Example of Importing Files
Prepare the files and upload them using the File editor. For example, let’s upload them to exim/backup/attachments.
Prepare the imported file. Specify the product data in there as described in this article.
Below you’ll find an example of the content of an imported file. You can copy this extract to an empty .txt file, change the file’s extension to .csv, and open it in a spreadsheet editor, for example LibreOffice Calc.
Product code; Language; Product name; Attachments
"T1"; "en"; "1st Test Product"; "test_file.pdf"
"T2"; "en"; "2nd Test Product"; "test_file.pdf"
Here’s what the content of the file means:
- Product code—determines the product to which the file belongs. If you enter a non-existing product code in the imported file, a new product with the specified file will be created.
- Language—a two-letter language code, for example,
en. This is a required field for importing products. - Attachments—the names (and sometimes locations) of the files.
Import the products. When matching the columns on the Fields mapping tab, make sure to match each of the columns in the imported file with a product property in CS-Cart. Most of the columns have the same names as the corresponding product properties; the Attachments column must be matched with Attachments (Attachments).
Note
If necessary, you can also switch to the Settings tab and tick the Delete existing attachments checkbox in the additional settings. That way you’ll replace the the old files of the imported products with new ones, rather than adding the new files to existing ones.
Questions & Feedback
Have any questions that weren't answered here? Need help with solving a problem in your online store? Want to report a bug in our software? Find out how to contact us.