Braintree
Overview
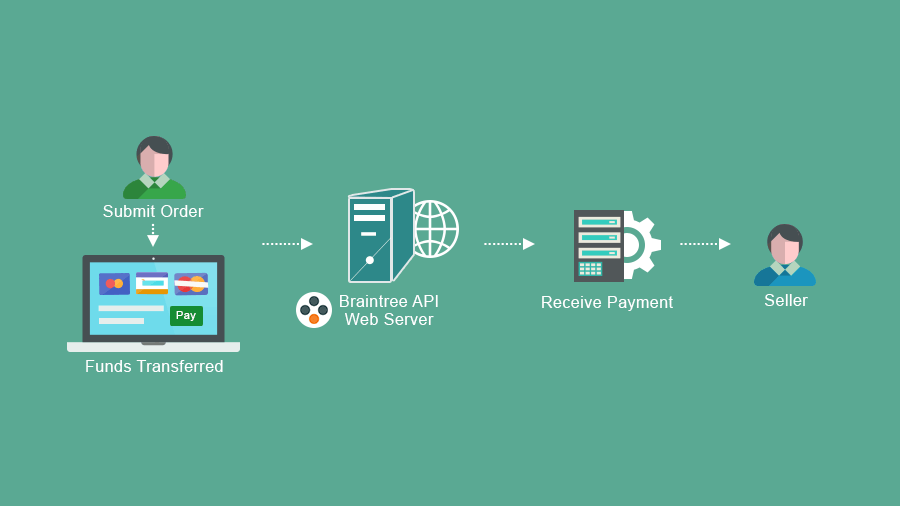
Accept payments in your CS-Cart store with the Braintree payment gateway. It provides secure and seamless experience to your customers across all devices.
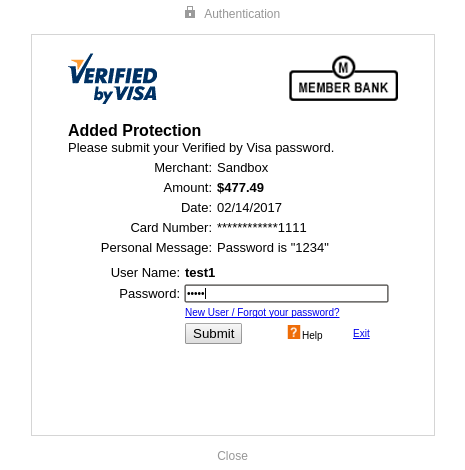
Braintree provides an additional layer of verification with 3D Secure. You can quickly enable it in the payment method settings. In this case, the customer will be prompted to authenticate using their bank login credentials.
What the customer will see
Braintree offers a variety of convenient ways to accept payments:
Drop-in UI
The quickest way to pay is Drop-in UI, which is also supported in the add-on. The add-on makes it possible to securely store customer information in the Braintree Vault so that your customers don’t need to re-enter their information each time at checkout. Refer to this article for more details.

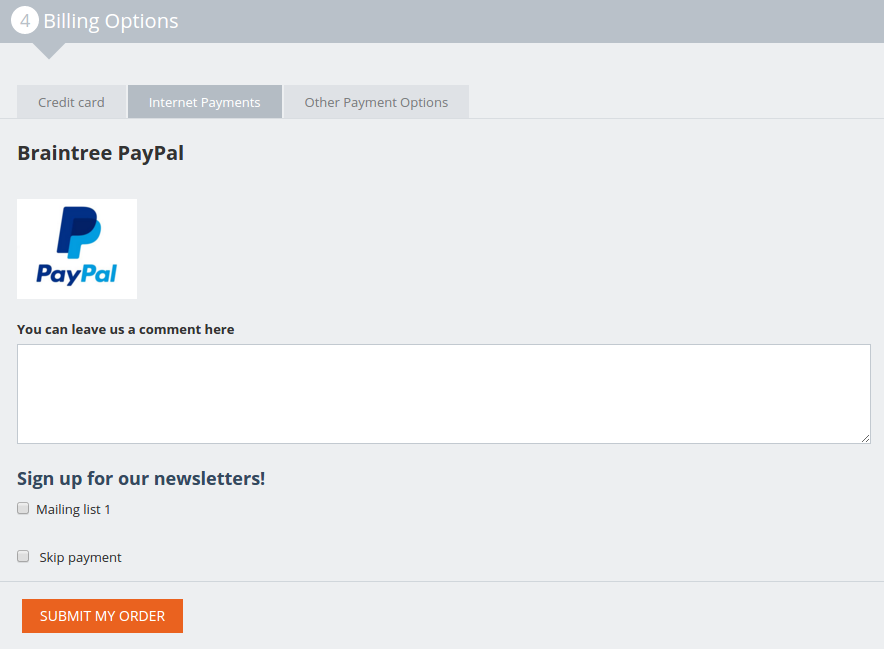
PayPal
The add-on provides the smoothest PayPal integration. There’s no additional work required to accept PayPal payments.
To learn the basics of payments and how to use Braintree features, you may want to have a look at Braintree Knowledgebase.
Get integrated quickly using our guide below.
Compatibility
The add-on is compatible with CS-Cart and Multi-Vendor 4.10 and above, but only versions 4.12.x and above are supported. Minimum required PHP version is 5.6. The add-on does not support PHP 8.x yet. PHP extensions
xmlwriter,openssl,dom,hashare required.See more information about compatibility of our add-ons here.
Note
Starting from CS-Cart 4.10.x, the Braintree add-on is not compatible with the deprecated default Step-by-Step Checkout add-on.
Features
- Allow your buyers to pay via Braintree.
- Accept payments via PayPal.
- Issue refunds right from the admin panel.
- Add an extra layer of verification with 3D Secure.
- Accept debit and credit card payments.
- Accept main credit cards worldwide: Visa, MasterCard, American Express, Discover, JCB, Amex, Diner’s, Maestro, UnionPay.
- Keep the business safe and secure with advanced features of data protection.
- Allow your customers to place orders within seconds.
- Available for merchants in the United States, Canada, Australia, Europe, Singapore, Hong Kong, Malaysia, and New Zealand.
Support
You are guaranteed a quality add-on supported by the future versions. If you need help, please contact us via our help desk system.
Start selling with Braintree
In this section, you can find details of creating a Braintree account. You will also learn how to get Merchant ID, Merchant Account ID, Public Key, and Private Key required to create the Braintree payment method.
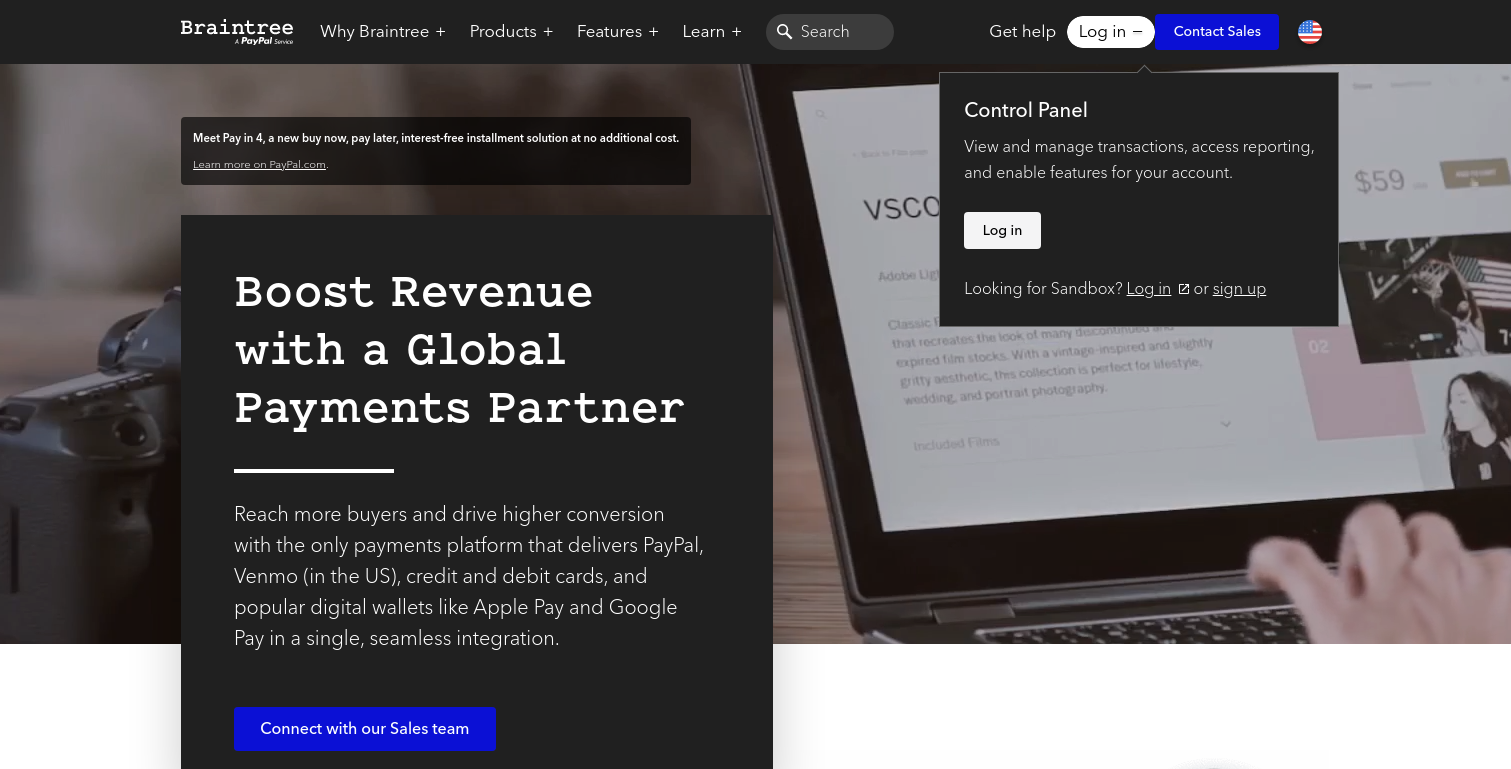
So, we are on the home page of Braintree. Log in to your Braintree account or create a new one.
Getting Merchant ID, Public Key, and Private Key
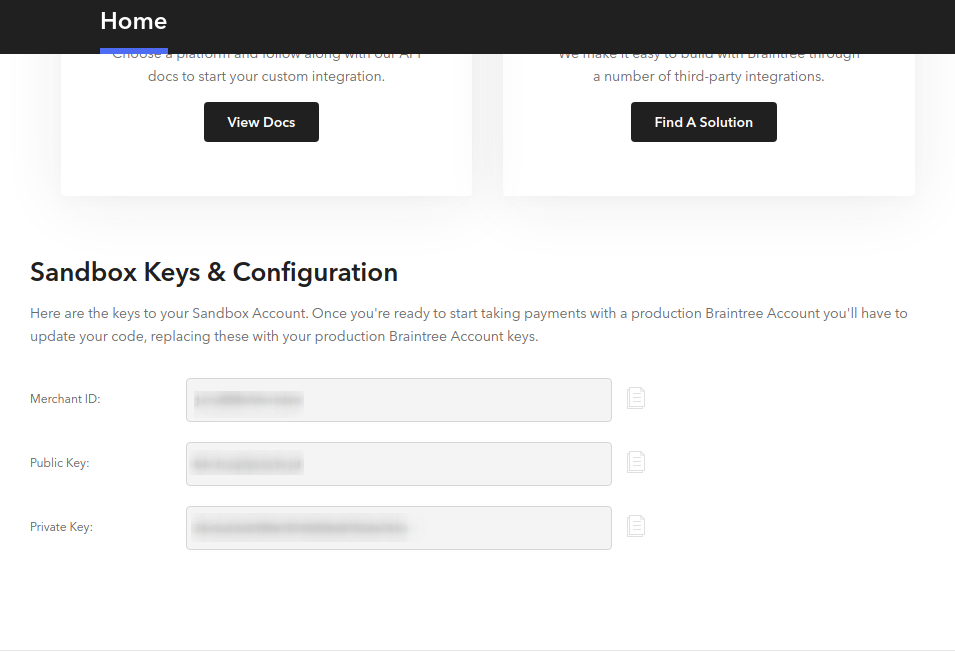
Merchant ID, Public Key, and Private Key can be visible on the homepage of your Braintree account
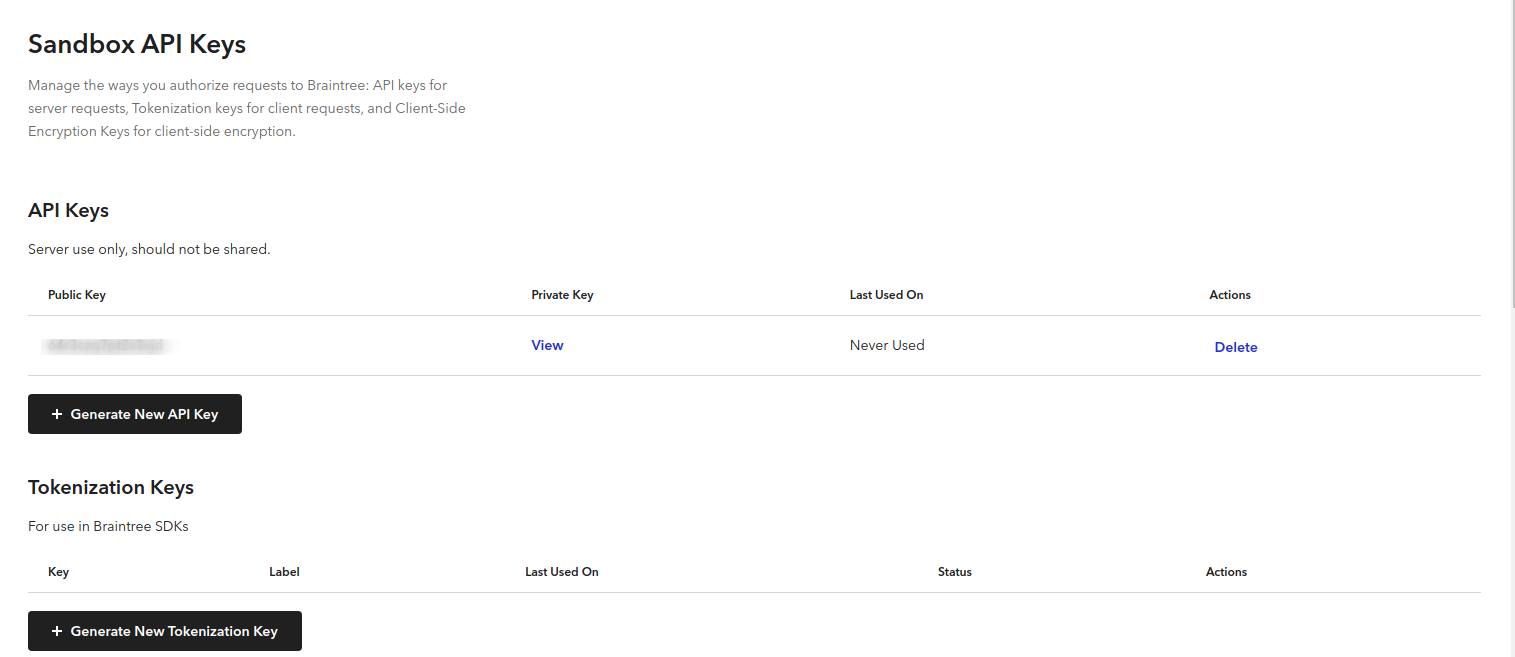
To get Merchant ID, Public Key, and Private Key, navigate to Settings → API in your Braintree account and observe the nessesary data
Getting Merchant Account ID
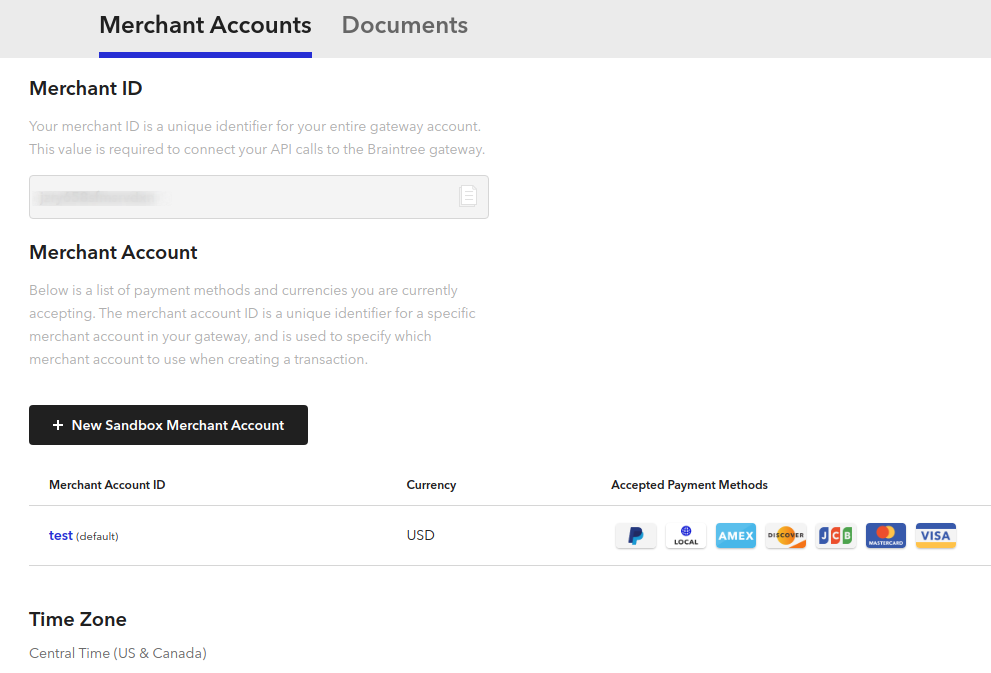
To get Merchant Account ID, go to Settings → Business → Merchant Accounts.
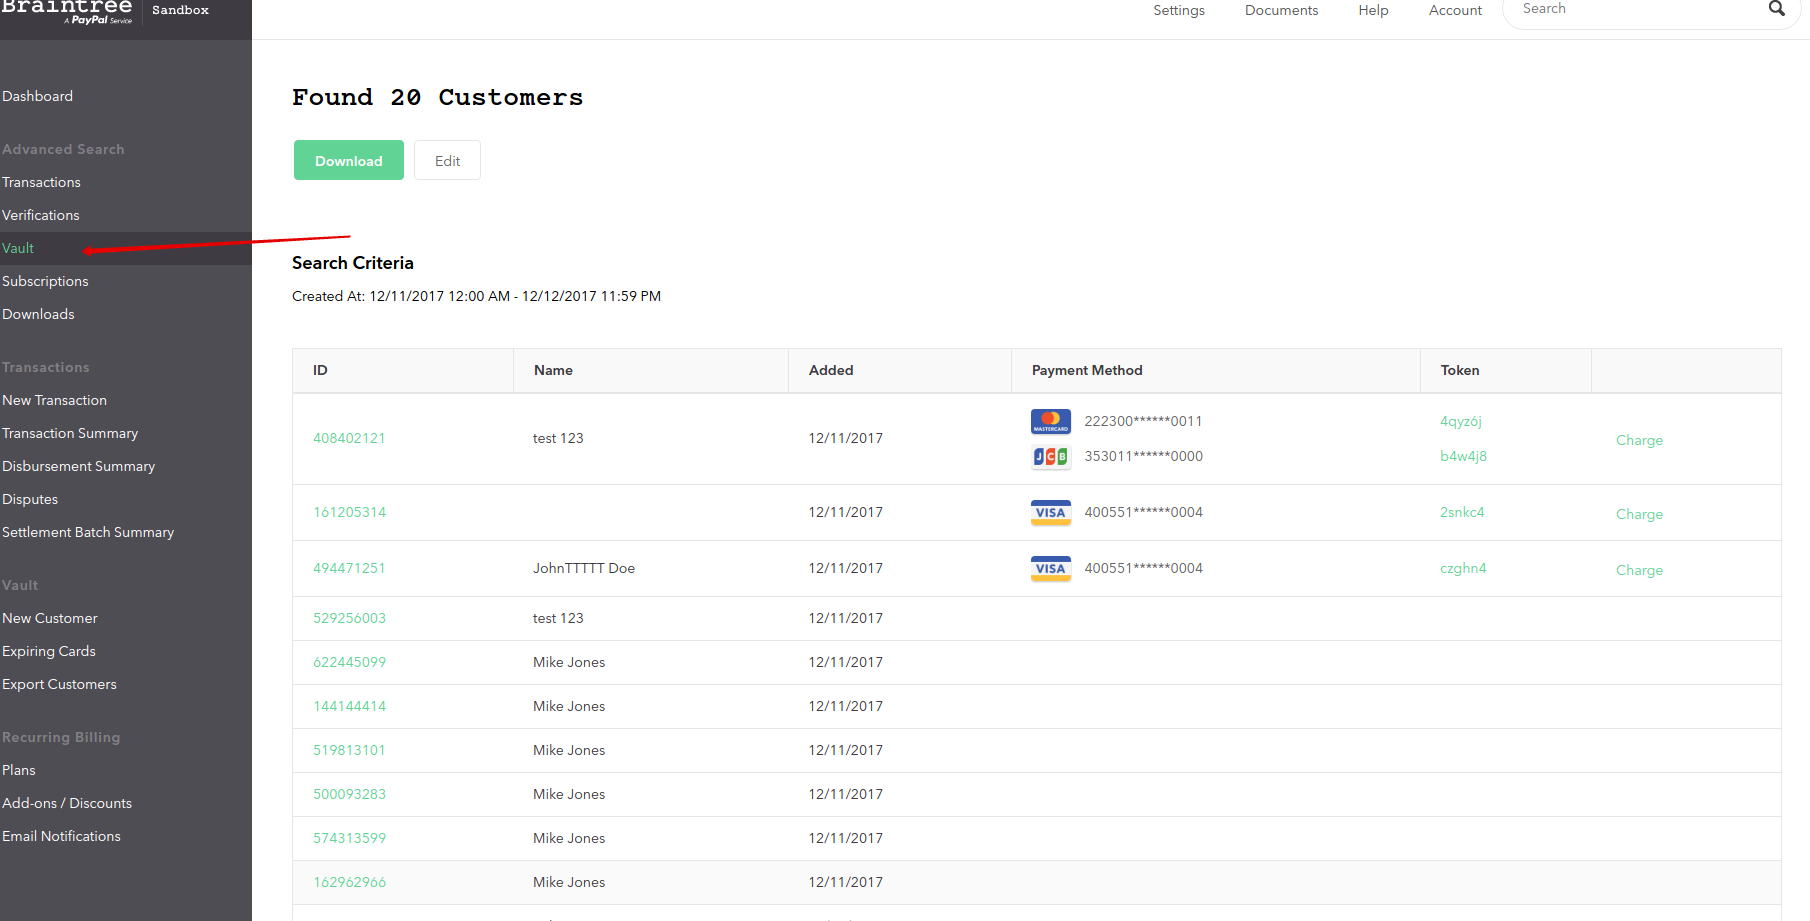
How is the customer information stored?
The customer information is securely stored in the Braintree Vault including payment method information.
When a customer pays using Drop-in UI they can save their payment info for future purchases.
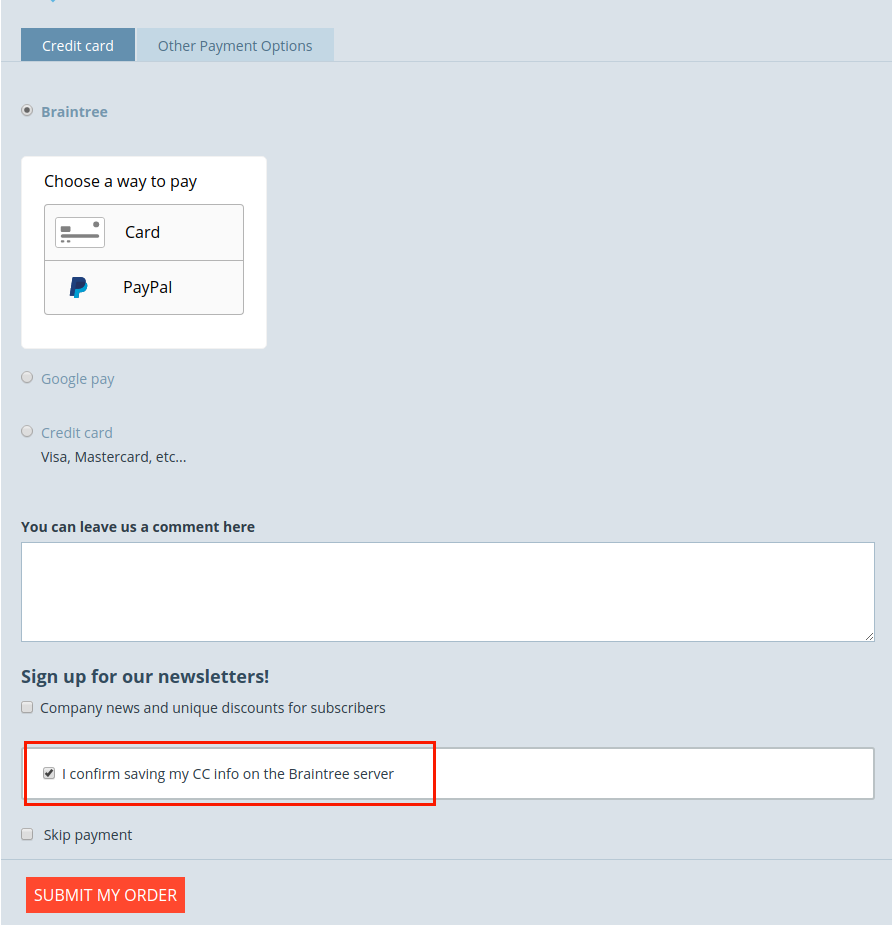
If the customer selects the I confirm saving my CC info on the Braintree server checkbox at checkout, the customer information (first name, last name, company, email, phone, email, and website) will be saved in the Braintree Vault.
The customer information is taken from the profile fields:
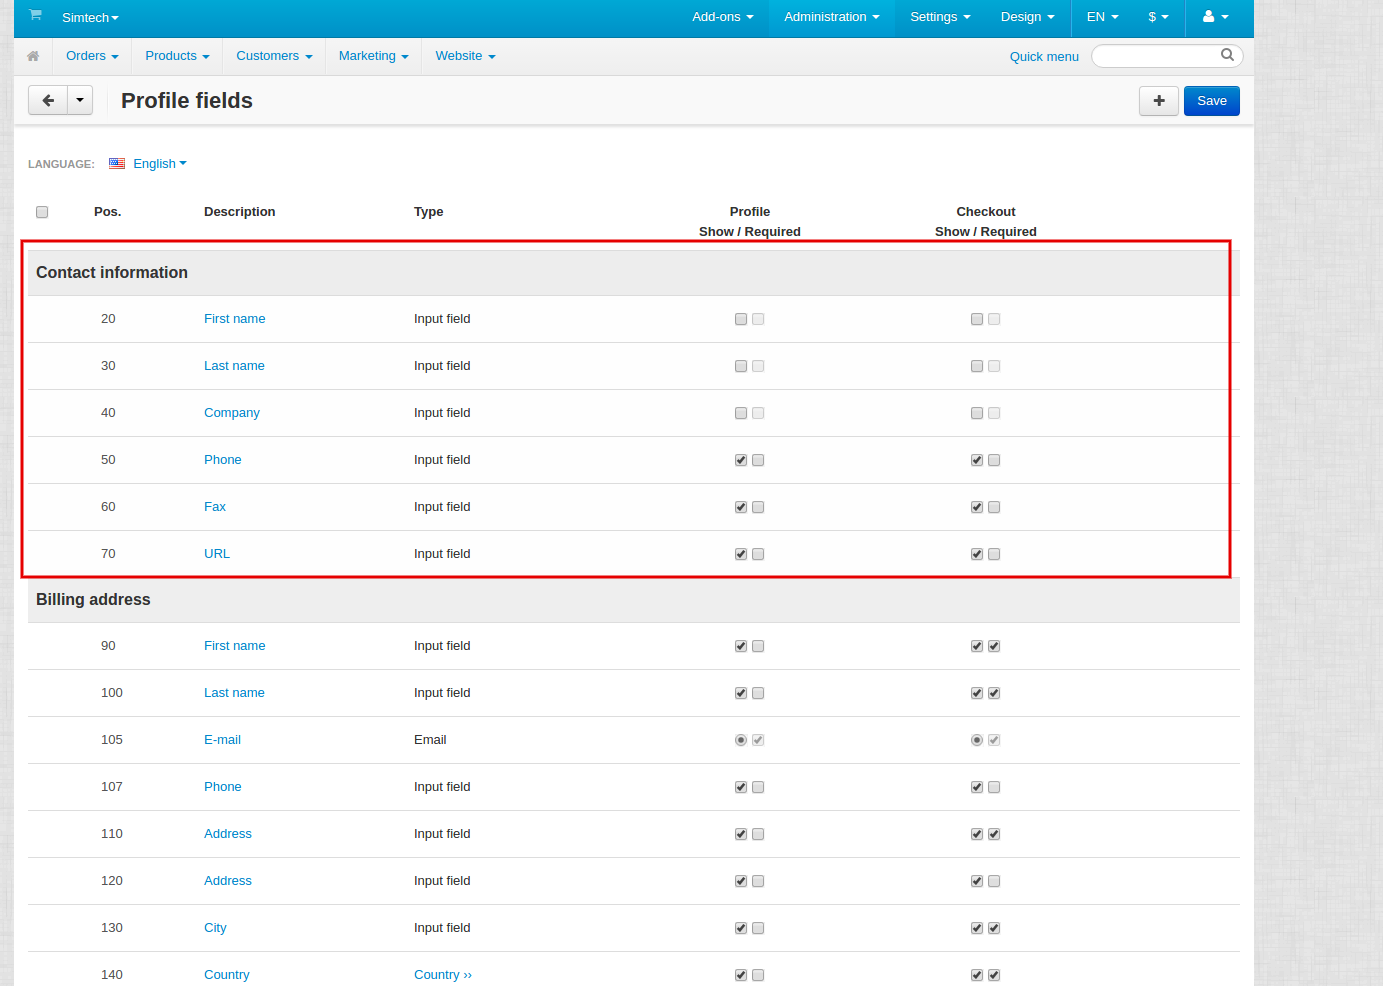
If the checkbox is cleared, the customer information will not be saved and the customer record will be deleted from the Braintree Vault.
When a customer registers in the store, a record is created in the Vault even if the customer has not paid with Braintree yet.
When a customer updates their information in the profile, this information is updated on the Braintree side too.
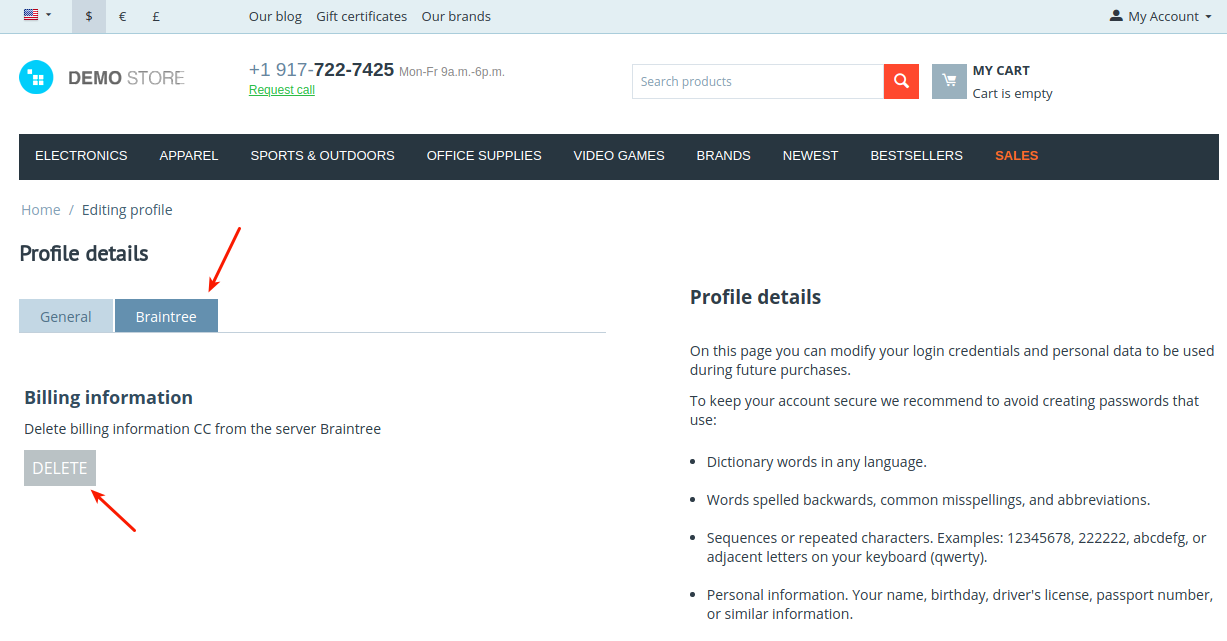
If the customer does not want to store their payment information on Braintree, they can delete their record from Braintree from their profile page:
For more information, refer to Braintree Developer Docs.
Managing in the admin area
Installing the add-on
Install the Braintree add-on on the add-ons list page (“Add-ons” → ”Manage add-ons”). Click the + button in the top right corner, select an archive and click Upload & install. You can now find the installed add-on in the list of installed add-ons, just make sure it is set to Active.
Setting up the add-on
Here are the settings for the add-on:

- Show confirmation to save CC info in Braintree server—The confirmation will be shown only for the Braintree payment method with the Drop-in UI option.
Creating a payment method
To create and configure a payment method:
- Go to Administration → Payment methods.
- Click the + button to create a new payment method.
- Select Braintree from the Processor selectbox.
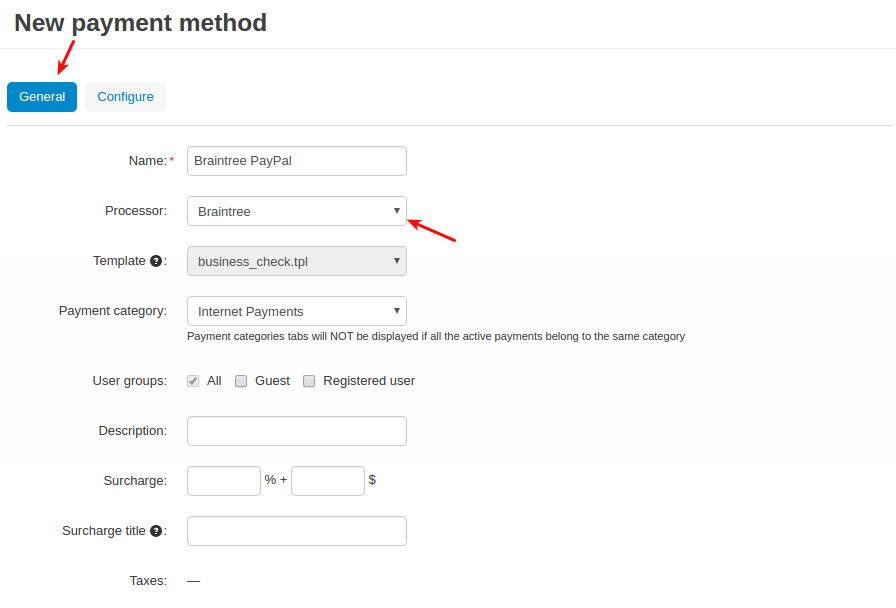
- Switch to the Configure tab, enter the data of your payment account: Merchant ID, Merchant account ID, Public Key, and Private Key. To get these credentials, have a look at the Getting Merchant ID, Public Key, and Private Key and Getting Merchant Account ID sections.
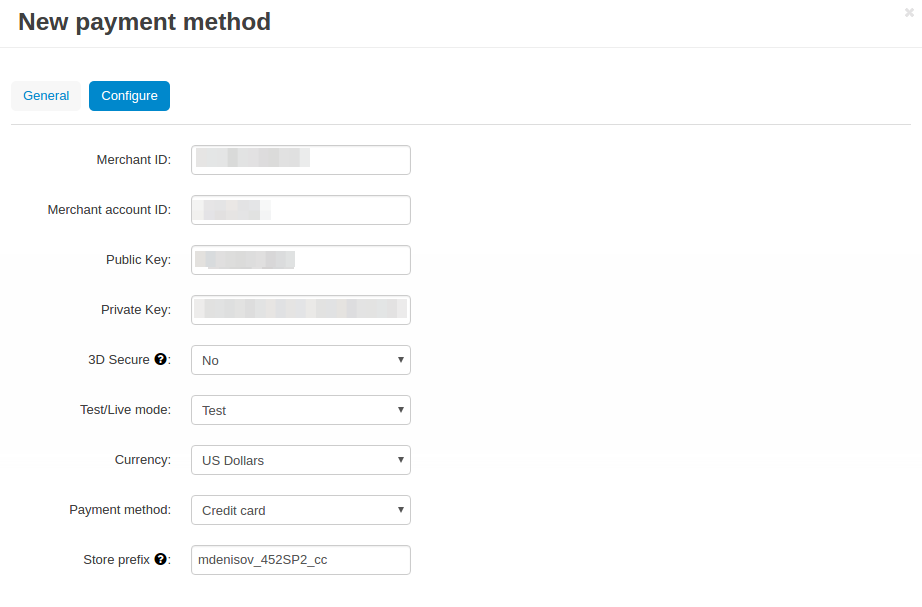
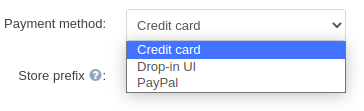
You can choose from several payment methods: Credit card, Drop-in UI, or PayPal.
The Store prefix setting helps to identify an order in the Braintree account if you use the Braintree payment method in more than one store. The prefix should contain up to three alphabetical characters. Leave blank if you use Braintree only in one store.
Note
3D Secure works only with credit cards and Drop-in UI payment options. It is not automatically enabled in production accounts and is only compatible with certain Braintree configurations in specific regions. If you are interested, contact Braintree Support team and tell them you’re interested in 3D Secure. They can help determine if you can use 3D Secure and if so, enable the 3D Secure setting.
Processing refunds
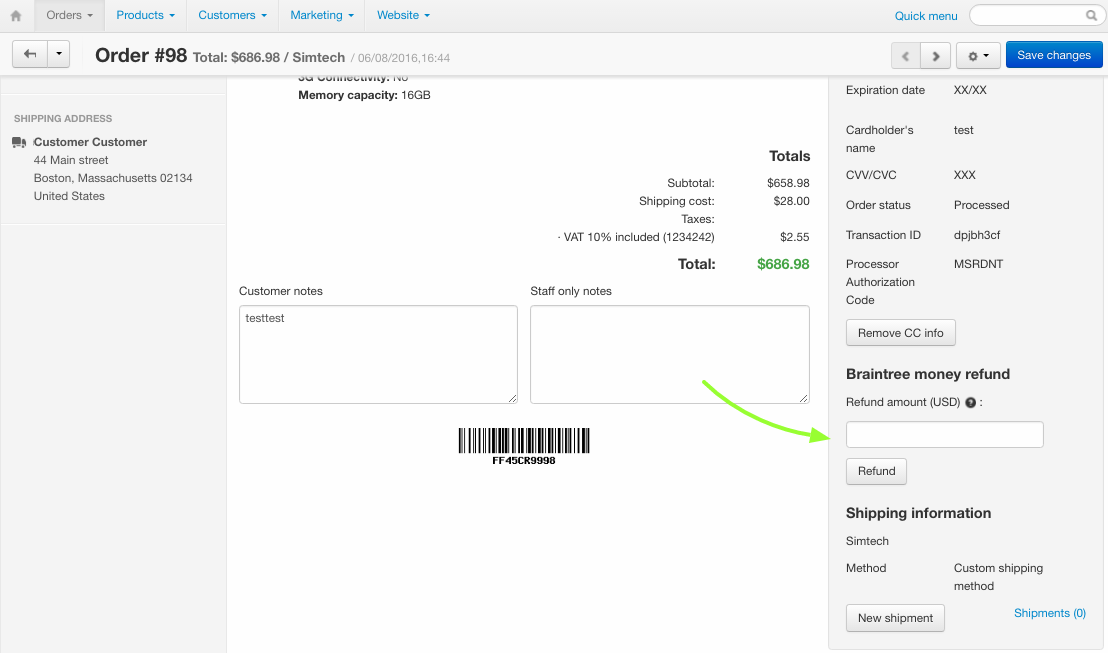
The add-on lets you issue refunds right from the admin panel.
To do this, first go to Orders > View orders and open an order you want to issue a refund for.
In the Refund amount field, enter the amount you want to refund and click Refund.
Questions & Feedback
Have any questions that weren't answered here? Need help with solving a problem in your online store? Want to report a bug in our software? Find out how to contact us.