How To: Create Custom Templates for Product List and Product Detail Page
This article describes how to create custom templates for the product list and product detail page. We’ll make those custom templates a part of the My Changes add-on. Storing custom templates in the folders of the My Changes add-on has two advantages:
- It’s easier to keep track of the template files you create or modify.
- You won’t have to reapply your changes after the upgrade.
Note
You can work in the design or var/themes_repository folders. Before you proceed, you might want to learn the difference between these folders.
Template for the Product List
By default, CS-Cart & Multi-Vendor have 3 template types for the product list:
- Grid (products_multicolumns.tpl)
- List without options (products_without_options.tpl)
- Compact list (short_list.tpl)
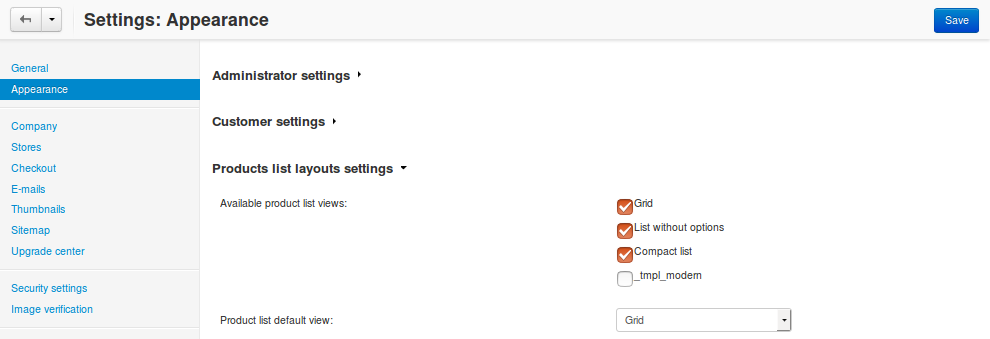
To set one of those templates as default, open the Administration panel and go to Settings → Appearance → Products list layouts settings.
To add a custom template for the product list via the My Changes add-on, create a file with the template settings for our custom product list, and the file of the template itself.
Structure of the Template
templates/
 |
 └─ addons/
     |
     └─ my_changes/
         |
         └─ blocks/
             |
             ├─ list_templates/
             |   |
             |   └─ modern_list.tpl — the template of the product list
             |
             └─ product_list_templates/
                 |
                 └─ products_modern_list.tpl — the template settings file
The file with the settings describes the template that we’re adding, as well as its settings.
It’s better to copy one of the existing product list templates from templates/blocks/list_templates to templates/addons/my_changes/blocks/list_templates and then rename the template.
Hint
We suggest you copy the file of an existing template to minimize the risk of syntax errors.
Example of the Template Settings File
{** template-description:tmpl_modern **}
{* The line above means that the name of the template will be stored
in the language variable called tmpl_modern *}

{* Below are the location and settings of the template. *}
{include file="addons/my_changes/blocks/list_templates/modern_list.tpl"
show_name=true
show_sku=false
show_rating=true
show_features=true
show_prod_descr=true
show_old_price=true
show_price=true
show_clean_price=true
show_list_discount=true
show_discount_label=true
show_product_amount=true
show_product_edp=true
show_add_to_cart=true
show_list_buttons=true
show_descr=true }
Brief Description of Template Settings
| Name | Type | Description |
|---|---|---|
| show_name | Boolean (true / false) | Show product names. |
| show_sku | Boolean (true / false) | Show the stock keeping unit (the CODE field from the product editing page). |
| show_rating | Boolean (true / false) | Show product ratings. |
| show_features | Boolean (true / false) | Show product features. |
| show_old_price | Boolean (true / false) | Show the old prices of the products. |
| show_price | Boolean (true / false) | Show product prices. |
| show_clean_price | Boolean (true / false) | Show the prices with the tax included. |
| show_discount_label | Boolean (true / false) | Show the size of the discount. |
| show_product_amount | Boolean (true / false) | Show the amount of products in stock. |
| show_add_to_cart | Boolean (true / false) | Show Add to Cart buttons. |
| show_list_buttons | Boolean (true / false) | Show the list buttons (Add to wishlist, Add to comparison list, etc.). |
| show_descr | Boolean (true / false) | Show product descriptions. |
| but_role | Text | The way the buttons are displayed in the template. Choose one of the available roles:
Action, Text, Delete, Big, Tool |
If everything is done right, you’ll find a new template in the Administration panel under Settings → Appearance.
Hint
If your custom template doesn’t appear, go to Add-ons → Manage Add-ons and make sure that the My Changes add-on is active.
Important
If you worked in var/themes_repository/templates/addons/my_changes, you’ll need to uninstall the My Changes add-on and install it again.
As you can see in the image above, we also need to add a language variable for our custom product list into the files with the add-on’s translations. The name of the language variable depends on how you called the product list in the template settings file.
In our case we need to add the following code to var/langs/en/addons/my_changes.po:
msgctxt "Languages::tmpl_modern"
msgid "Modern list"
msgstr "Modern list"
If we enable our template of the product list, it will appear on the storefront on the category page. However, you’ll notice that our template has no icon.
The name of the icon is taken from the name of the template. For example, if the name of the template settings file is products-modern-list, then the name of the icon will be ty-icon-products-modern-list. We just need to add an icon with this name as described in the Designer Guide.
Congratulations! You now have a new custom template for the product list.
Template for the Product Detail Page
By default, CS-Cart & Multi-Vendor have 2 template types for the product detail page:
- Default template (default_template.tpl)
- Big picture (bigpicture_template.tpl)
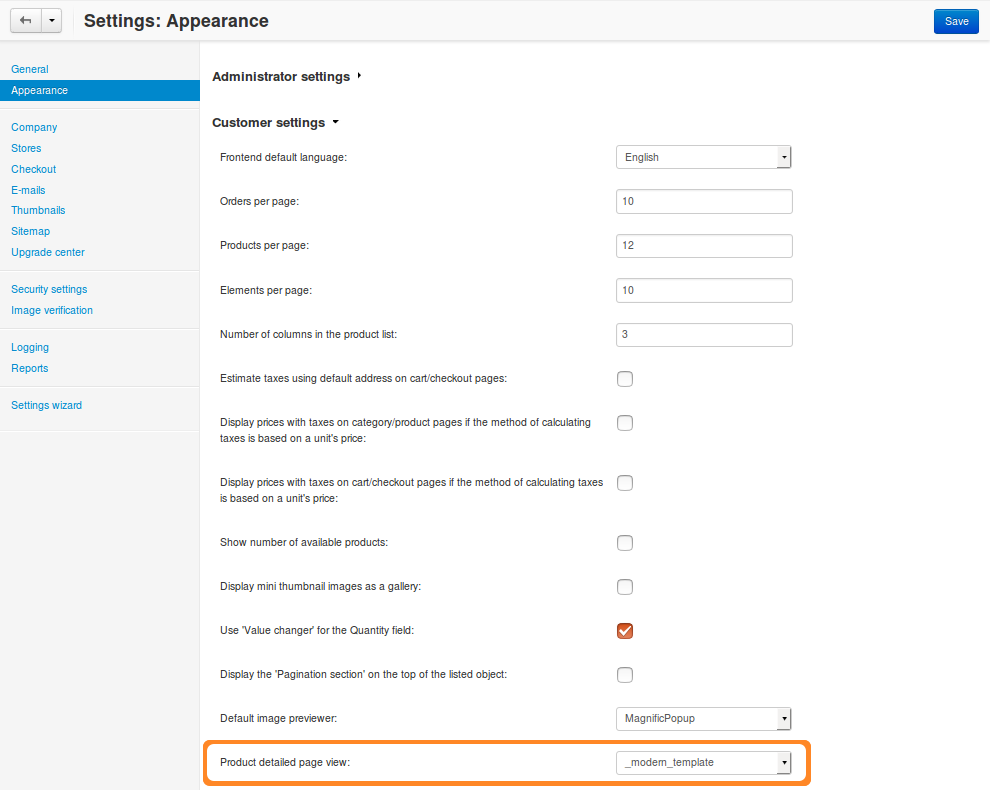
To set one of those templates as default, open the Administration panel and go to Settings → Appearance → Customer settings.
To create a custom template for the product detail page via the My Changes add-on, you need to create a .tpl file in the templates/addons/my_changes/blocks/product_templates directory.
Structure of the Template
templates/
 |
 └─ addons/
     |
     └─ my_changes/
         |
         └─ blocks/
             |
             └─ product_templates/
                 |
                 └─ modern_template.tpl
We recommend copying one of the existing template from templates/blocks/product_templates. Let’s call our copied file modern_template.tpl.
Again, we need to add a language variable for our custom product detail page into the files with the add-on’s translations. The name of the language variable is the same as the name of the template file. In our case it’s modern_template.
We need to add the following code to var/langs/en/addons/my_changes.po:
msgctxt "Languages::modern_template"
msgid "Modern Product"
msgstr "Modern Product"
Questions & Feedback
Have any questions that weren't answered here? Need help with solving a problem in your online store? Want to report a bug in our software? Find out how to contact us.