How To: Translate CS-Cart
Important
Before you add a new language, check if it already exists at translate.cs-cart.com.
Download an Existing Translation
To add a new language from translate.cs-cart.com to your installation, follow these steps:
- Go to translate.cs-cart.com, find the desired language, and click on its name.
- Save the file.
- Open the Administration panel of your store.
- Go to Administration → Languages → Manage languages.
- Click the + button in the right upper corner of the page to add a language.
- A new page will open; use it to upload a language file in the PO format, that you have previously downloaded from translate.cs-cart.com.
- Click the Install button. The new language will appear in the list of installed languages.
Create a New Translation
Note
Before you create a new translation, make sure that the desired language is not on the list of available languages—check the Available tab under Administration → Languages → Manage languages. Also, make sure there is no such language at translate.cs-cart.com.
- Go to Administration → Languages → Manage languages.
- Click the gear button next to any existing language and choose Clone.
- Enter the two-letter language code in the pop-up window. A new language will be added to the Installed list (it will be the copy of the existing language). The select box allowing users to choose a language will be displayed in the customer area and on the store Administration panel.
- Click the gear button next to the newly created language and choose Edit from the drop-down menu.
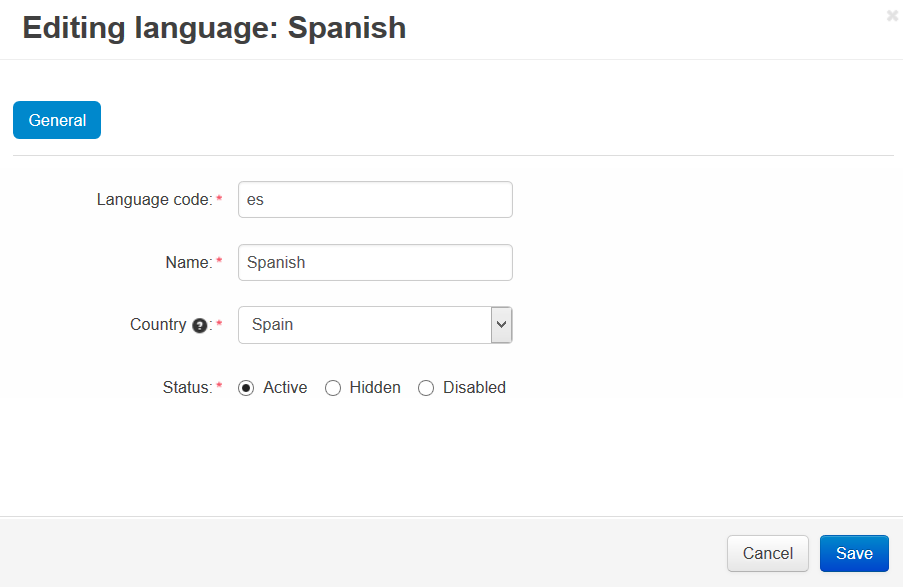
- Fill in the fields and click the Save button.
Translate CS-Cart
Most of CS-Cart texts are stored in the so-called language variables. Although you can view and edit all those variables under Administration → Languages → Translations tab of the Languages page , we recommend a different way:
- Open the Administration panel and go to Administration → Languages → Translations.
- Click the gear button in the right upper corner of the page and choose On-site live editing from the drop-down menu.
- You will be redirected to the storefront and will need to translate the text marked with a dash line. To do it, follow these steps:
- Choose the newly created language from the drop-down menu in the left upper corner of the page.
- Hover the mouse pointer over text marked with a dash line. The edit icon will appear—click it.
- Enter the desired translation in the input field.
- Click the green tick button to save your changes.
- After you translate all visible texts, there are still some language variables left: the ones displayed in the e-mail notifications and in some special situations, e.g. error notifications, pop-up window messages, etc. To translate the remaining variables, follow these steps:
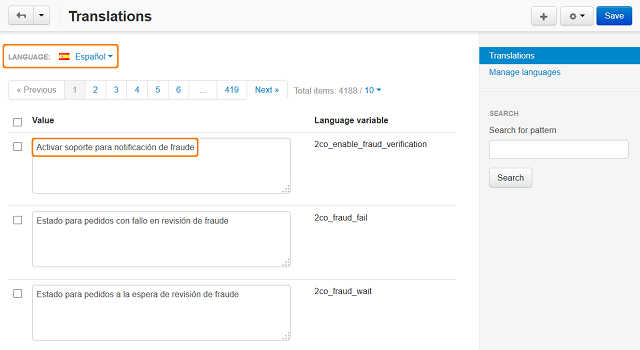
- Go to Administration → Languages → Translations
- Select the newly created language in the select box in the top left corner.
- Now you can edit the text variables for this language.
- Translate the texts in the Value input fields of the language variables.
Important
Be careful—if English is selected in the language select box, you will be editing the English texts.
Important
Do not translate or remove the words in square brackets written in lowercase, e.g. [link], [product], etc. These are variables that will be replaced with an appropriate value automatically when they appear on the storefront. For example, [product] will be replaced with the corresponding product name.
Important
Translate the words written in square brackets in uppercase, e.g. [ALREADY PATCHED], [DELETED], [FAILED], [NON WRITABLE], etc. These are the notifications generated by the Upgrade Center and should be translated.
- Click the Save button to save the changes you made to the language variables on this page.
Important
Save your changes on every page where you translate language variables. If you open the next page with language variables without clicking the Save button on your current page, the translations you made on the page will be lost.
- Make sure to translate the content of the following pages in the Administration panel, as they affect the storefront too:
- Administration → Order statuses
- Marketing → Gift Certificates → Gift Certificate Statuses
- Administration → Profile fields
- Customers → User Groups
- Administration → Shipping & Taxes → Shipping Methods
- Administration → Shipping & Taxes → Countries
- Administration → Shipping & Taxes → States (if required)
- Administration → Payment Methods
- Administration → Currencies
- Design → Layouts
- Website → Content → Forms (the Contact us page)
- Products → Products
- Products → Categories
- Products → Features
- Products → Filters
- Products → Options
- You might need to translate the following pages, if you enabled the corresponding add-ons:
- Marketing → Gift Certificates
- Orders → Return Requests → RMA Request Statuses (translate this page if you plan to use the RMA add-on)
- Marketing → Banners
- Website → News
Translating the Entries
To translate the entries on the pages listed above, follow the steps below:
- Open the necessary page and select the desired language in the language section in the top left corner of the page.
- Open the entry (e.g. order status) editing page, enter the necessary information for the selected language in the new window, then click the Save button.
- Repeat the previous step for the other entries on the page.
Important
We recommend closing the store when the On-site text editing is enabled: it displays debugging information on the storefront, and that may confuse your customers.
You can also contribute to CS-Cart localization via Crowdin.
Questions & Feedback
Have any questions that weren't answered here? Need help with solving a problem in your online store? Want to report a bug in our software? Find out how to contact us.