Vanilla
Overview
Vanilla is a highly intuitive, seamlessly sleek and very aesthetically accomplished theme for CS-Cart and Multi-Vendor stores.
It comes with many advanced theme customization options that make customization easier than ever. You can add a Pro Banner, Social Buttons PRO, hamburger menu, and promotion bar.
With its fully responsive layout design, your website will definitely look striking when viewed on different devices.
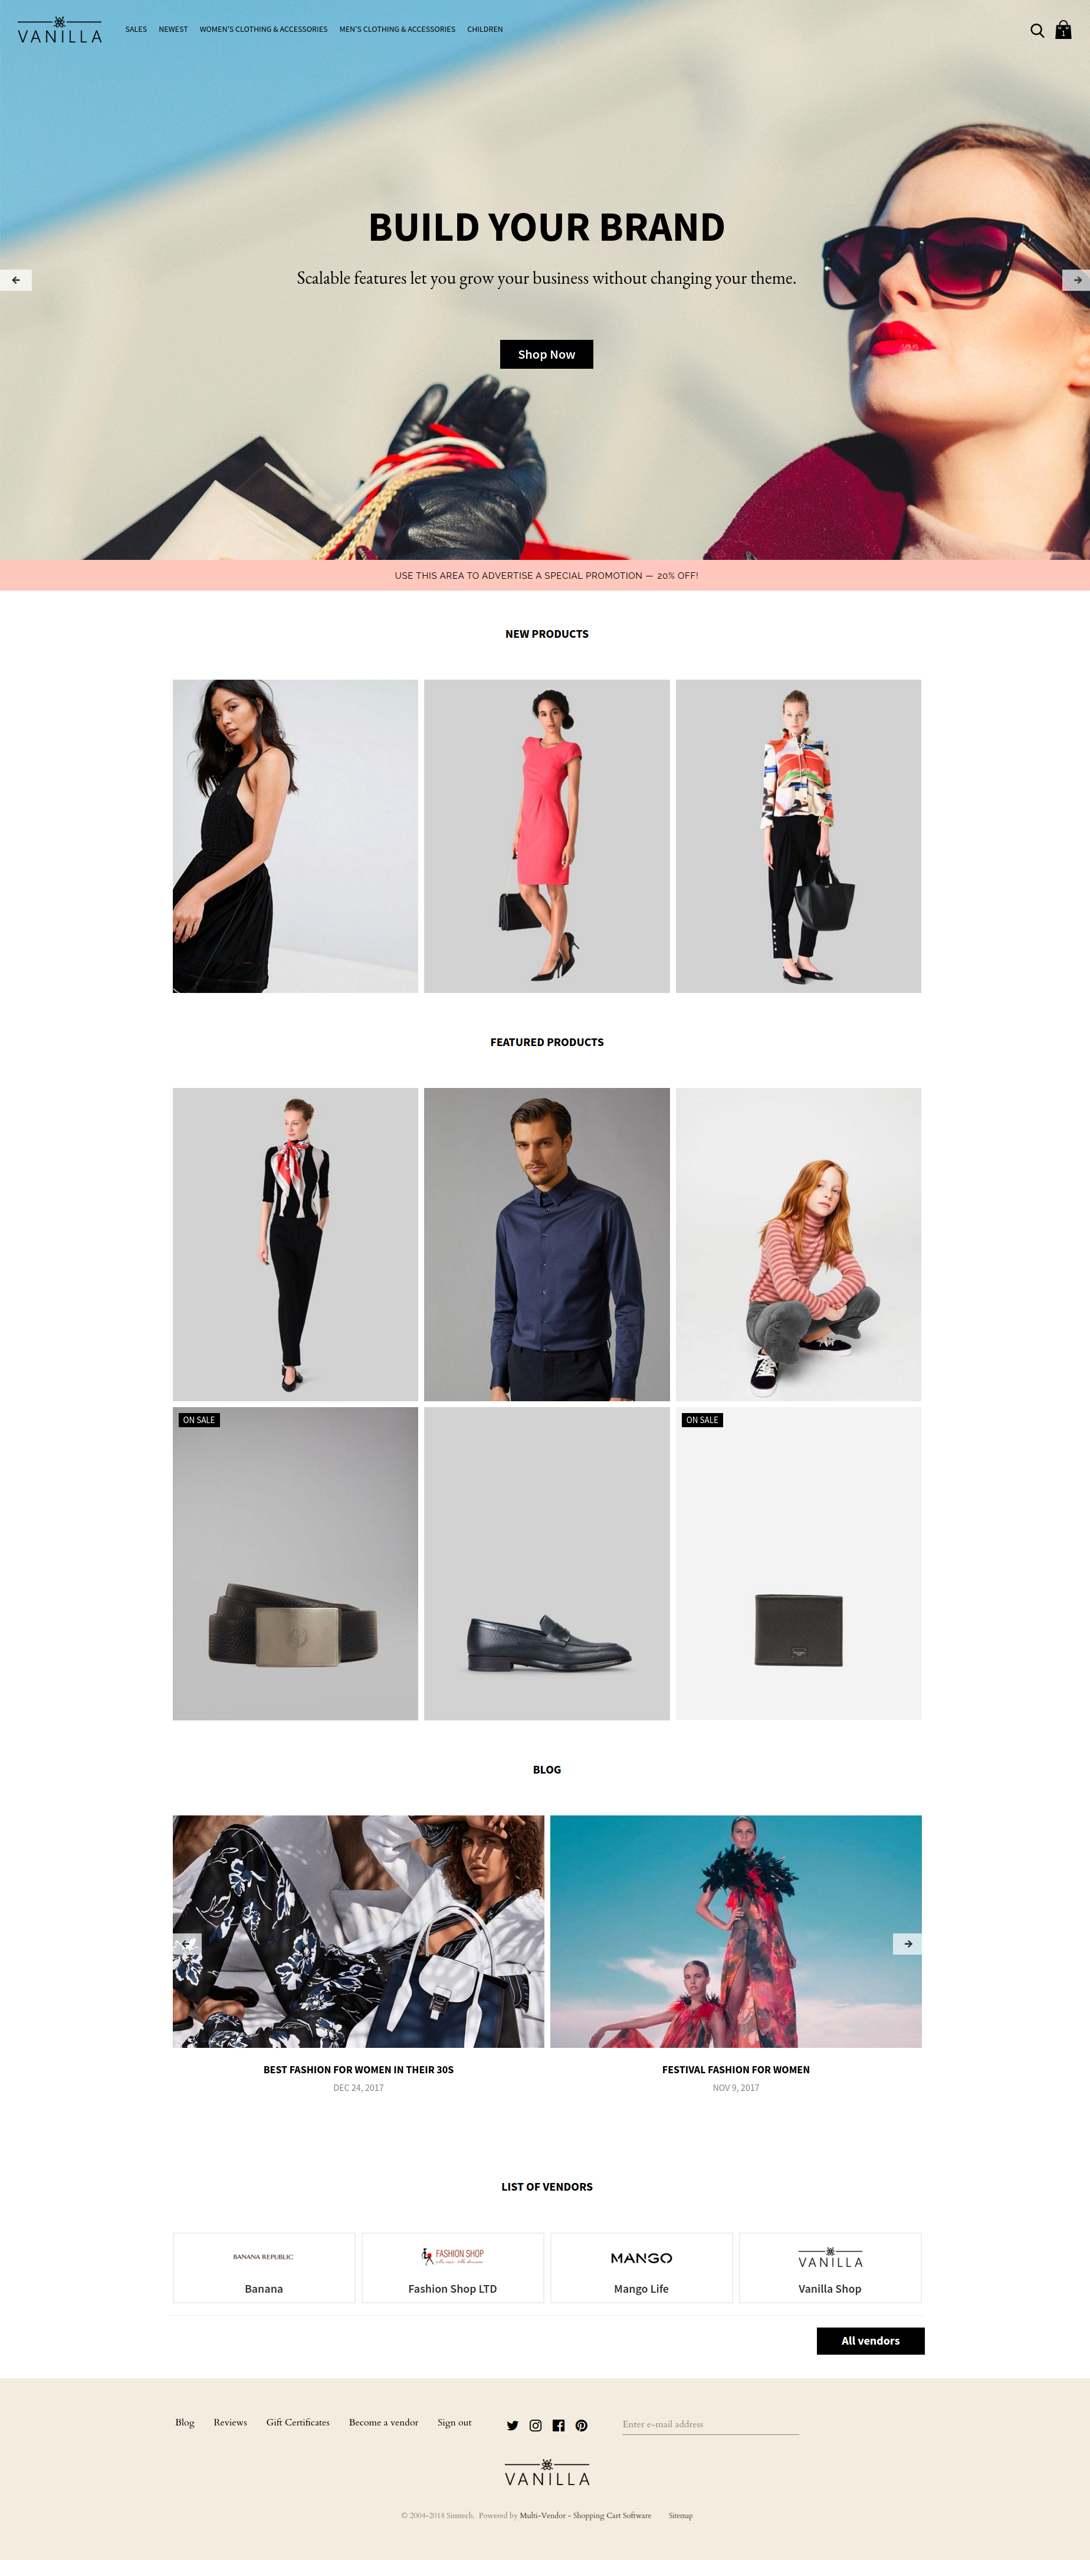
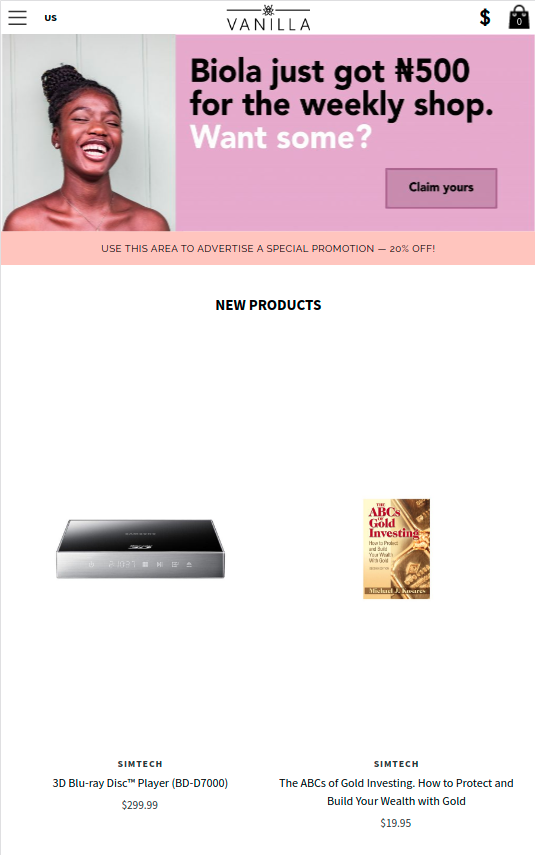
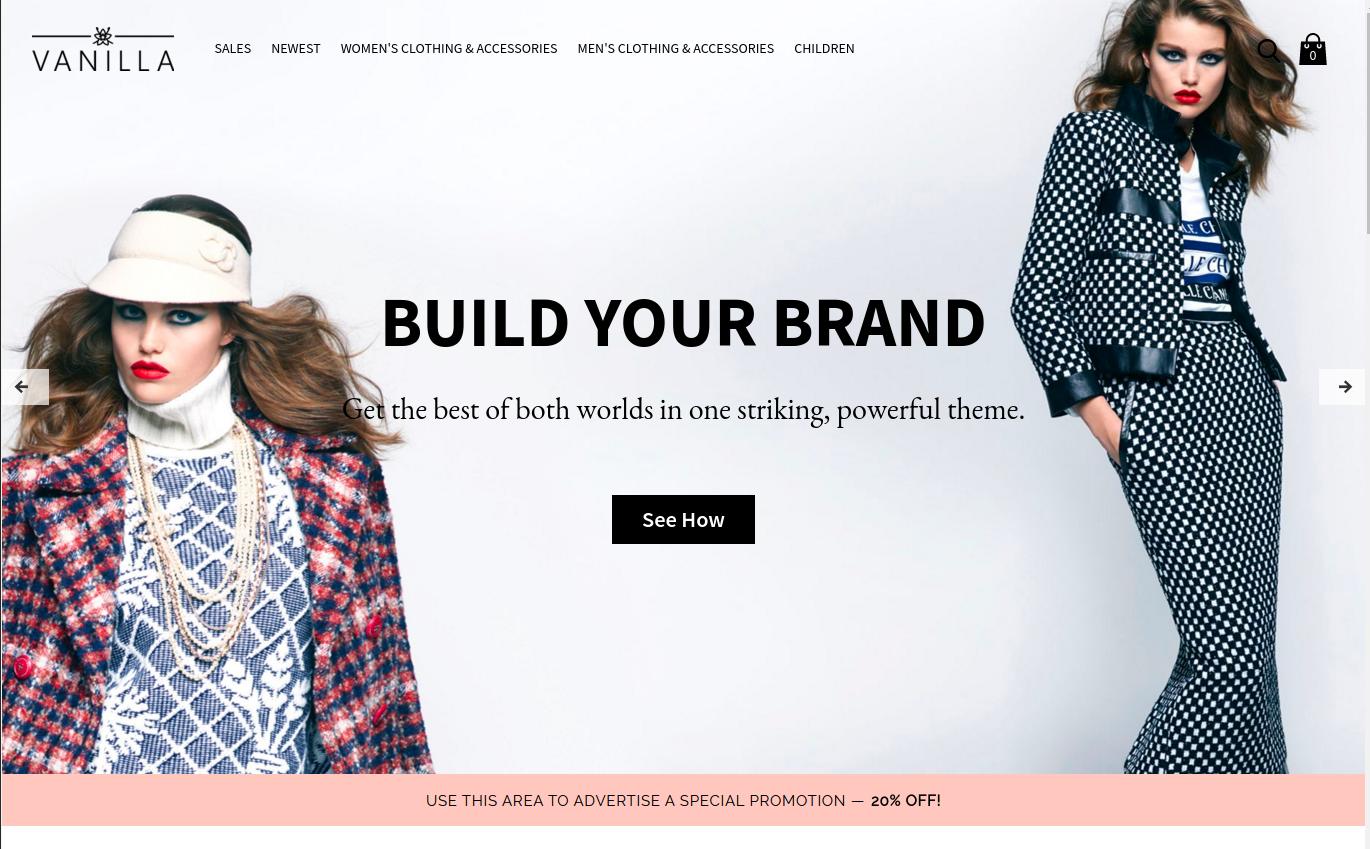
Home page
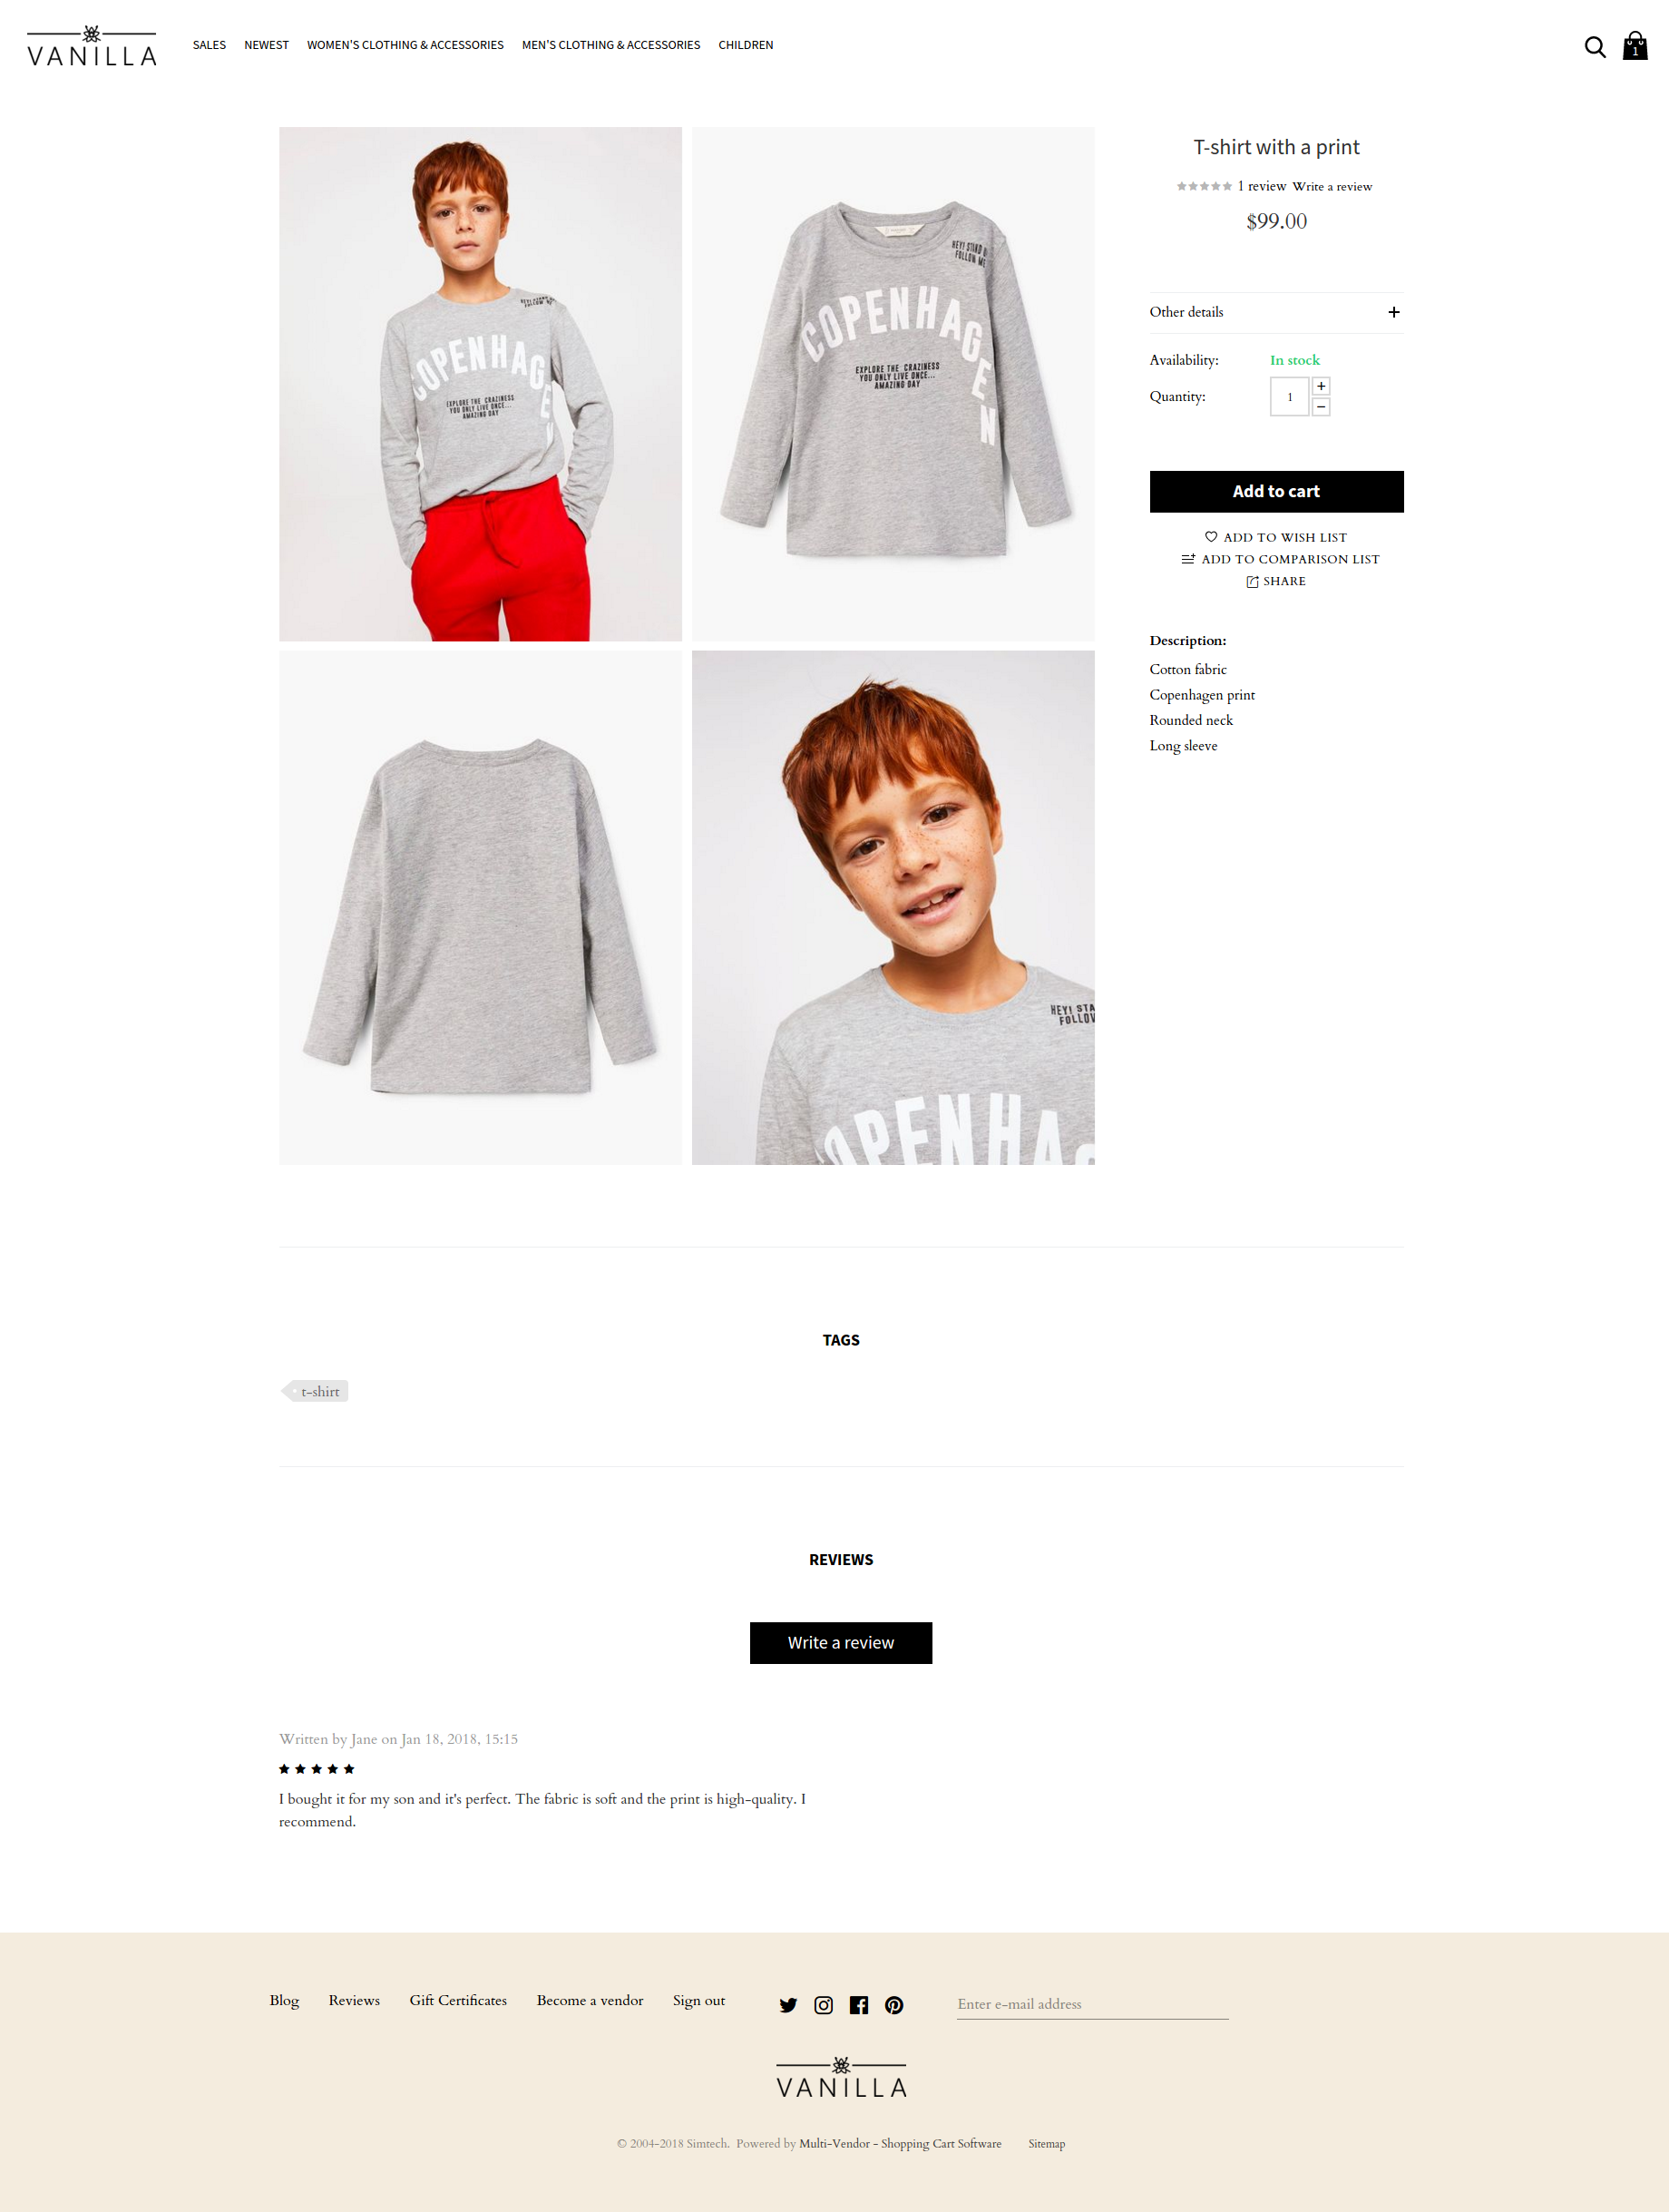
Product page
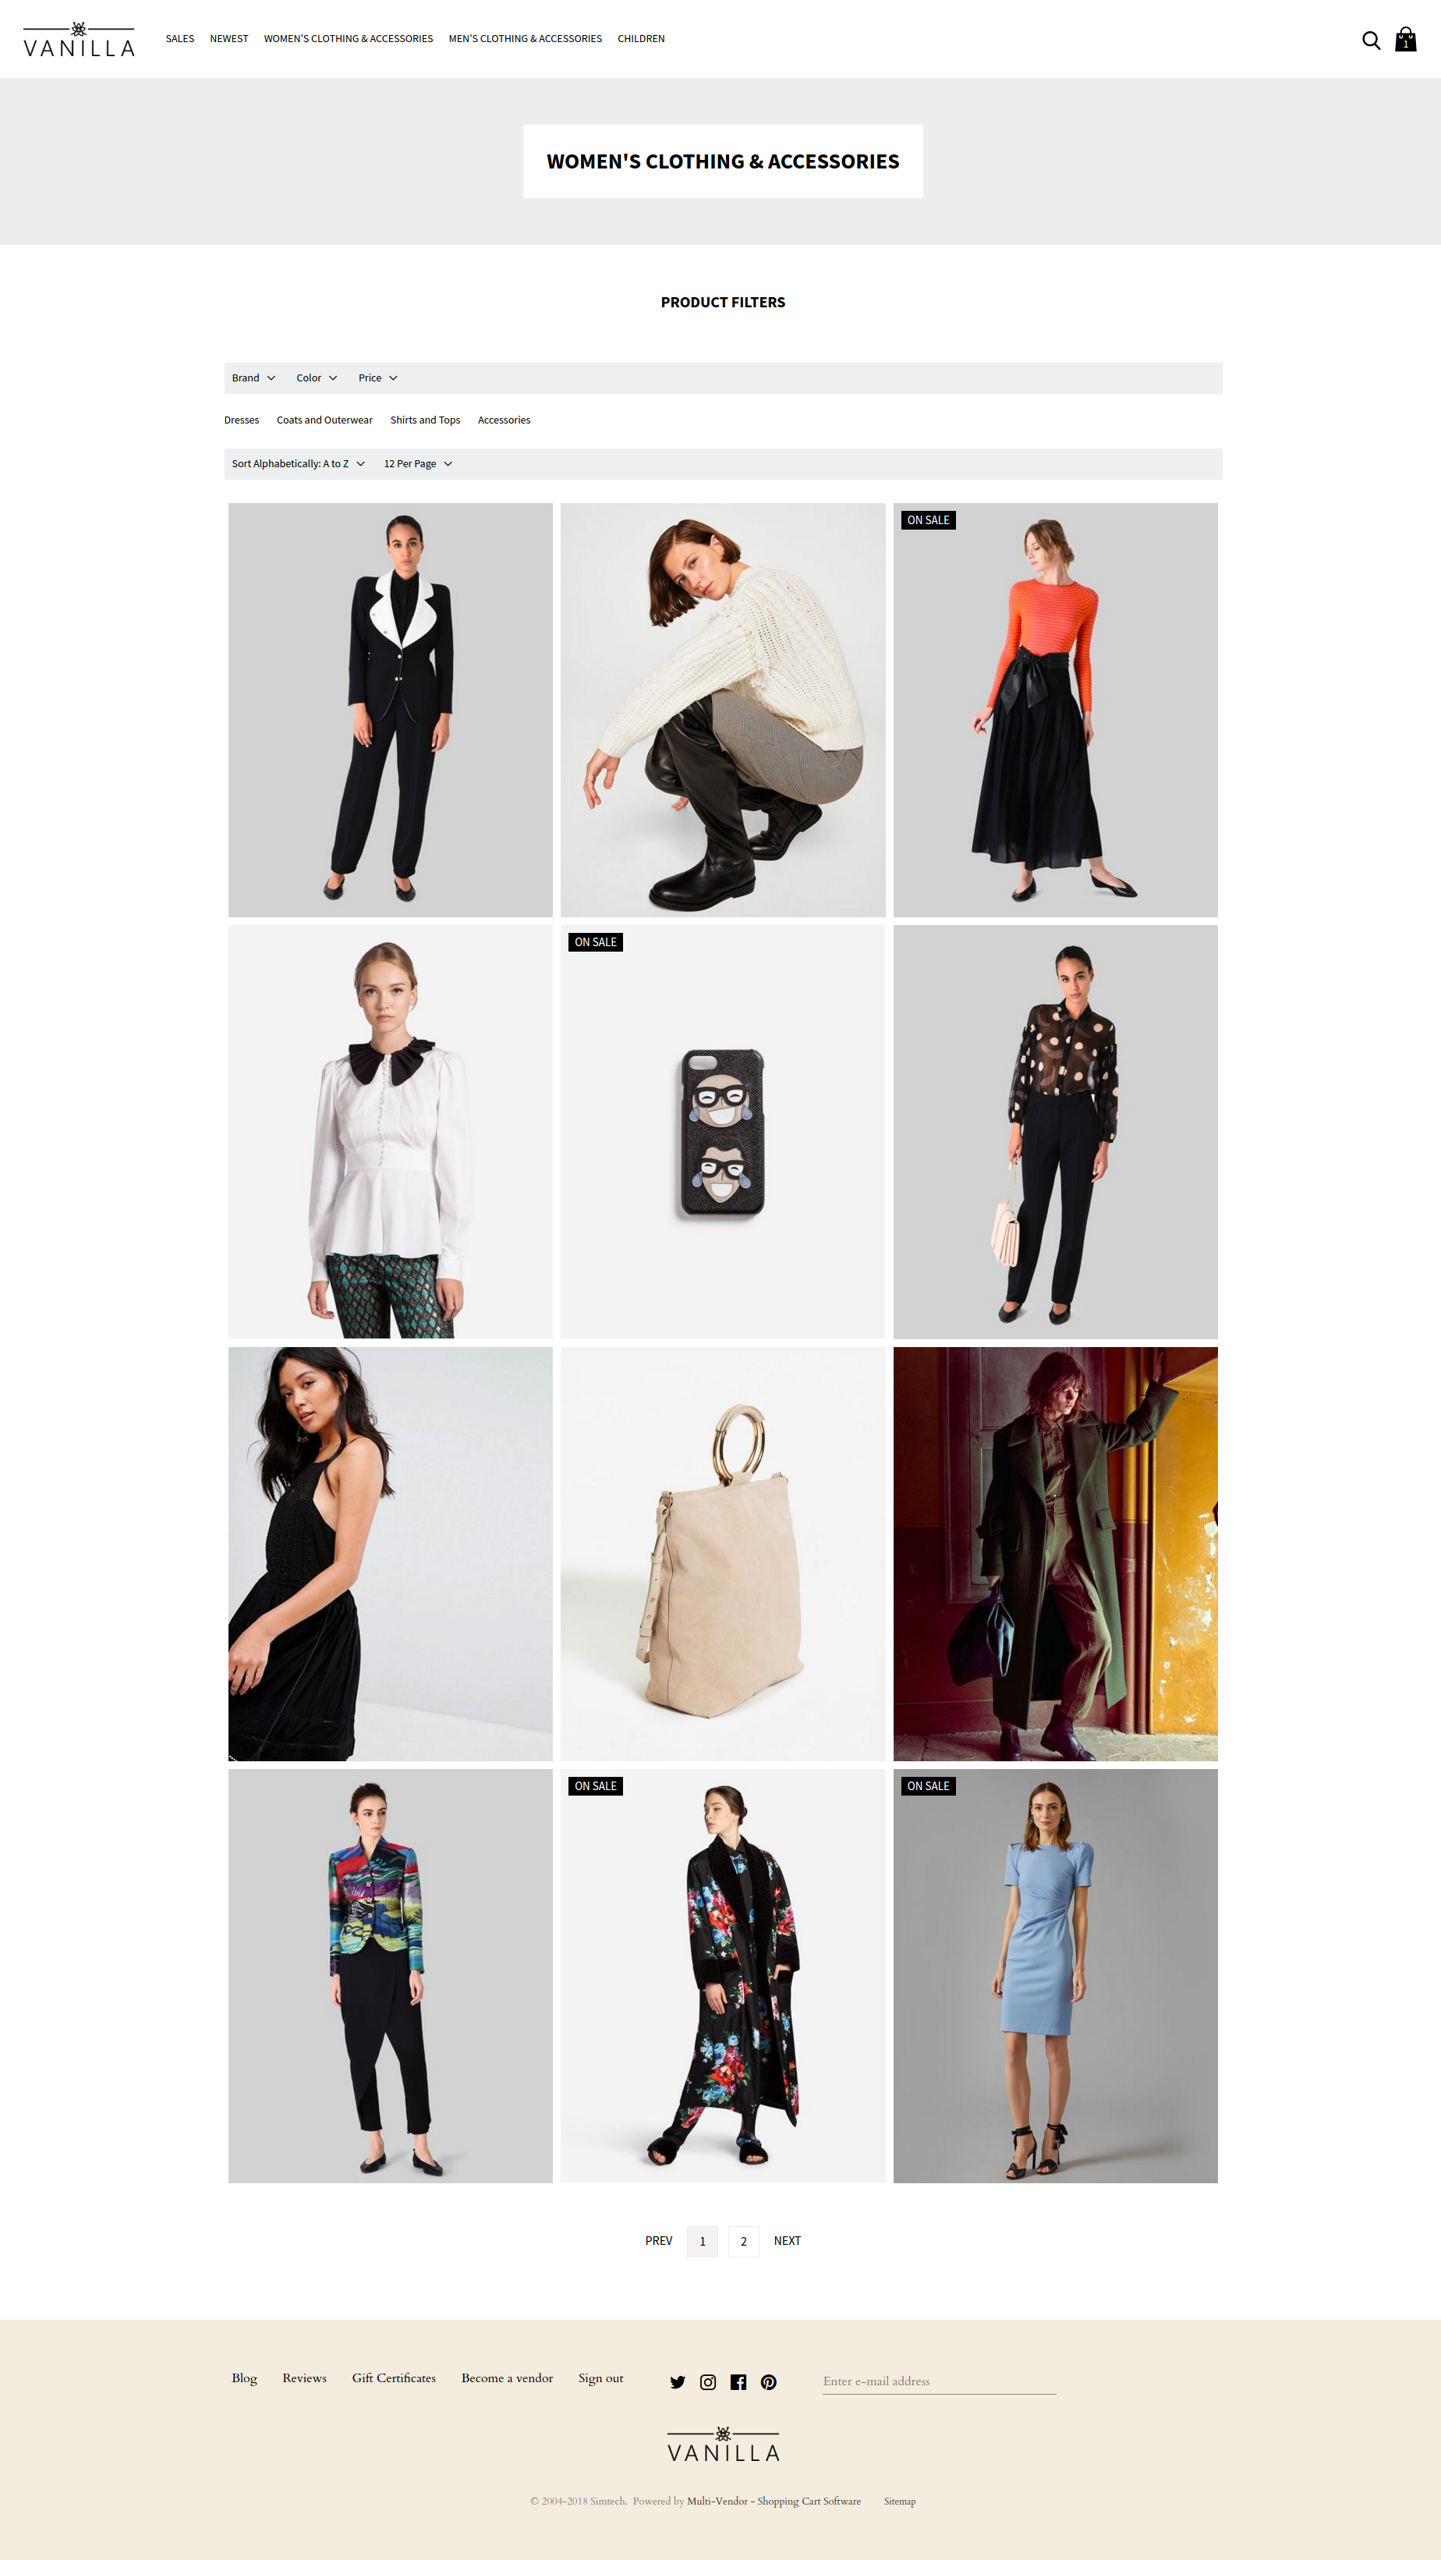
Catalog page
The Vanilla Theme comes with 2 add-ons to enhance your customer experience:
- Pro Banner
- Social Buttons PRO
Compatibility
The add-on is compatible with CS-Cart and Multi-Vendor 4.12 and above. Minimum required PHP version is 5.6.
See more information about compatibility of our add-ons here.
Support
You are guaranteed a quality theme supported by the future versions. If you need help, please contact us via our help desk system.
Demo store
Check out our Vanilla Theme to show you a glimpse of the store look and feel.
Note
Every half an hour the demo store is reset to the default state.
Installation and setup
Installing and setting up the theme
Vanilla Theme
- Install the add-on on the add-ons list page (Add-ons → Manage add-ons).
- Click on the add-on name to open its settings.
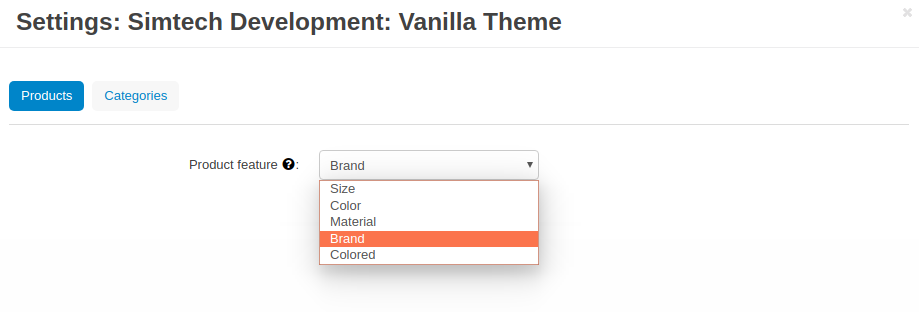
- In the Products tab, select the product feature that should be displayed above the product name of the product details page. Clicking the feature link will take the customer to the page with a list of products with the corresponding feature.
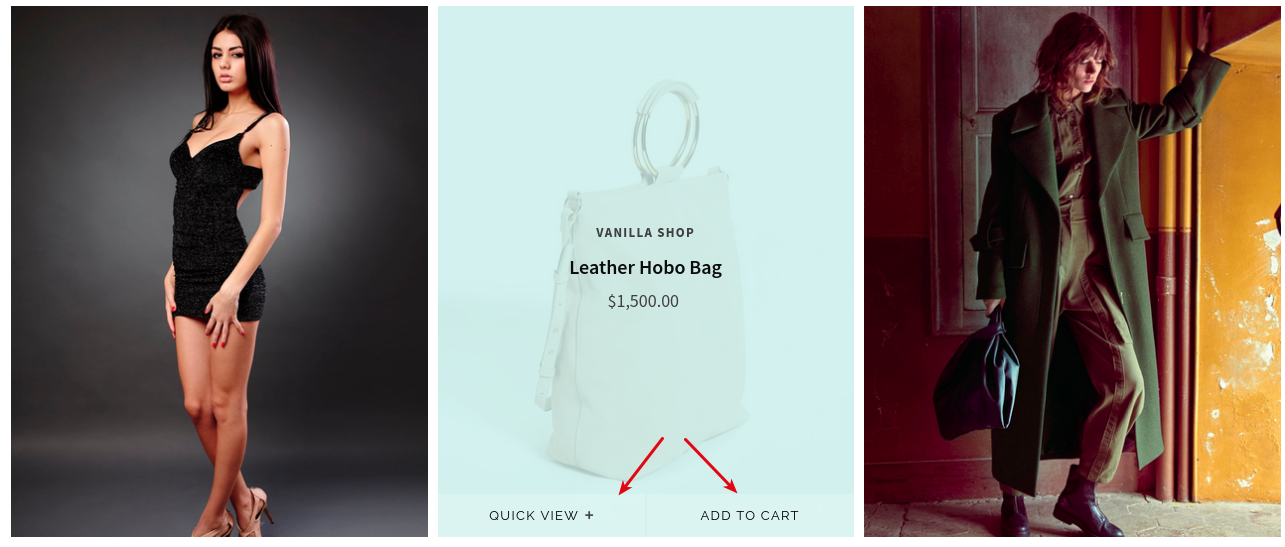
- In the Categories tab, select buttons you want to display when hovering over the product image in the grid list.
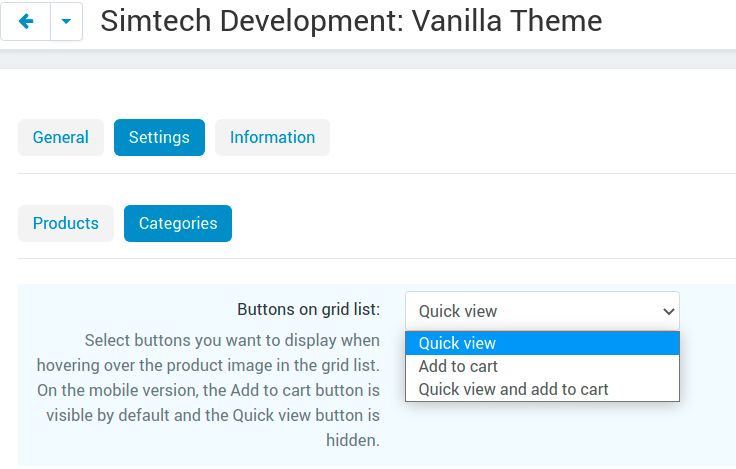
- In the Block Settings, you can disable the Cart button if needed.
- On the mobile version, Add to cart and Quick view buttons are hidden.
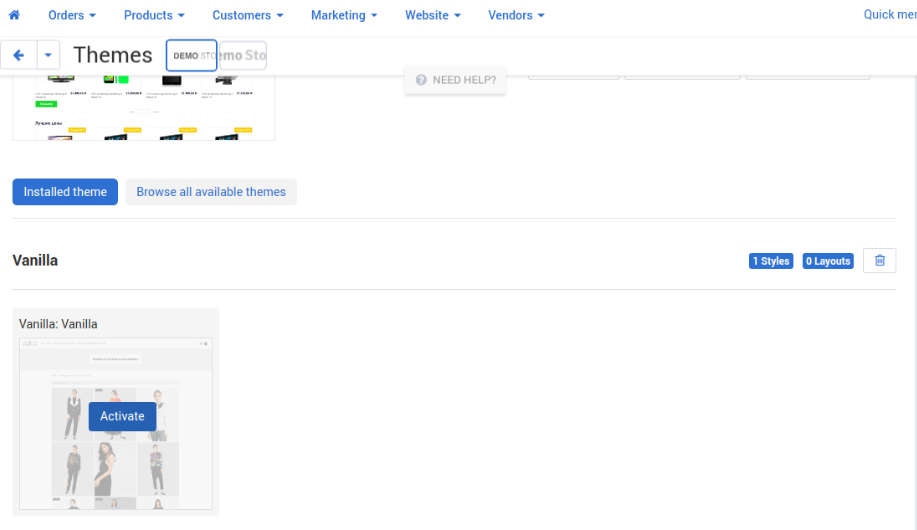
- Navigate to Design - Themes, find the Vanilla Theme on the Browse all available themes tab, hover over it and click Install.
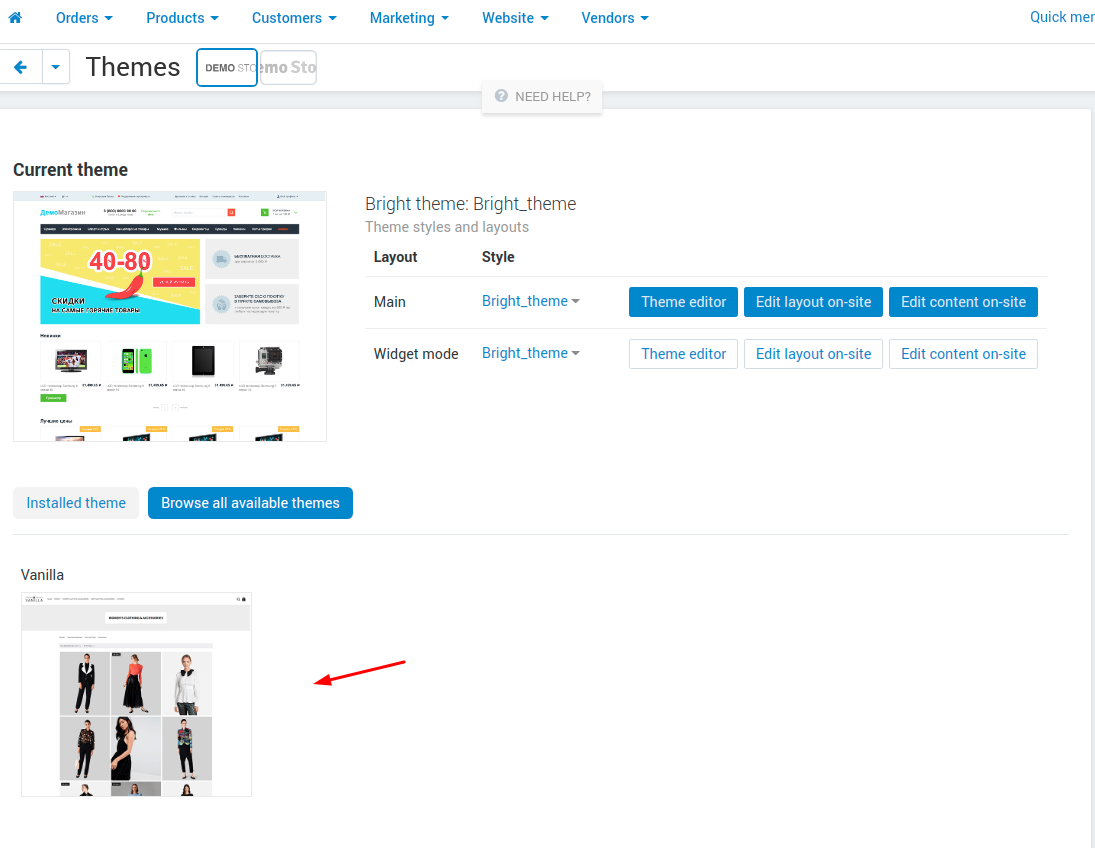
Then activate the theme on the Installed themes tab.
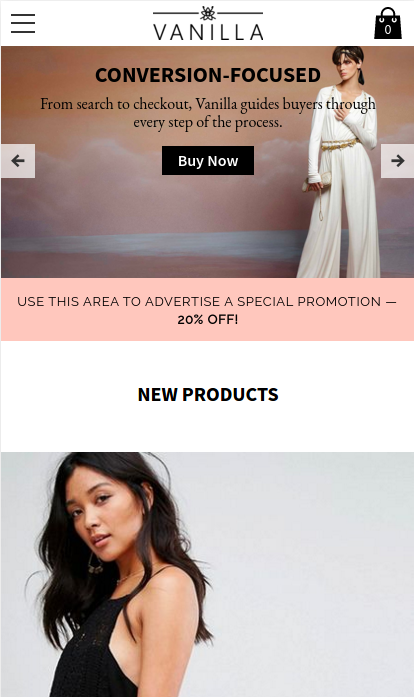
Adding a hamburger menu for the mobile version
You can add a hamburger menu to your store, which will be displayed only on the mobile version of your store.
To do that, in the admin panel:
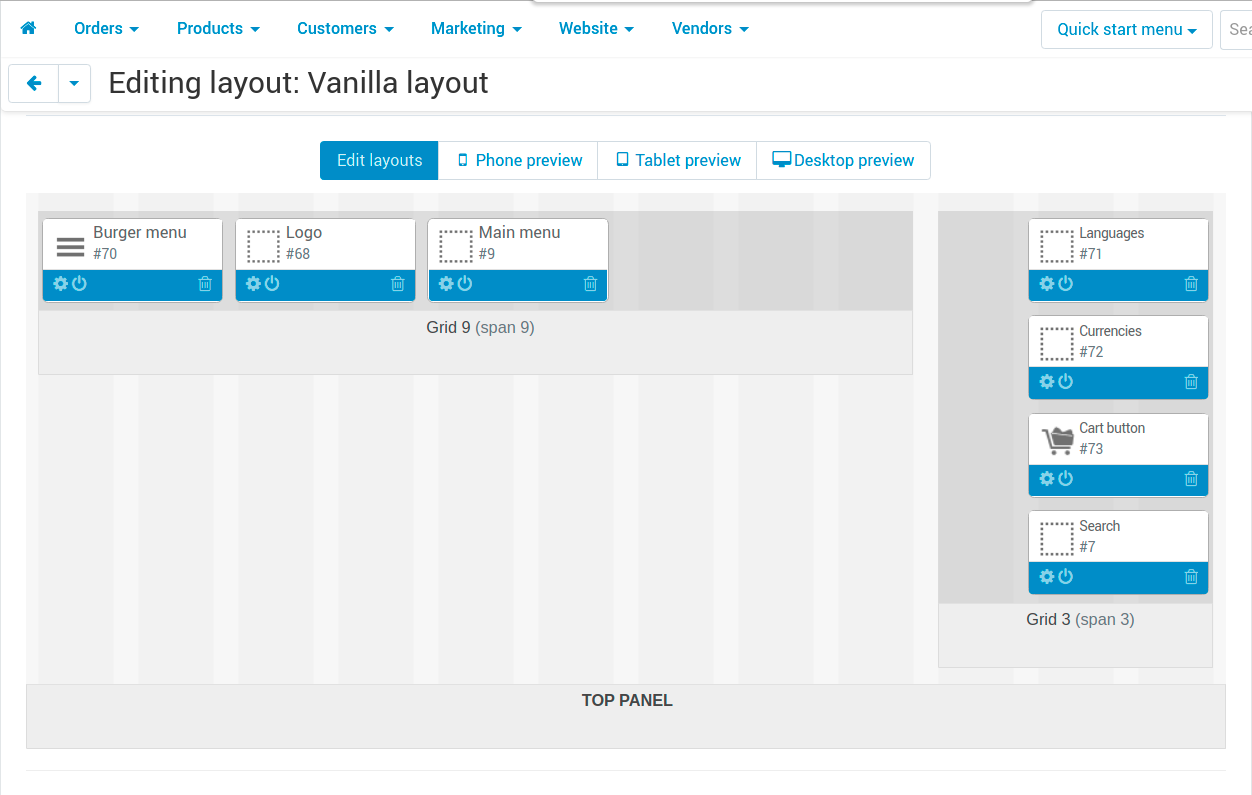
- Go to Design > Layouts.
- In the Default layout in the Top panel, add a new SD: Hamburger menu block.
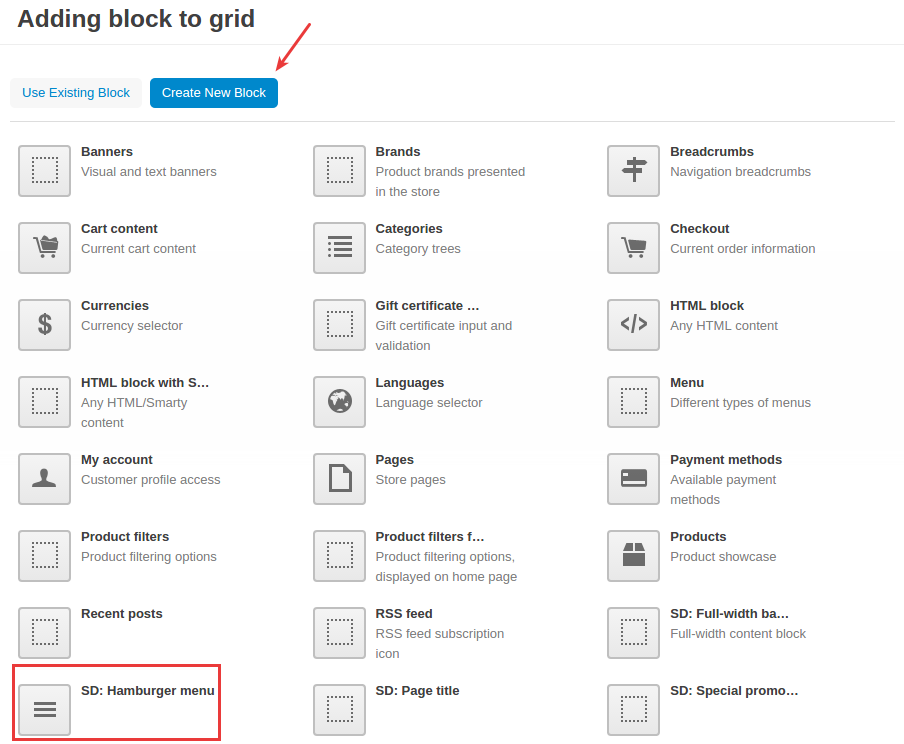
- In the General tab, name the block and select SD: Hamburger menu template.
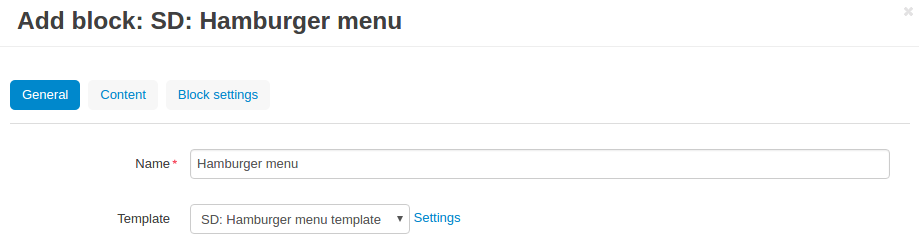
- In the Content block, select the necessary menu.
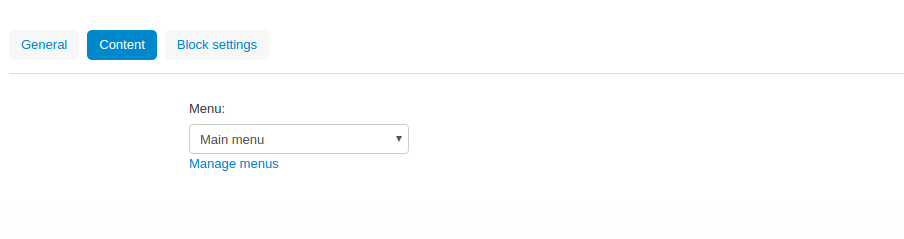
- In the Block settings tab, configure the block settings.
- Click Create.
Here’s the result:
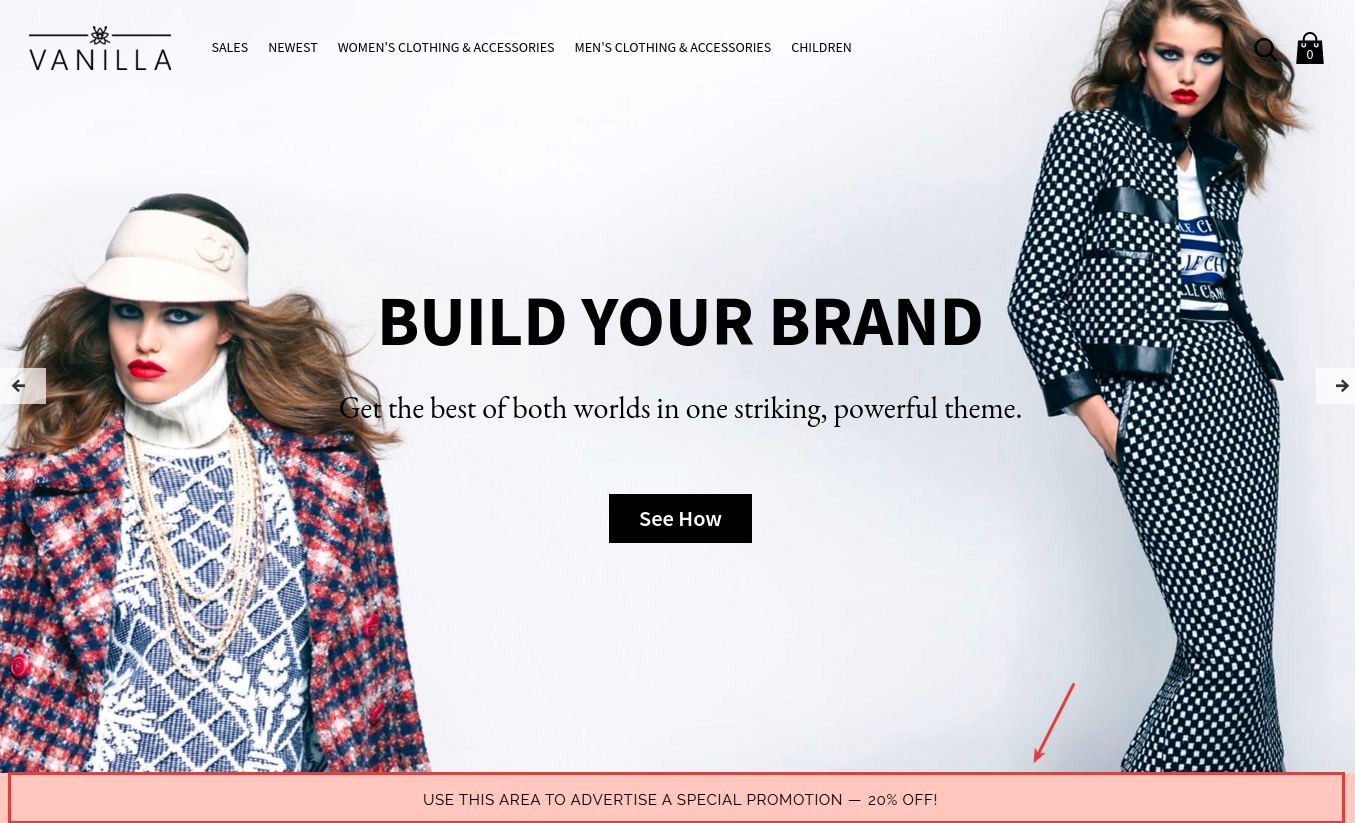
Adding a promotion bar
You can display a special promotion in a bar on any page of your store. The bar will be displayed to the full width of the screen. The text is customizable.
To add it, in the admin panel:
- Go to Design > Layouts.
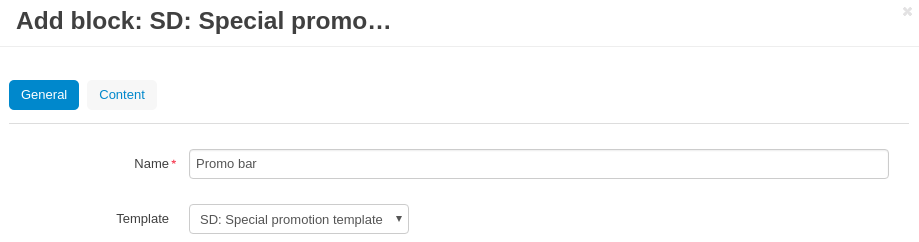
- Switch to the layout where you want to add the promotion bar and add a new block in the necessary grid. Select the SD: Special promotion block.
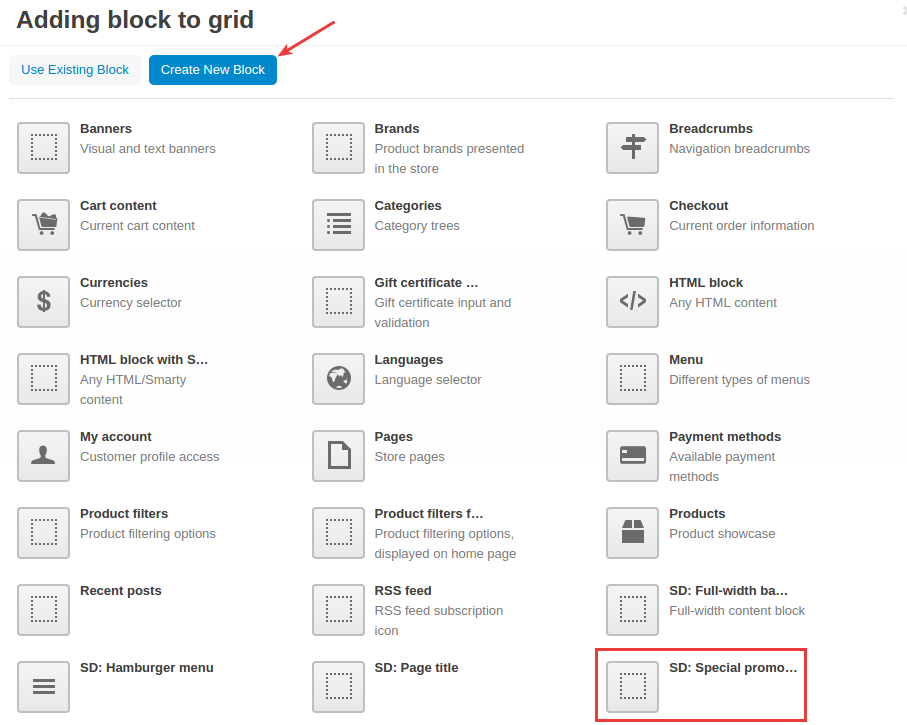
- In the General tab, name the block and select the SD: Special promotion template.
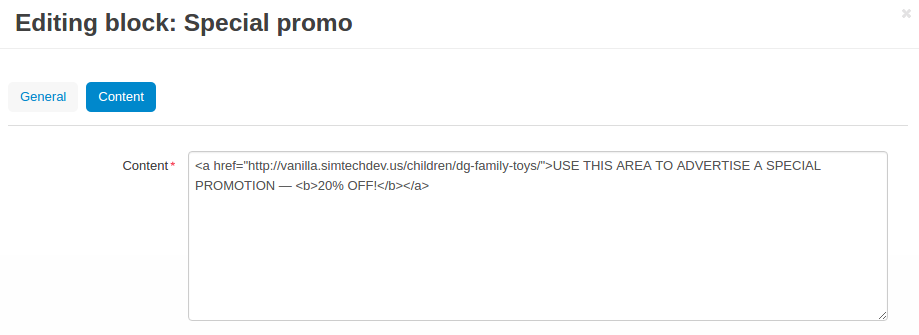
- In the Content tab, add a promotional text that will be shown on the promotion bar on the storefront.
- Click Create.
Here’s the result.

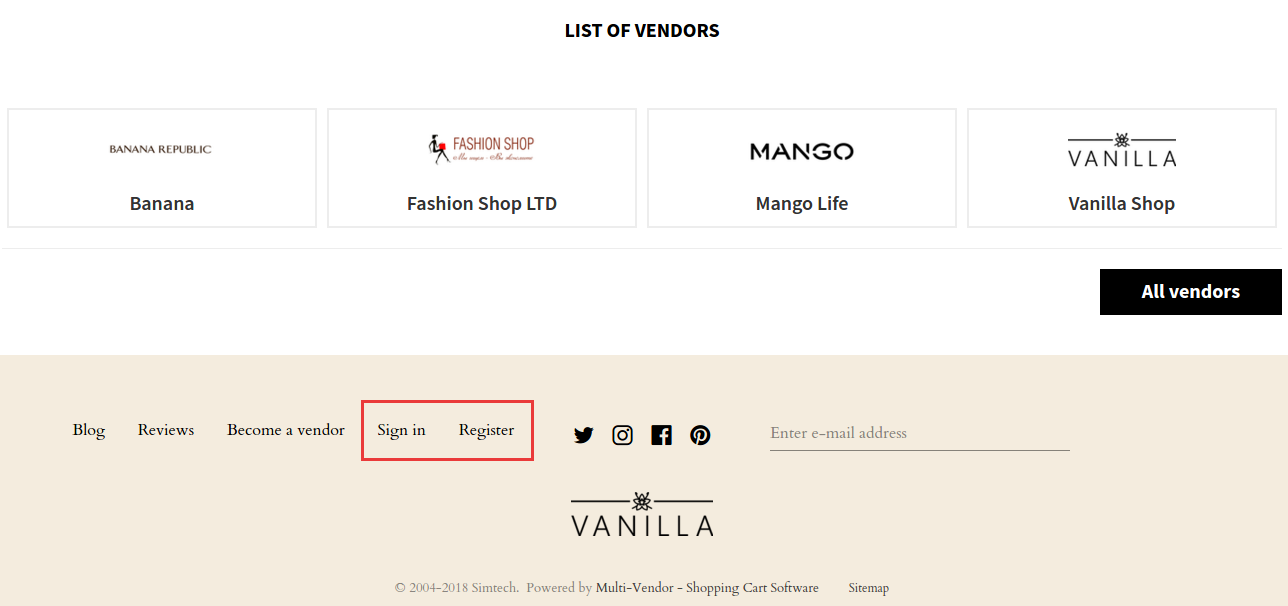
Adding the Sign in and Register links to the footer
You can include the Sign in and Register links in the footer links using a special template.
To do that, in the admin panel:
- Go to Design > Layouts.
- Switch to the Default layout and add a new block in the Footer container. Select the Menu block.
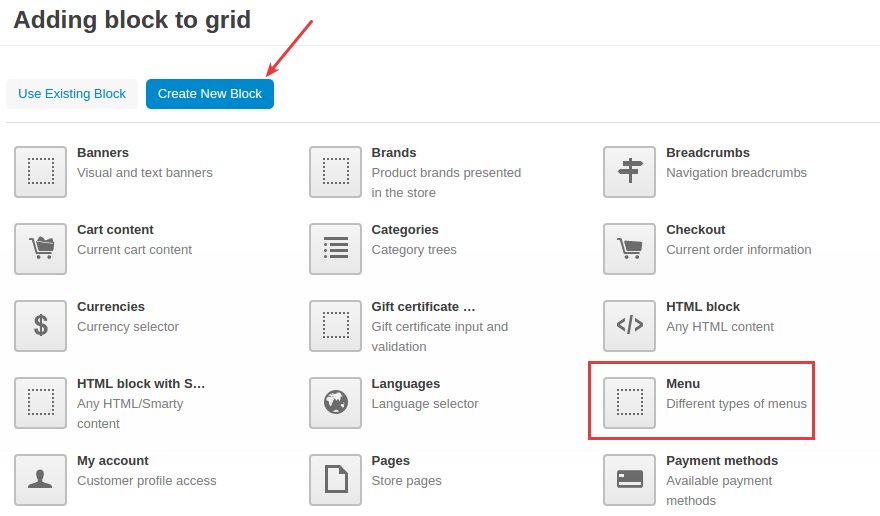
- In the General tab, name the block and select the SD: Text links with login links template.

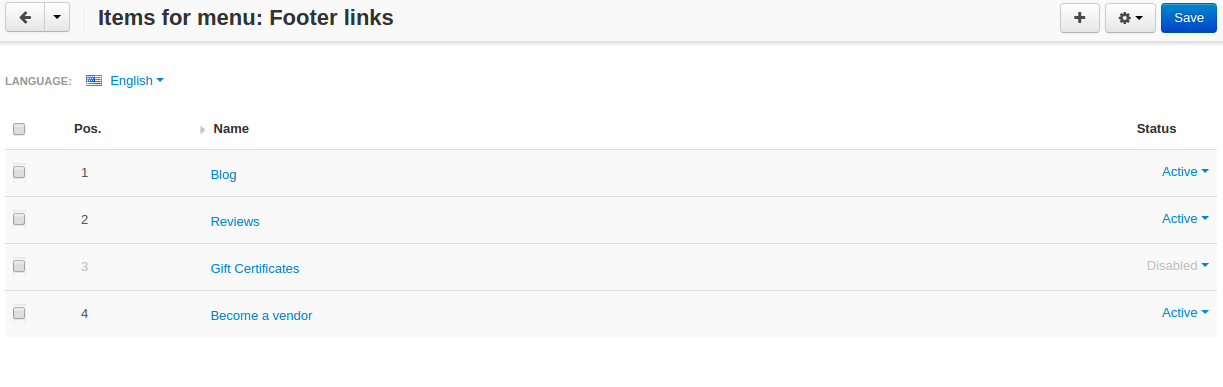
- In the Content tab, select the Footer links menu.

Note
Click Manage menus below the template selectbox to change the footer links. Note that the Sign in and Register links will be added automatically with the template besides the footer links you see under Design > Menus > Footer links:
- Click Create.
Here’s the result.
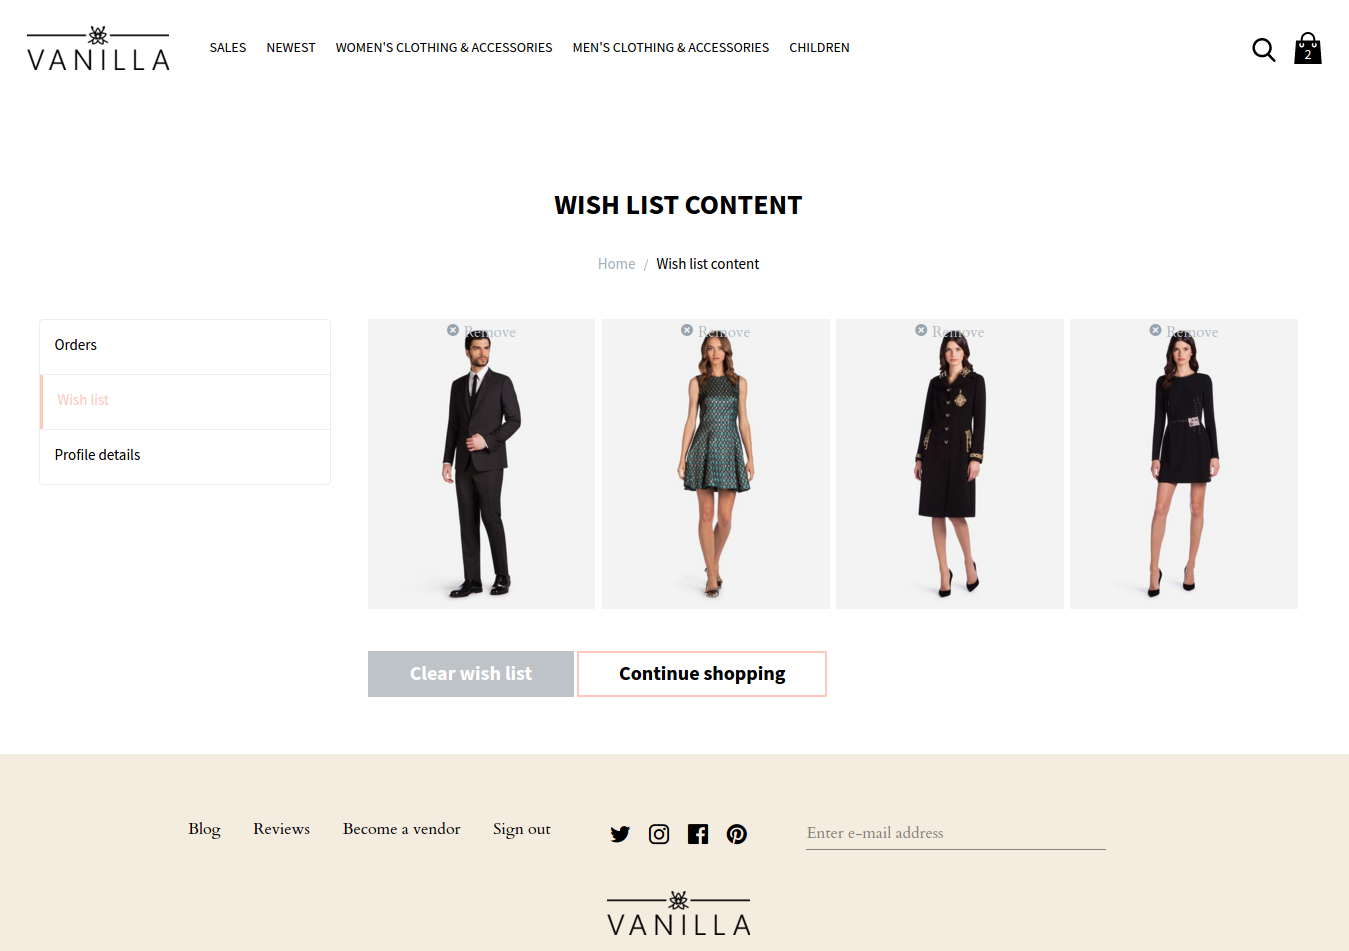
Adding a page title
You can show a page title on the page. For example, display Wish list content on the wish list page.
To do that, in the admin panel:
- Go to Design > Layouts.
- Switch to the layout of the page where you want to add a title and add a new block. Use the SD: Page title block.
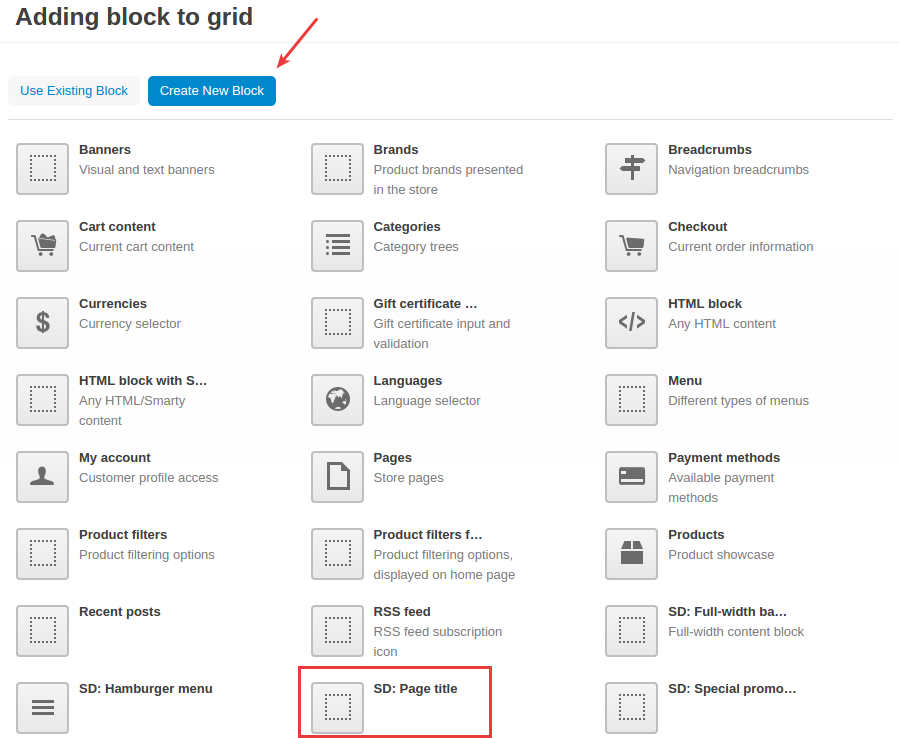
- In the General tab, name the block and select the Page title template.

- Click Create.
Here’s the result.
Pro Banner
Allows to show an eye-catching wide banner on any page of your store.
Questions & Feedback
Have any questions that weren't answered here? Need help with solving a problem in your online store? Want to report a bug in our software? Find out how to contact us.
Social Buttons PRO