How To: Configure Vendor-to-Admin Payments Add-on
Important
This add-on replaced the Vendor Debt Payout add-on in Multi-Vendor 4.12.1.
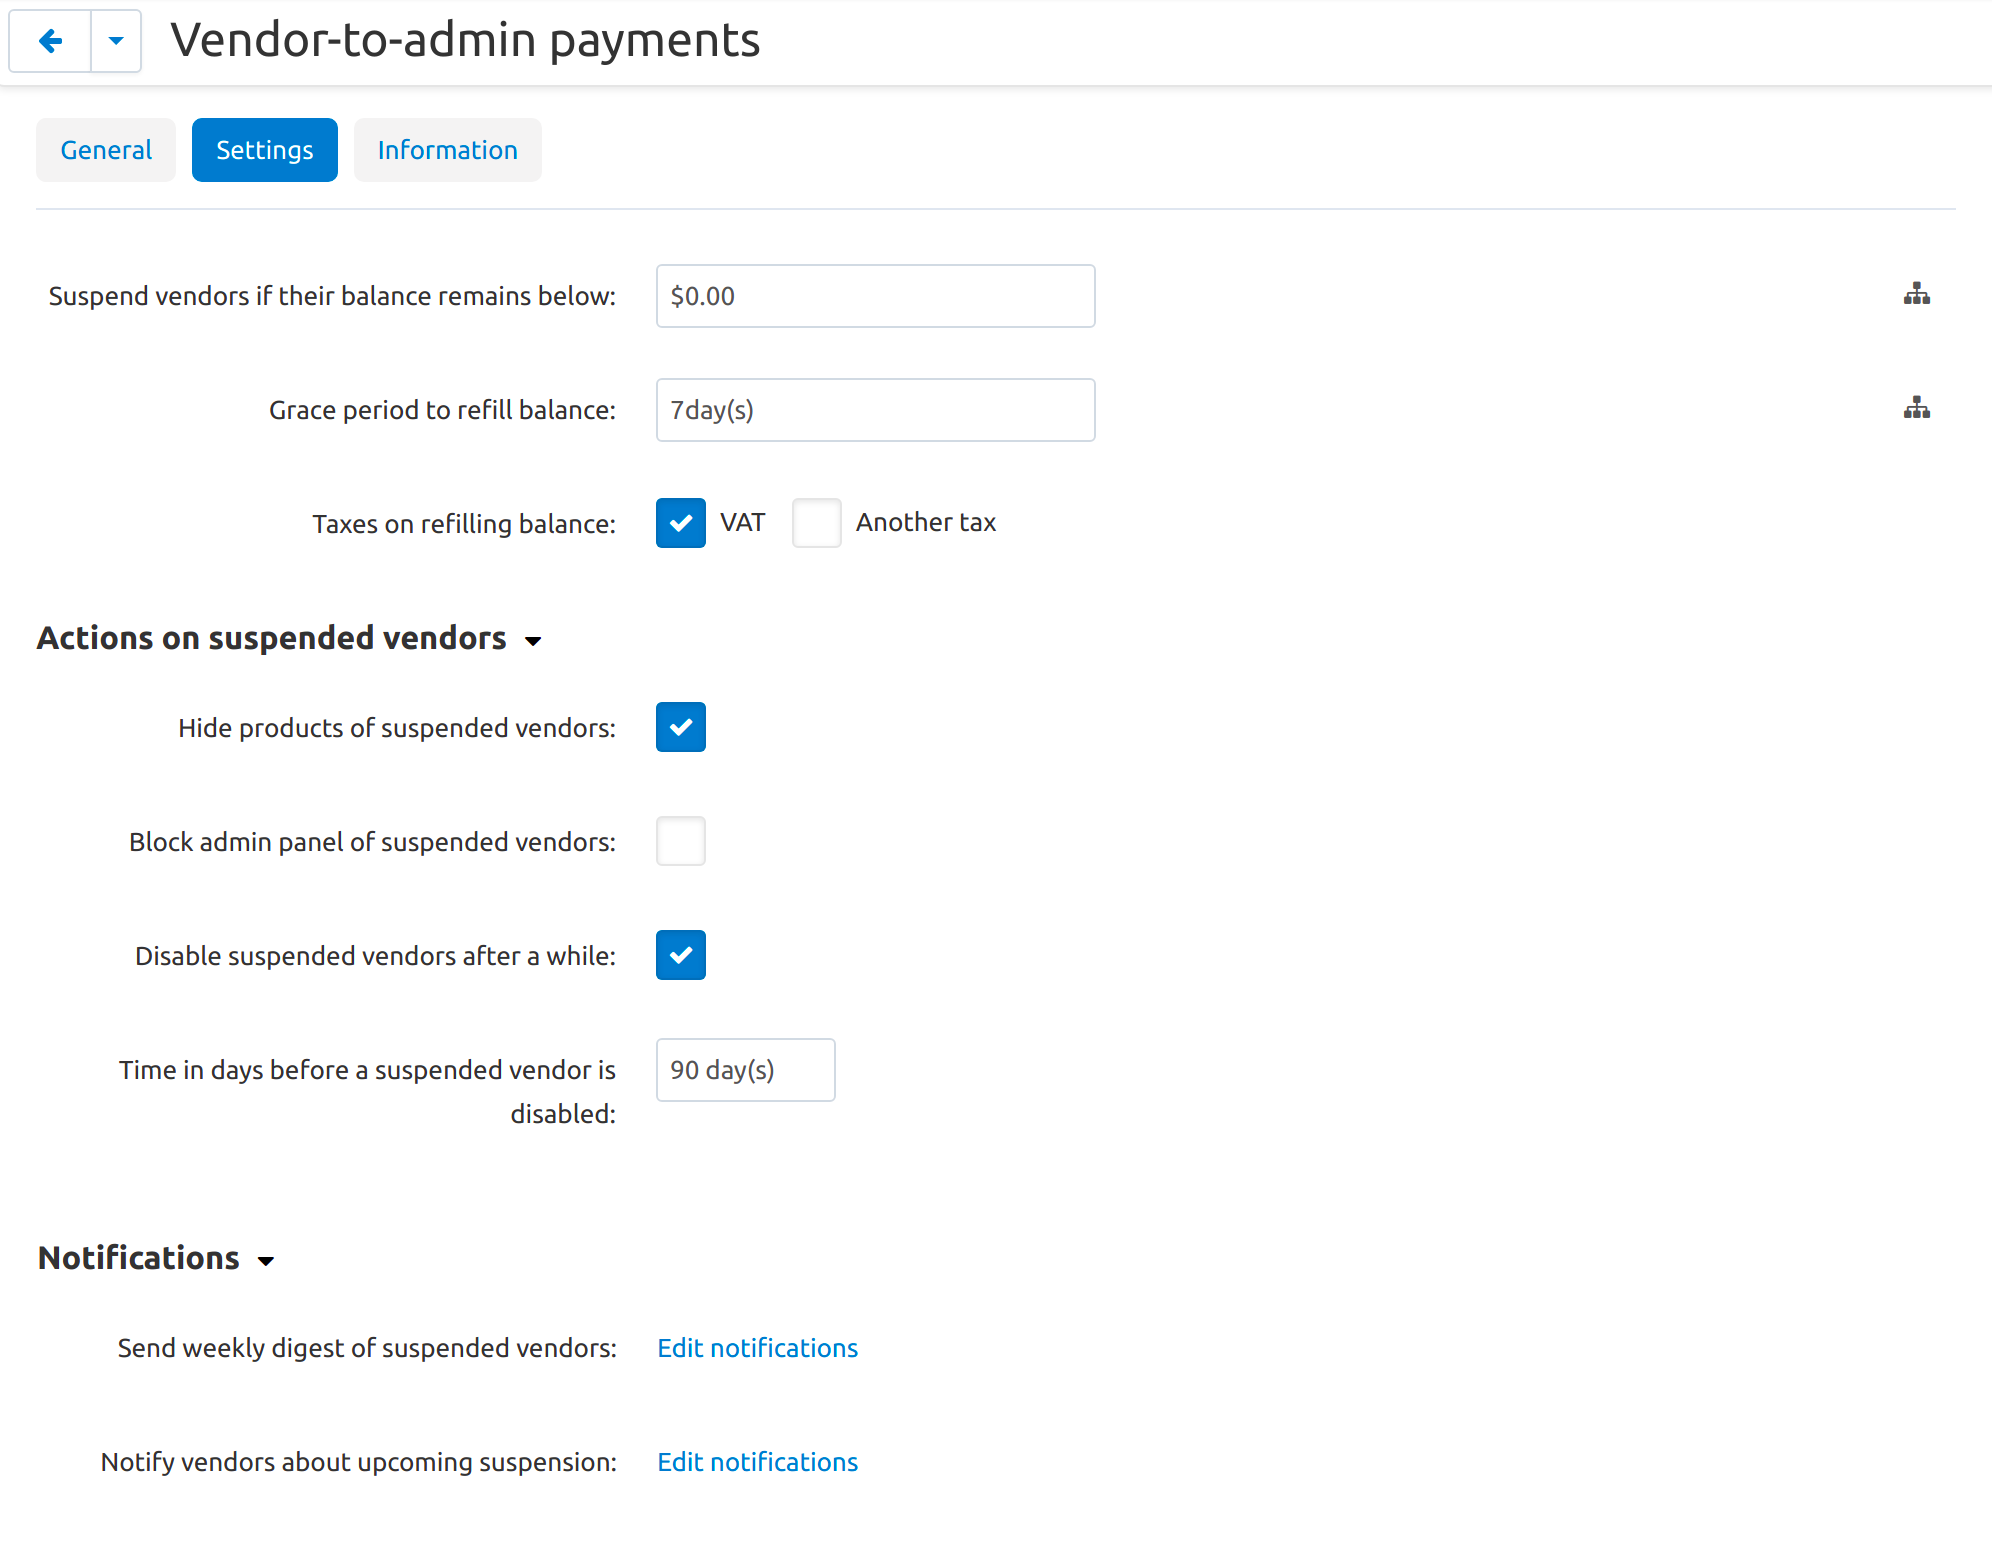
Install the Vendor-to-Admin Payments add-on just like any other add-on. After the installation, click on the add-on name to open its settings. Here you can do the following:
Decide when a vendor becomes a debtor. By default, these rules are global and apply to all your vendors. However, you can allow own values of these settings for different vendor plans.
Note
To allow different values for different vendor plans, click the button next to the settings.
Choose taxes to be included to vendor payments. Here you can see all the taxes created on the Administration → Shipping & taxes → Taxes page.
Note
The setting first appeared in Multi-Vendor 4.14.1.
Decide what restrictions to apply to suspended vendors: hide their products and/or block their admin panels.
Decide whether to completely disable accounts of those vendors who don’t pay their debts for a long time (and when to disable them).
See what notifications the add-on has, and edit them.
Questions & Feedback
Have any questions that weren't answered here? Need help with solving a problem in your online store? Want to report a bug in our software? Find out how to contact us.